Appearance
Creating Automation and Its Editor
FluentCRM automations let you trigger a sequence of actions whenever something happens on your WordPress site — a form submission, a tag applied, a purchase made, and more.
This article walks you through creating a new automation funnel and using the Automation Editor to build your trigger, actions, and conditions.
Creating A New Automation
To learn how to create new automation in FluentCRM, follow the steps with screenshots below –
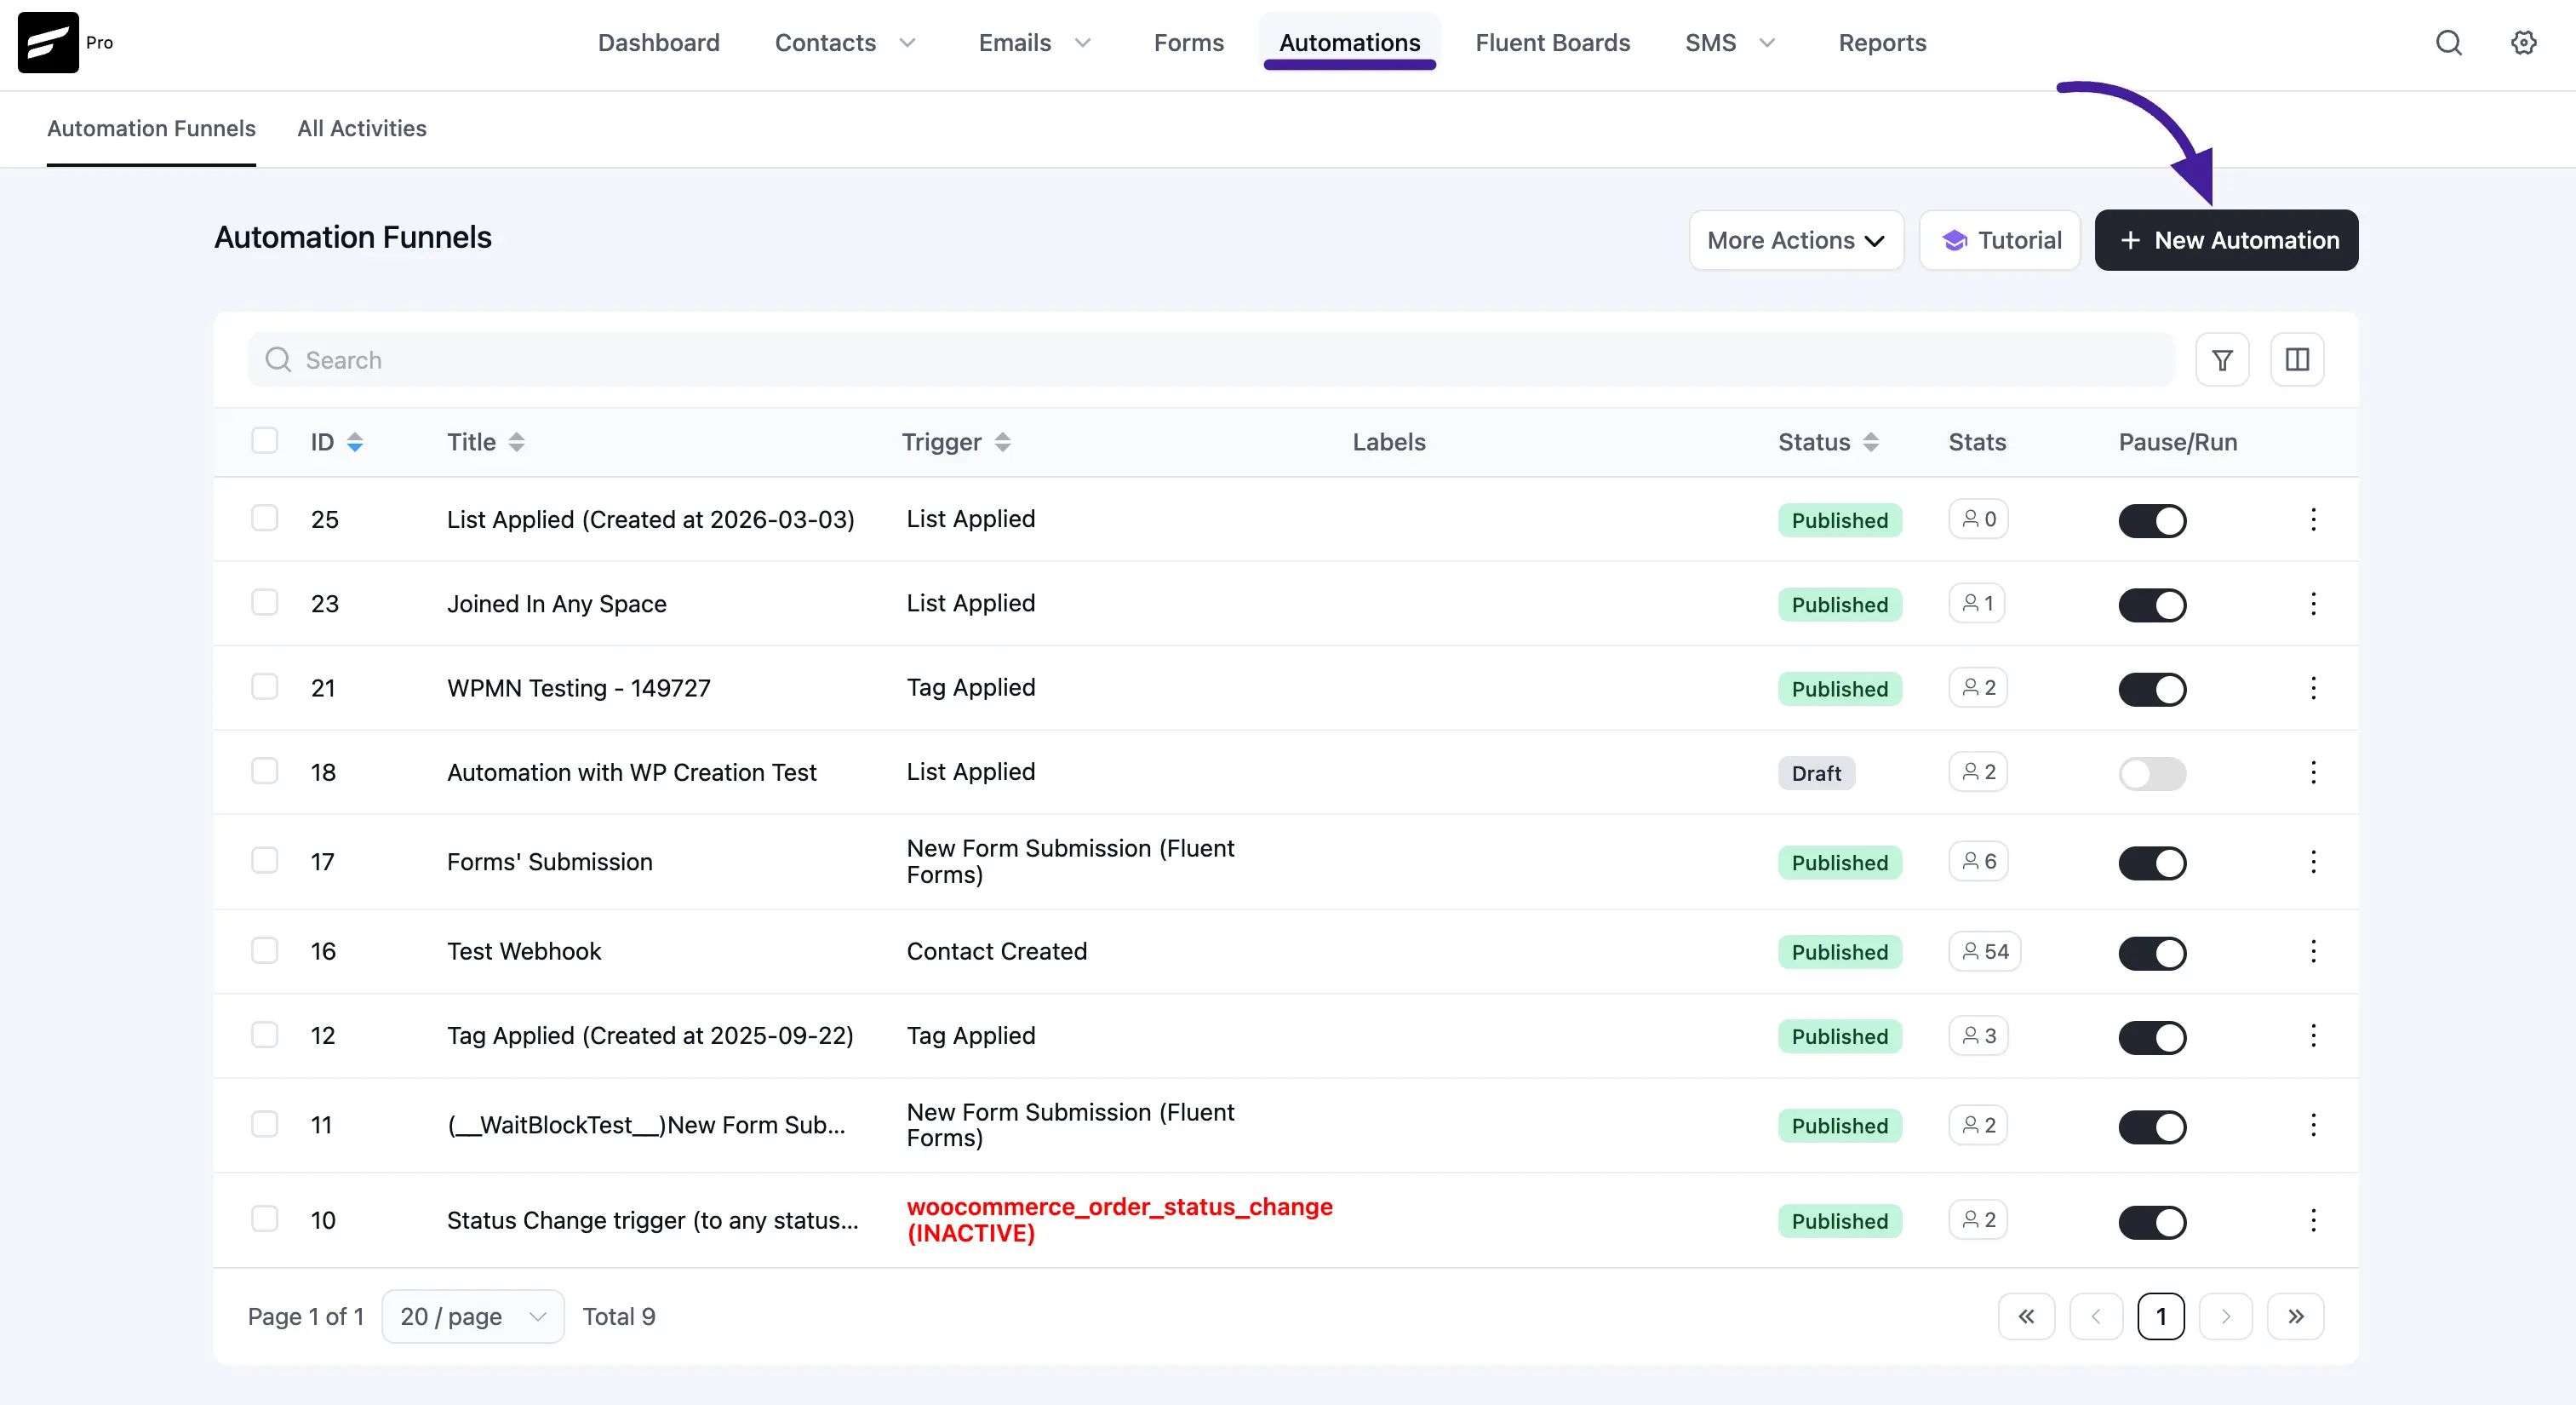
First, go to the Automations section from the FluentCRM Navbar and click on + New Automation.
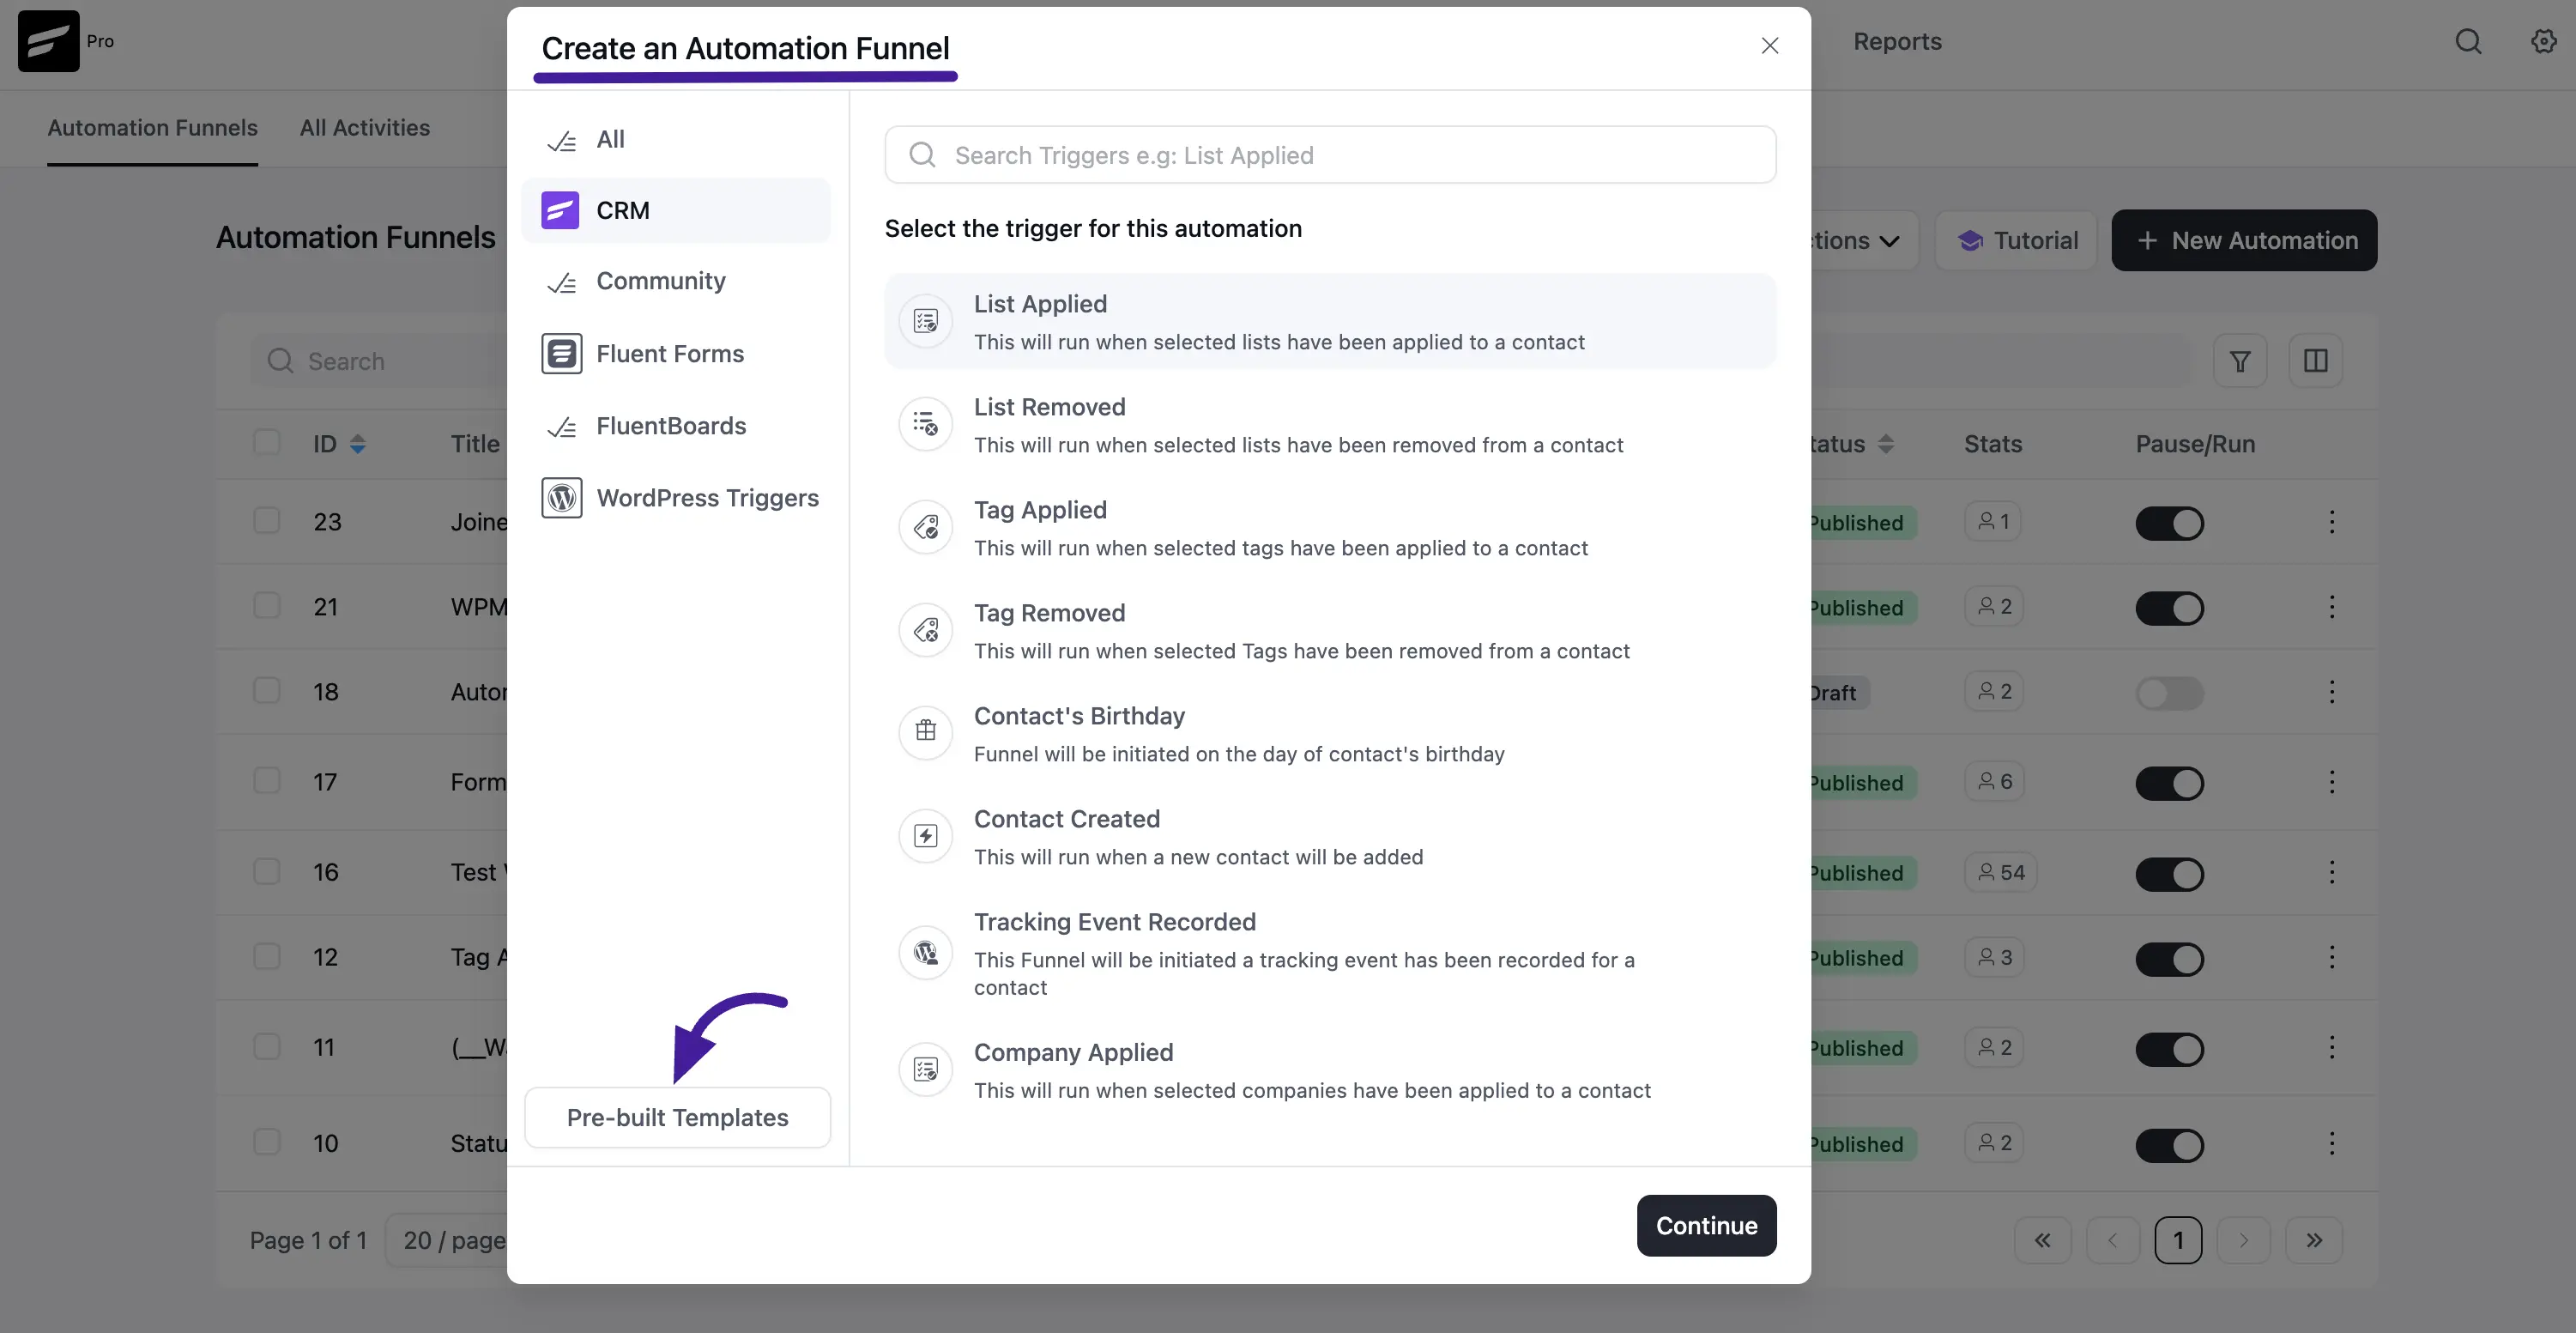
Once you click the + New Automation button, a pop-up page will appear with Triggers to reduce your hassle of creating automation from scratch every time. You can start the automation by selecting the Trigger only.
Or, you can choose any of the Pre-built Funnel Templates according to your needs.
Then click on the Continue button.
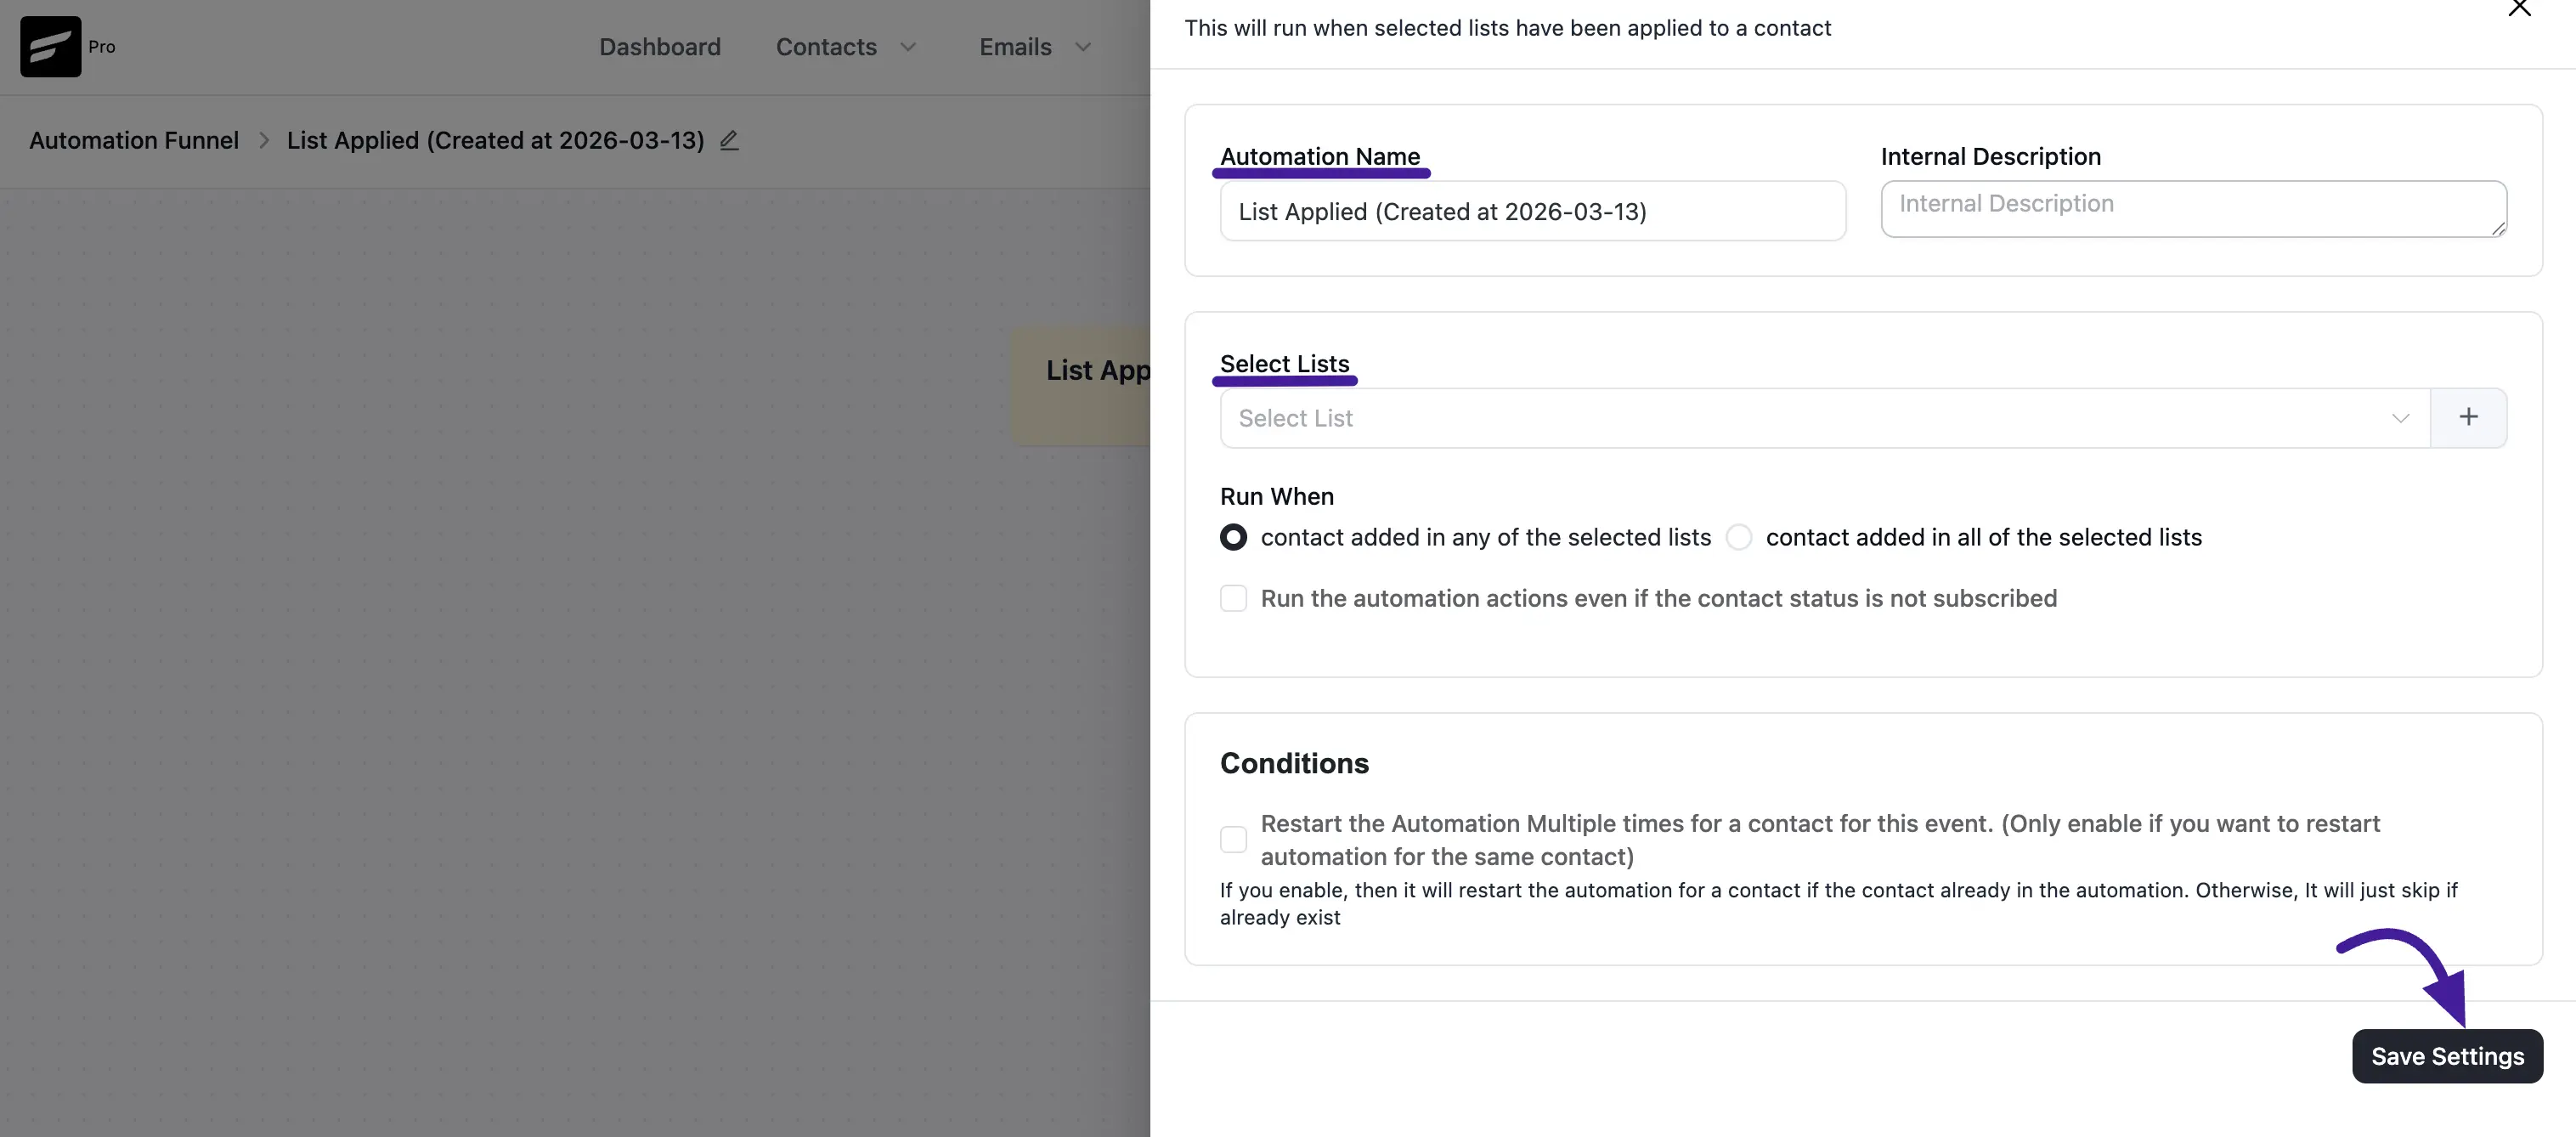
Now a pop-up will come up from where you have to give a Title to your Automation in the Internal Label field for easy referencing later. But, if you leave it blank, the title will be automatically set based on your chosen trigger.
Apart from the triggers shown below, FluentCRM also comes with lots of other triggers. To see the full list of triggers, click here.
For example, I’ve selected the List Applied trigger under the CRM option. As a result, this automation funnel will trigger when the selected list will be applied to any of the FluentCRM Contacts.
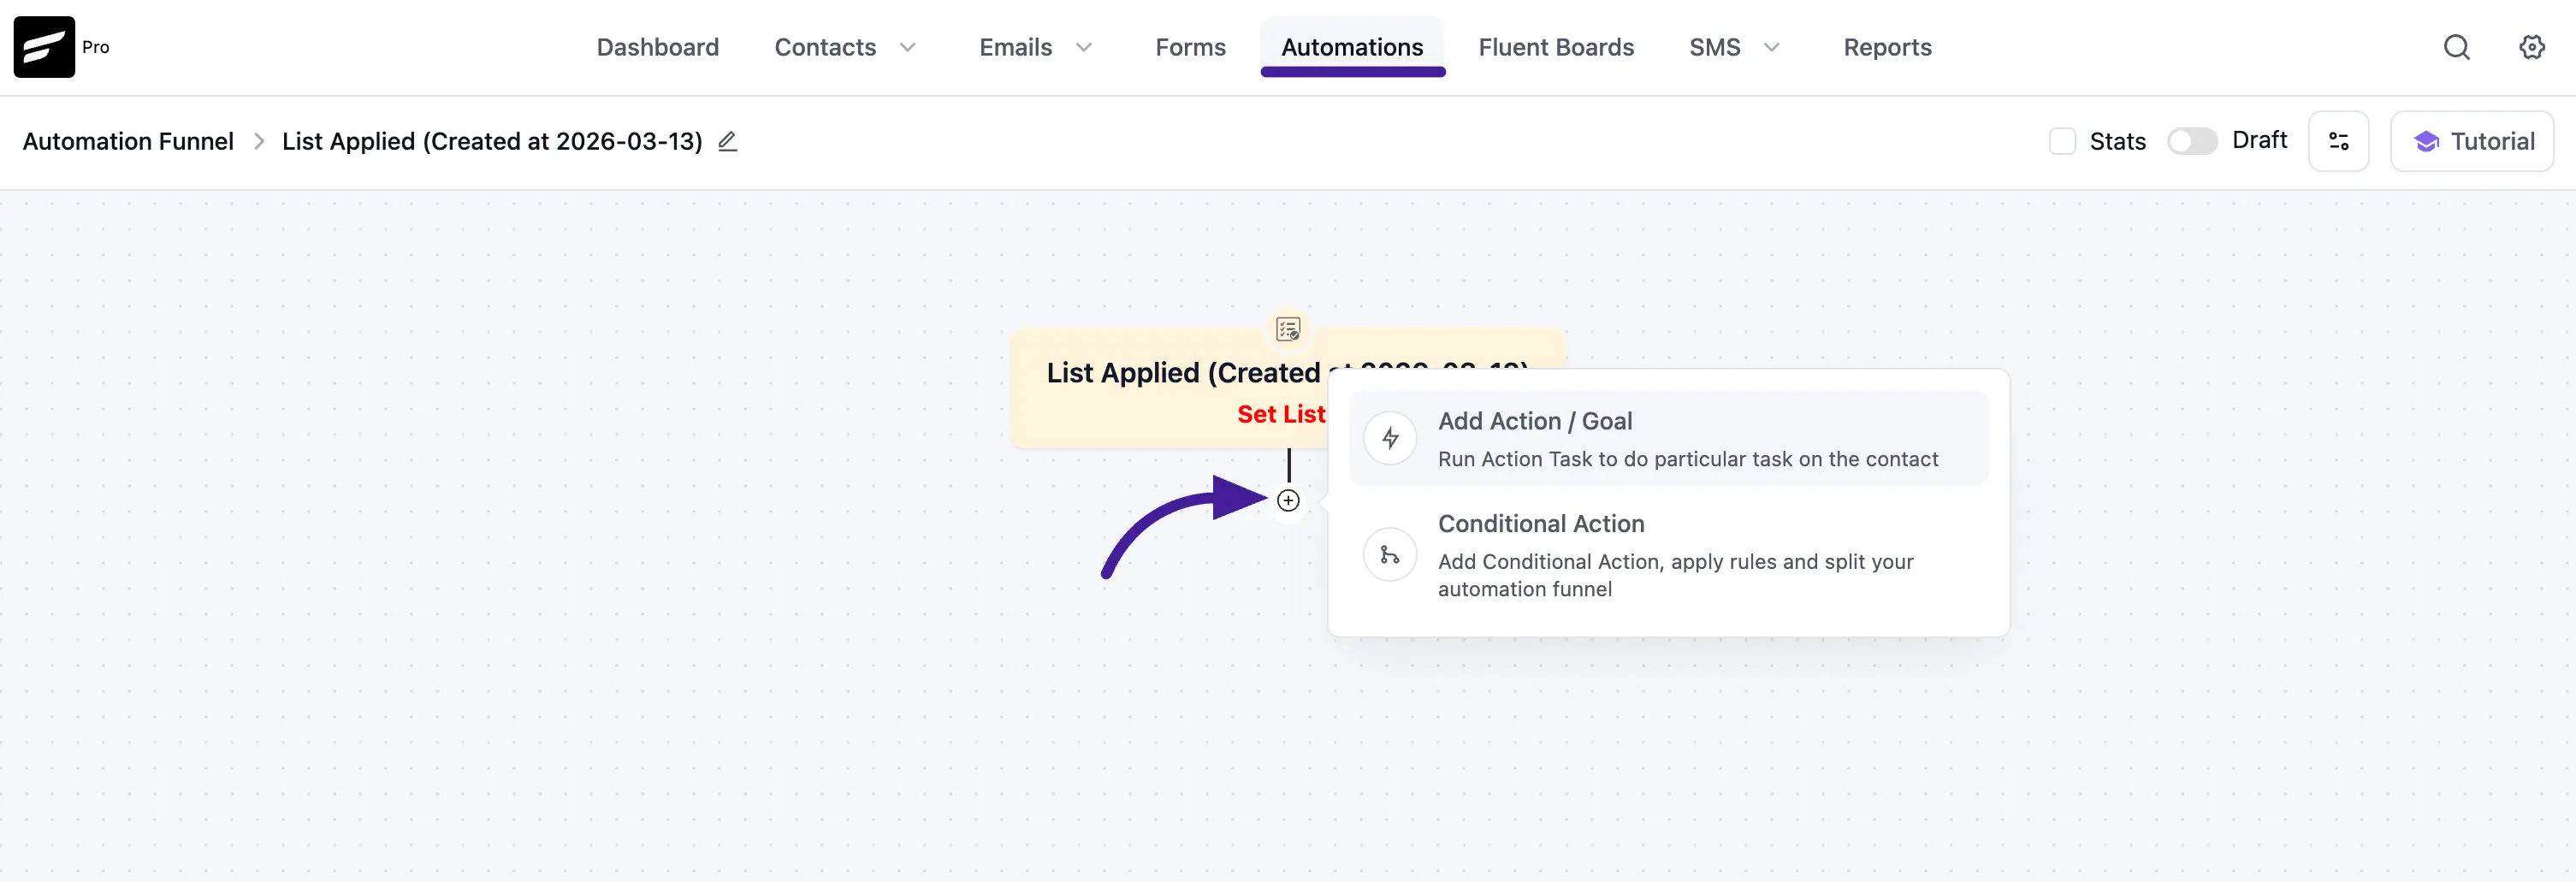
Once you choose the Trigger, you will be redirected to the similar screen below from where you can add the Action blocks, Conditional Automation Actions, and Goals or BenchMark Actions into your Funnel.
To add Actions, click the Plus Icon and press on the Add Action / Goal or Conditional Action. For example, I’ve selected the Add Action / Goal option for the automation.
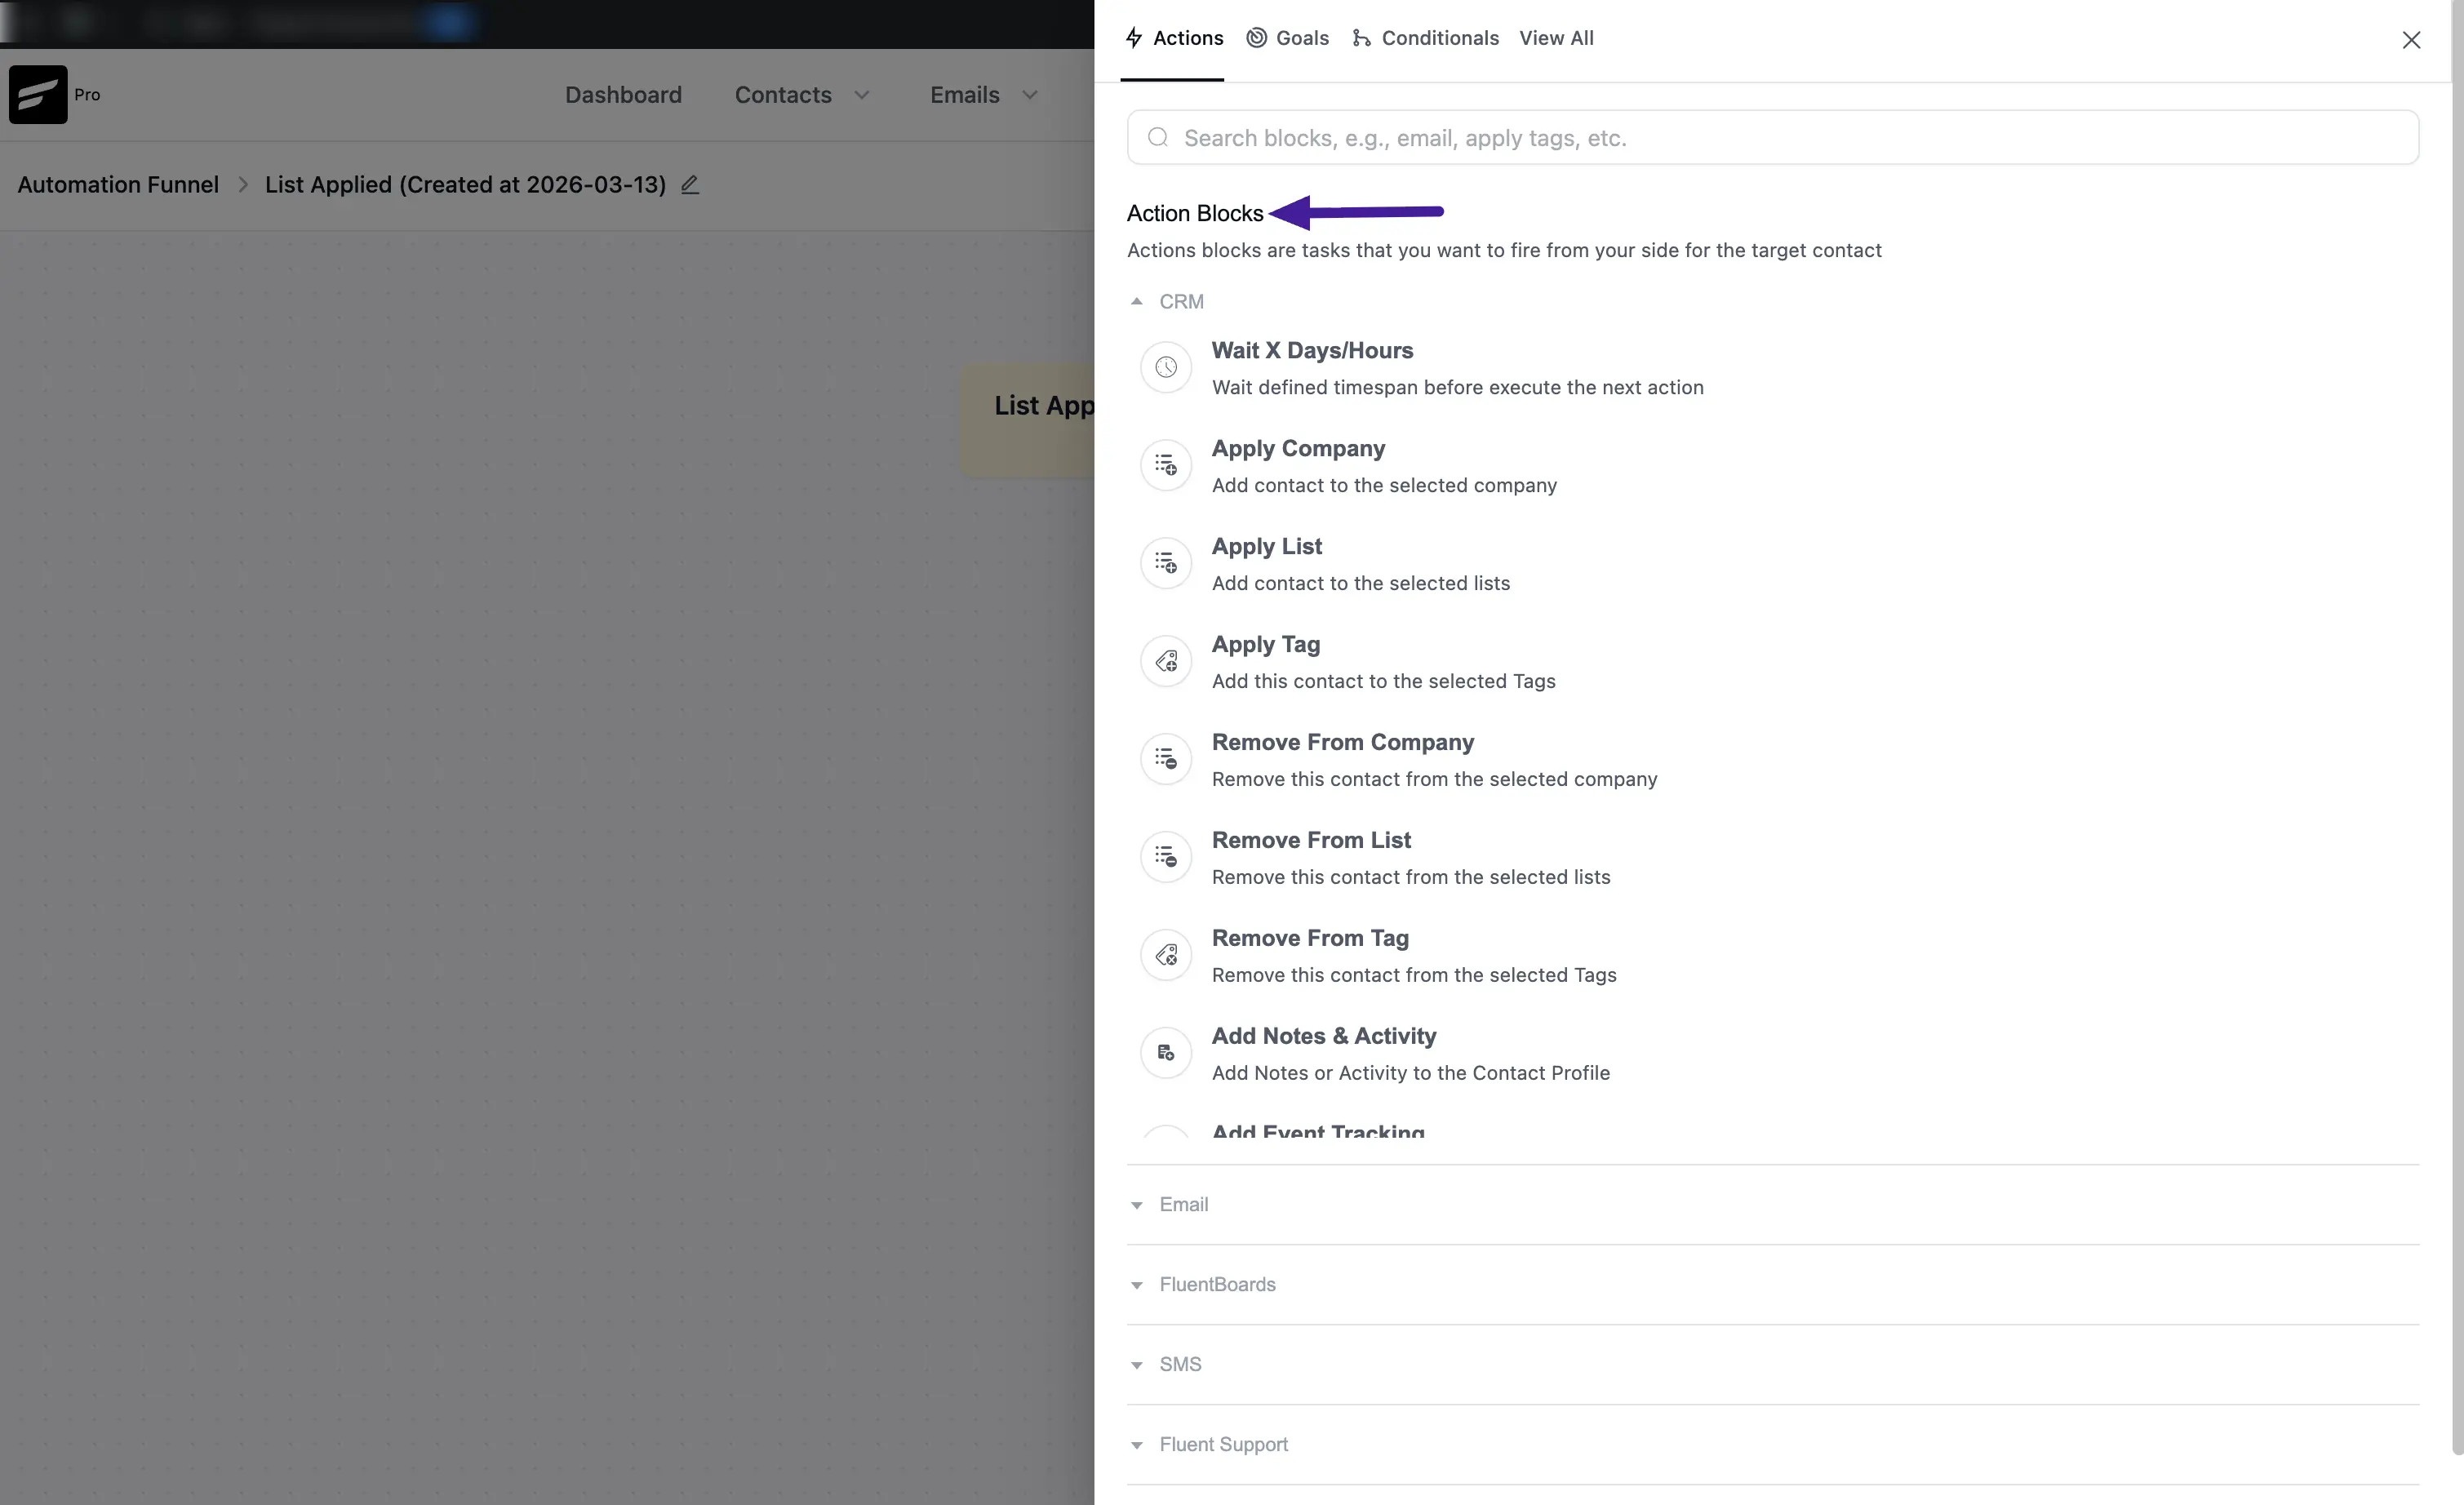
Now, a popup will appear with a set of Action Blocks from where you can choose any type of action block.
There are various actions that can be added like –
- Primary Actions,
- Goals BenchMark Actions,
- WordPress Actions,
- Email Actions,
- LMS Actions, and
- Miscellaneous Actions along with the
- Conditional Automation Actions.
For example, here, I’ve selected Apply Tag as an Automation Action.
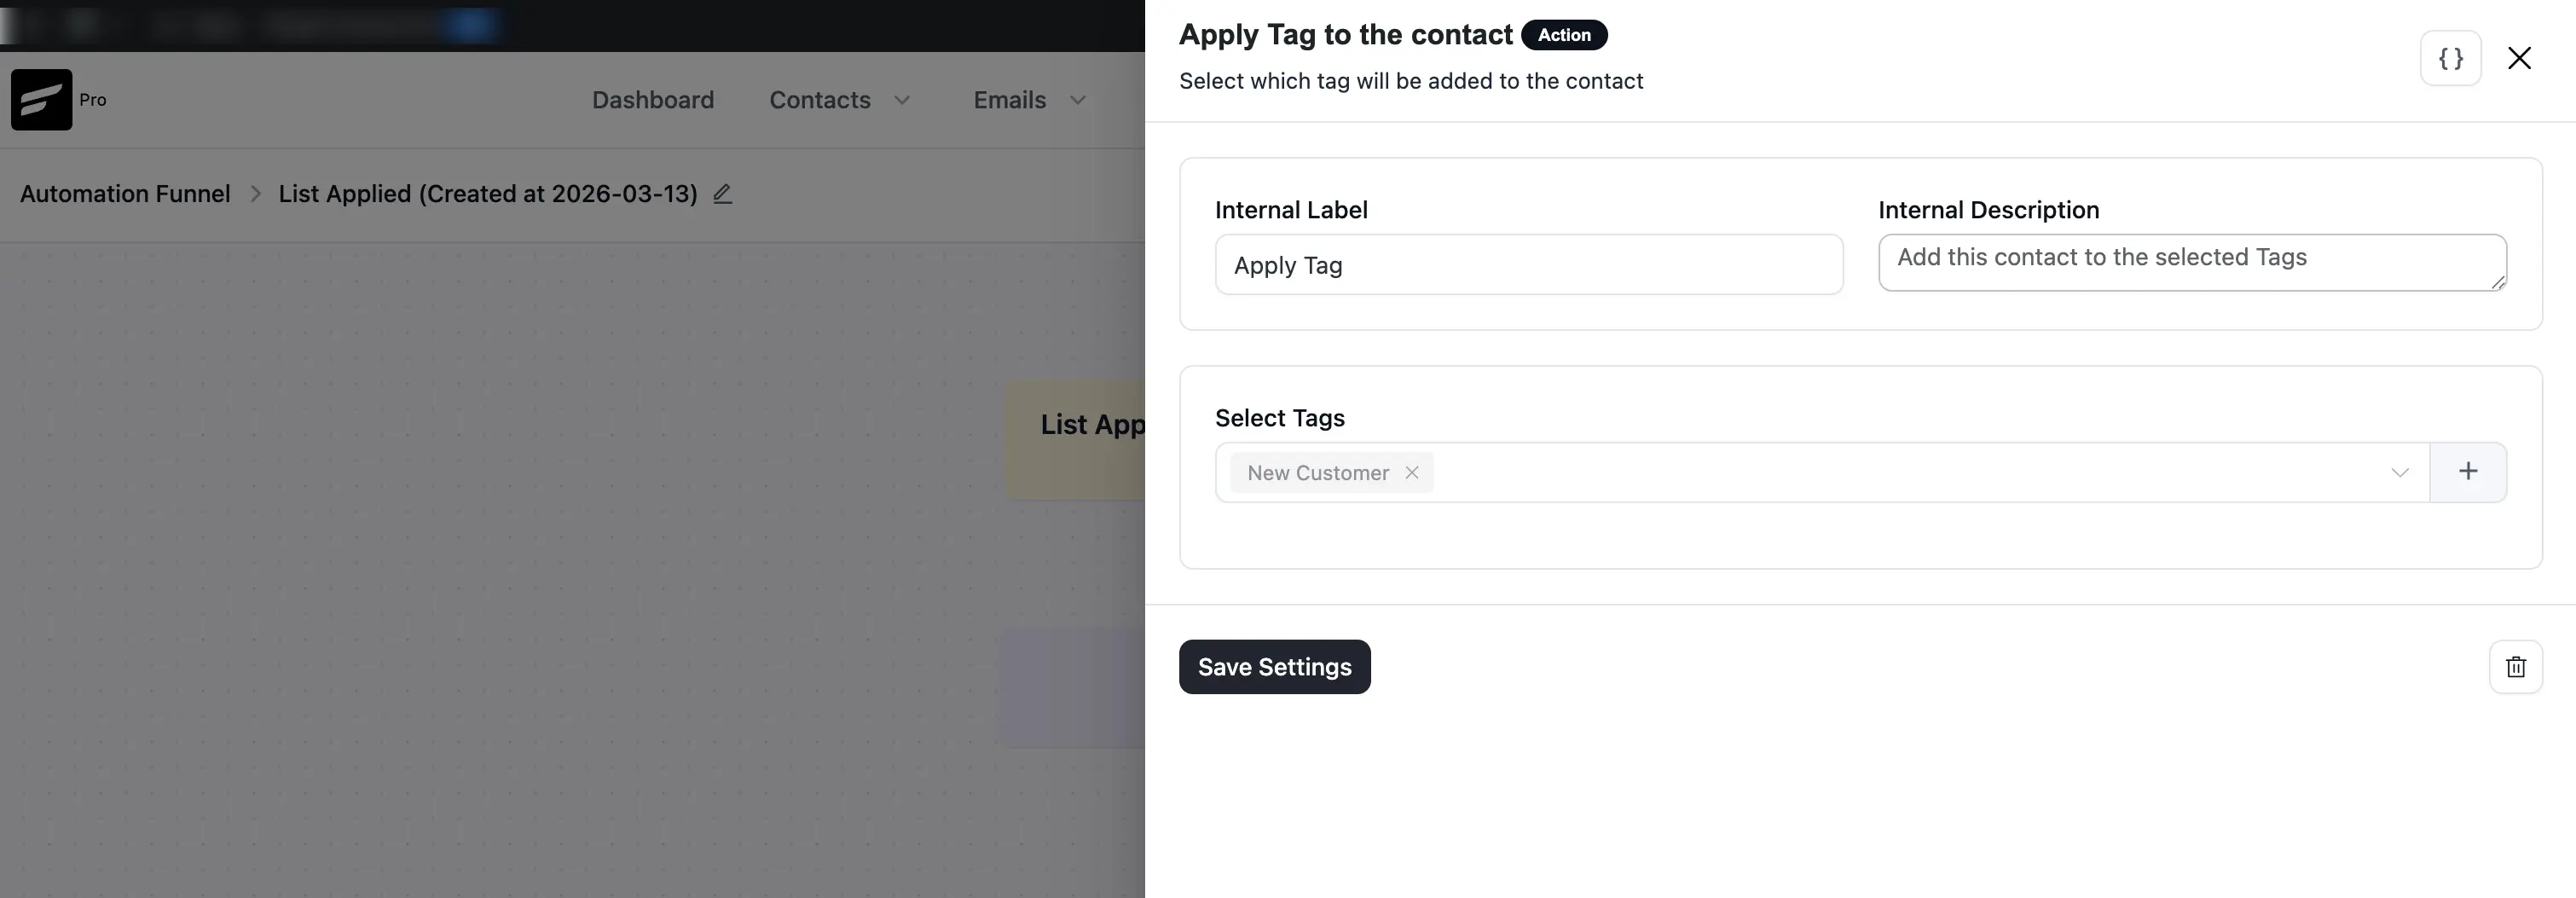
Once you choose the action, another popup will appear, now fill in all the fields according to your requirements and click Save Settings once you are done.
If you don’t want to save click the Trash Icon to delete the action. Also, you can create new tags here by clicking the Plus Icon.
Once you are done, enable the Toggle to Publish your automation so that your automation activates.
For example, when this automation runs, the contacts that are listed in the Student list will be tagged as Enrolled.
Automation Editor
To learn how you can edit your existing Automations anytime, follow the steps with the screenshots below –
First, go to the Automations section from the FluentCRM Navbar, select the automation you want to edit, and click on its Title.
For example, here, I’ve selected the List Applied automation for customization.
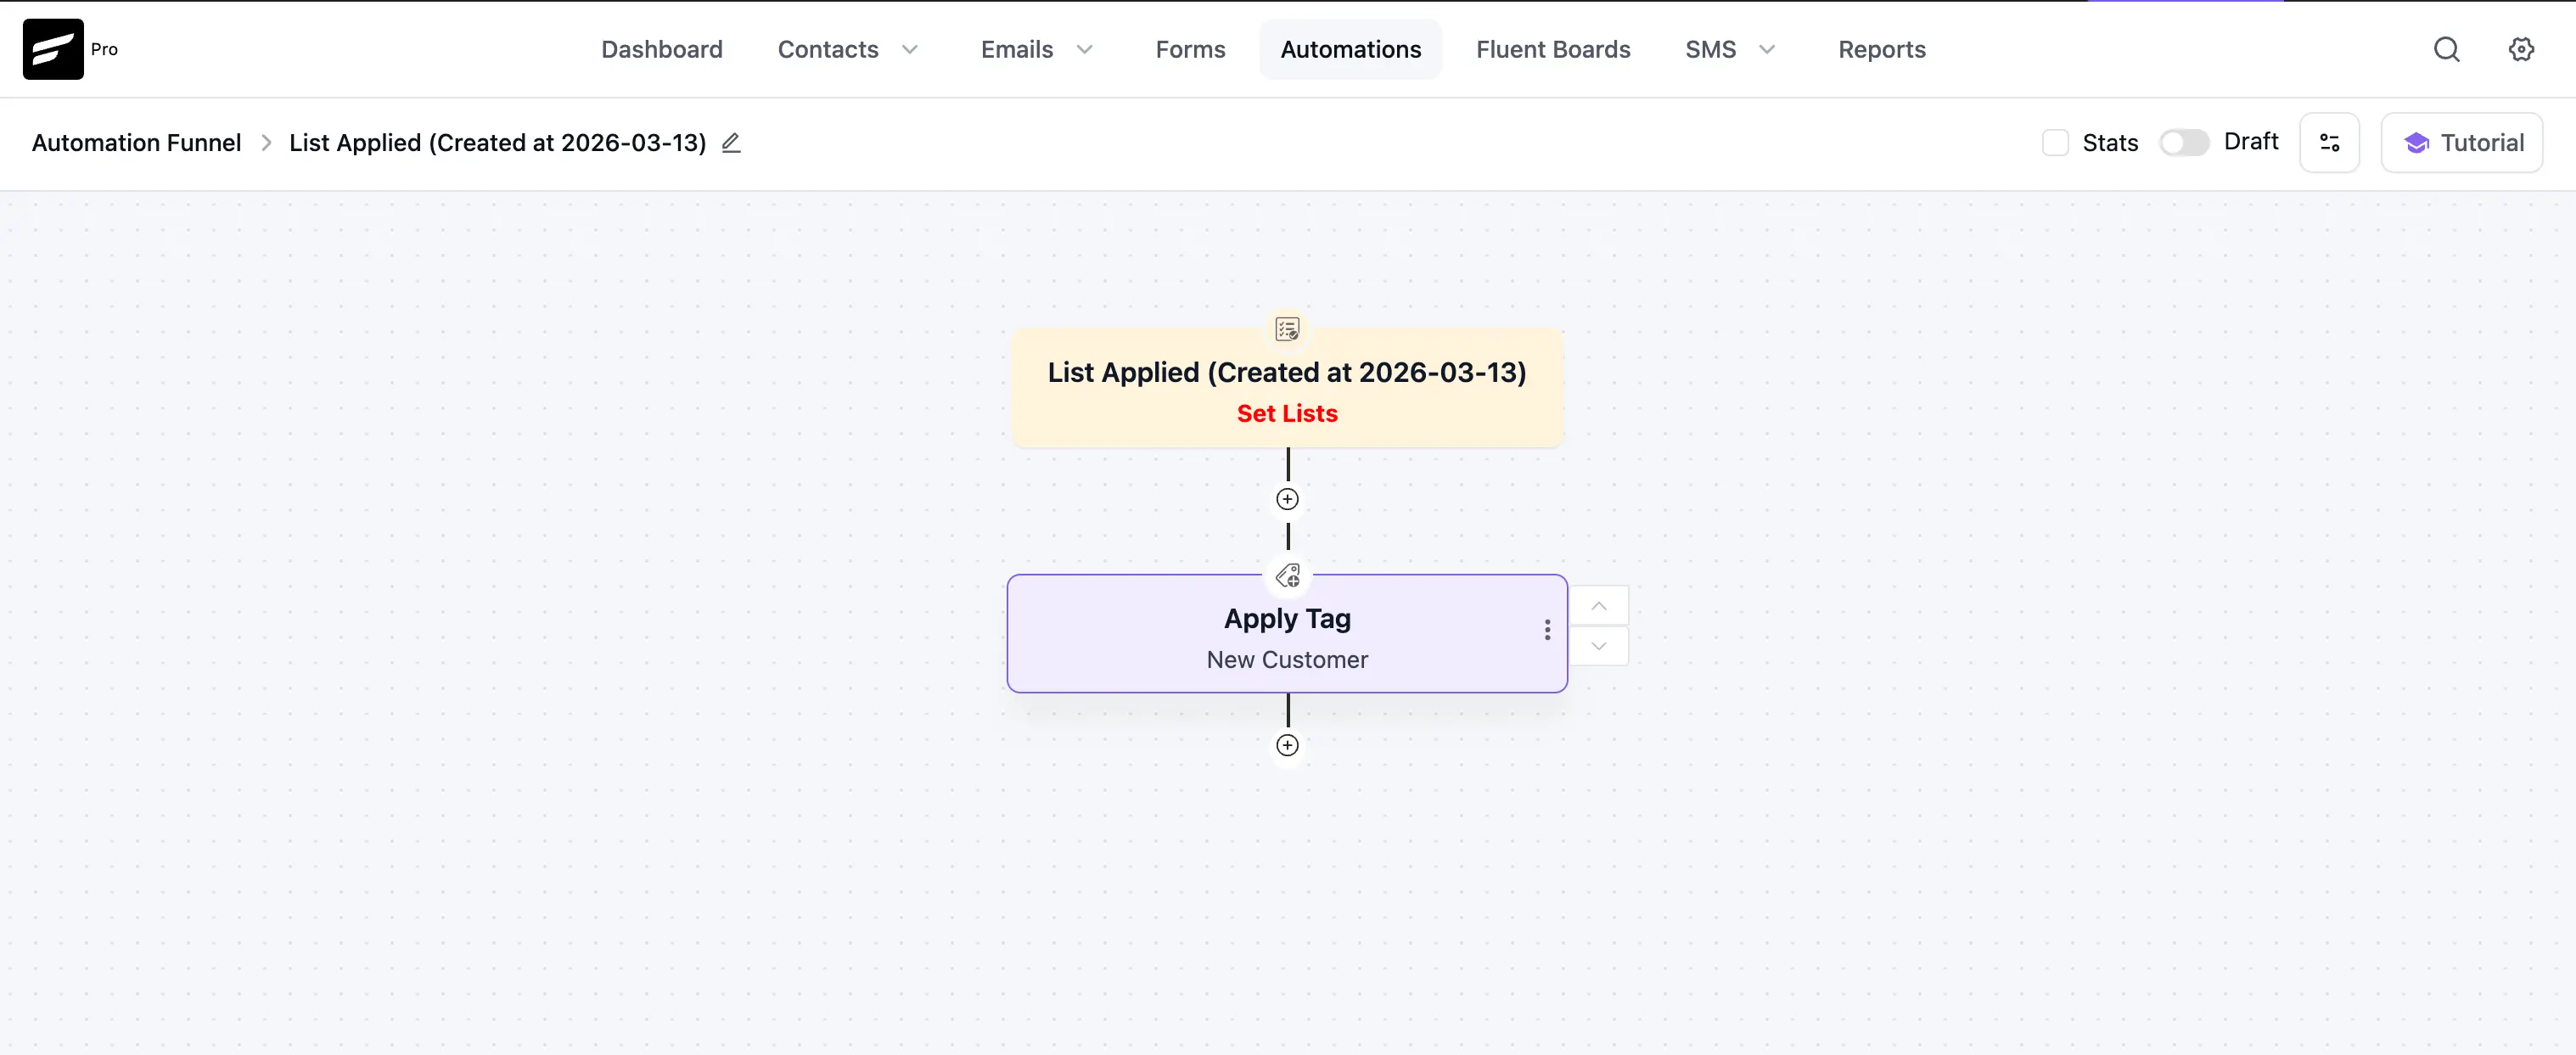
Once you click the Title of your desired automation it will take you to the Automation Editor page with all the available options for your edit.
All the edit options mentioned above are briefly explained below:
Settings Icon: Click on this icon if you want to change the trigger for this automation. Once you change, please reconfigure the trigger settings.
Stats Checkbox: Check this box if you want to see all the Statistics of your automation funnel.
Status Toggle: Enable this option, to Publish and run your automation. Otherwise, your automation will be saved as a Draft only.
View Reports: By clicking this button, you can check the overall Reports of the Automations. To learn more detailed reporting details please visit Automation Reports.
Guideline Resource: This button will open a sidebar on the right-hand side with the documentation to guide you through the basics of FluentCRM Automation Actions.
Existing Trigger: If you want to edit any Trigger that you already added, just click on it and the edit options will open on the right-hand side.
Existing Action: If you want to edit any Action that you already added, just click on it and the edit options will open on the right-hand side.
Three-dot-icon: Once you click this icon, you will get two more options. These are:
- Delete: Click on this option if you want to delete the action.
- Clone: Click on this option if you want to clone/duplicate the action.
Move Icon: To move any action, please hover over the action you want to move and you will see 2 Arrows beside them indicating up or below to move the action. Now, by clicking the Arrows you can easily move your action up and down within the funnel.
Plus Icon: Always press the Plus Icon to add new Actions or Conditions.
This way you can create and edit automations easily at any time!