Appearance
Amazon End User Messaging SMS Integration
Amazon End User Messaging (formerly known as Amazon SNS for SMS) is a robust, highly available messaging service from Amazon Web Services (AWS) that lets you send SMS notifications reliably at scale. Integrating FluentCRM with this service gives you an enterprise-grade, cost-effective solution for SMS campaigns and automated messages.
This guide walks you through the full setup in four parts:
- Create a dedicated IAM user in AWS
- Generate Access Keys for that user
- Get a phone number (originator) in AWS End User Messaging
- Enter your credentials in FluentCRM
Step 1: Open AWS IAM and Create a Dedicated User
It is strongly recommended to use a dedicated IAM user with limited permissions for FluentCRM's SMS integration rather than using your root AWS account credentials. This limits the blast radius if keys are ever compromised.
1.1 Navigate to IAM
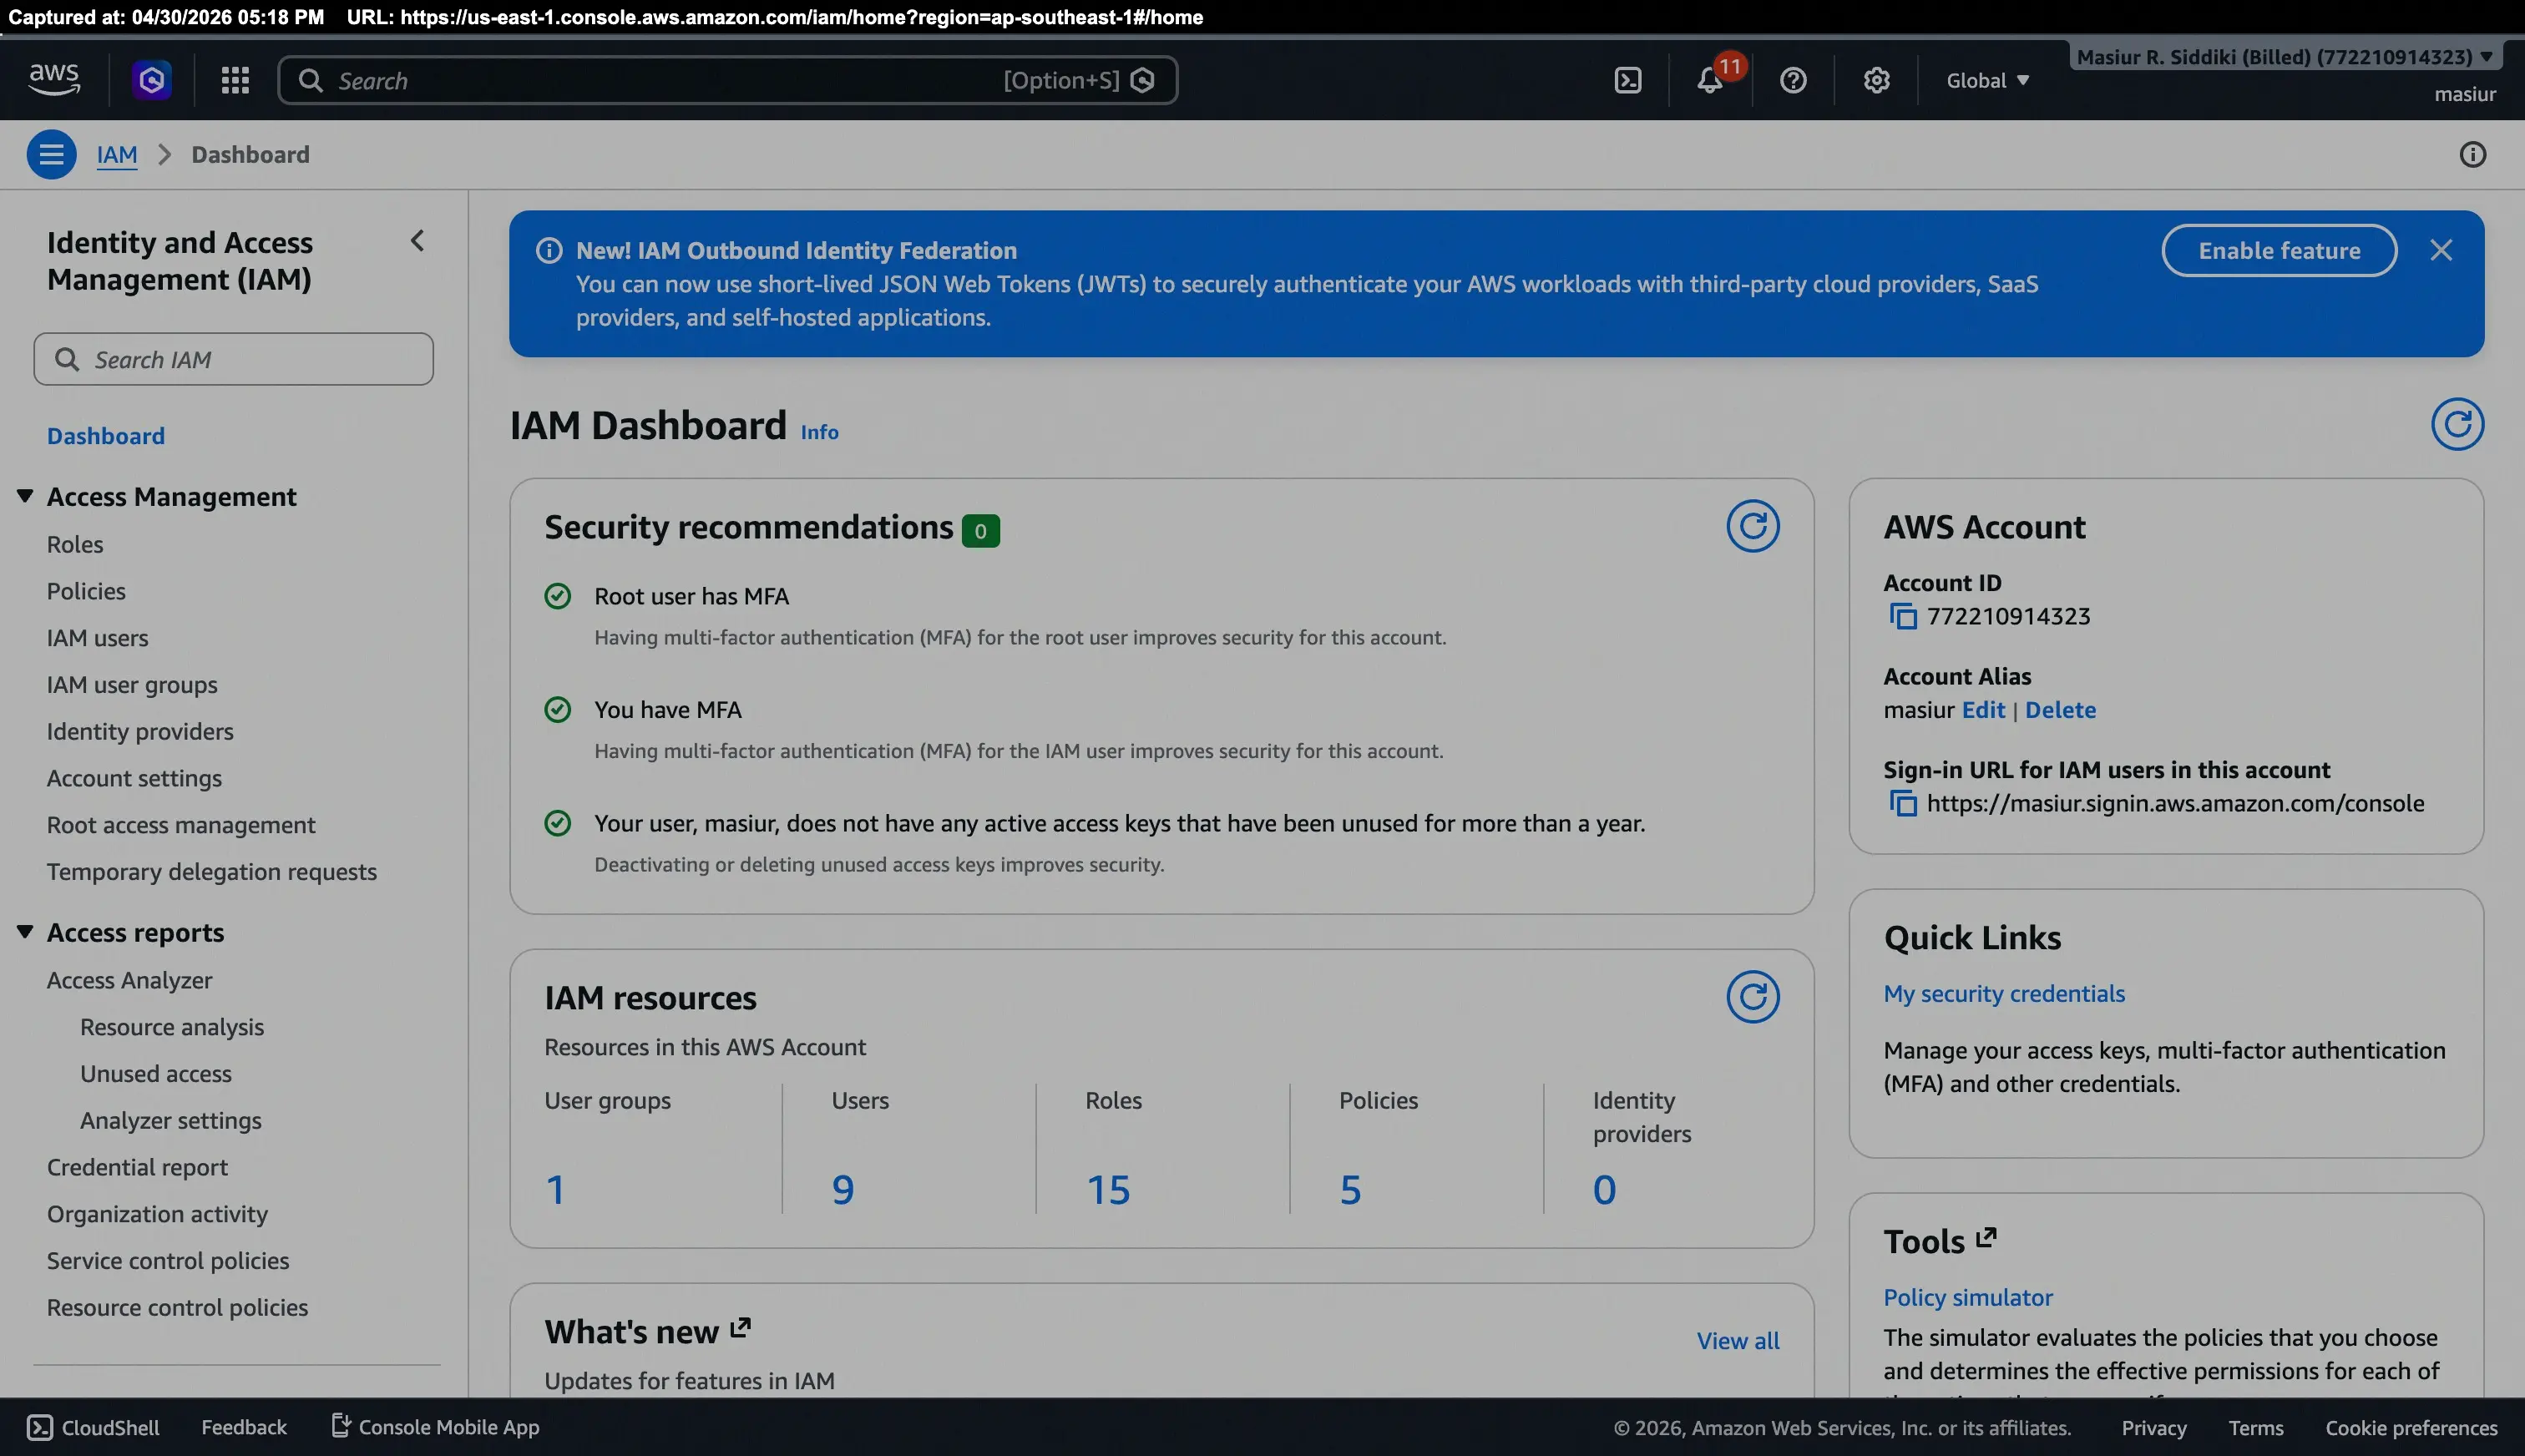
Log in to your AWS Management Console. In the search bar at the top, type IAM and select the IAM service from the results.
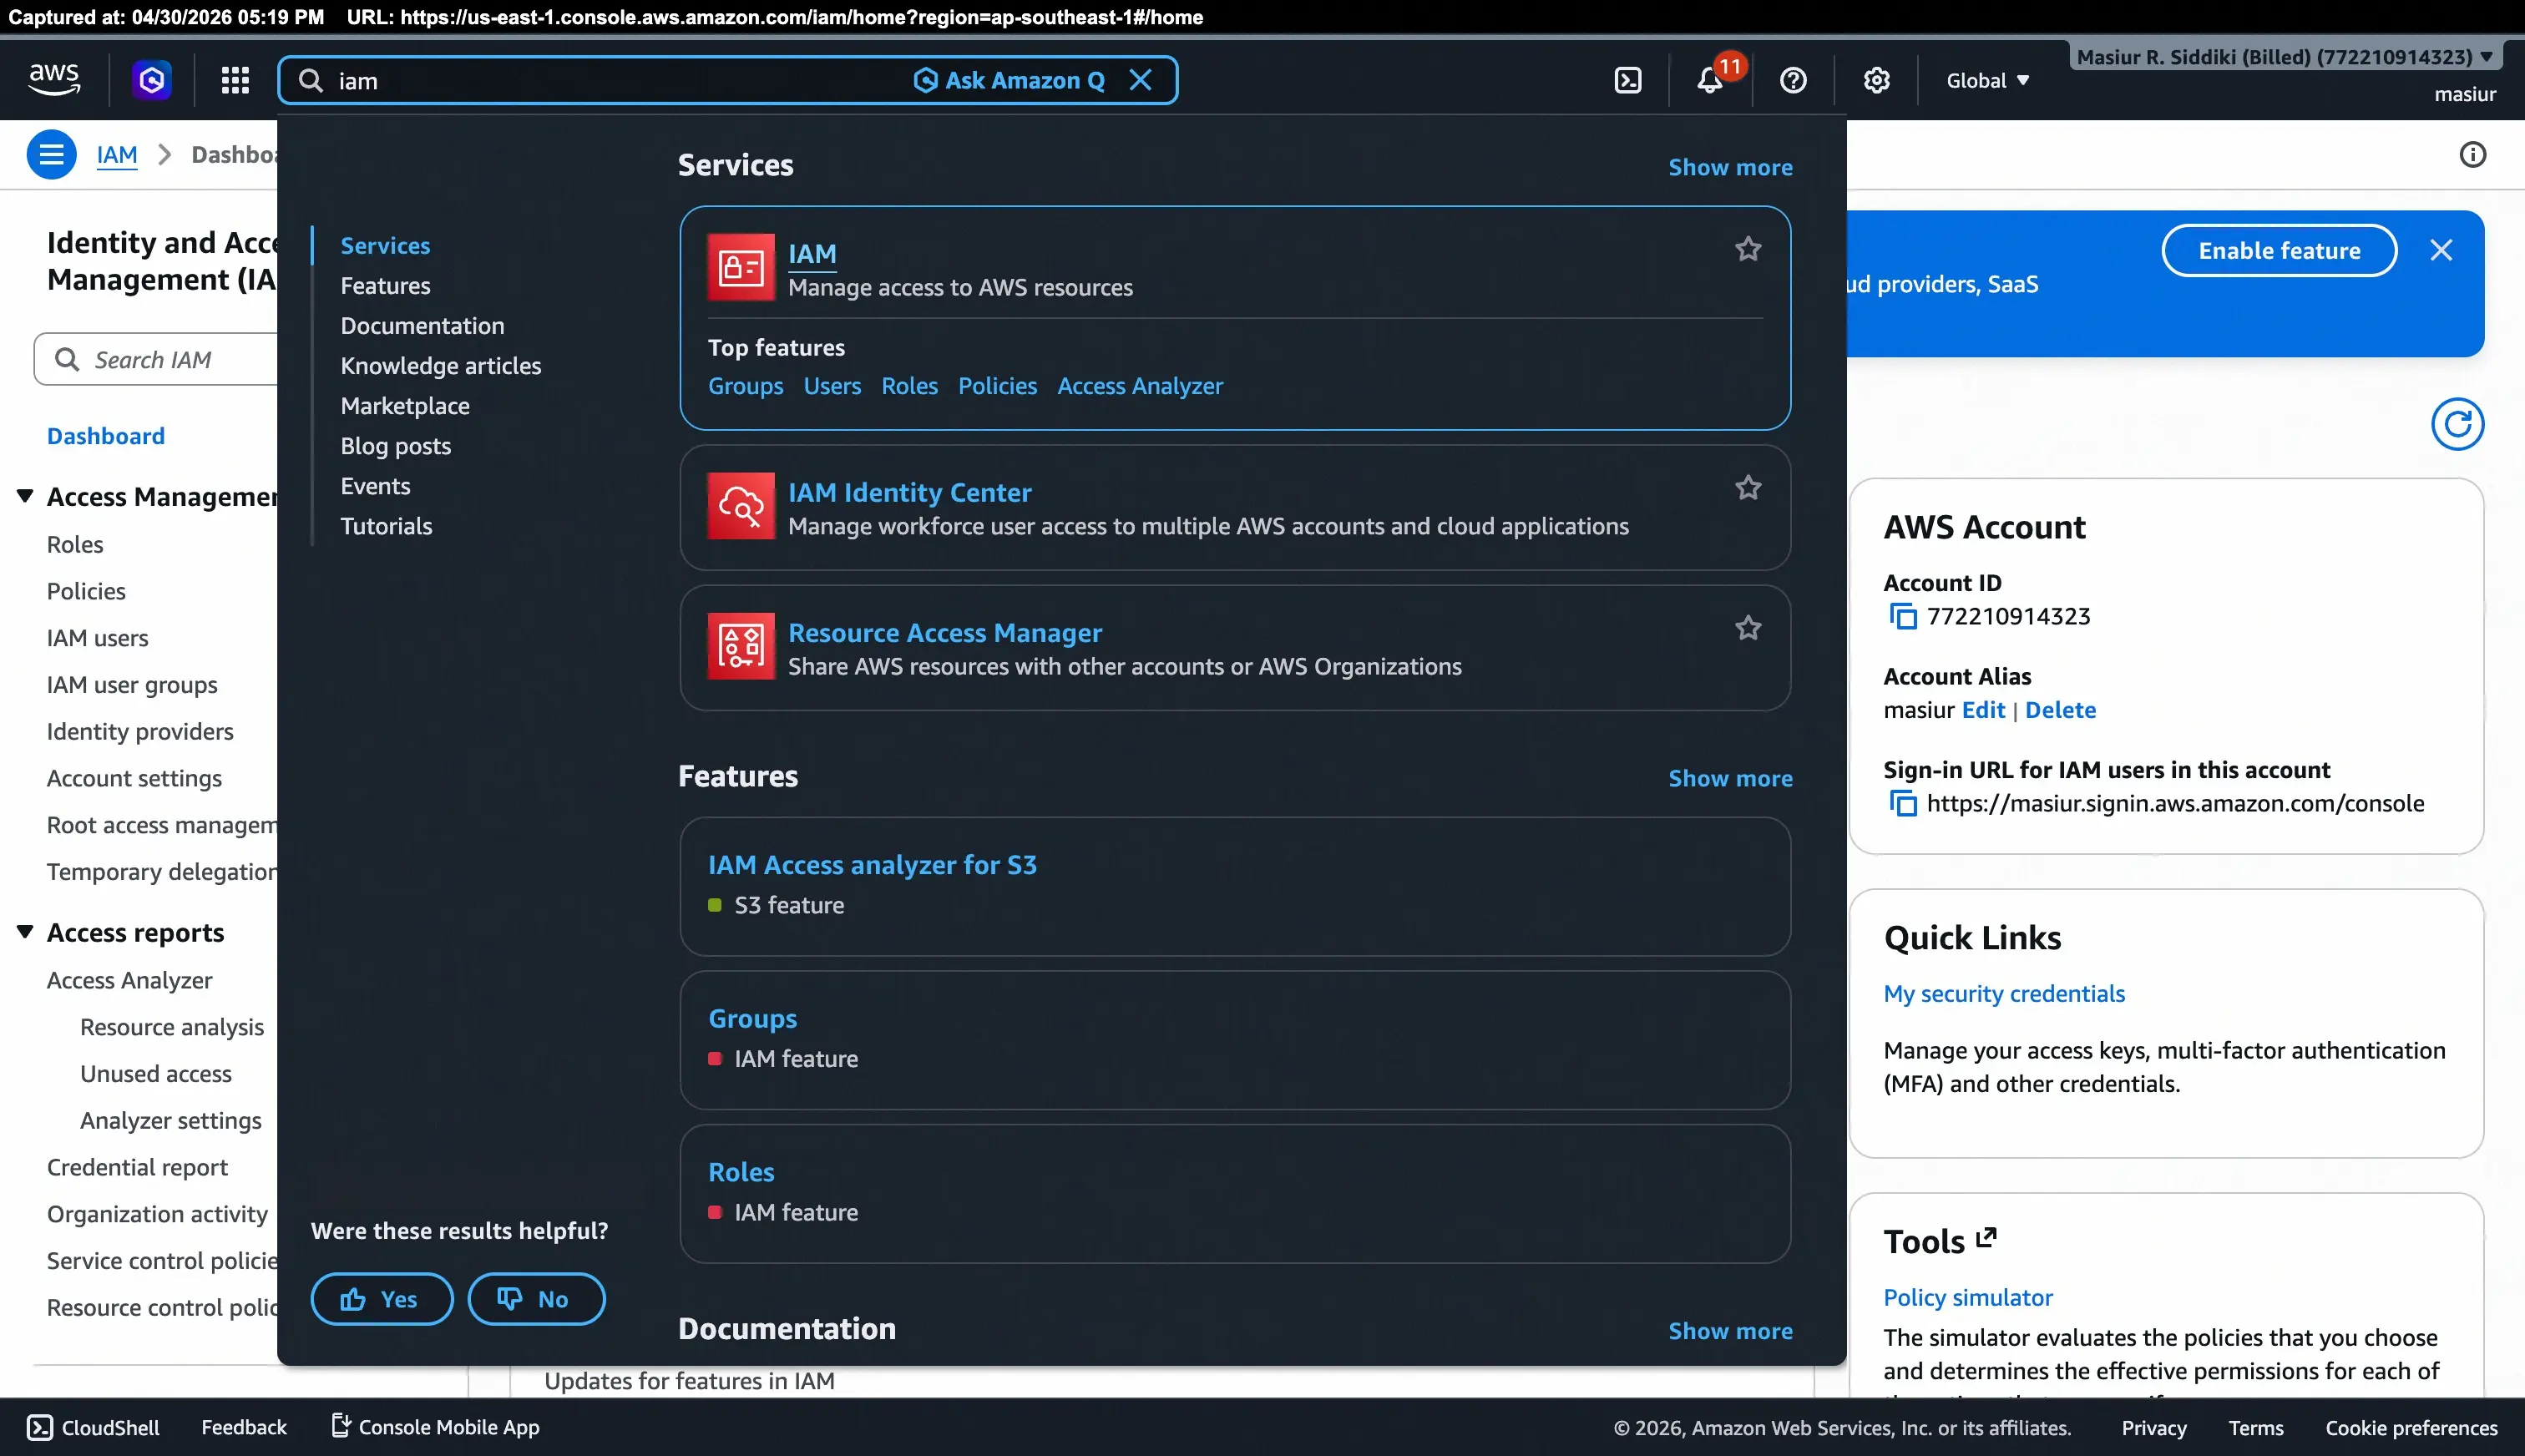
You will land on the IAM Dashboard, which gives you a security overview of your AWS account.
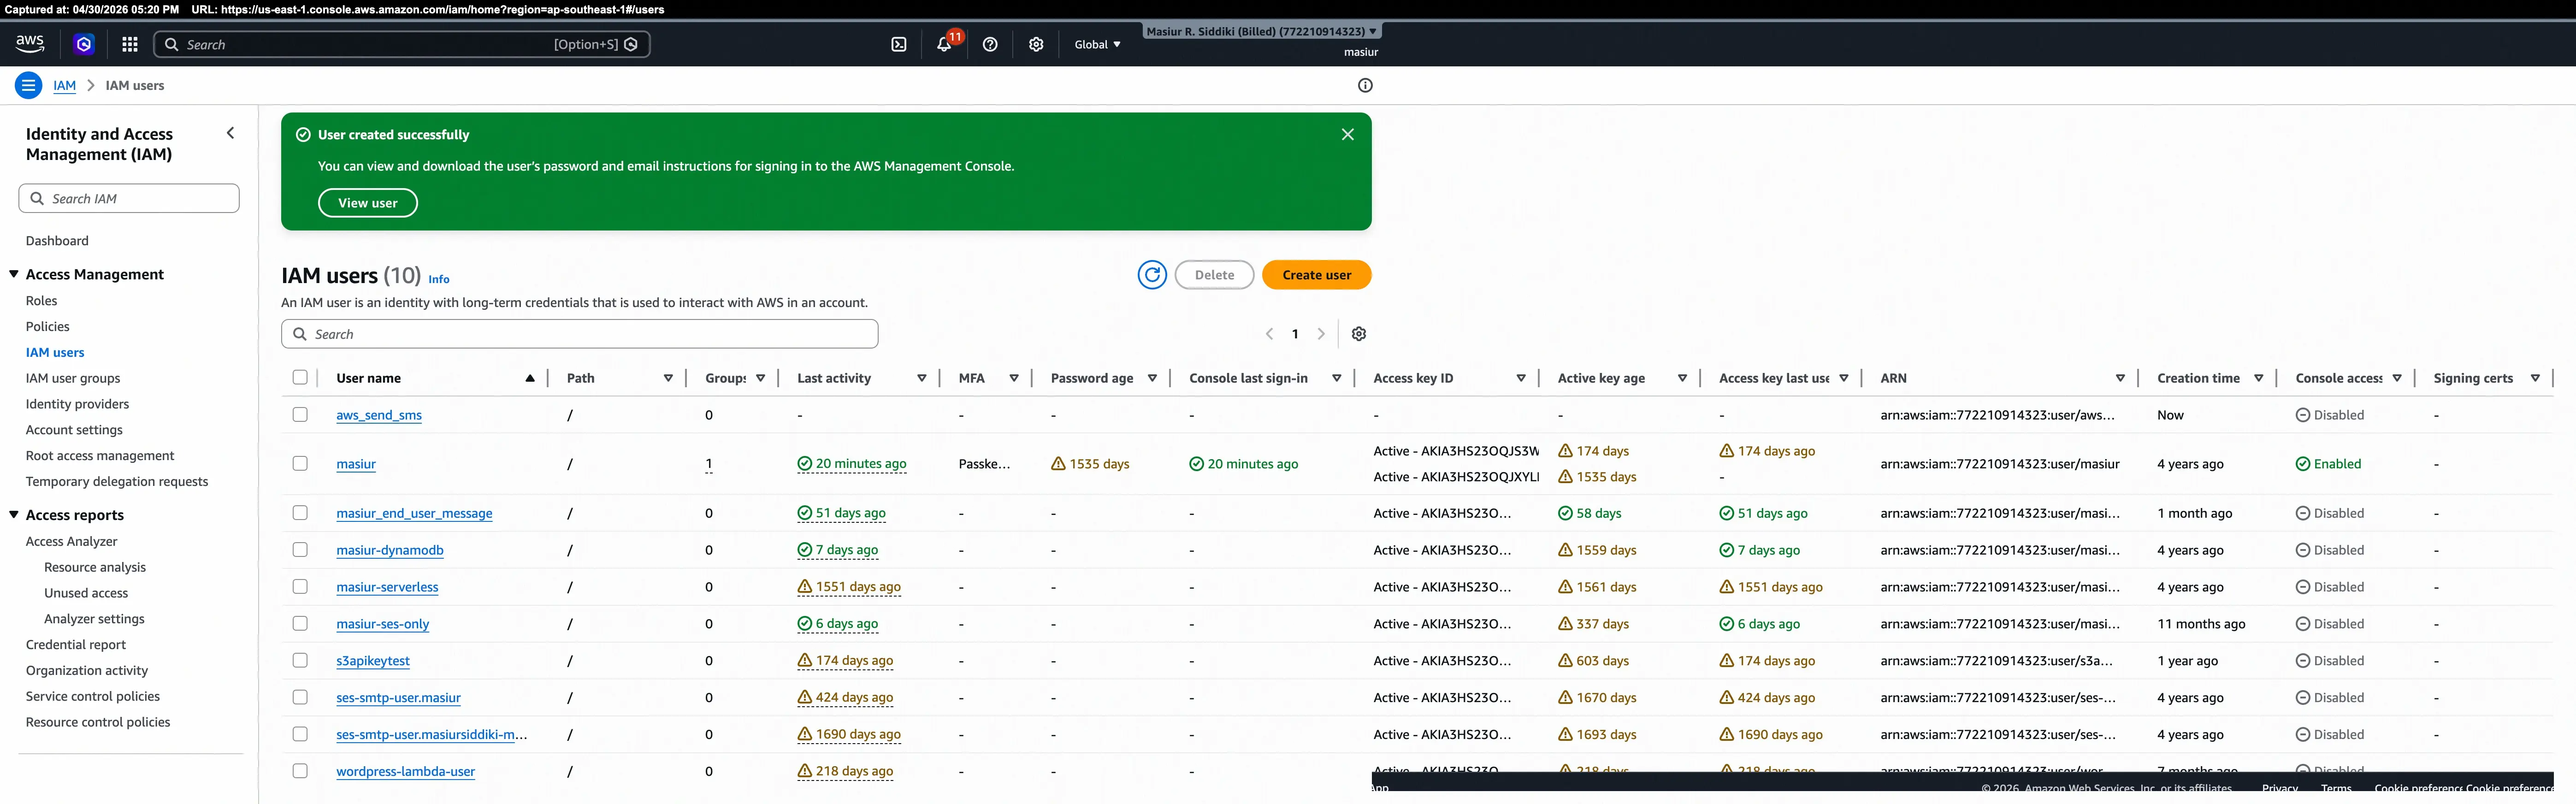
1.2 Open the IAM Users list
In the left sidebar, under Access Management, click IAM users.
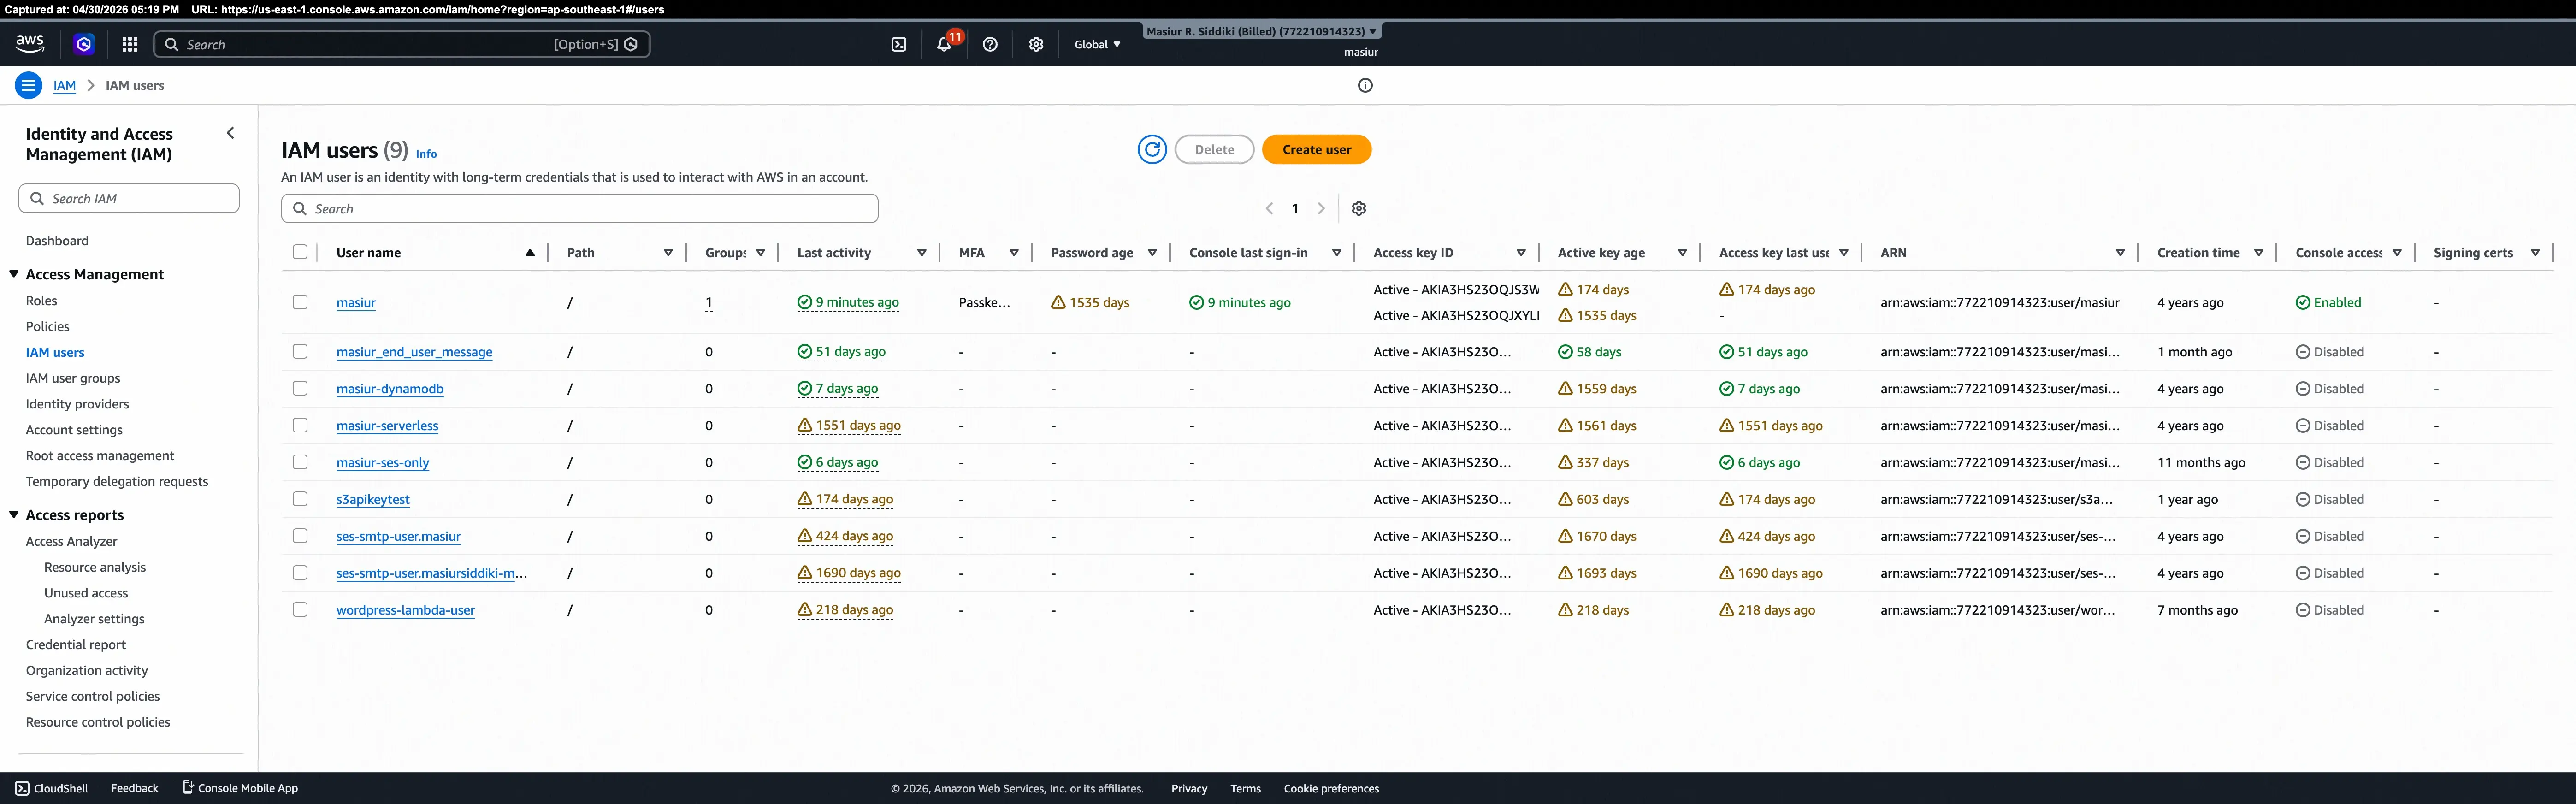
1.3 Create a new user
Click the Create user button in the top-right corner.
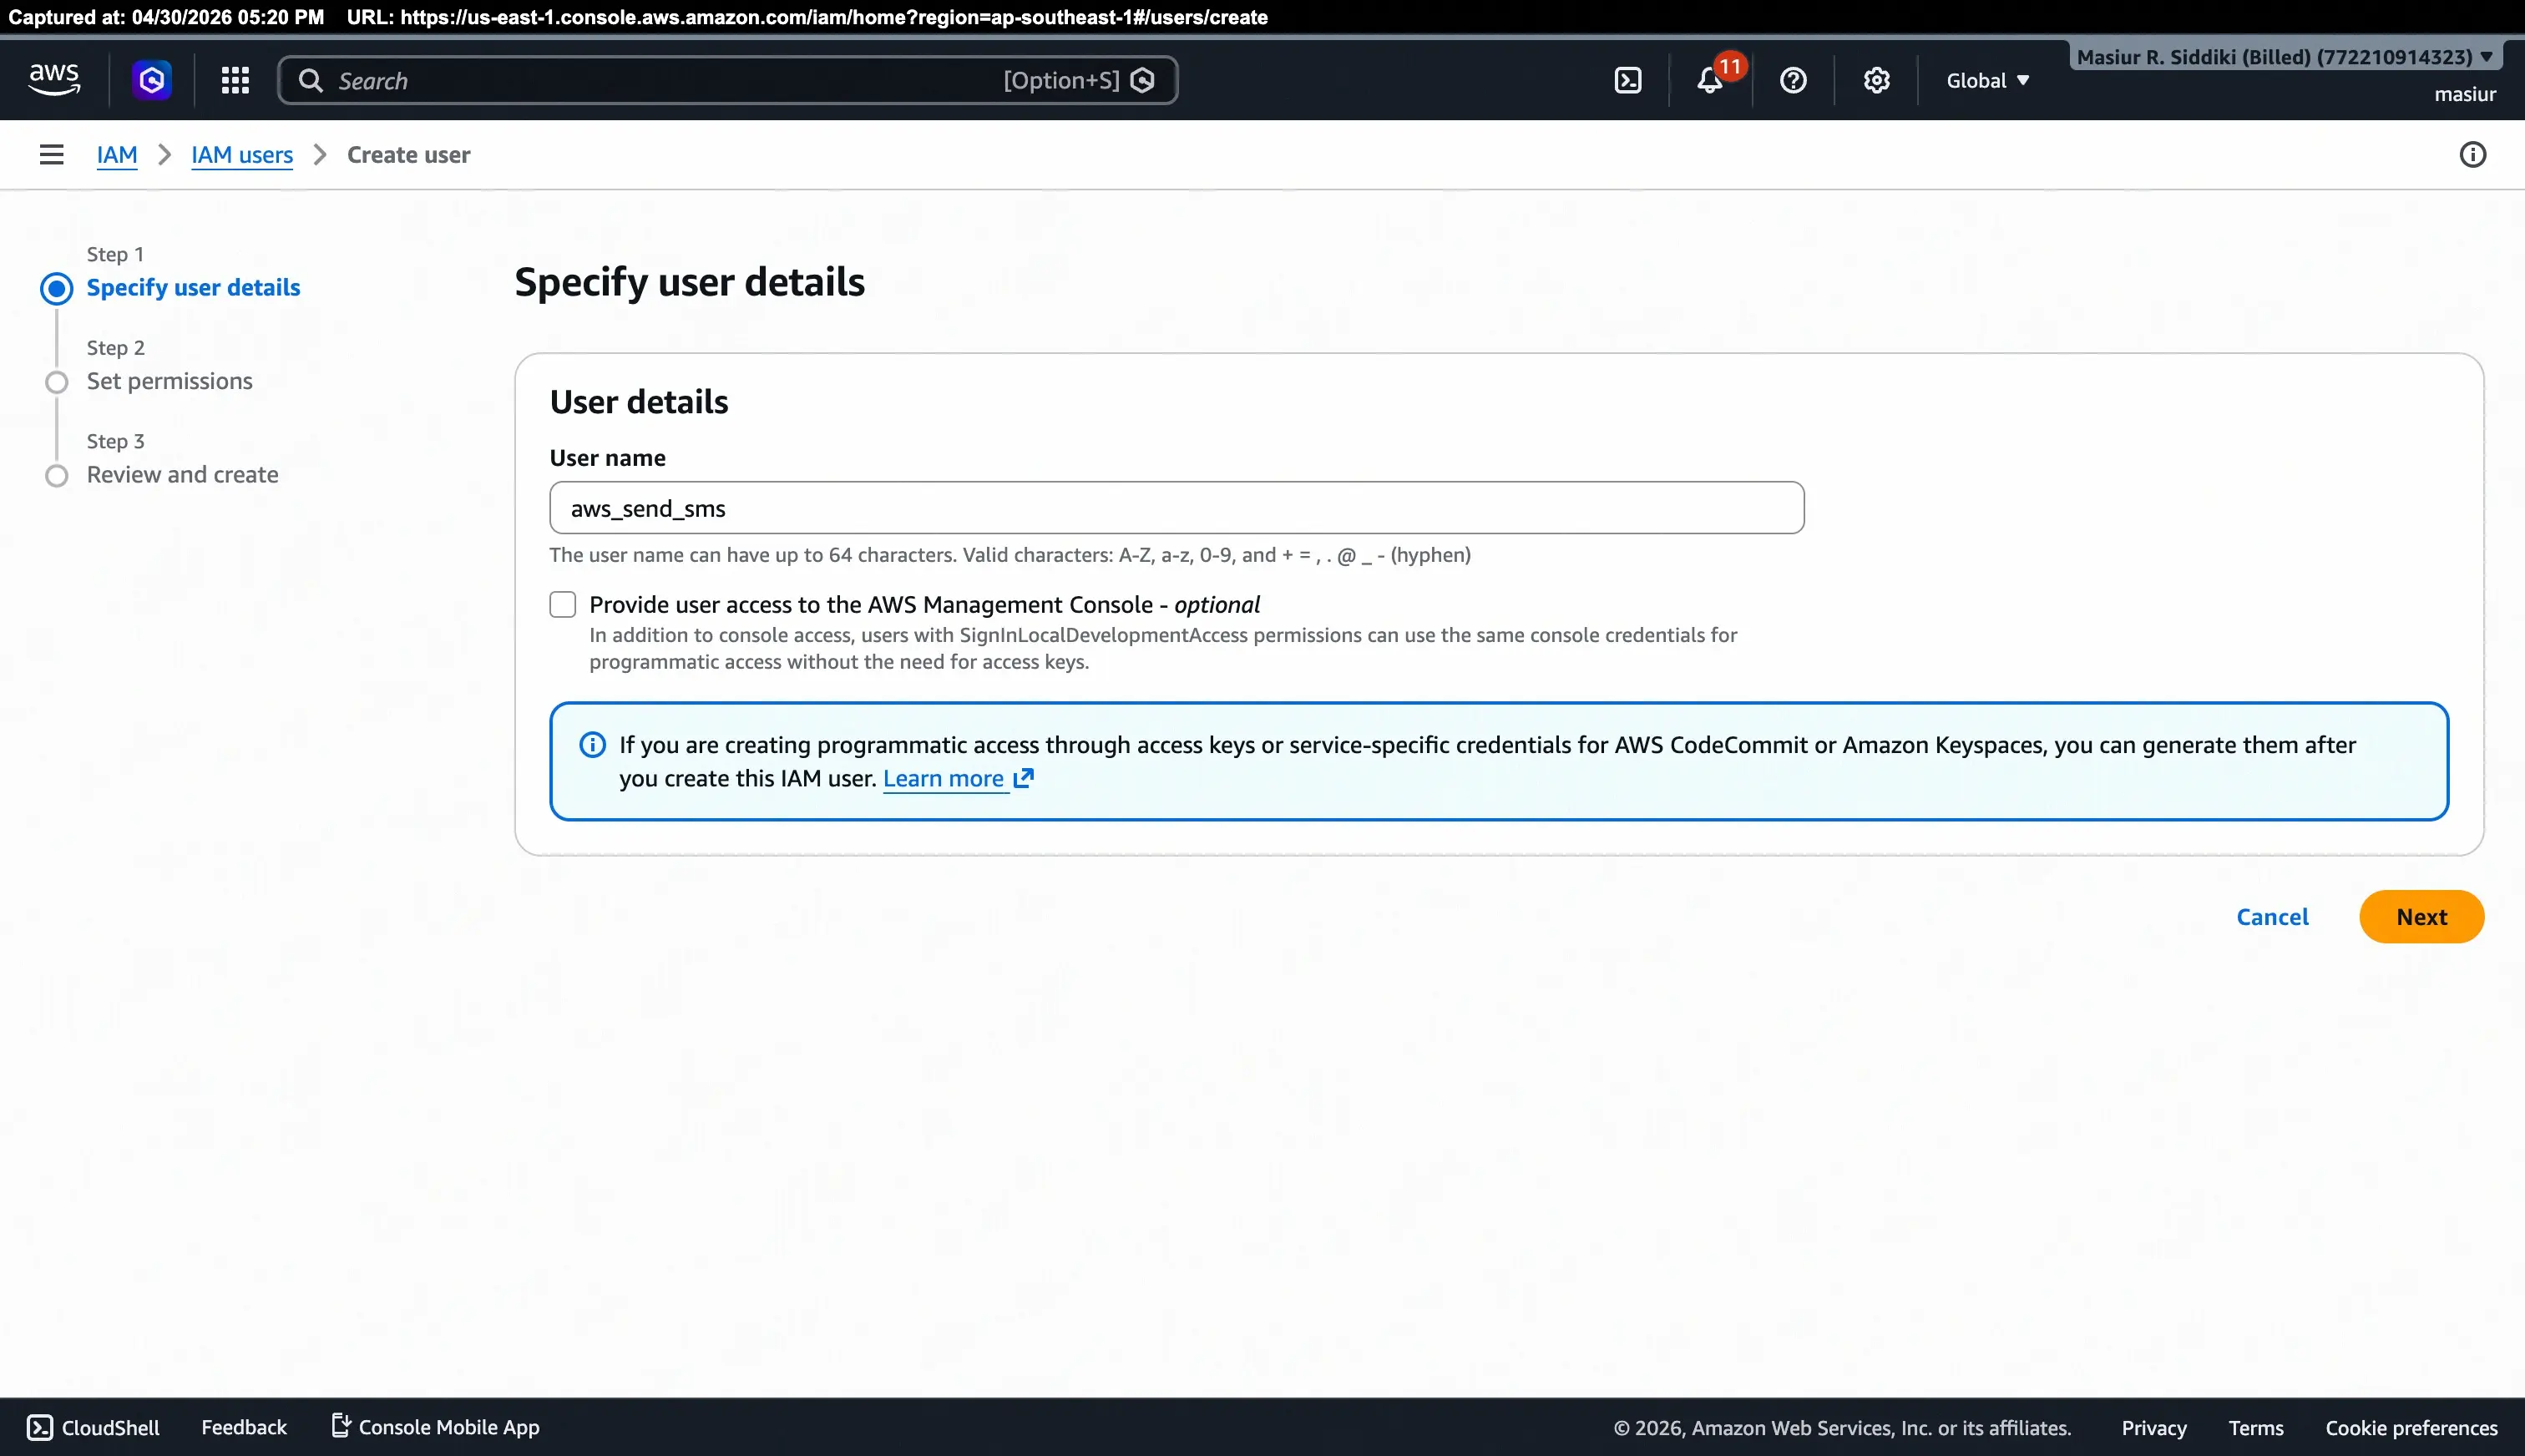
On the Specify user details page:
- User name: Enter a descriptive name such as
aws_send_sms. - Leave the Provide user access to the AWS Management Console checkbox unchecked — this user only needs programmatic access.
Click Next.
On the Set permissions step, attach the AmazonSNSFullAccess policy (or a custom least-privilege policy scoped to sms-voice:*). Complete the remaining steps and click Create user.
You will see a green success banner — "User created successfully" — and the new user (aws_send_sms) will appear at the top of the IAM Users list.
Step 2: Create Access Keys
Access Keys are the credentials FluentCRM uses to authenticate API calls to AWS. You create them on the new IAM user's profile page.
2.1 Select the use case
On the IAM user's detail page, go to the Security credentials tab and click Create access key.
AWS will ask you to select the use case for this key. Select Third-party service, check the confirmation checkbox that says "I understand the above recommendation and want to proceed to create an access key", and click Next.
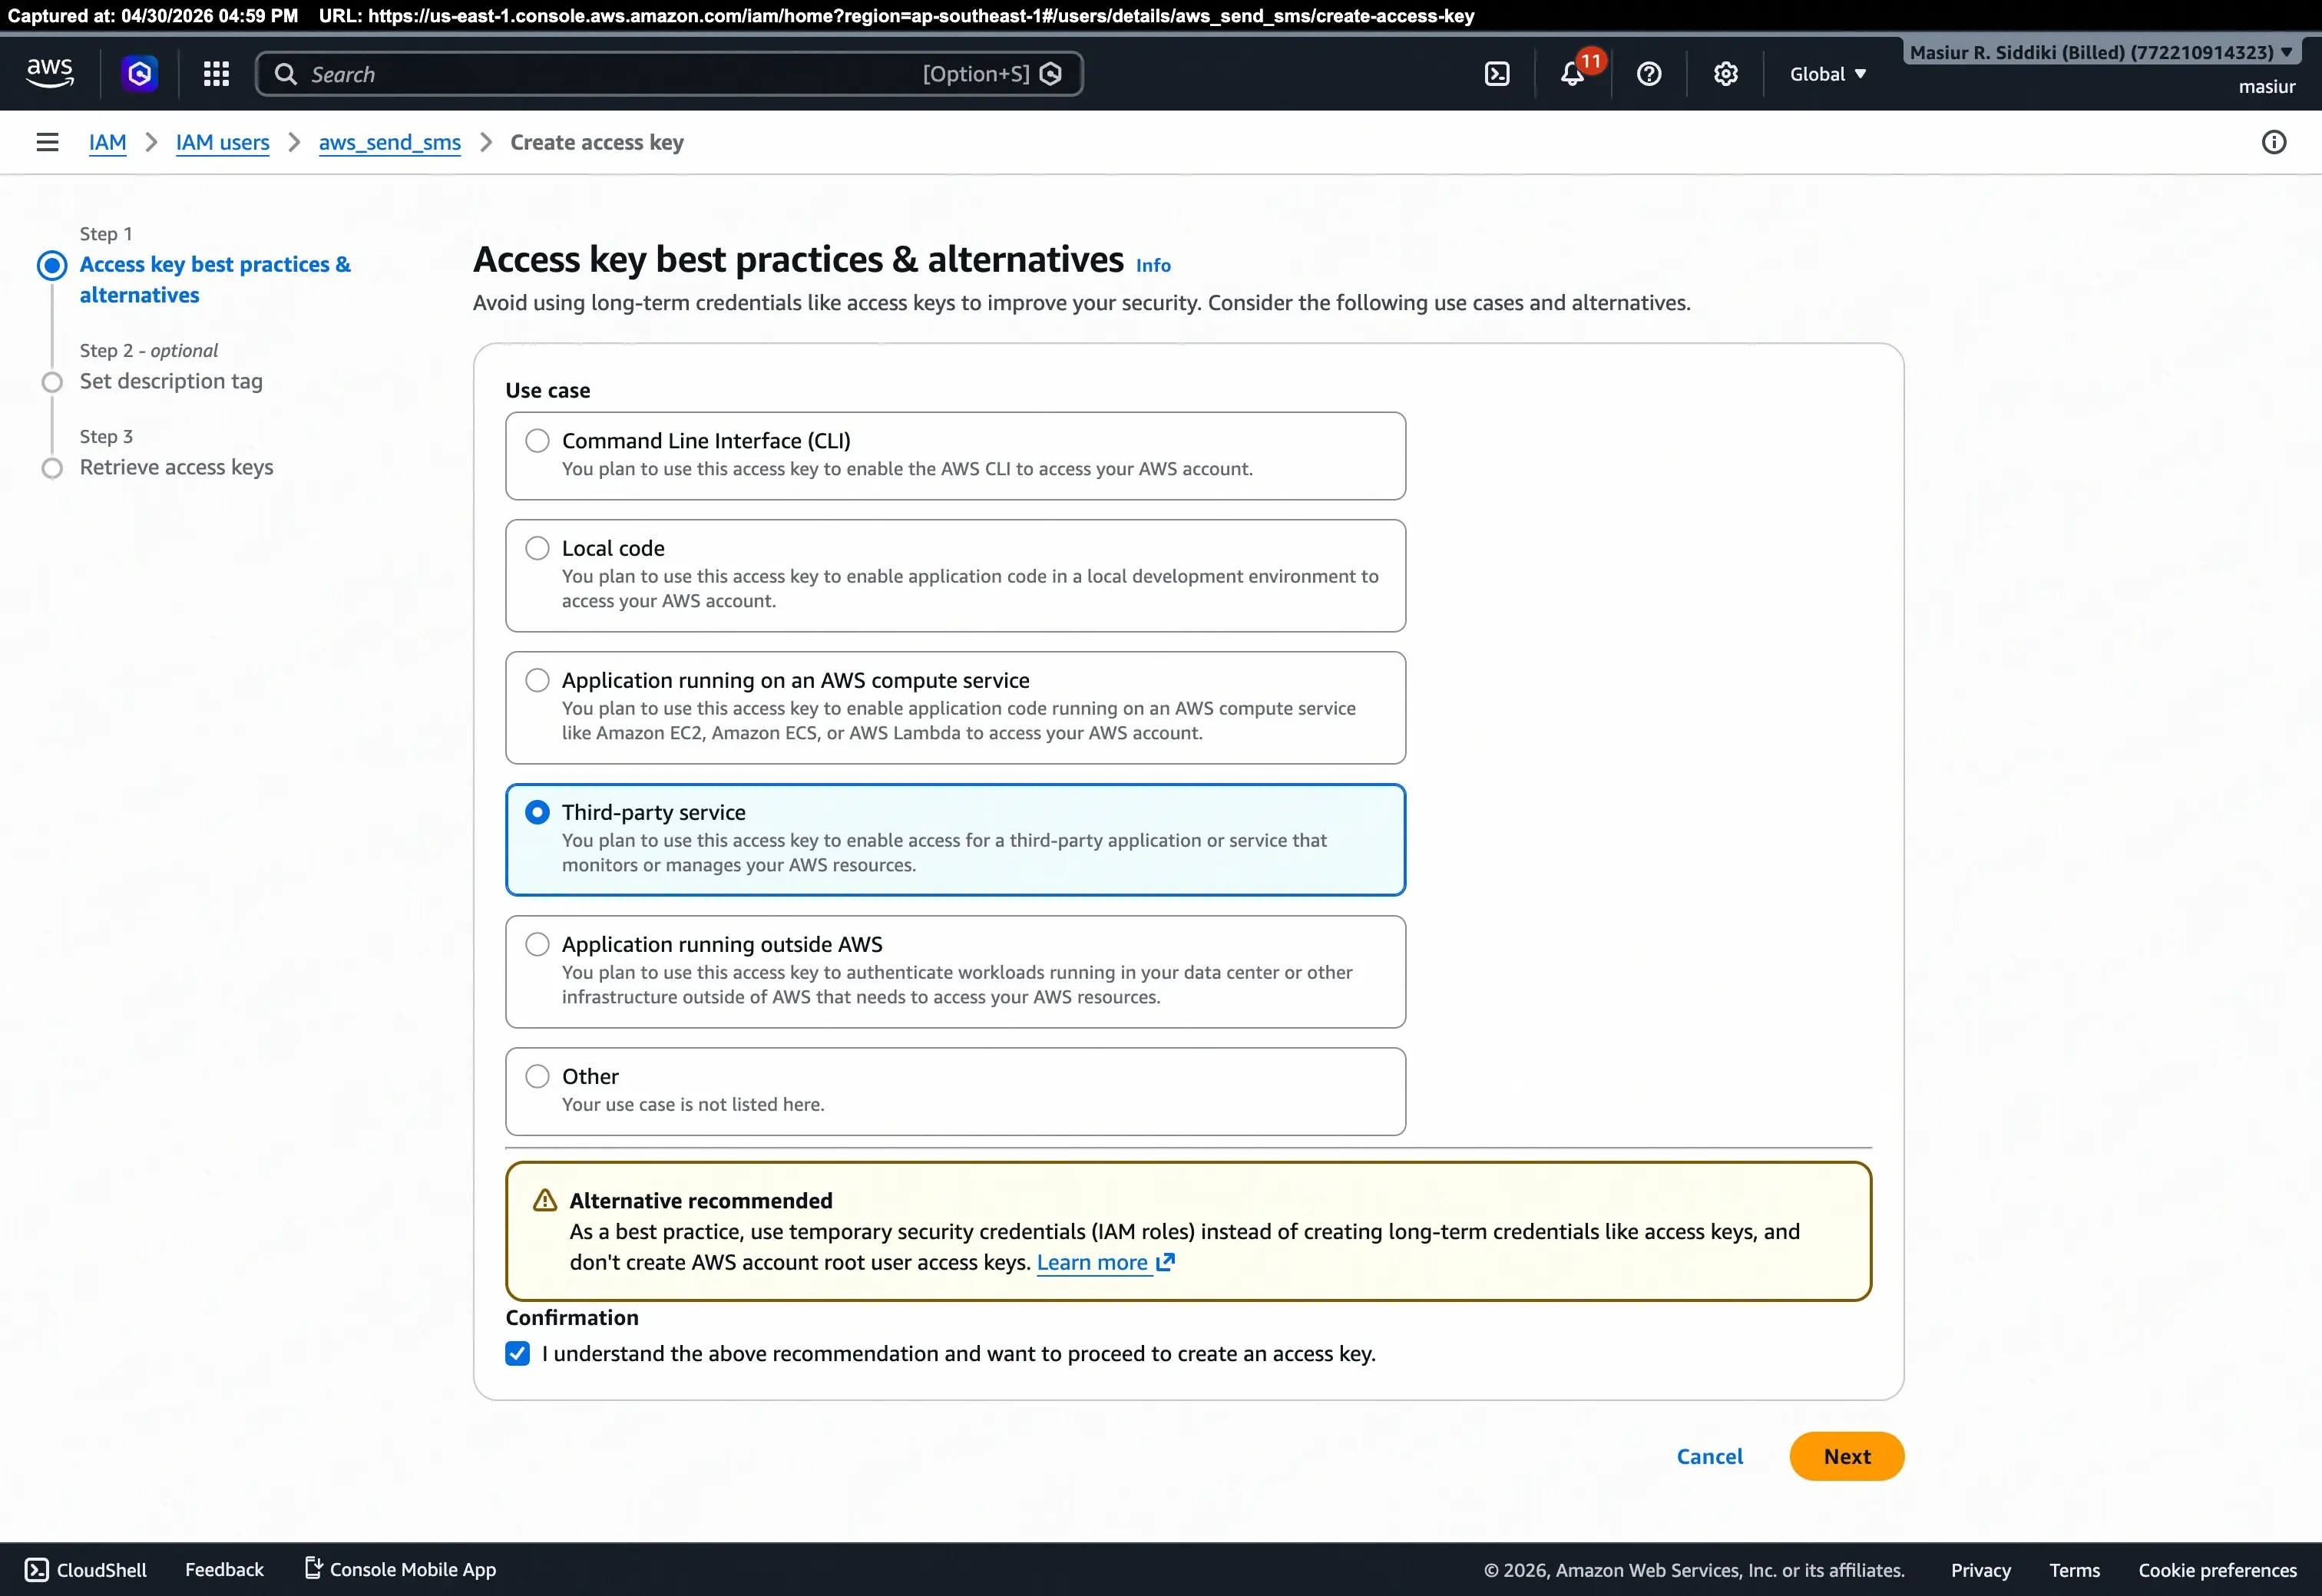
Why "Third-party service"? This is the correct use case when giving an external application (FluentCRM) access to your AWS resources.
2.2 Retrieve and save your keys
After completing the optional description tag step, AWS will display the Retrieve access keys screen. This is the only time the Secret Access Key is shown in full.
- Access key: Copy the Access Key ID shown in the table (e.g.,
AKIA3HS23OQJQ3HOFGTJ). - Secret access key: Click Show to reveal it, then copy it or click Download .csv file to save both keys safely.
Click Done when finished.
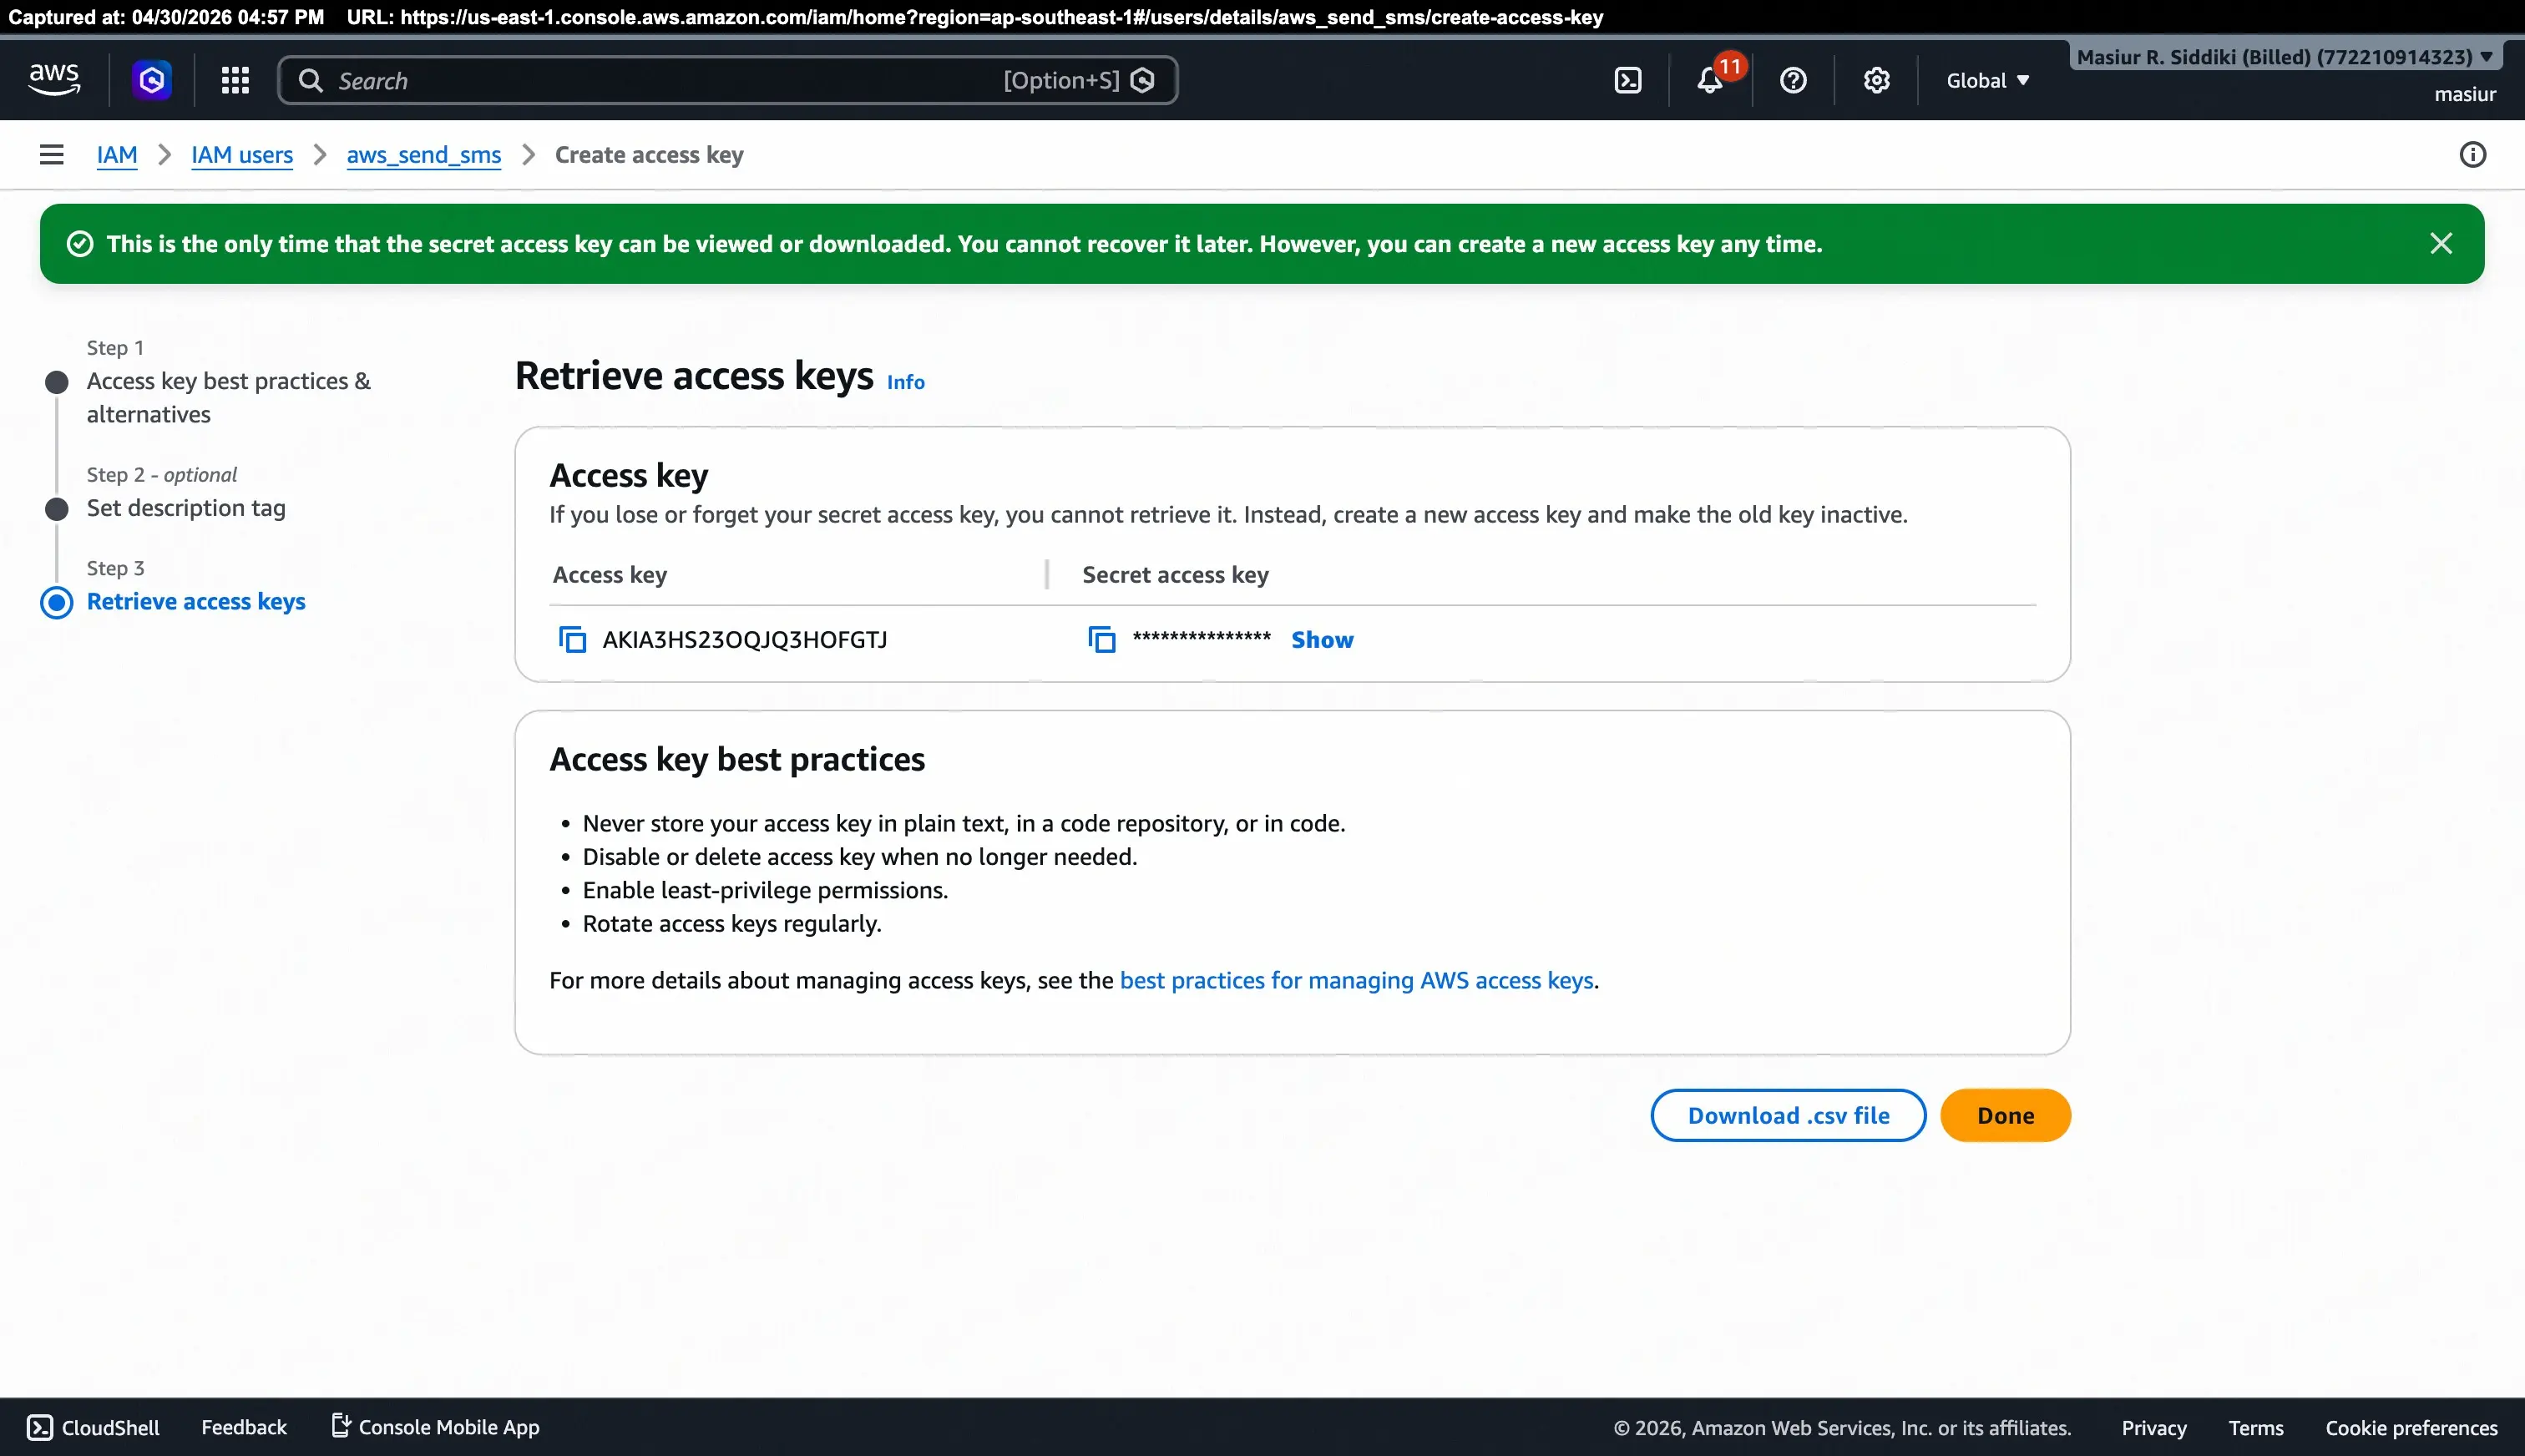
Important: Store your Secret Access Key securely. If you lose it, you cannot retrieve it — you will need to create a new access key.
Step 3: Set Up a Phone Number in AWS End User Messaging
Before FluentCRM can send SMS messages, you need at least one originating phone number (or Sender ID) registered in AWS End User Messaging.
3.1 Navigate to AWS End User Messaging
In the AWS Console, search for End User Messaging or go directly to: AWS End User Messaging → SMS → Phone numbers
Make sure your console is set to the AWS Region you intend to use for sending (visible in the top-right corner, e.g., Asia Pacific (Singapore)).
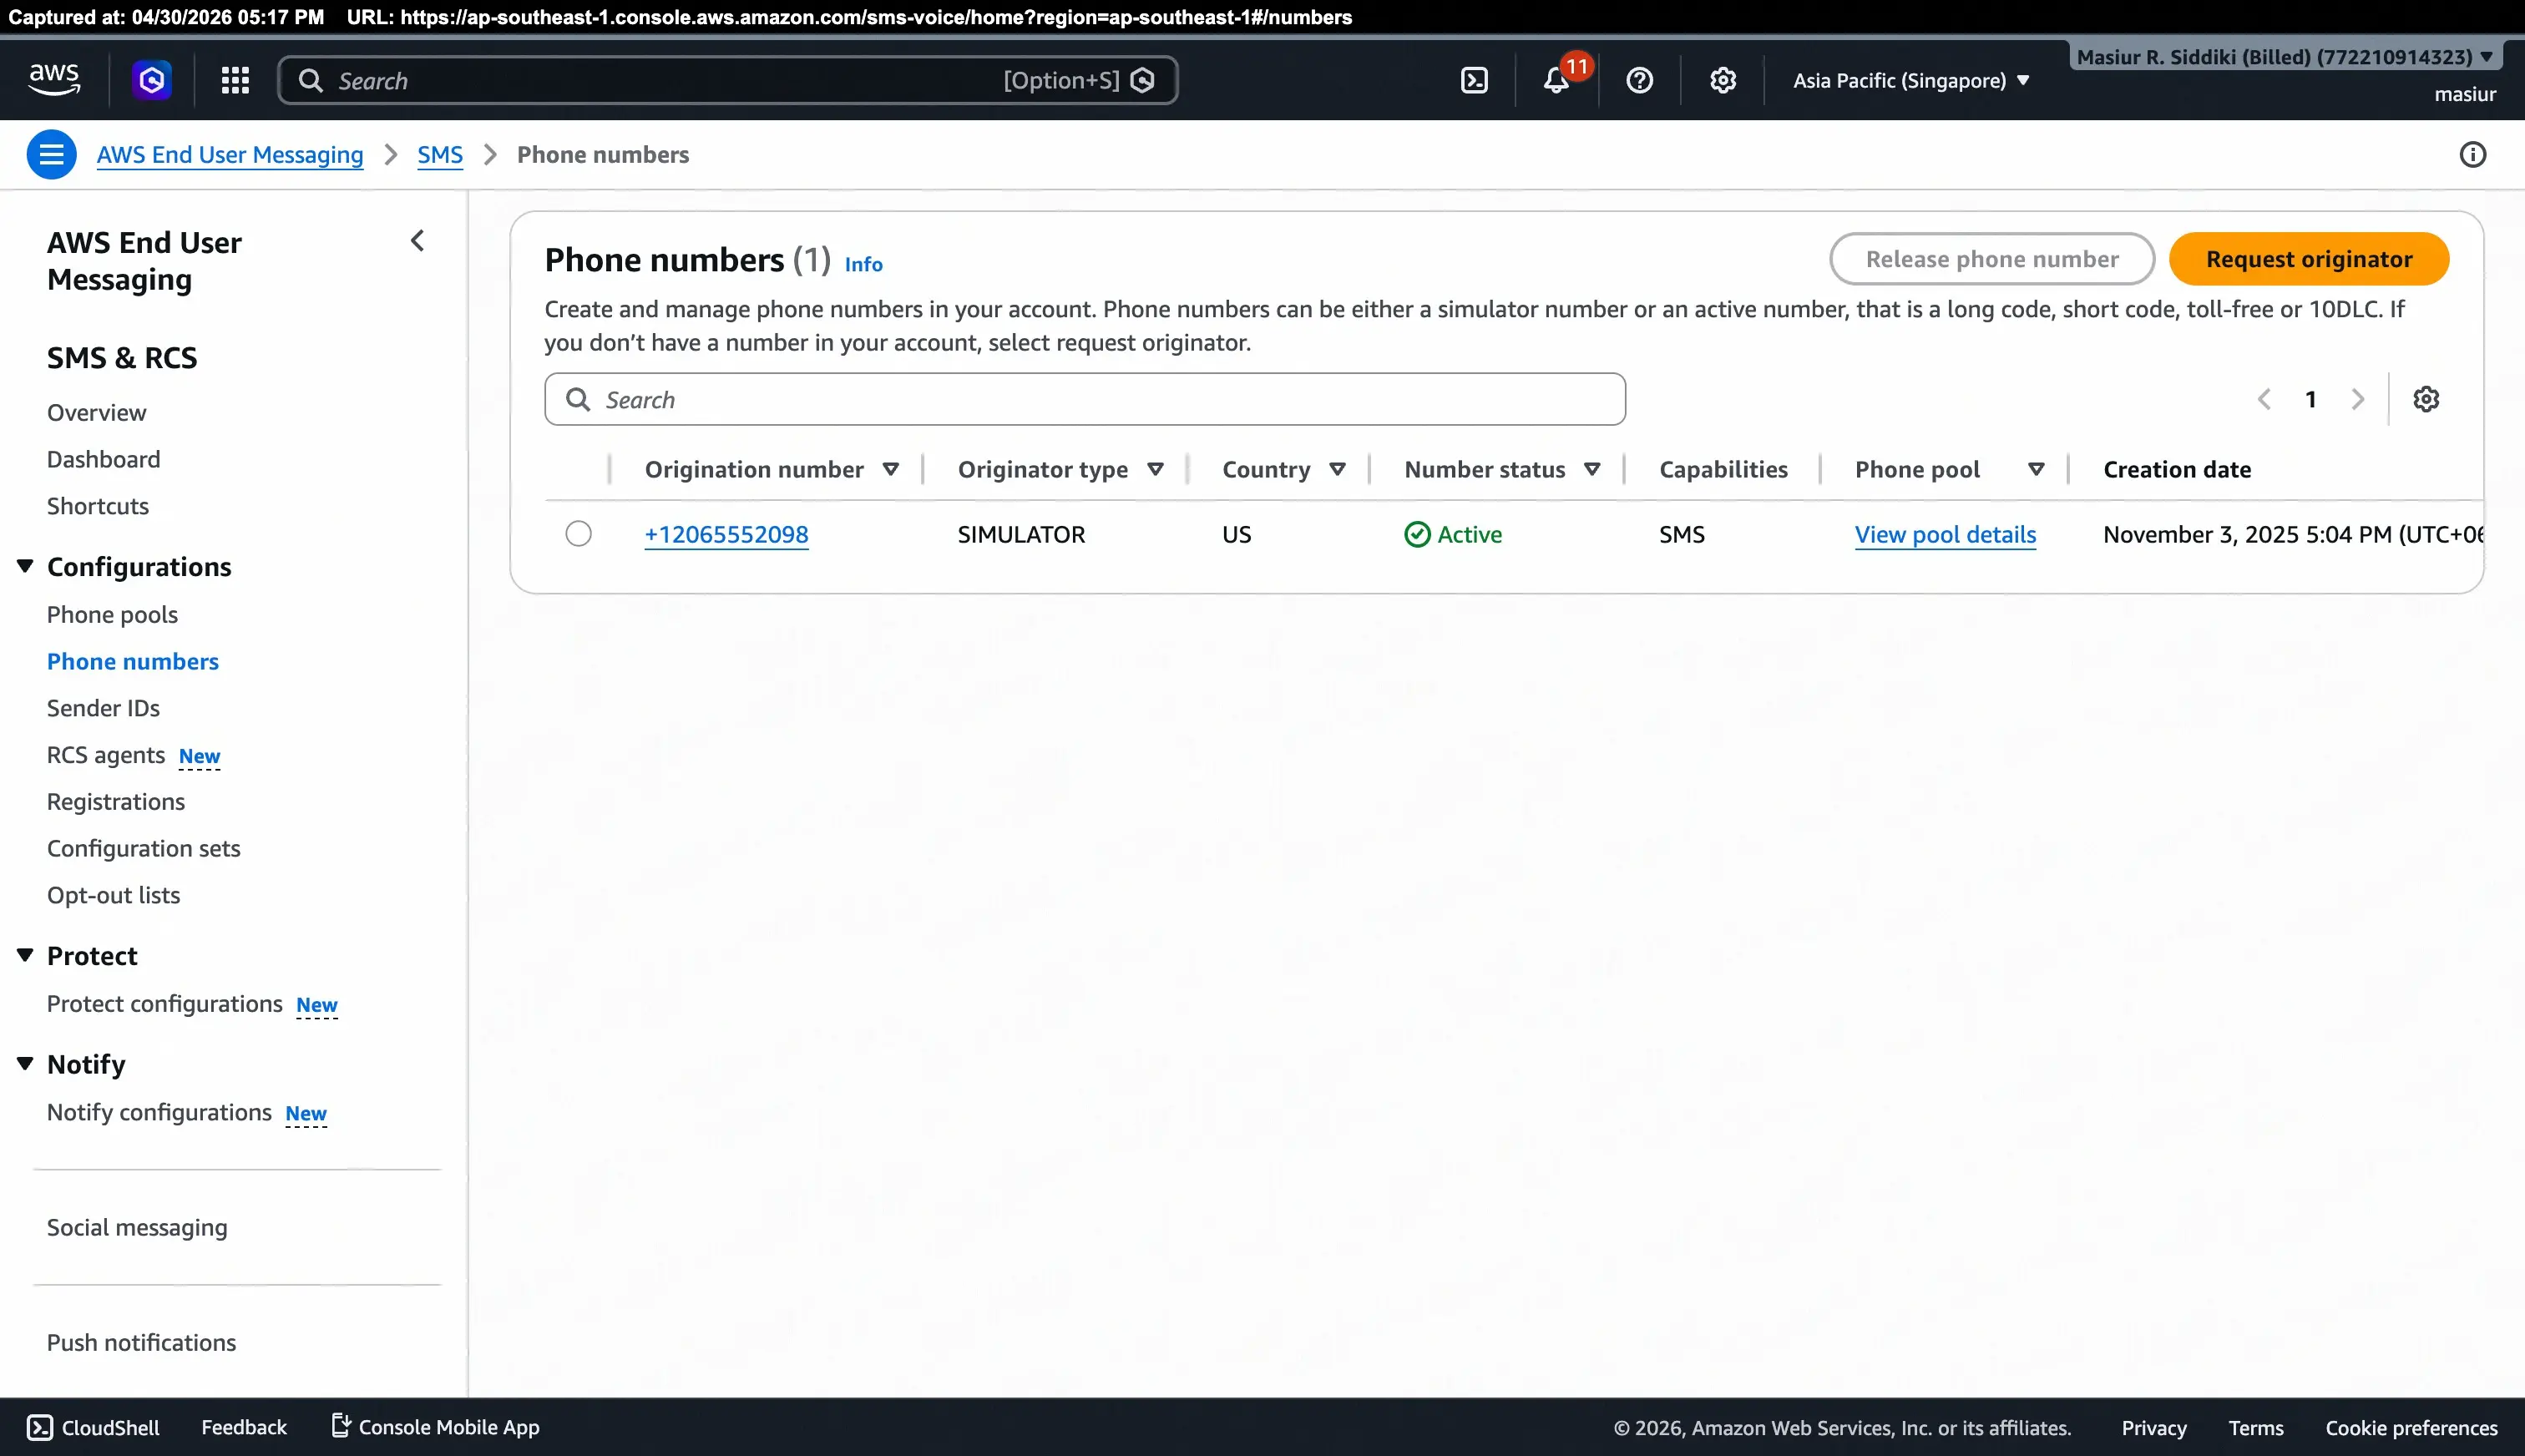
If you already have a phone number listed, click on it to view its details confirm that its Number status shows Active and that SMS is listed under Capabilities.
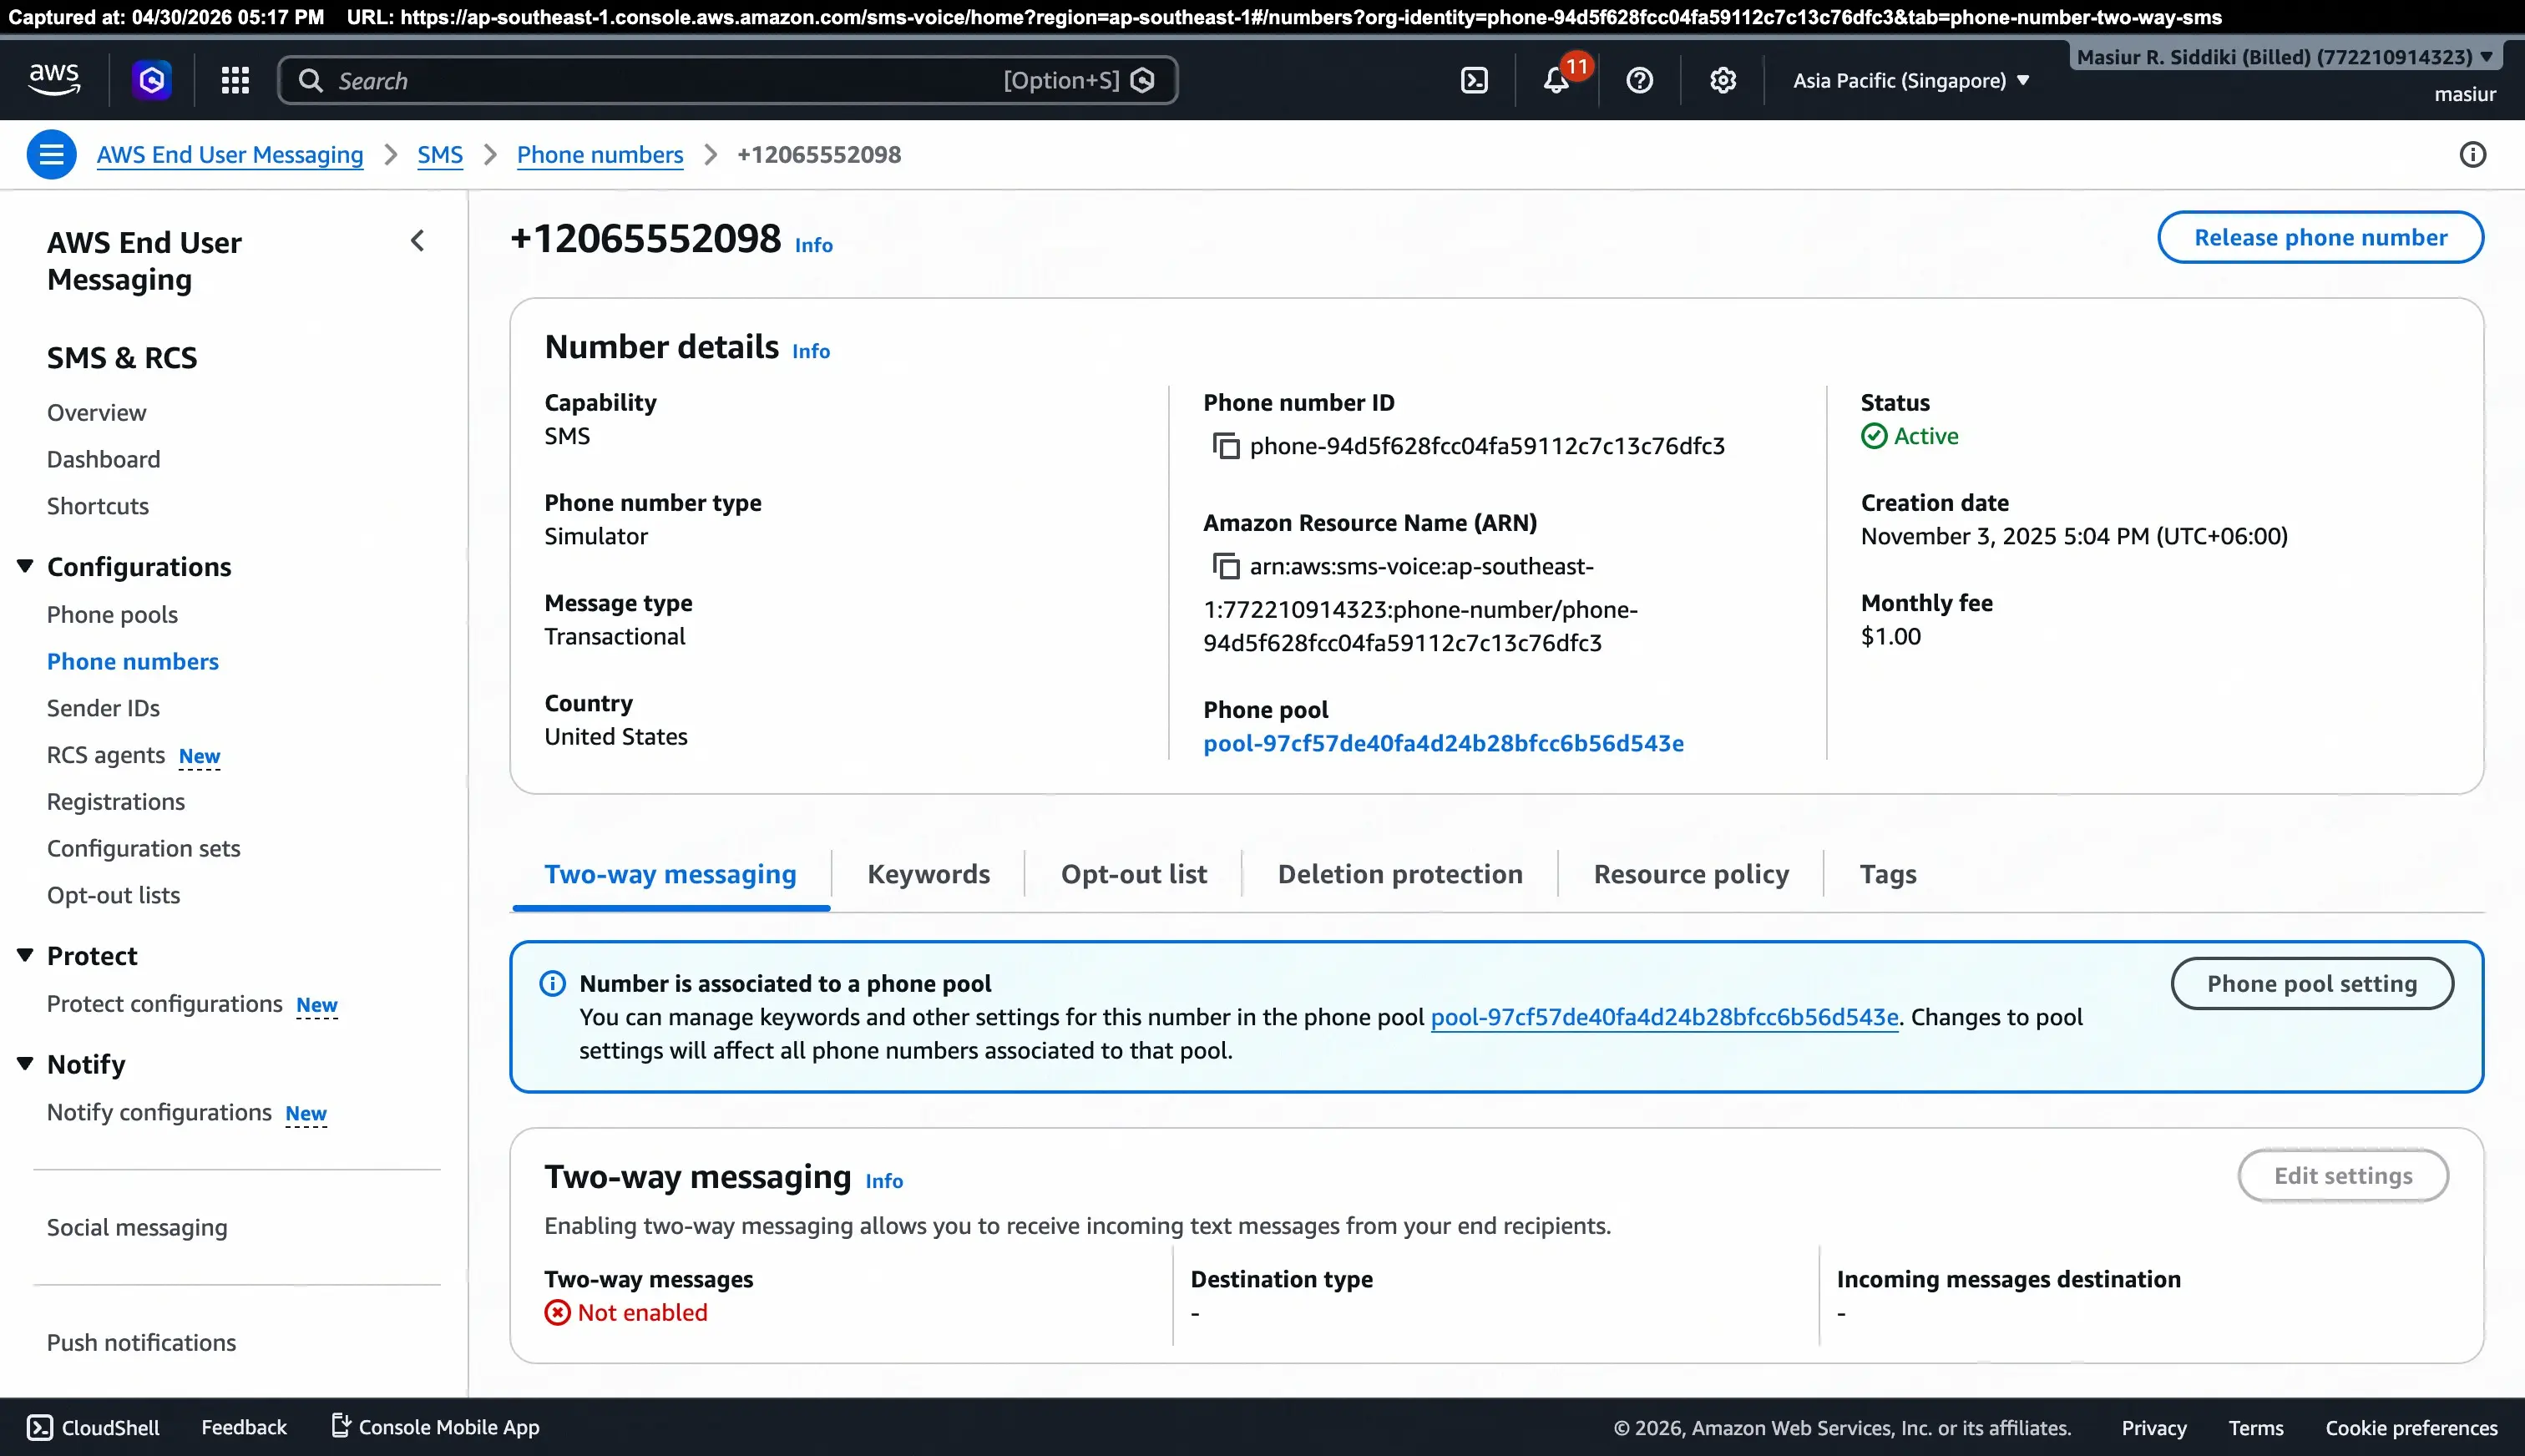
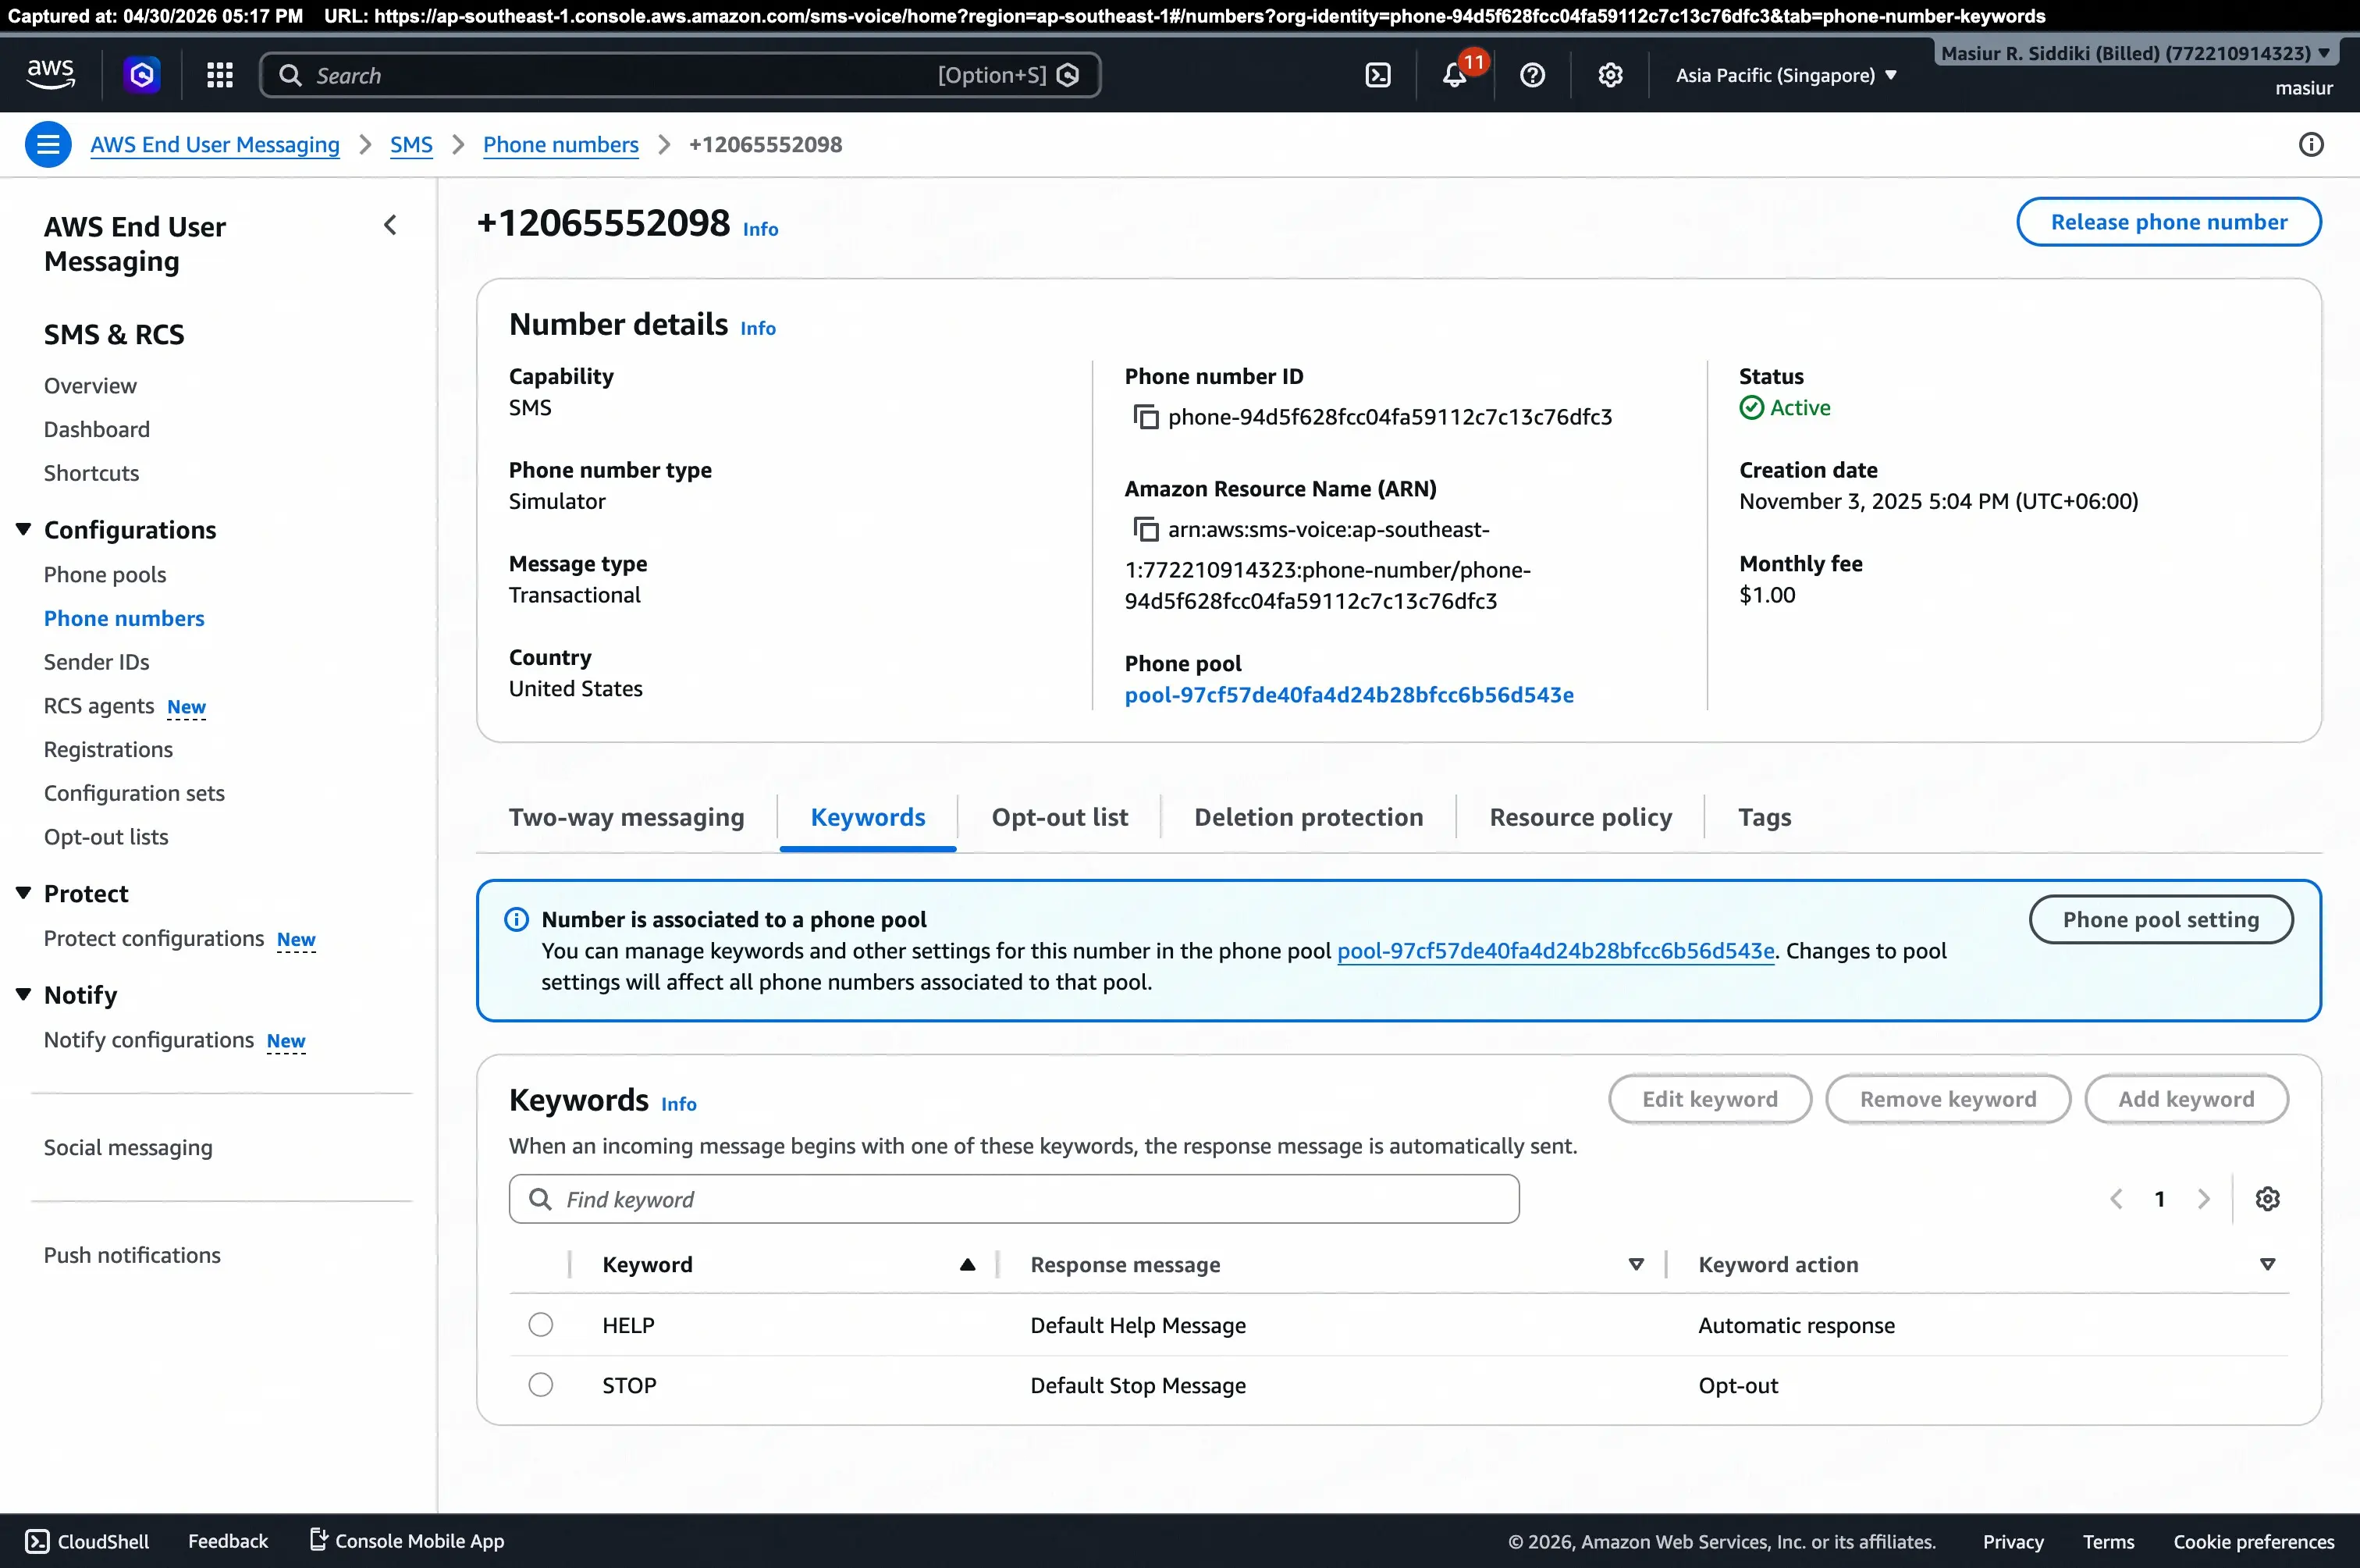
You can also review the Keywords tab to see the default opt-out keywords (STOP) and help keywords (HELP) automatically configured for the number.
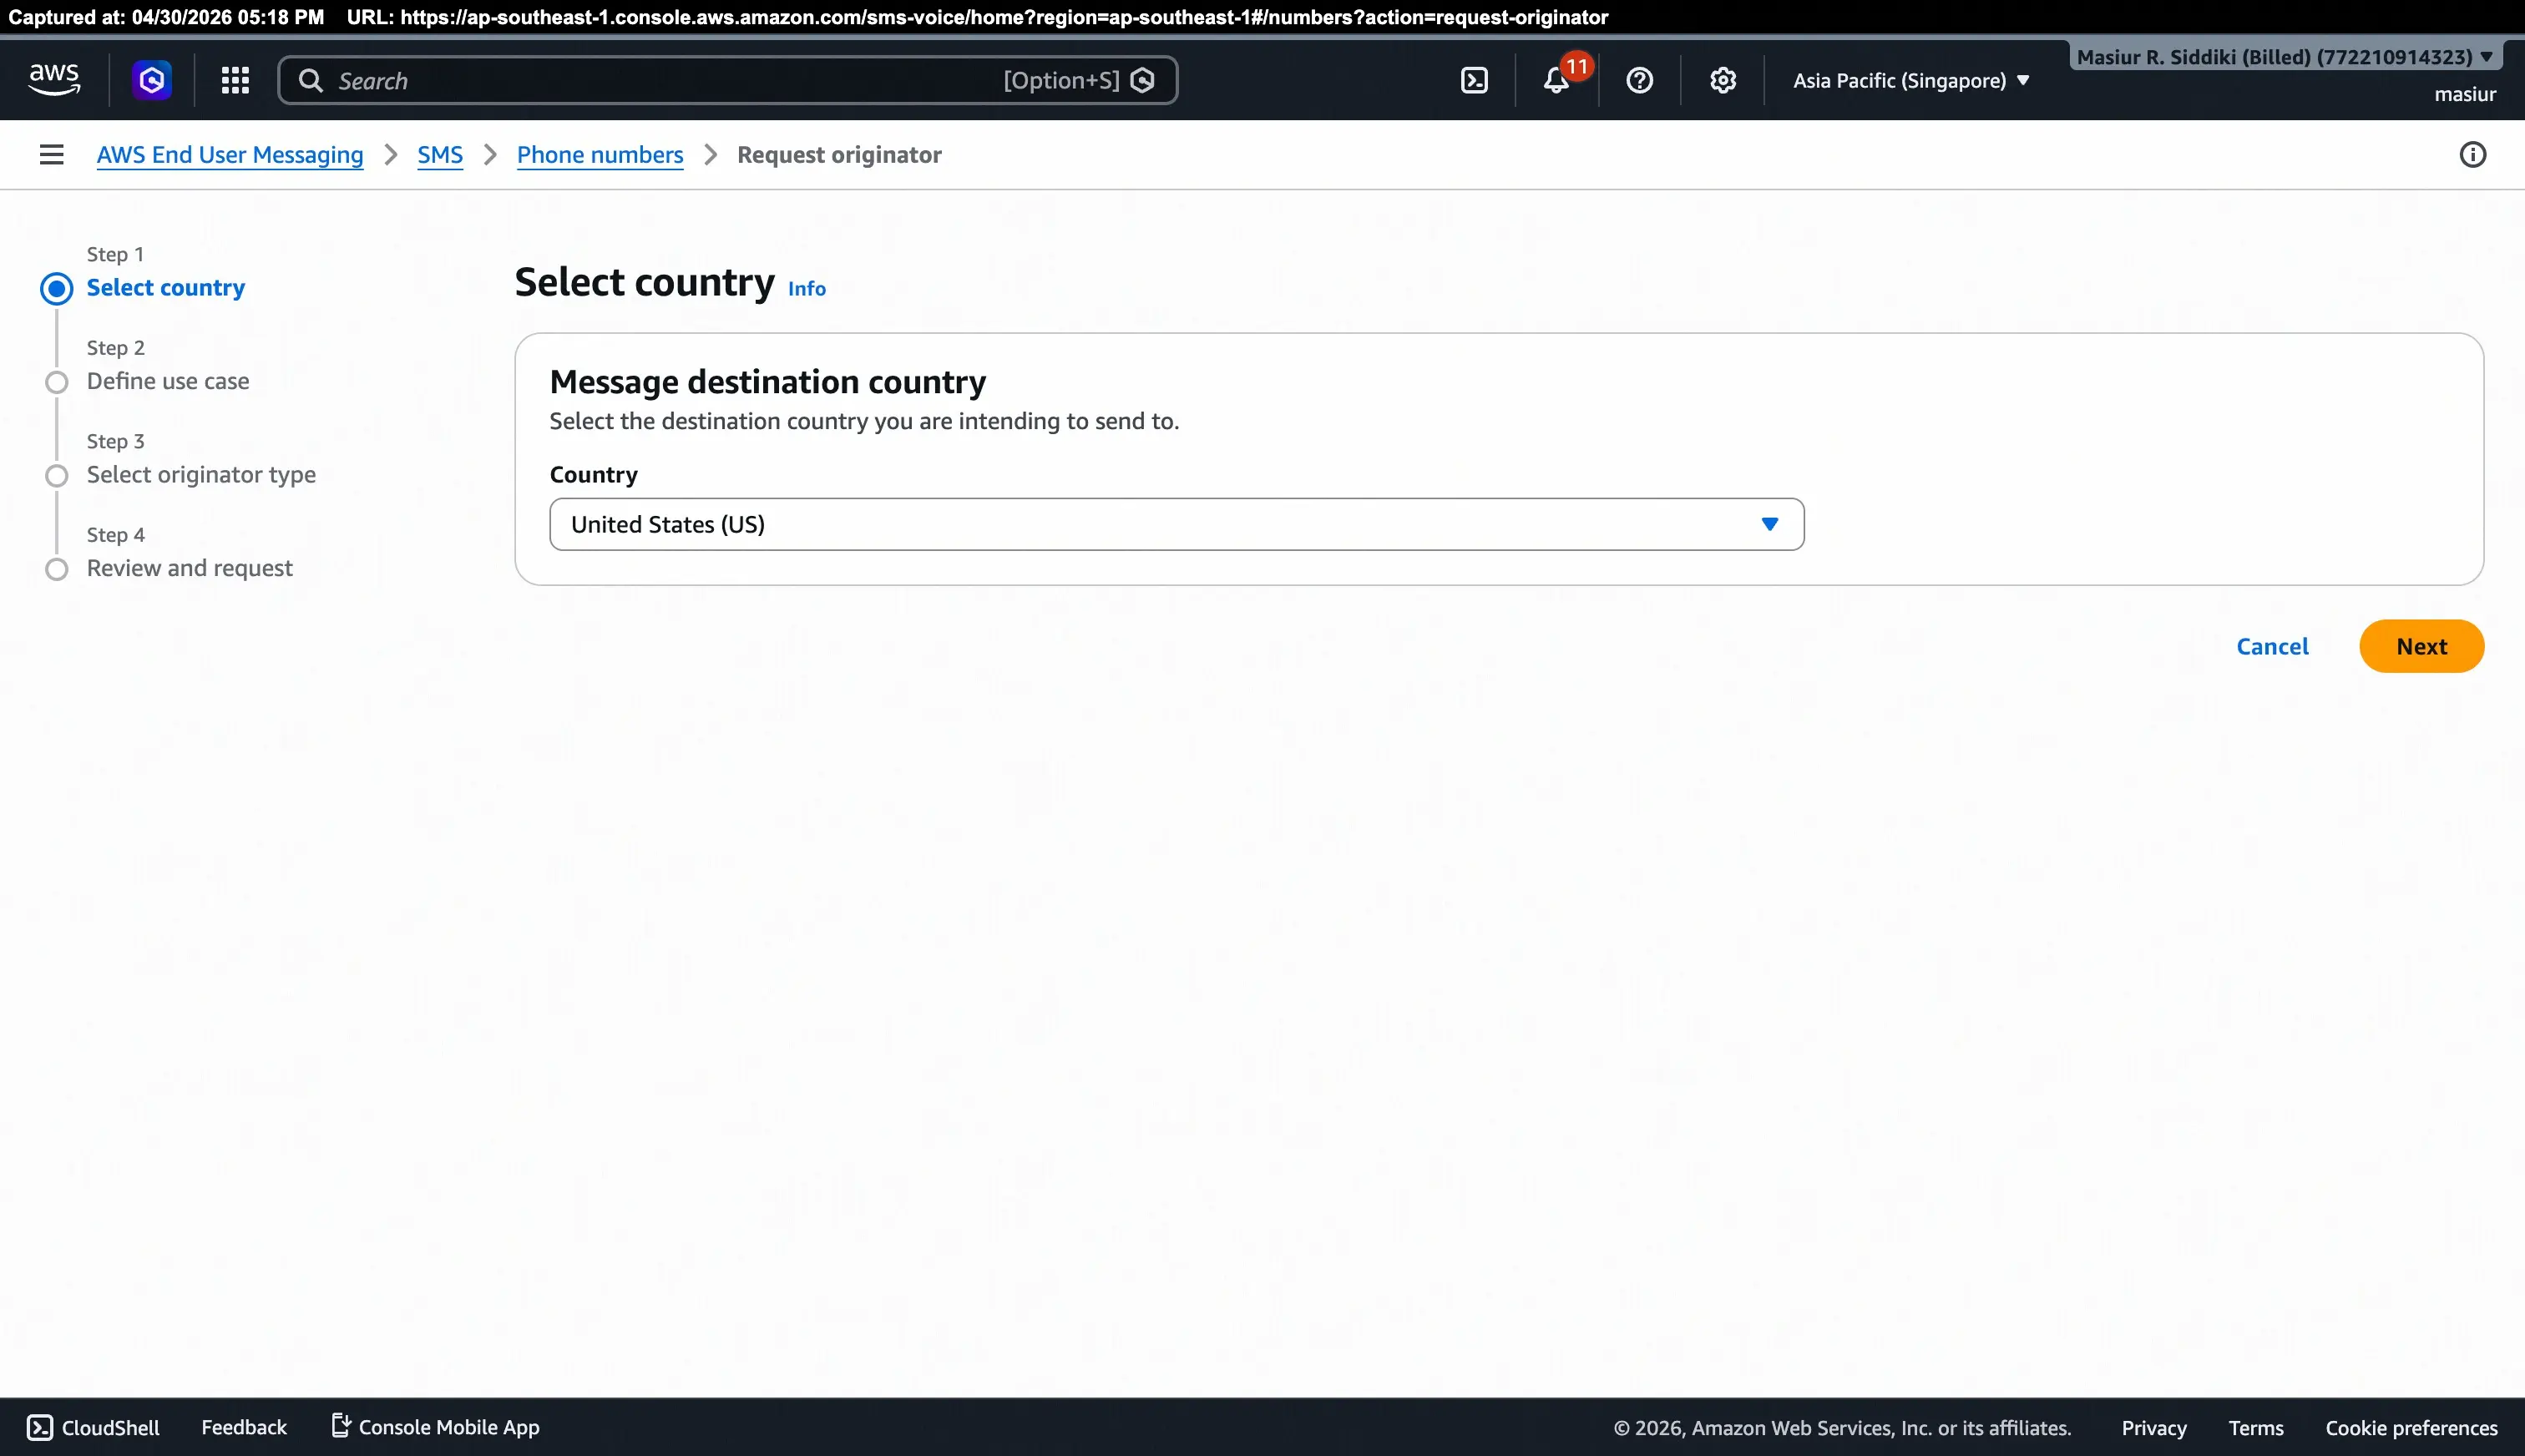
3.2 Request a new originator (if you don't have one)
If no phone number is listed, click Request originator. The wizard has four steps:
Step 1 – Select country
Choose the destination country your messages will be sent to (e.g., United States (US)). Click Next.
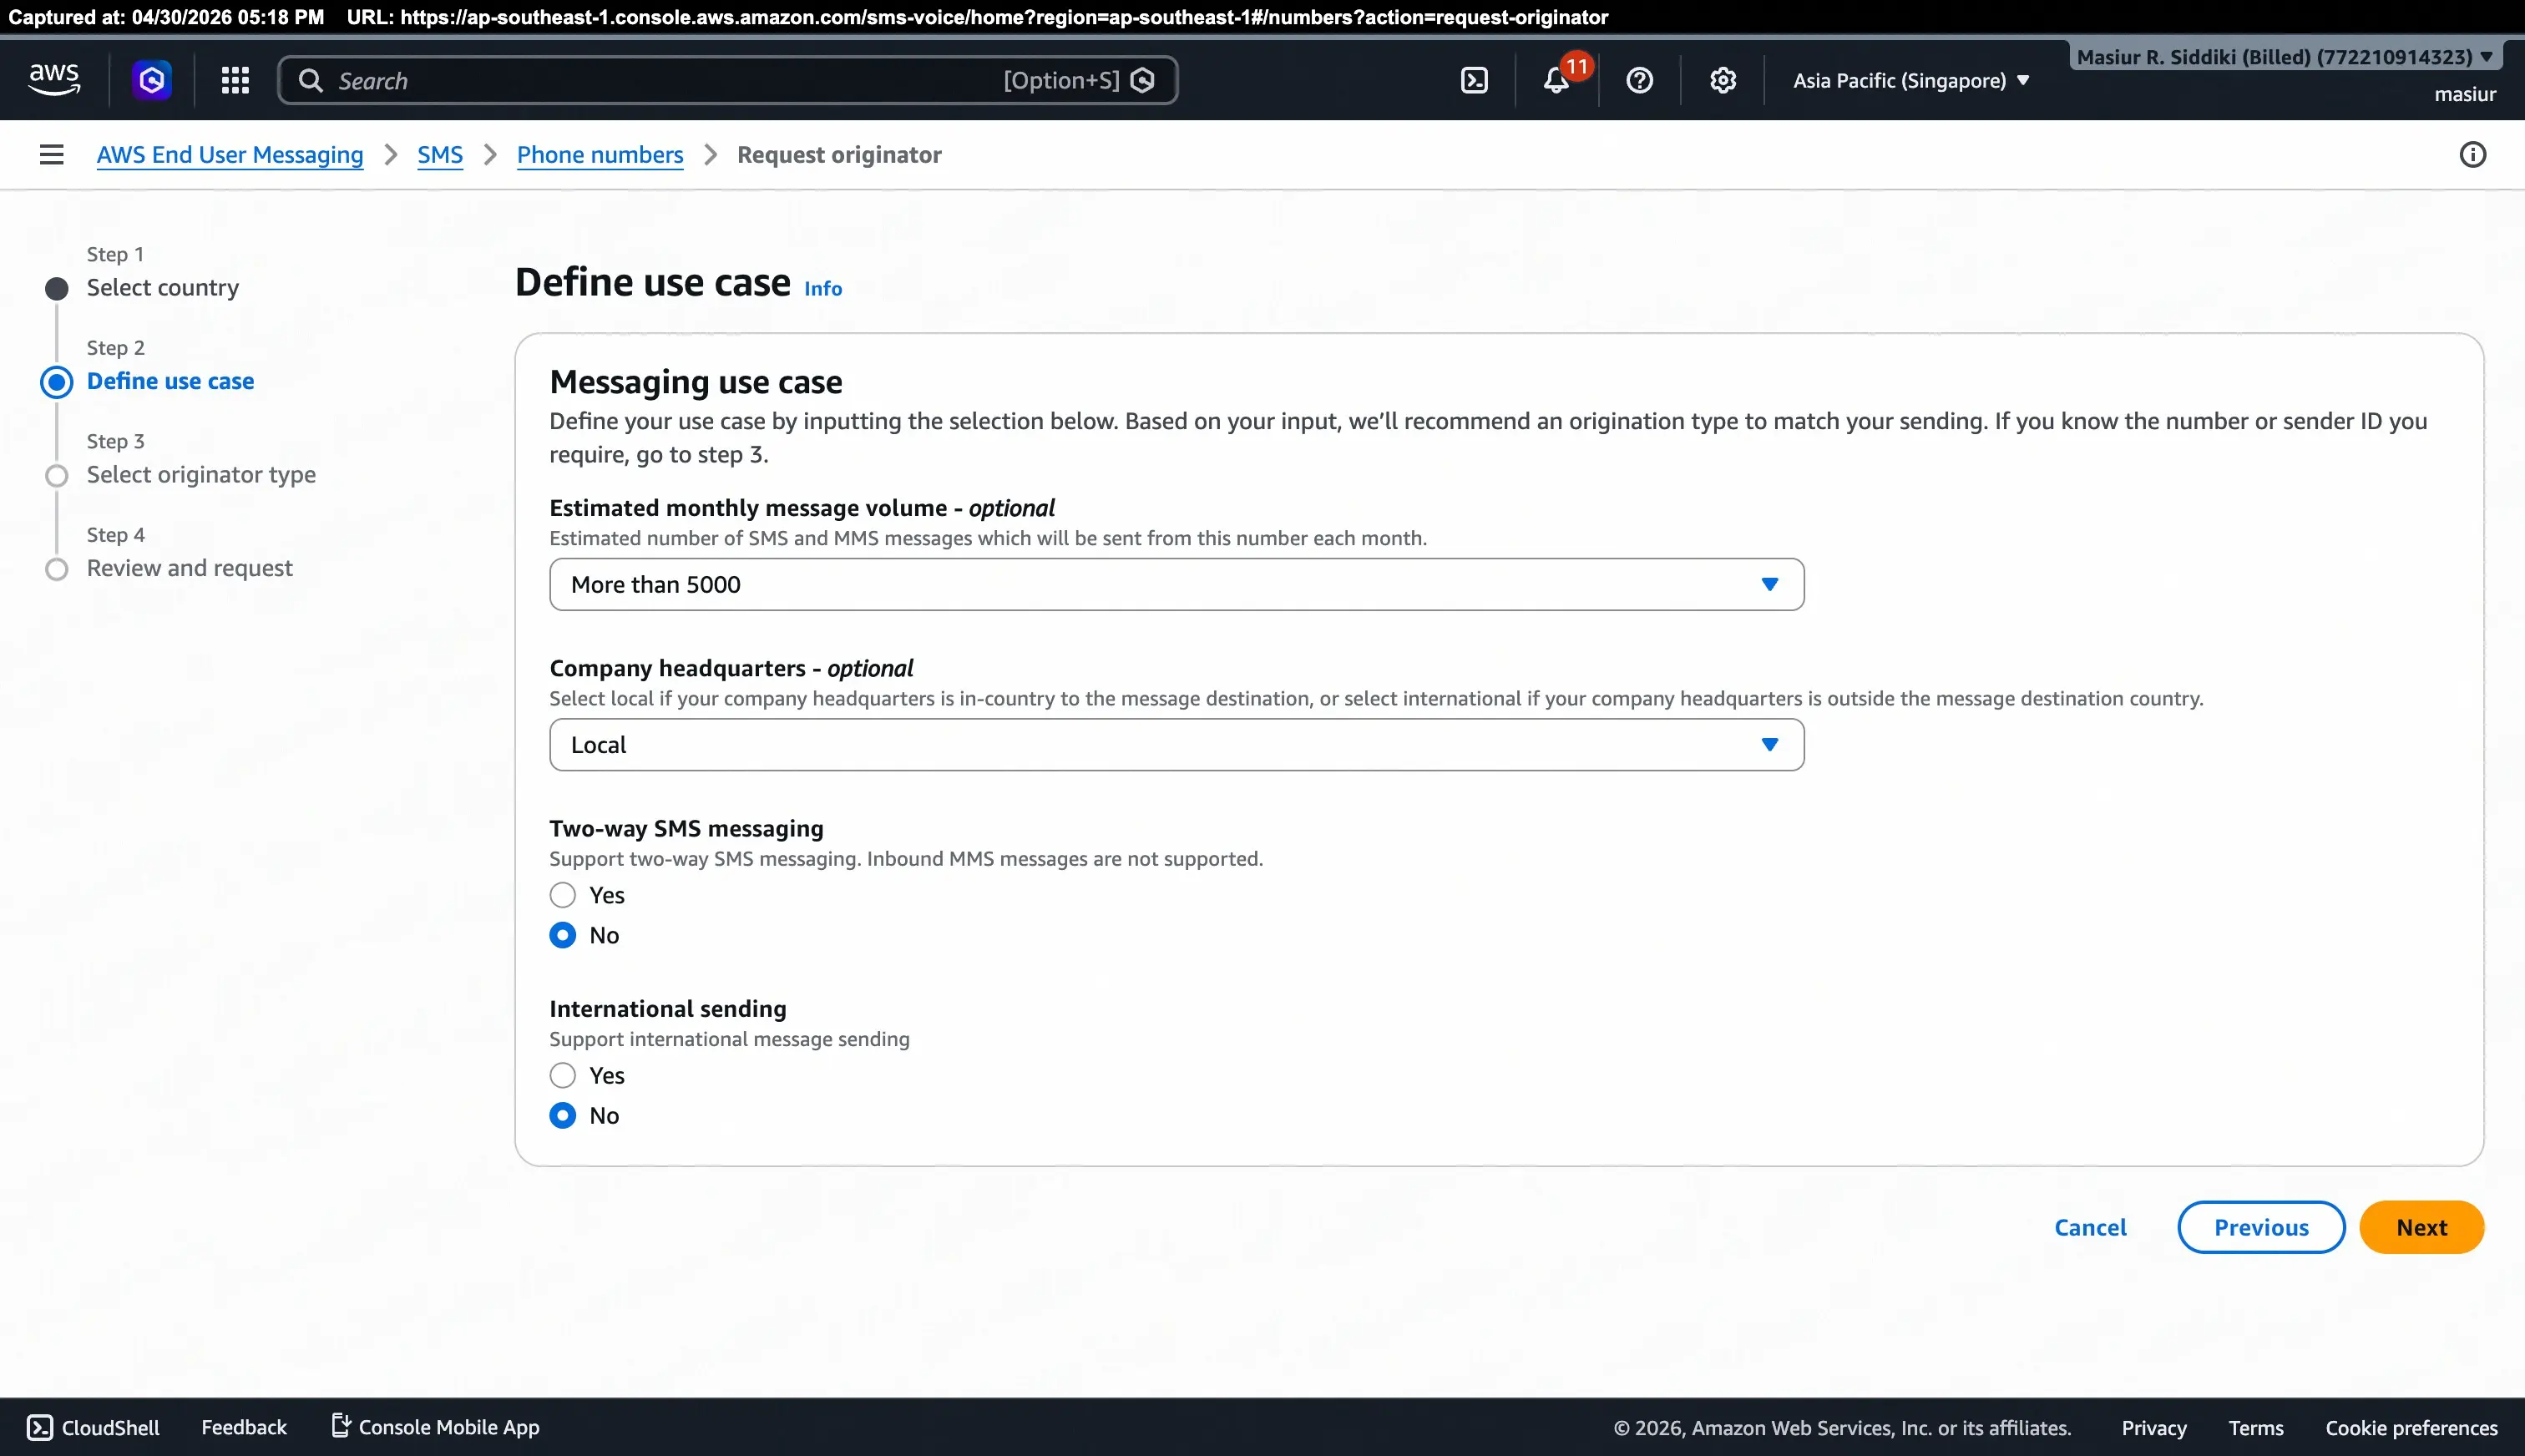
Step 2 – Define use case
Fill in the messaging use case details:
- Estimated monthly message volume: Select the expected volume (e.g., More than 5000).
- Company headquarters: Choose Local if your company is in the same country as the message destination, or International otherwise.
- Two-way SMS messaging: Select Yes if you need to receive replies; otherwise No.
- International sending: Select Yes if you need to send to multiple countries; otherwise No.
Click Next.
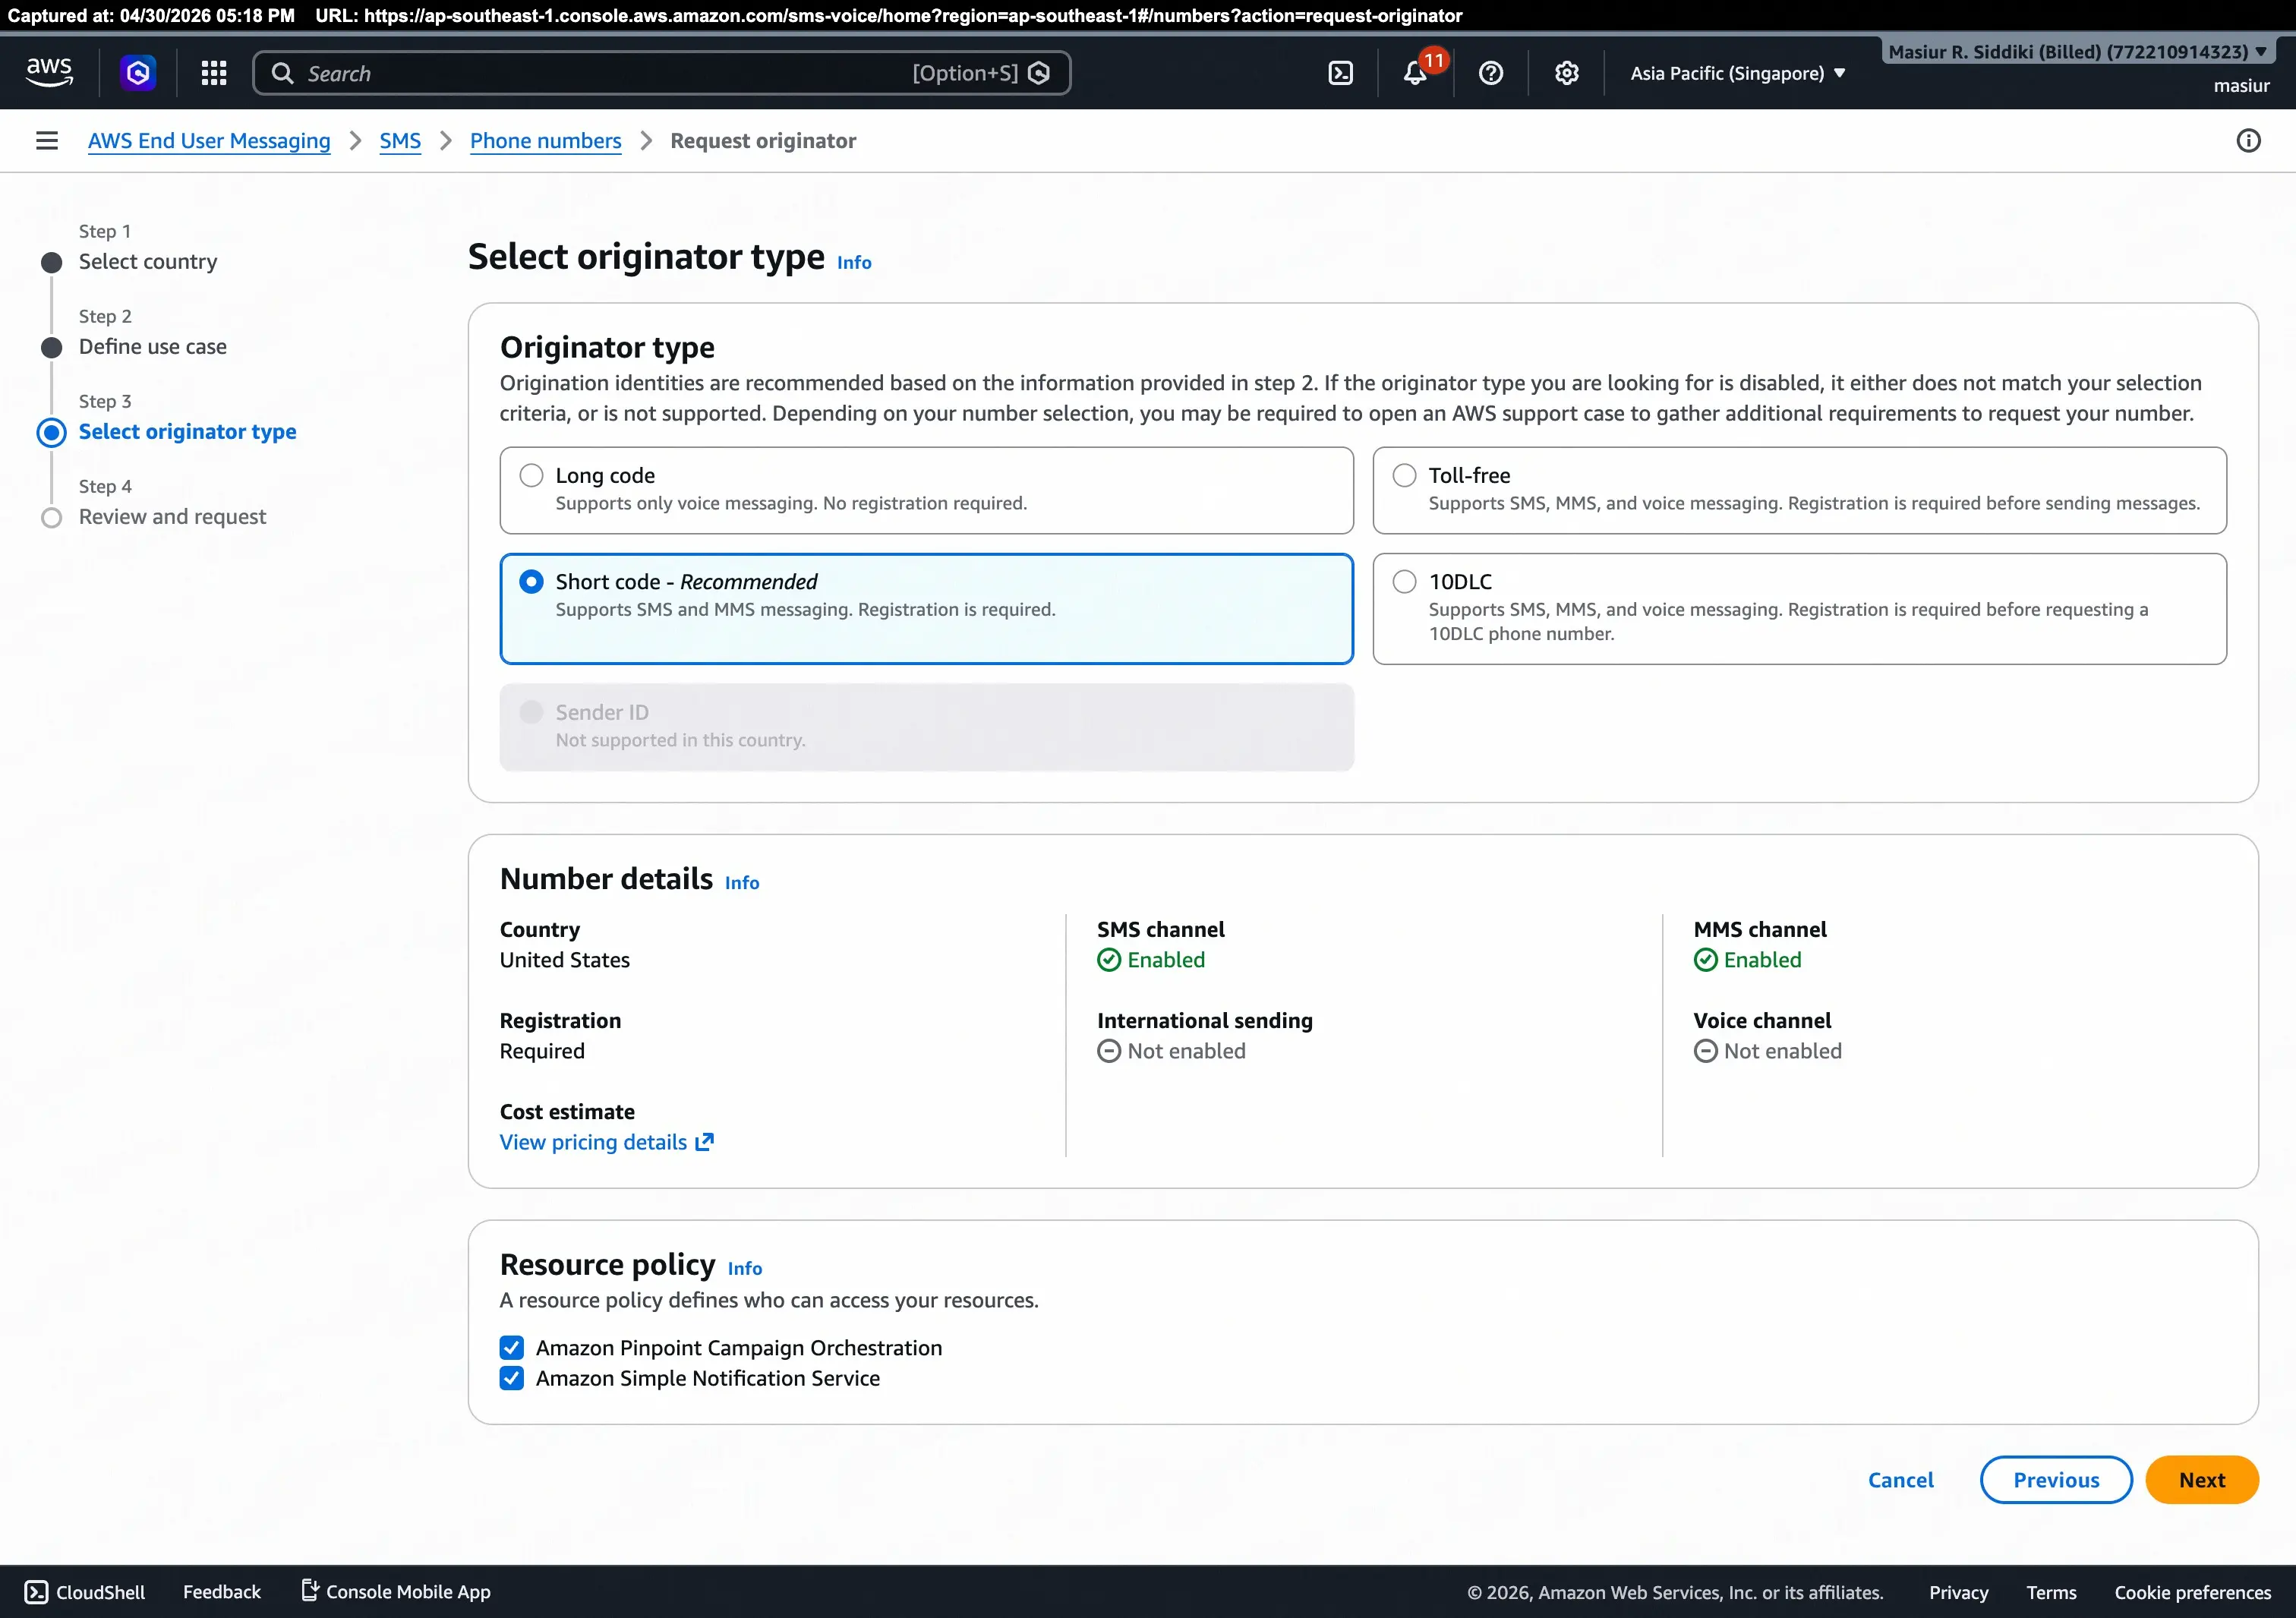
Step 3 – Select originator type
AWS recommends a Short code for high-volume SMS sending (supports SMS and MMS, registration required). Select Short code – Recommended and review the Number details panel on the right.
Click Next.
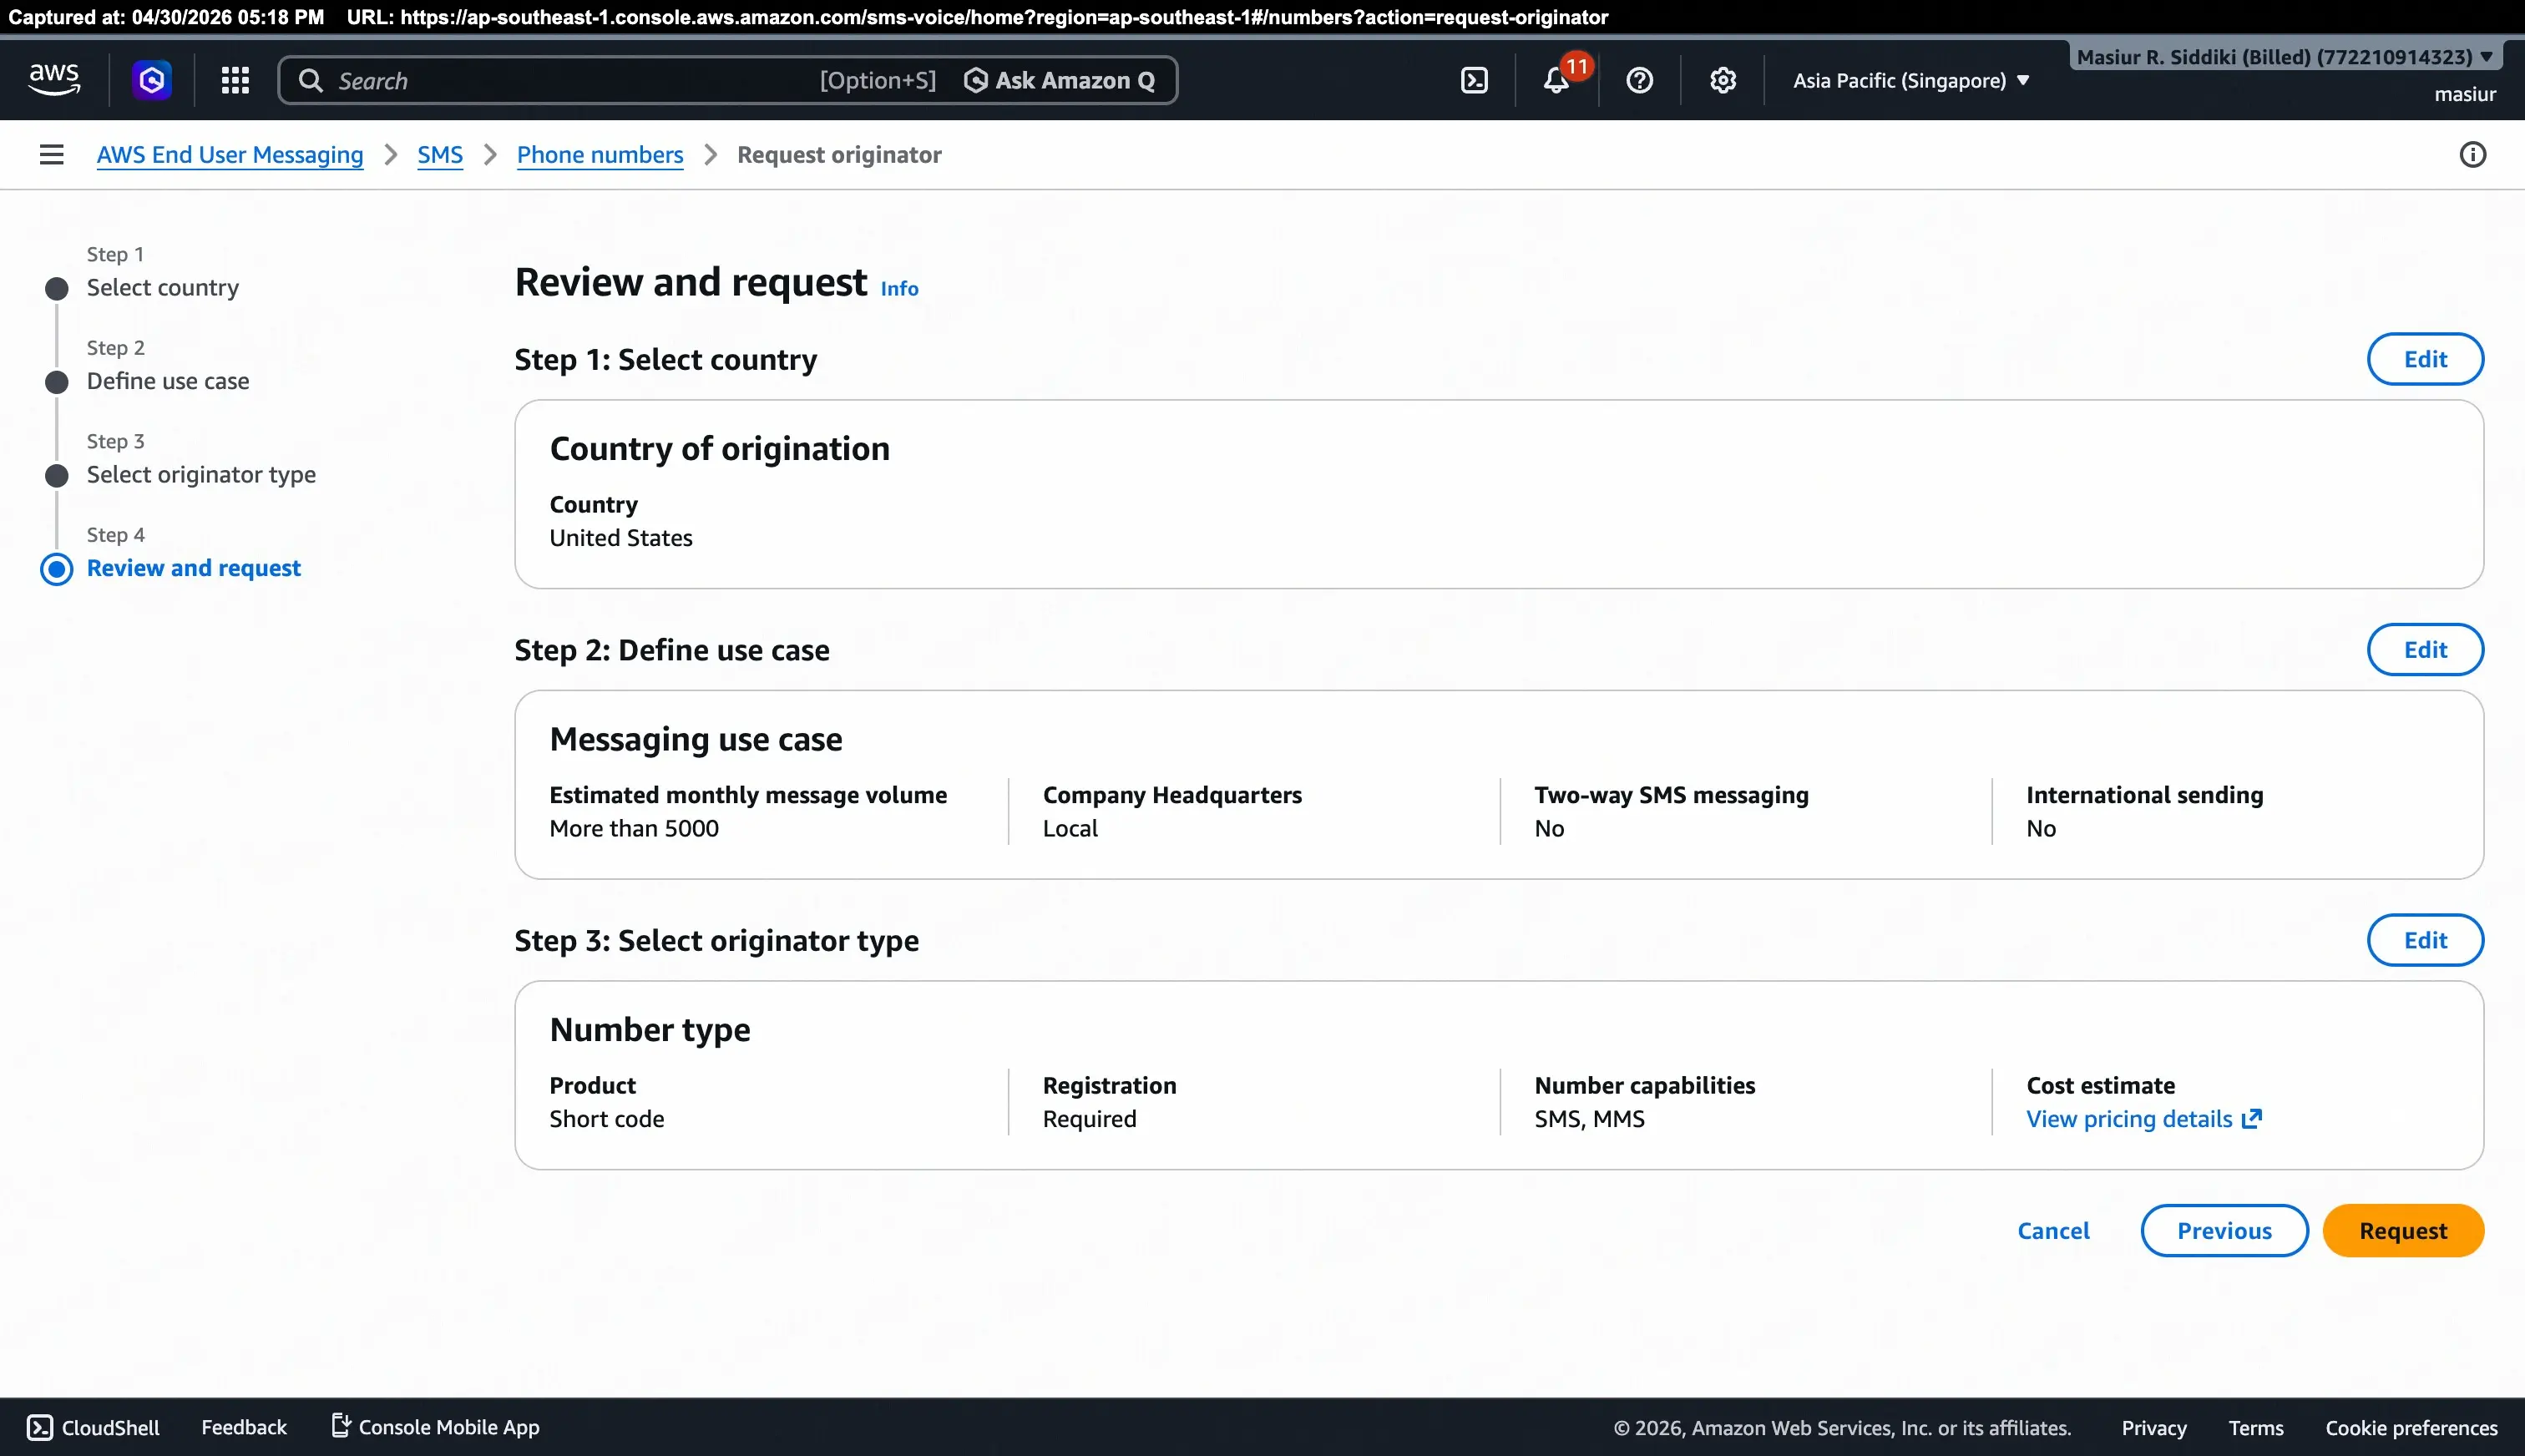
Step 4 – Review and request
Review your selections country, use case, and originator type and click Request to submit.
Note: Short code registration is subject to AWS review and carrier approval. For testing, you can use the Simulator phone number type which is available immediately.
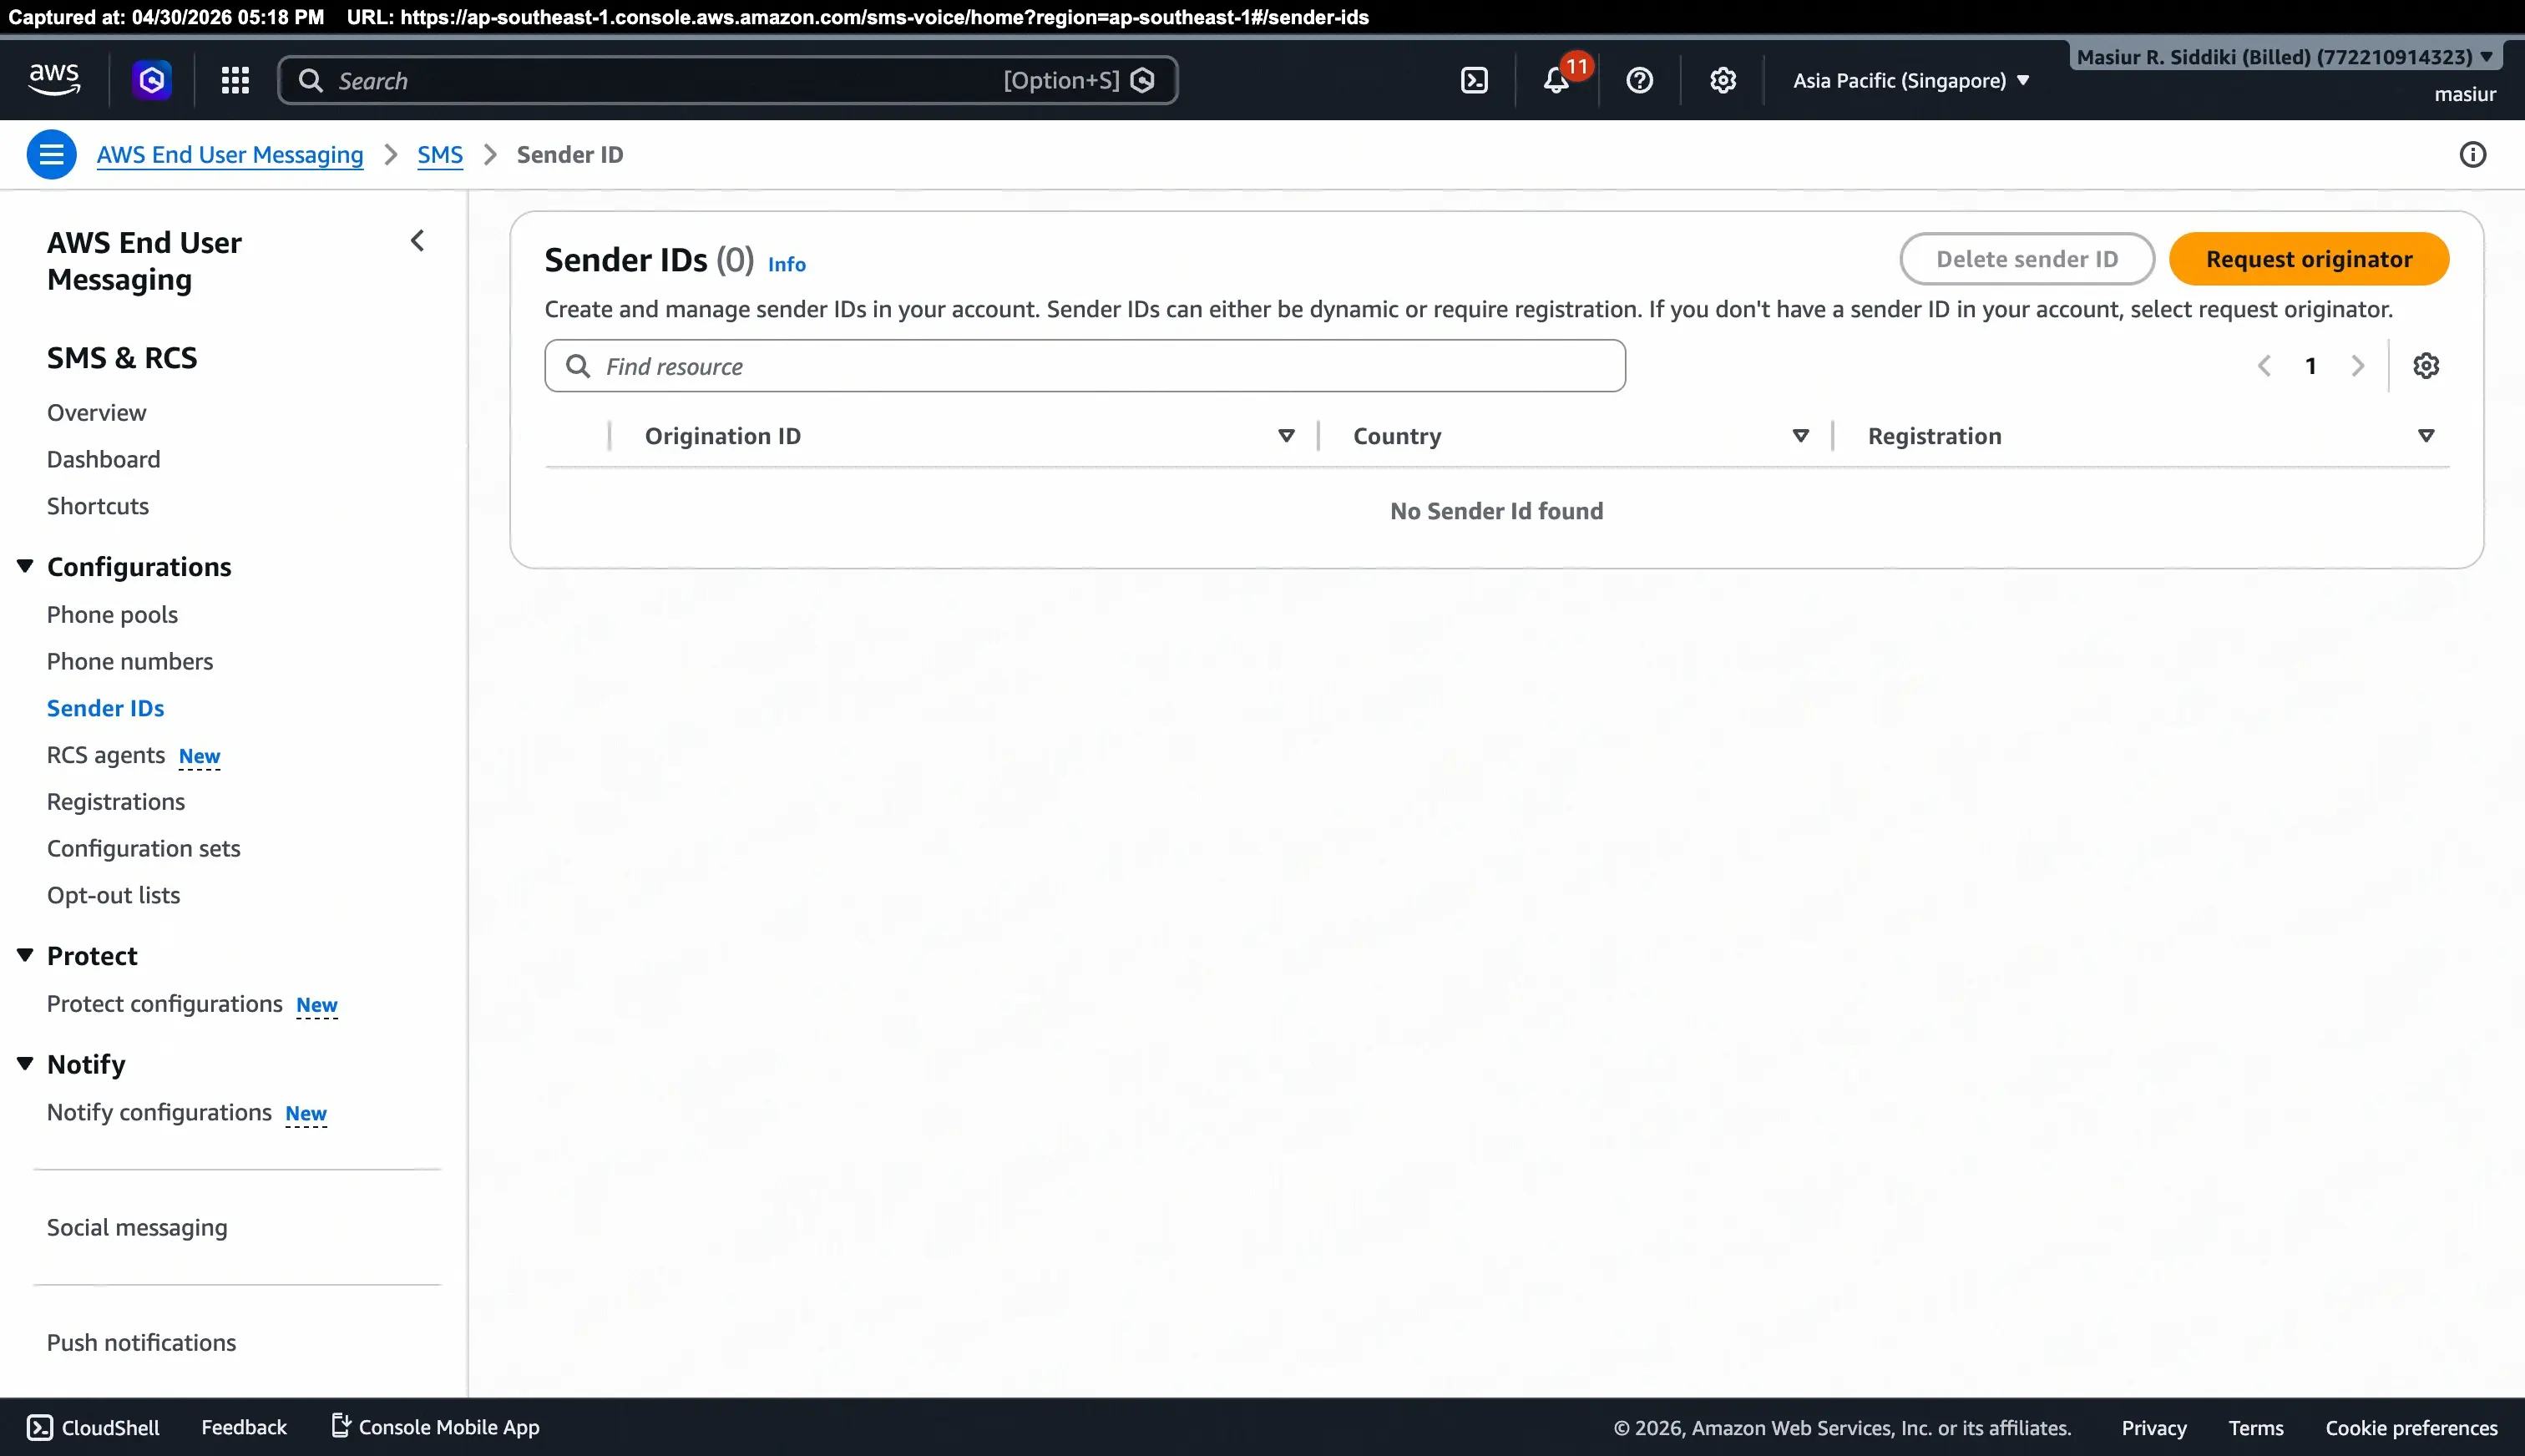
Step 3b: Sender IDs (Optional)
Some countries support Sender IDs alphanumeric names (e.g., MyBrand) that appear instead of a numeric phone number in the recipient's inbox. To manage Sender IDs, navigate to:
AWS End User Messaging → SMS → Sender IDs
If no Sender IDs are registered, the page will show "No Sender Id found". Click Request originator to register one for supported countries.
Note: Sender ID support and registration requirements vary by country. Check the AWS Sender ID documentation for your target country before proceeding.
Step 4: Configure FluentCRM
With your AWS credentials and phone number ready, return to FluentCRM to complete the setup.
4.1 Enable the SMS Module
- From your WordPress dashboard, navigate to FluentCRM Pro → Settings.
- In the left-hand menu, click SMS Setting.
- Switch the Enable SMS Module toggle to ON.
- Under SMS Provider, open the Choose your SMS provider dropdown and select Amazon End User Messaging.
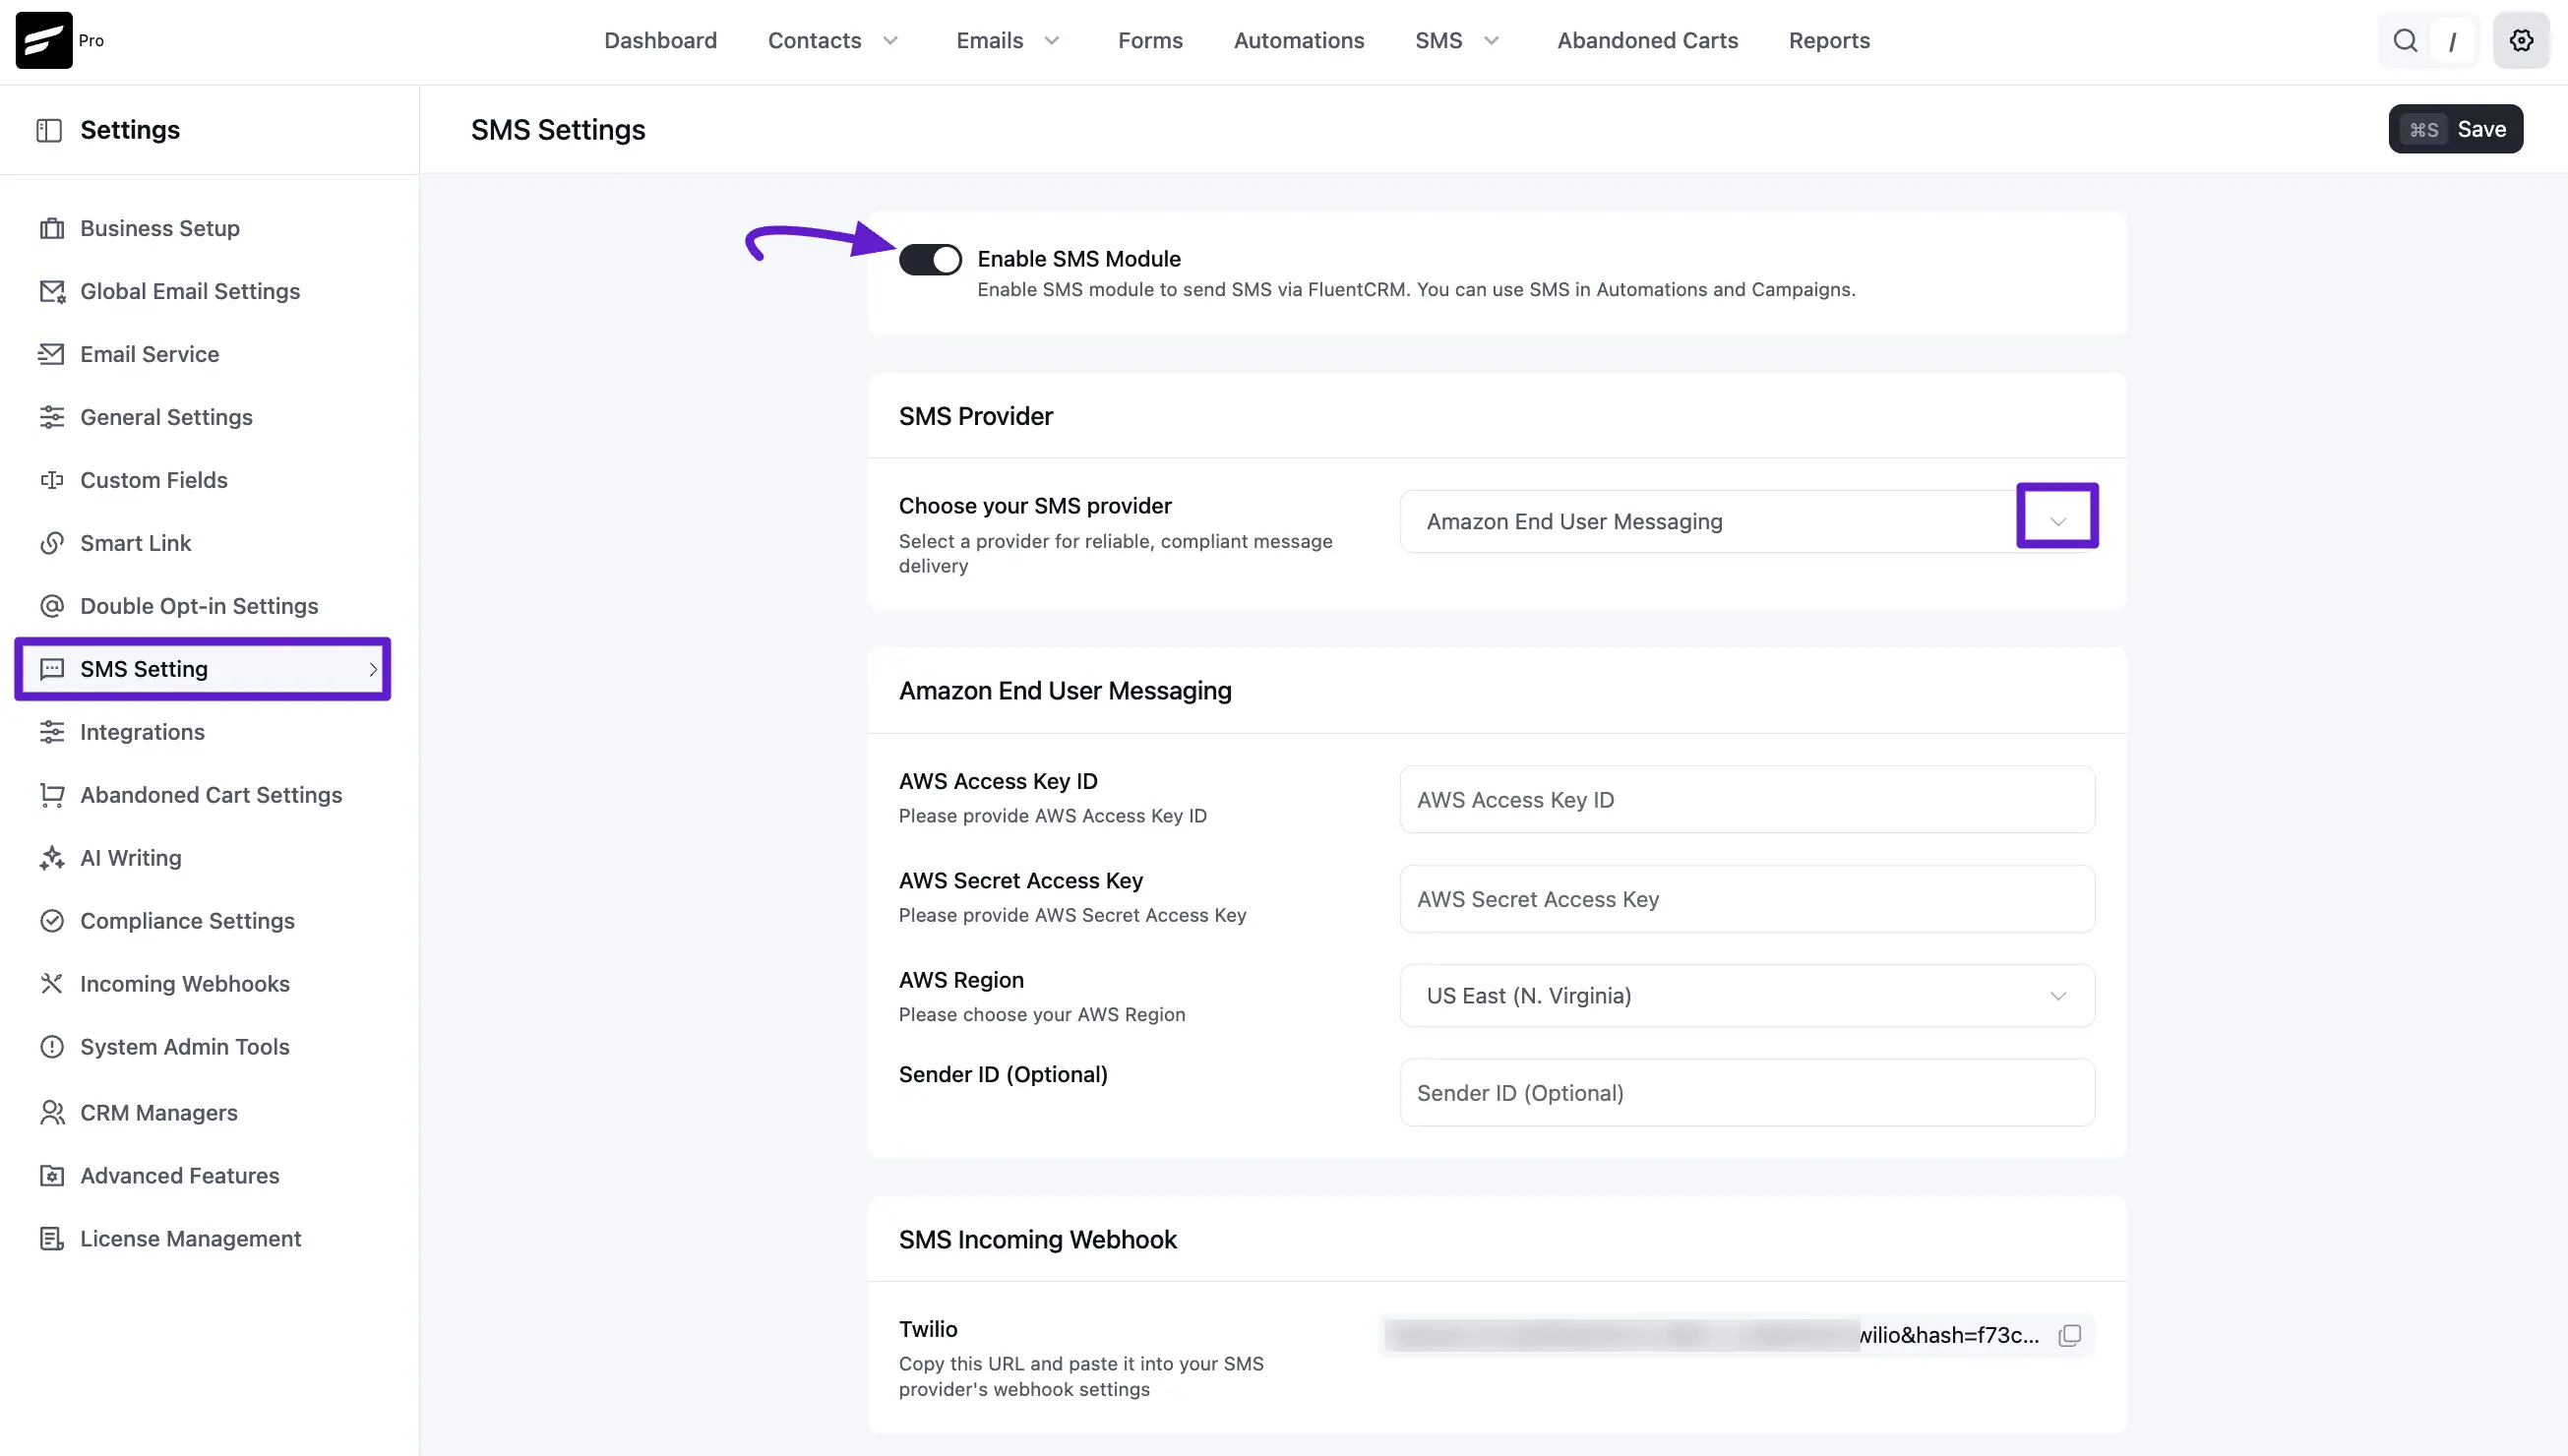
4.2 Enter your AWS credentials
Fill in the following fields:
| Field | Value |
|---|---|
| AWS Access Key ID | The Access Key ID you copied in Step 2 |
| AWS Secret Access Key | The Secret Access Key you copied in Step 2 |
| AWS Region | The region where your End User Messaging phone number is configured (e.g., ap-southeast-1 for Asia Pacific Singapore) |
| Sender ID (Optional) | Your registered Sender ID, if you set one up in Step 3b |
Region must match exactly. The AWS Region you enter in FluentCRM must be the same region where your phone number is active in AWS End User Messaging. A mismatch will cause message delivery failures.
Click Save at the top right of the page.
4.3 SMS Incoming Webhook
After saving, FluentCRM generates a unique SMS Incoming Webhook URL at the bottom of the page. Copy this URL and add it to your AWS End User Messaging configuration if you need to handle delivery receipts or inbound messages.
Your Amazon End User Messaging integration is now complete. You are ready to use AWS for high-volume SMS campaigns and automated workflows in FluentCRM. To start sending, visit the SMS Automation or SMS Campaign Report documentation.