Appearance
Incoming Webhooks
As we use various platforms, services, or even plugins inside our WordPress website we may need to process data from outside of the FluentCRM and also run Email Campaigns or Automation we may need to capture data from those external services or sources. Receive data from any third-party or external services with the feature of FluentCRM Incoming Webhook without writing code or running servers.
Configuration steps
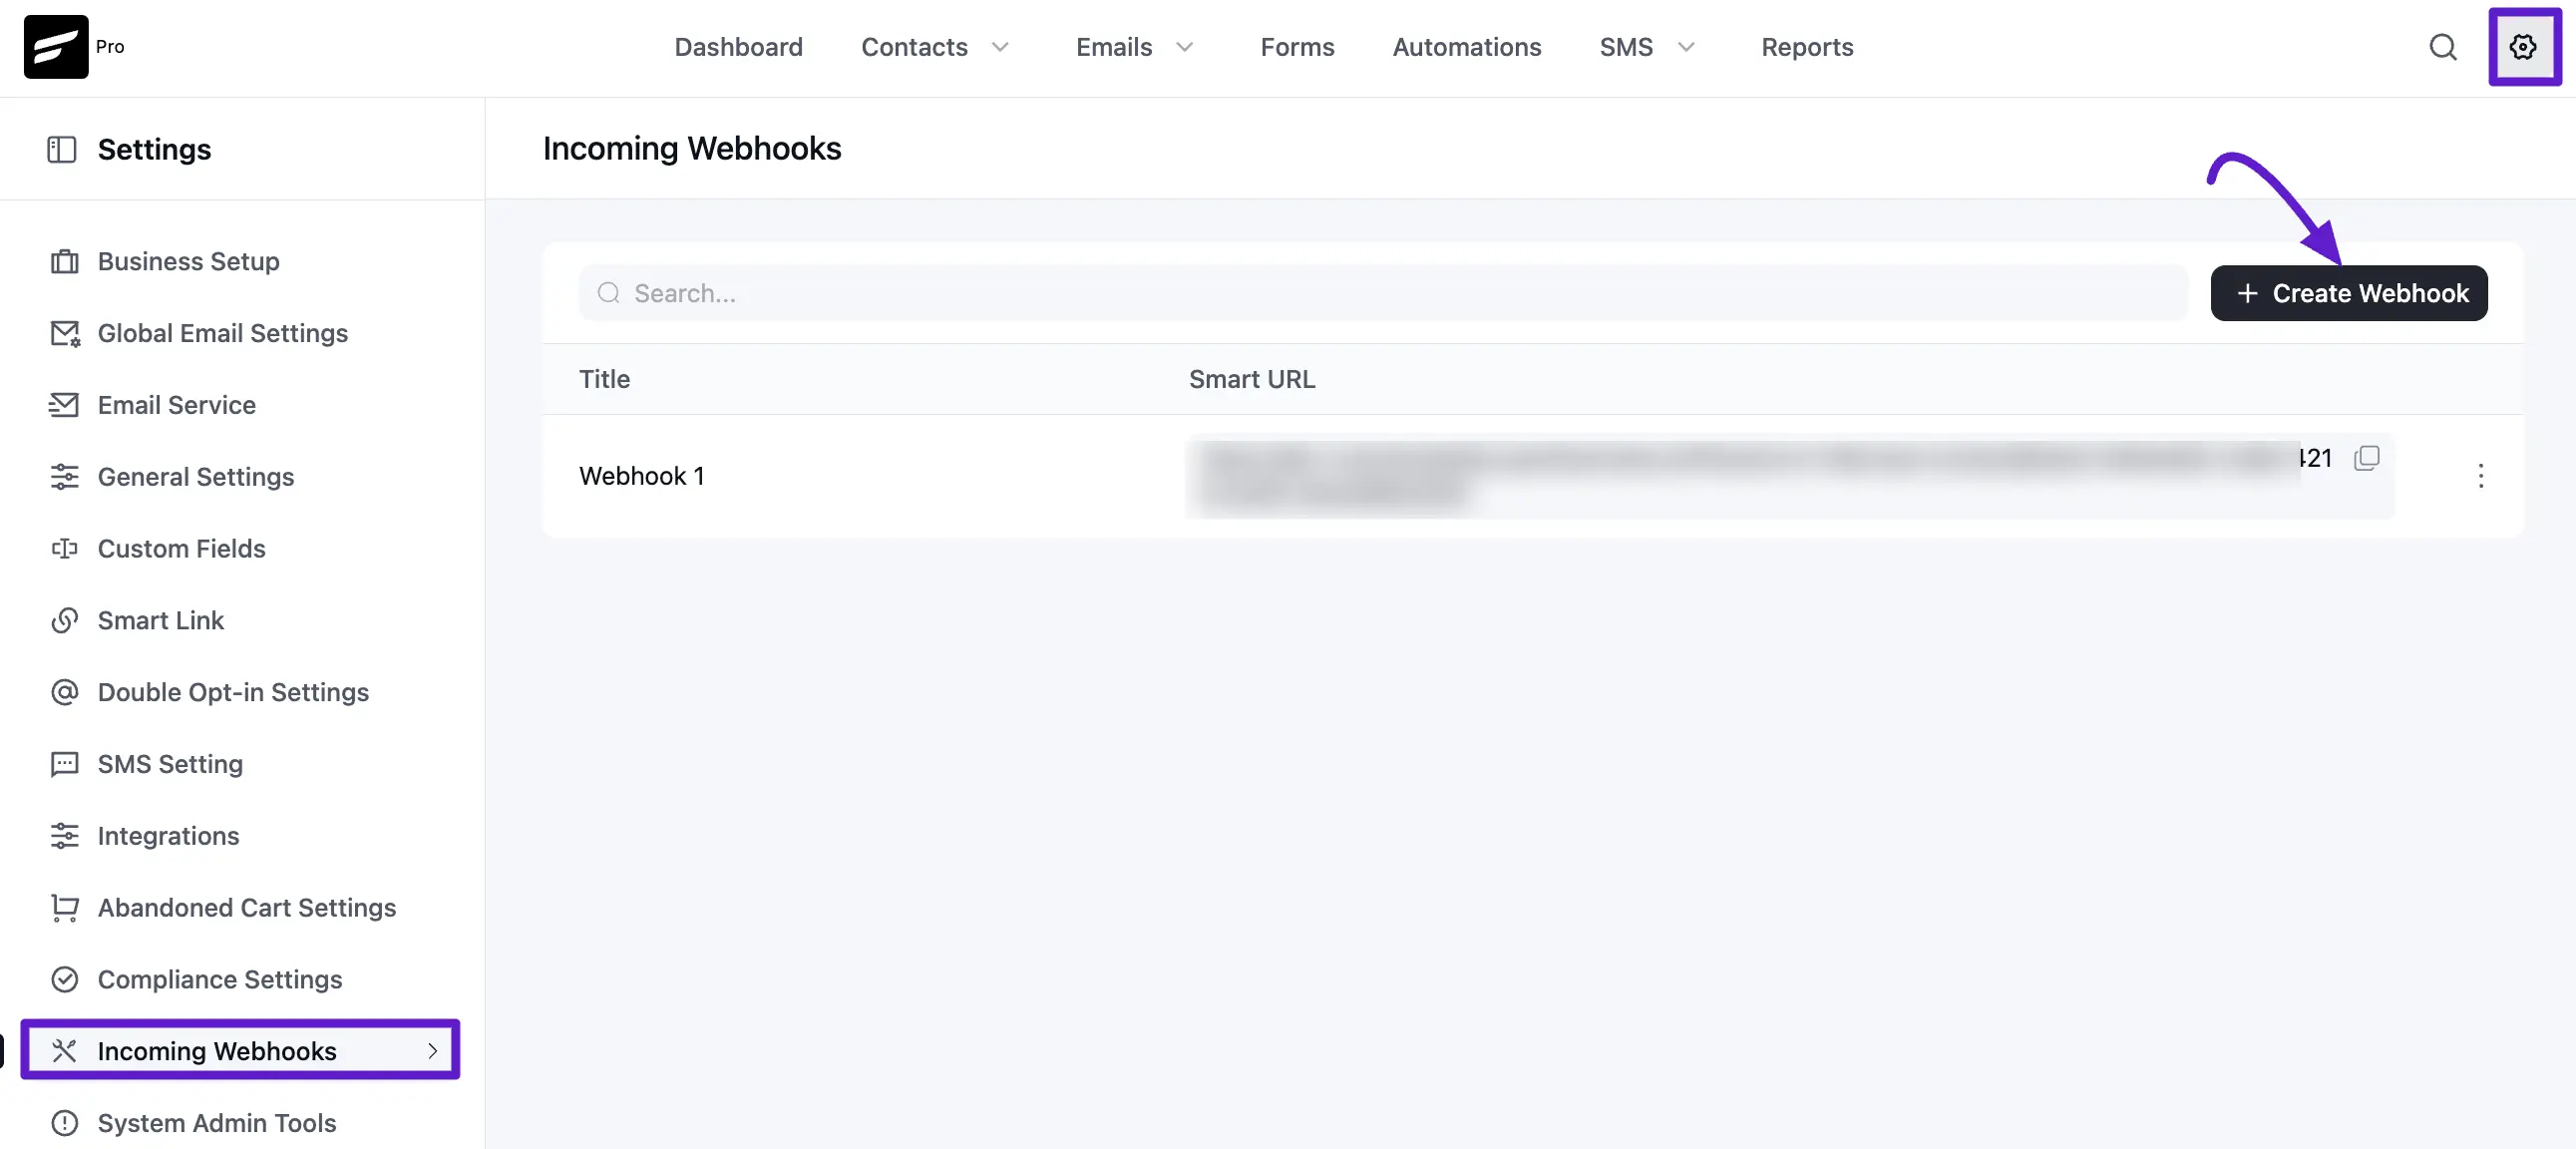
First, navigate to Settings from the top menu. Select Incoming Webhooks from the left sidebar. Click the + Create Webhook button located at the top right of the screen.
Creating a New Webhook
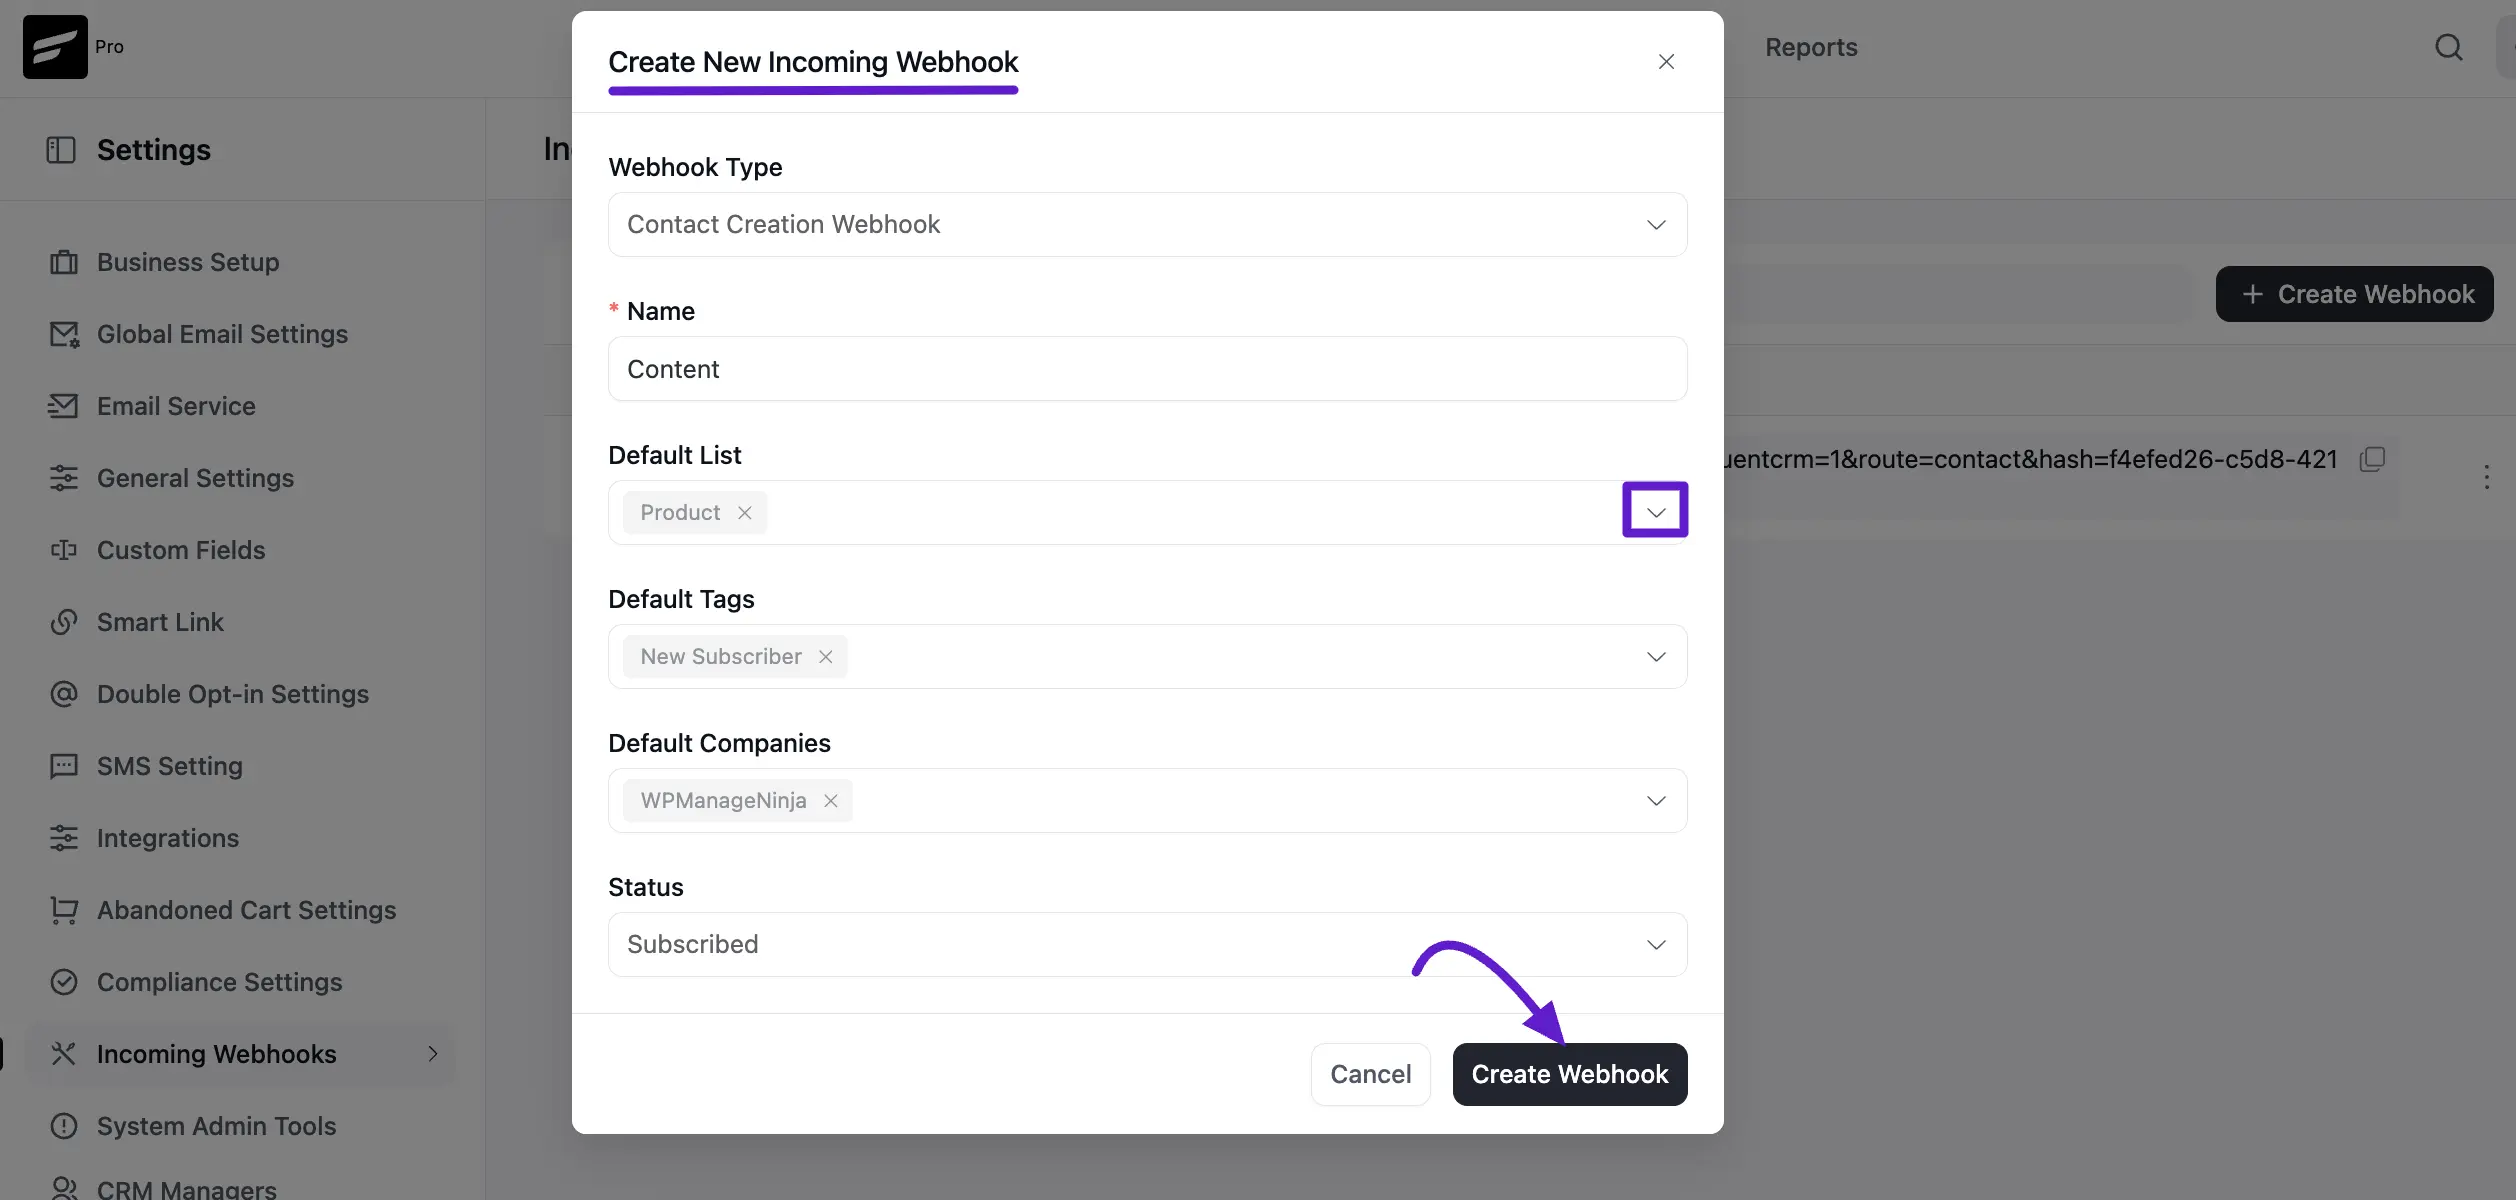
Once you click the create webhook button, a configuration pop-up will appear. Fill in the following details to define how the incoming data should be handled:
- Webhook Type: Select the appropriate type (e.g., Contact Creation Webhook).
- Name: Provide a clear identifier for this webhook so you can easily recognize its purpose later.
- Default List: Choose the list(s) that the new contact should be added to upon a successful webhook trigger.
- Default Tags: Select specific tags to be applied to the contact for better segmentation.
- Default Companies: (Optional) Assign the contact to a specific company within your CRM.
- Status: Set the subscription status for the user. In most cases, you will want to select Subscribed to ensure they receive your communications.
After filling out the fields, click the Create Webhook button to finalize.
Managing Your Webhooks
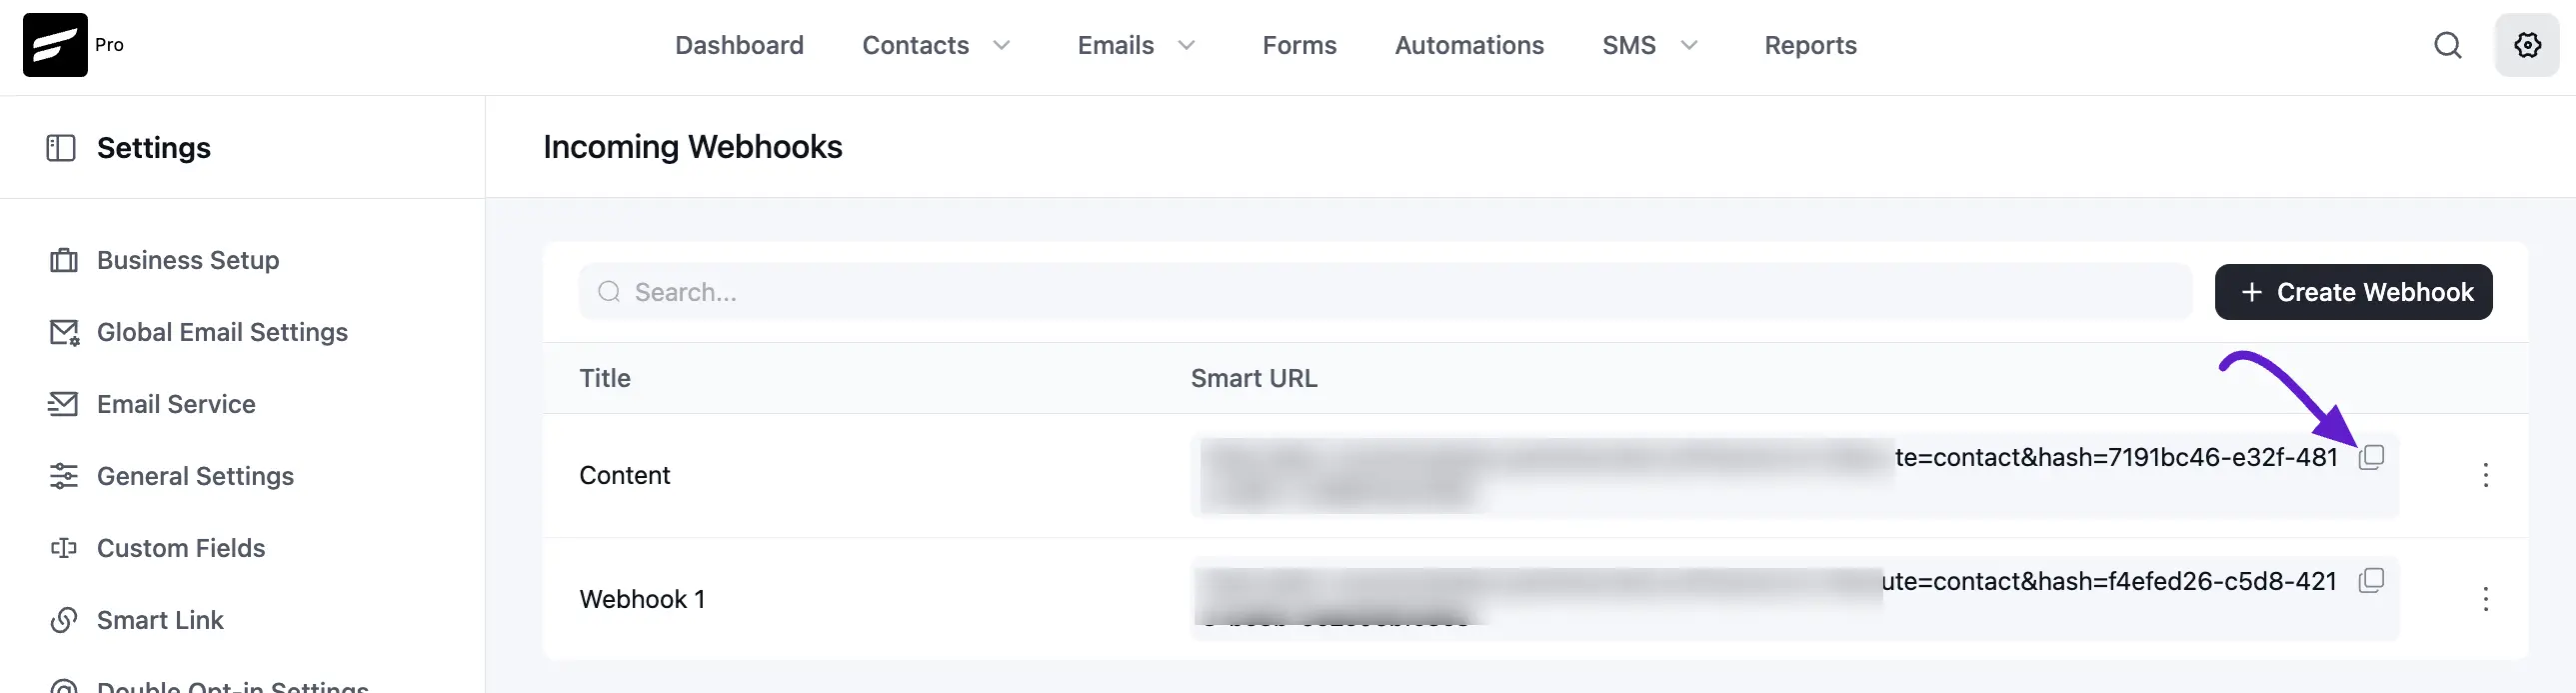
Once created, your webhook will appear in the main list.
- Smart URL: FluentCRM generates a unique Smart URL for each webhook. You will need to copy this URL (using the copy icon) and paste it into the external service or third-party app that is sending the data.
- Search and Organize: Use the search bar to quickly find specific webhooks as your list grows.