Appearance
Opt-in Forms (Fluent Forms) Basic Configuration
Integrating Fluent Forms with FluentCRM allows you to automate contact collection and immediately trigger marketing funnels, such as email sequences and automations. As the default form engine for FluentCRM, this native integration provides a seamless way to handle subscriptions and lead generation.
Activating the Forms Module
To begin using subscription forms within FluentCRM, you must first enable the integration:
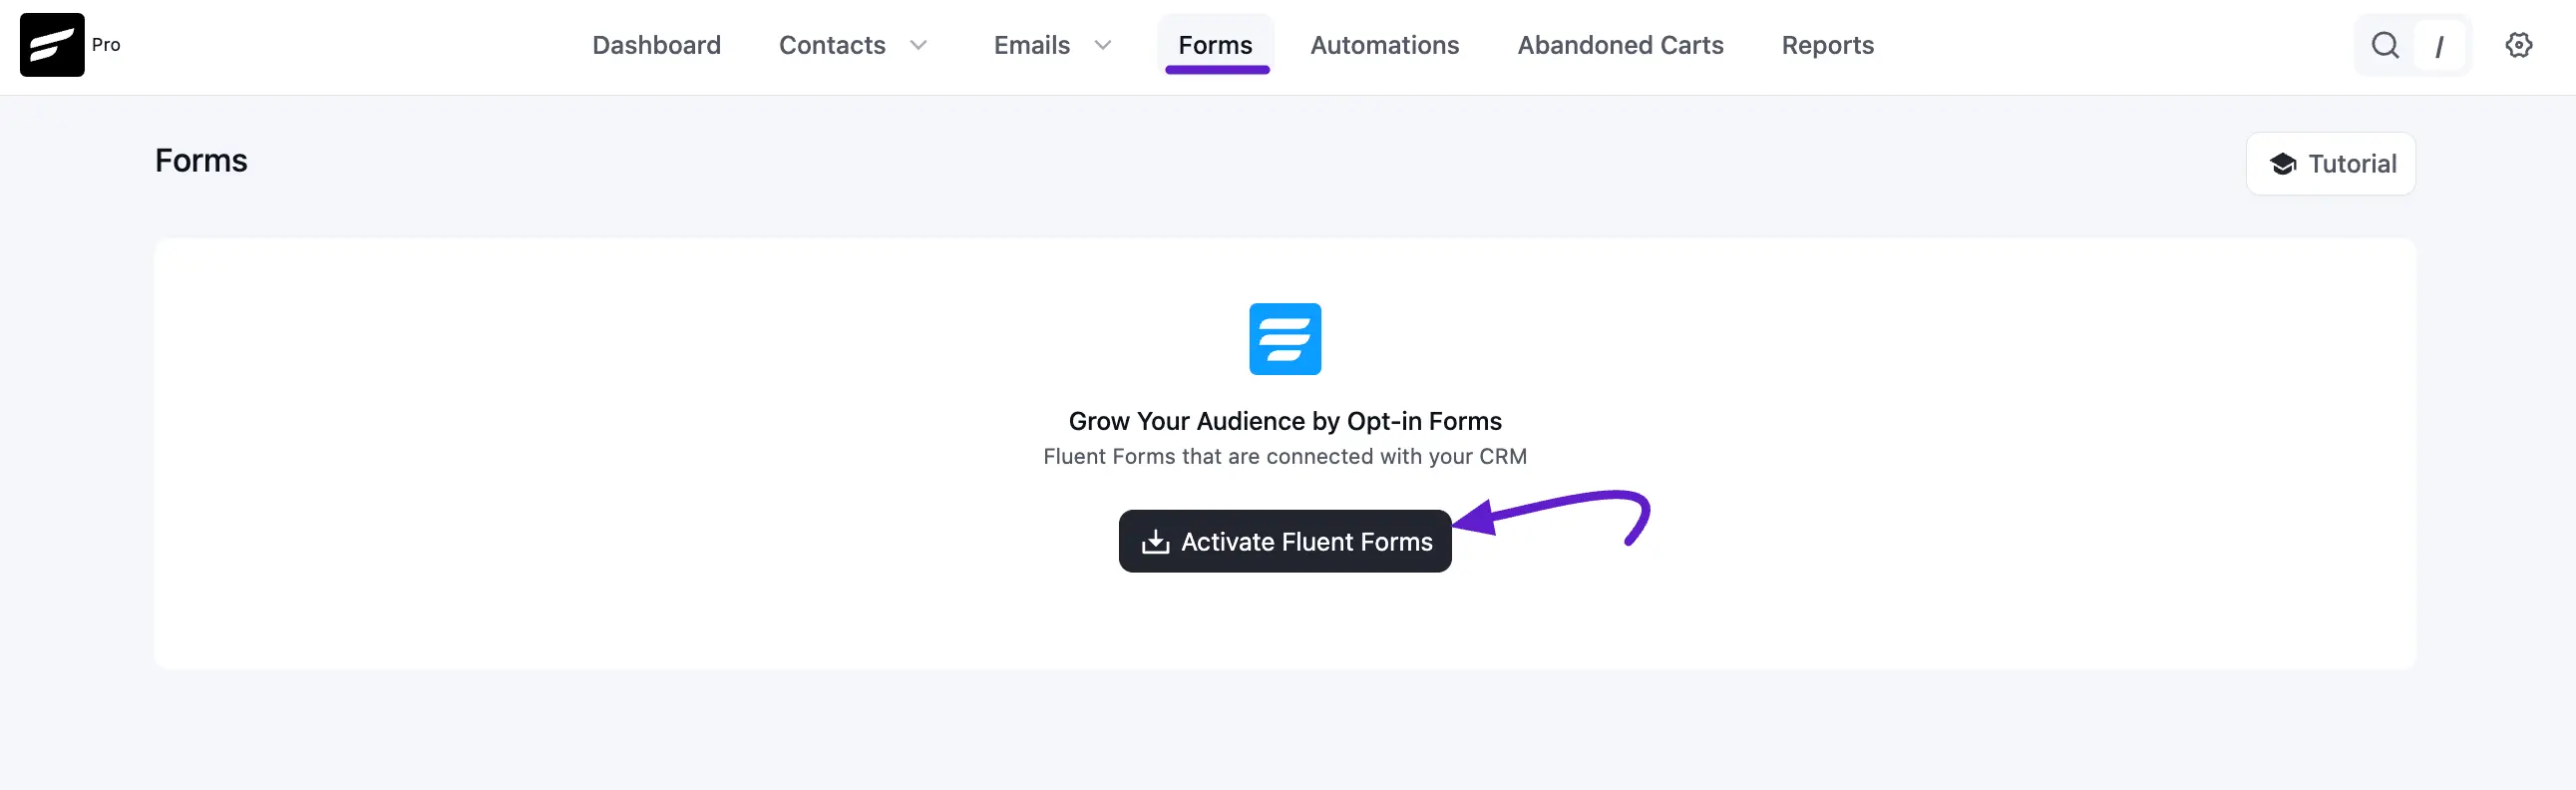
First, navigate to the FluentCRM Dashboard ➜ Forms. Click the Activate Fluent Forms button.
Wait for the confirmation message; FluentCRM will automatically install the Fluent Forms plugin in the background.
Creating Your First Subscription Form
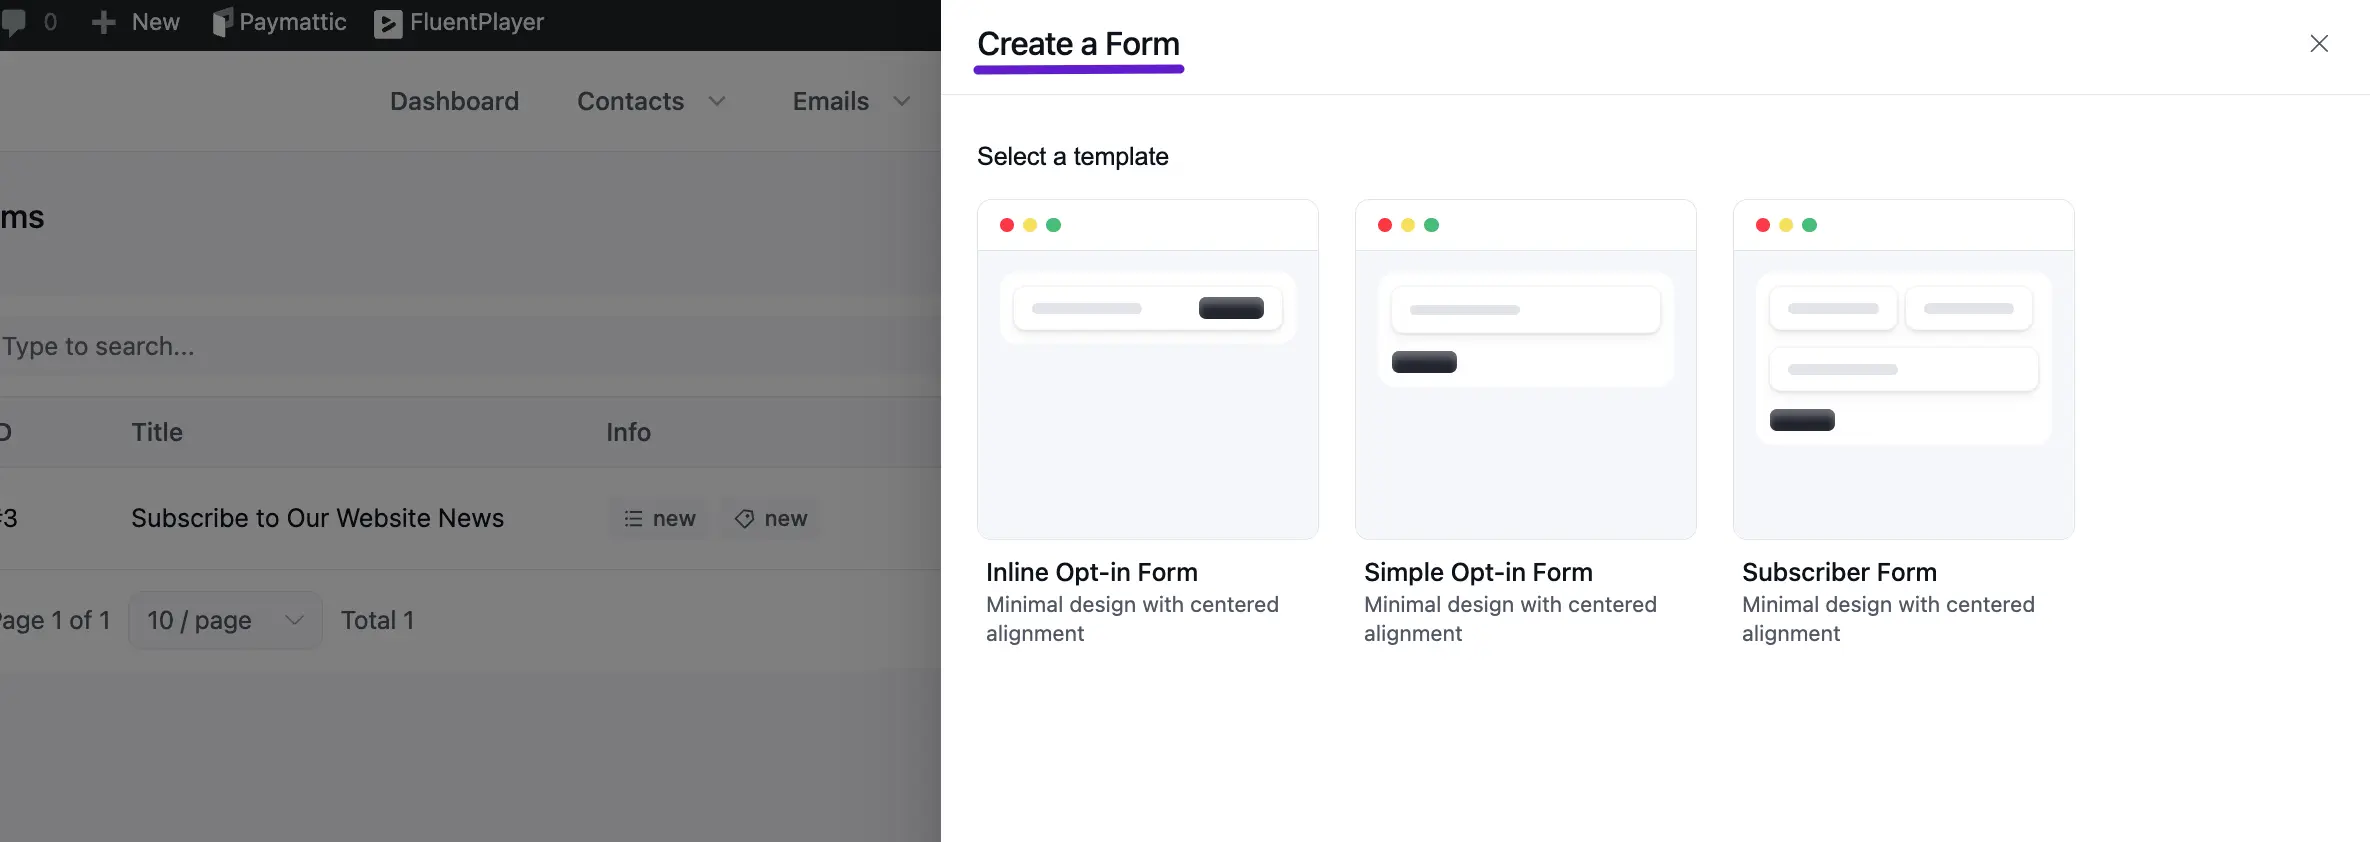
Once activated, you can initiate form creation. Click Create Your First Form or Create a New Form.

A popup will display several ready-to-use Templates.
- Recommendation: Template 3 is often used as it includes both Name and Email fields, which are standard for most subscription needs.
Mapping Lists and Tags
Mapping ensures that every person who fills out your form is correctly categorized in your CRM.
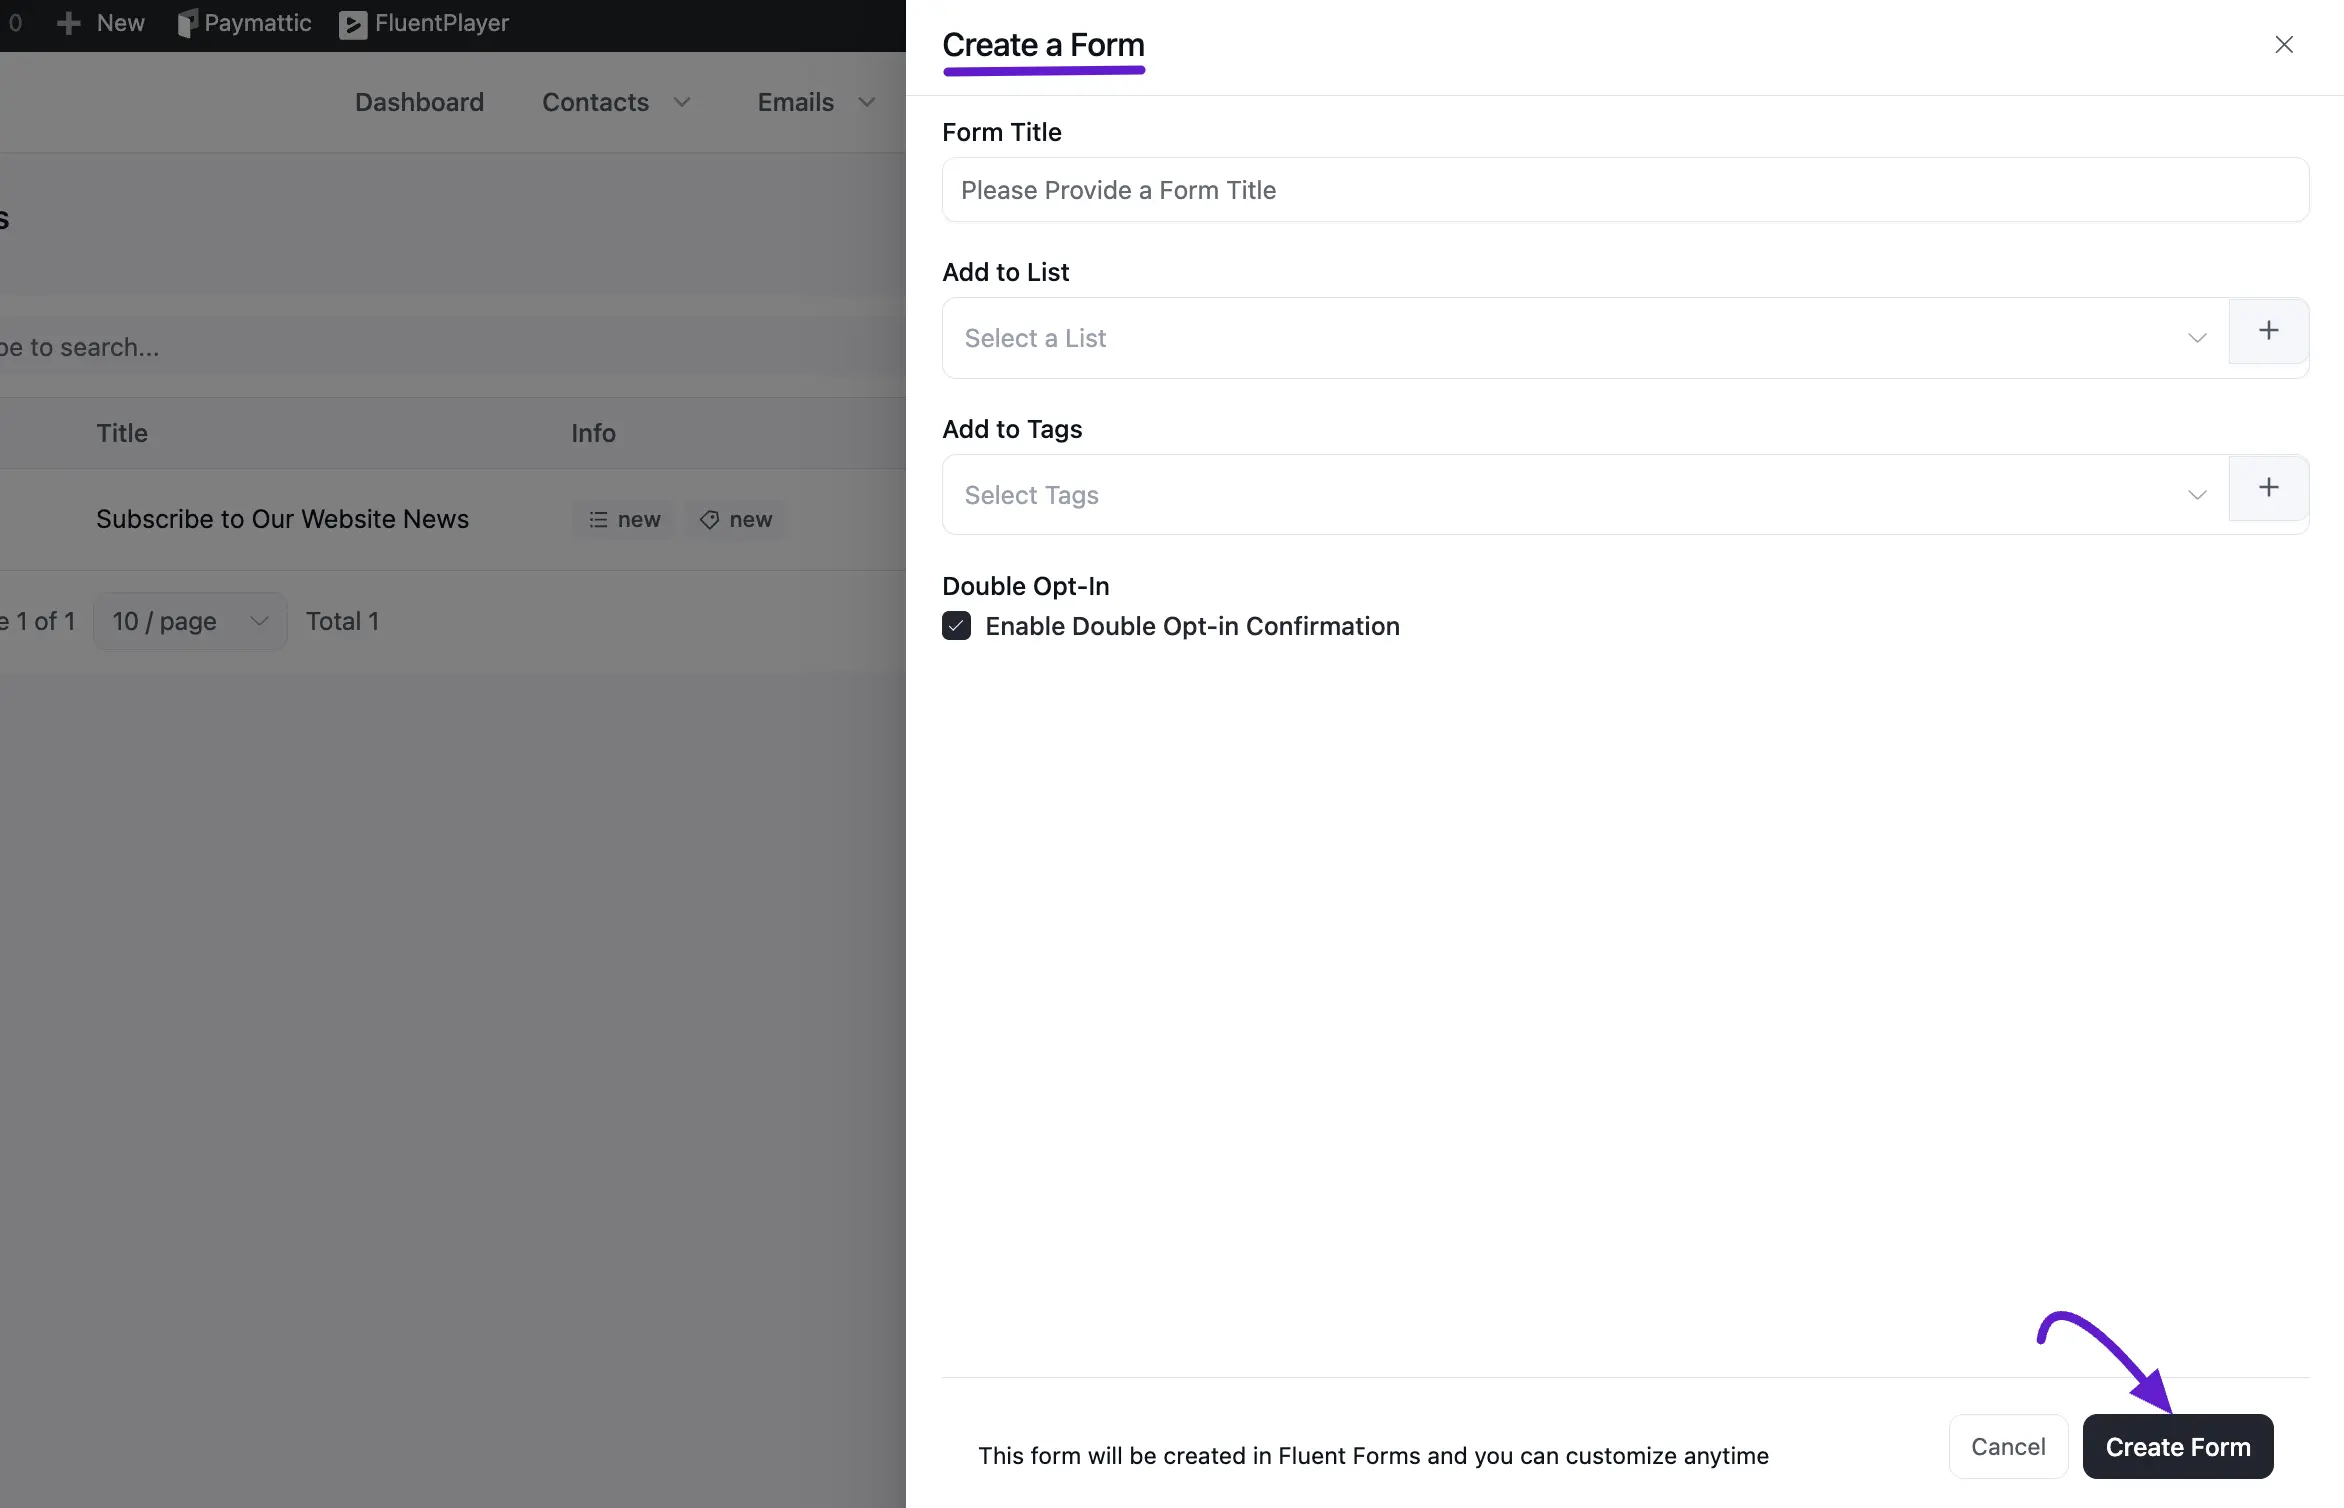
- Form Title: Enter a clear name for your form.
- List & Tag Selection: Select the specific Lists and Tags you want to apply to contacts who submit this form.
NOTE
Tag and List must be created in FluentCRM before setting up the form.
- Double Opt-in: Enable the Double Opt-in Confirmation checkbox to ensure new contacts confirm their subscription via email before being marked as "Subscribed".
You will also see a message saying “This form will be created in Fluent Forms and you can customize it anytime” which means the form is customizable and you can design and configure settings later at any time. We made a dedicated guide on that in Fluent Forms Advanced Configuration.
Managing Form Actions
After clicking Create Form, several management options become available:
- Preview the Form: View how the form looks on the front end.
- Edit the Form: Modify fields or add new field types (e.g., country or address) directly in the Fluent Forms editor.
- Edit Connection: Adjust the "Feed" settings that determine how data is sent to FluentCRM, including mapping contact data like first name, last name, and email.
Embedding the Form on Your Site
To display your form to your audience, you can use two primary methods:
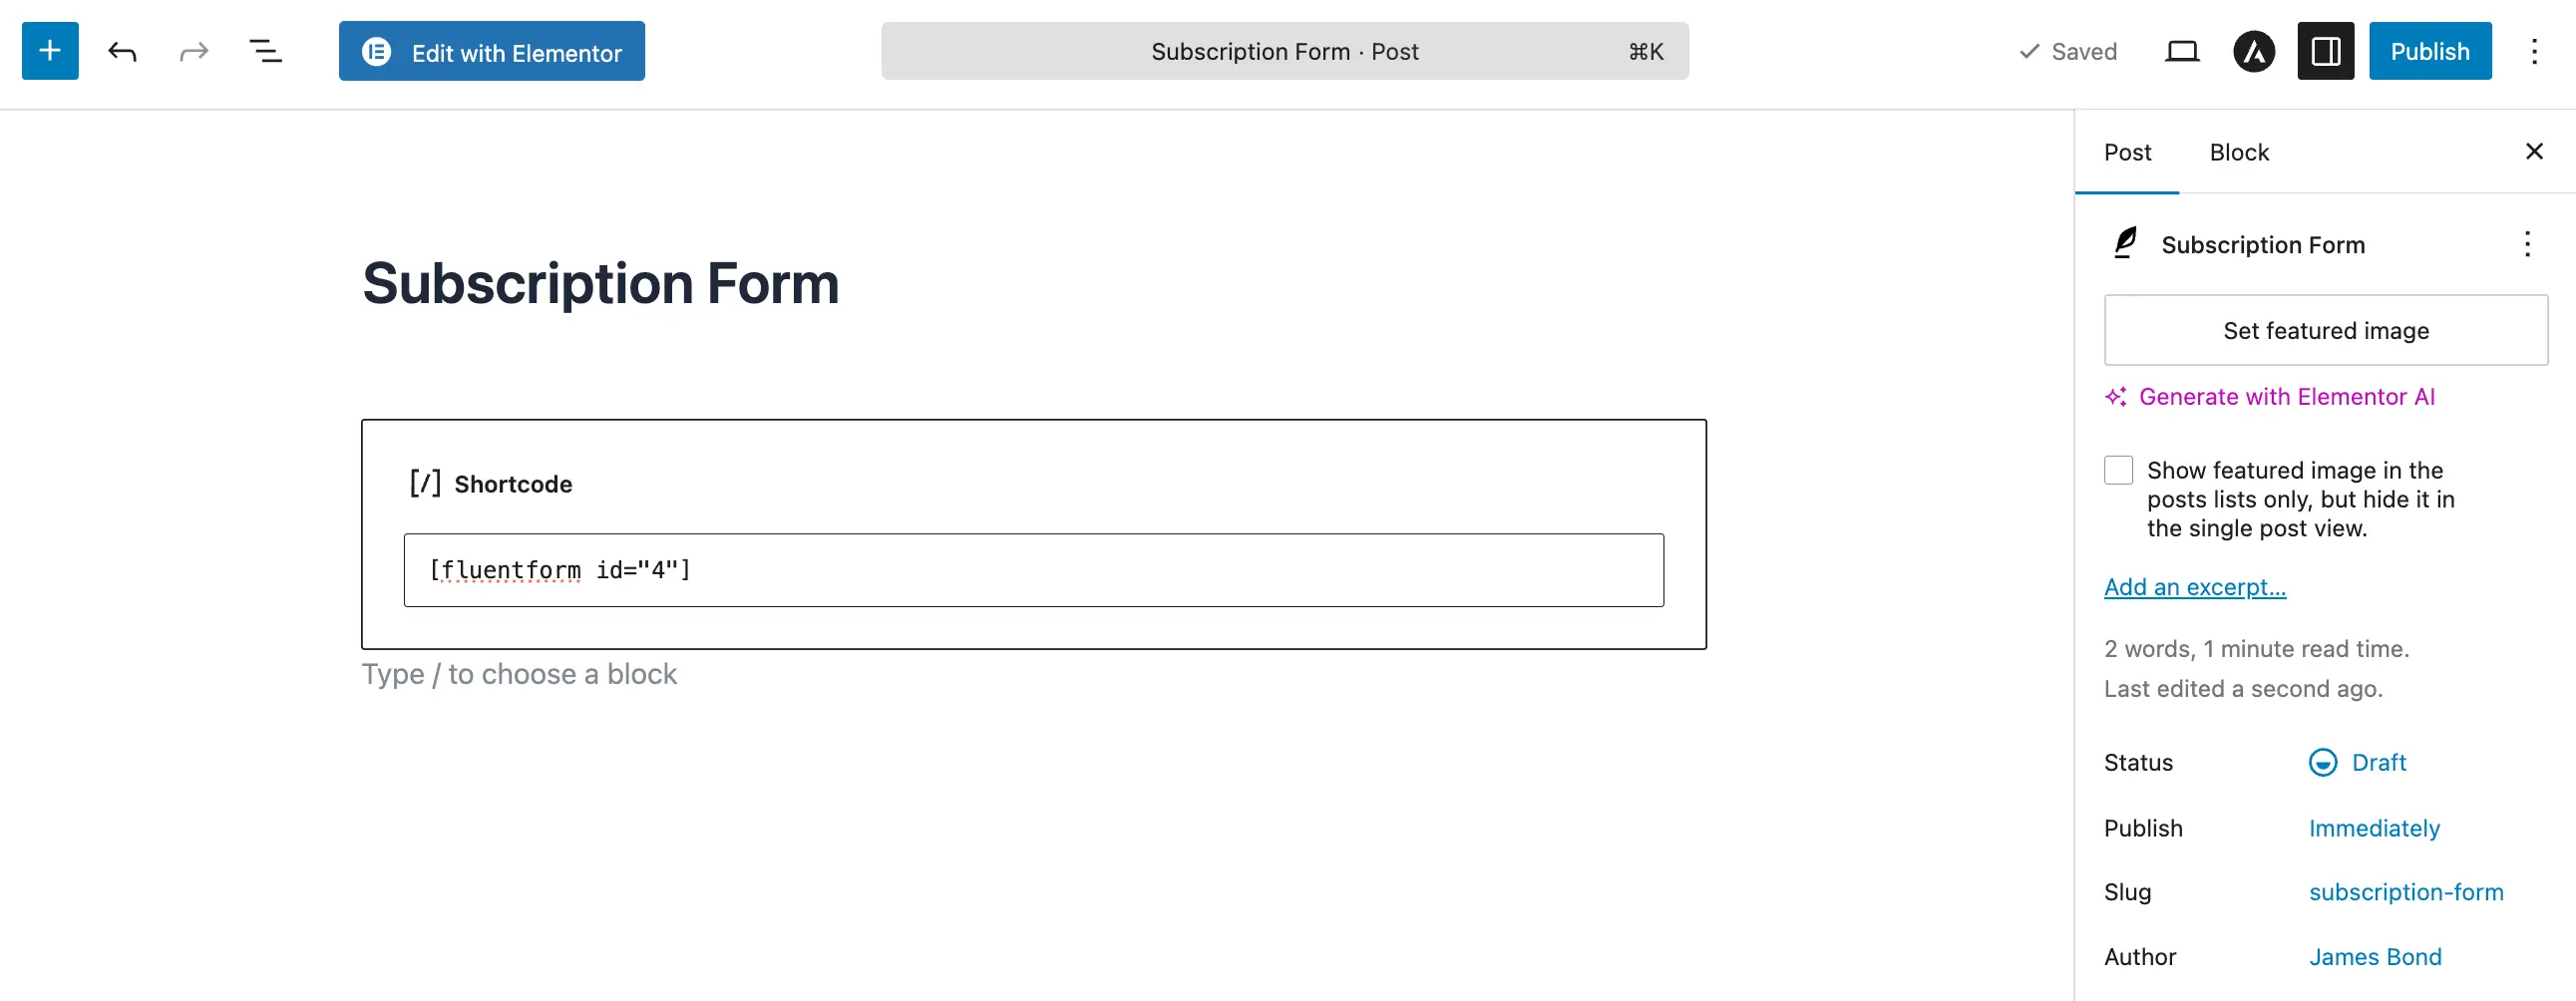
- Gutenberg Block: In the WordPress editor, add a "Fluent Forms" block and select your form from the dropdown menu.
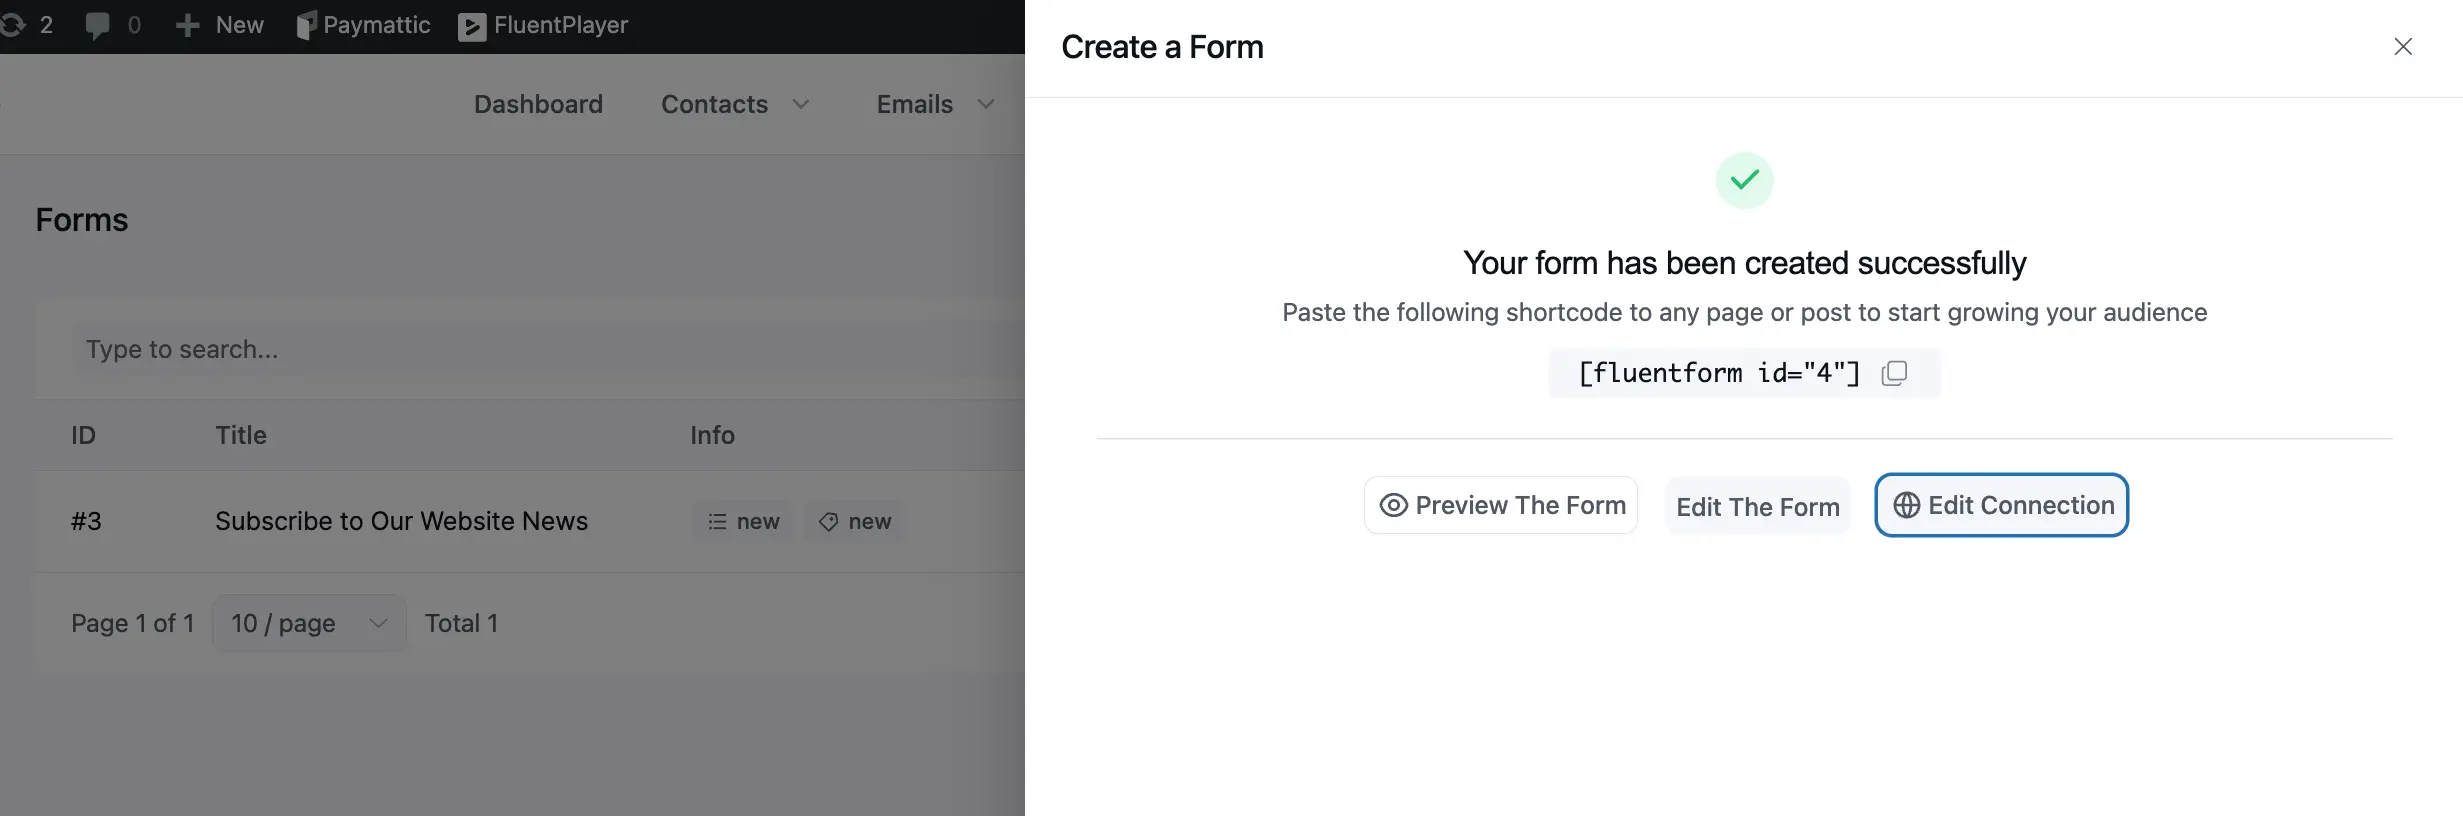
- Shortcode: Copy the unique shortcode provided in the form dashboard and paste it anywhere on your website.
Verifying Submissions and Feed Status
After publishing your form, it is critical to test a submission to ensure the data is flowing correctly into your CRM. You can monitor this process directly from the Forms dashboard in FluentCRM.
1. Monitoring Entries
Once a test submission is made, you can verify the data received by the form:
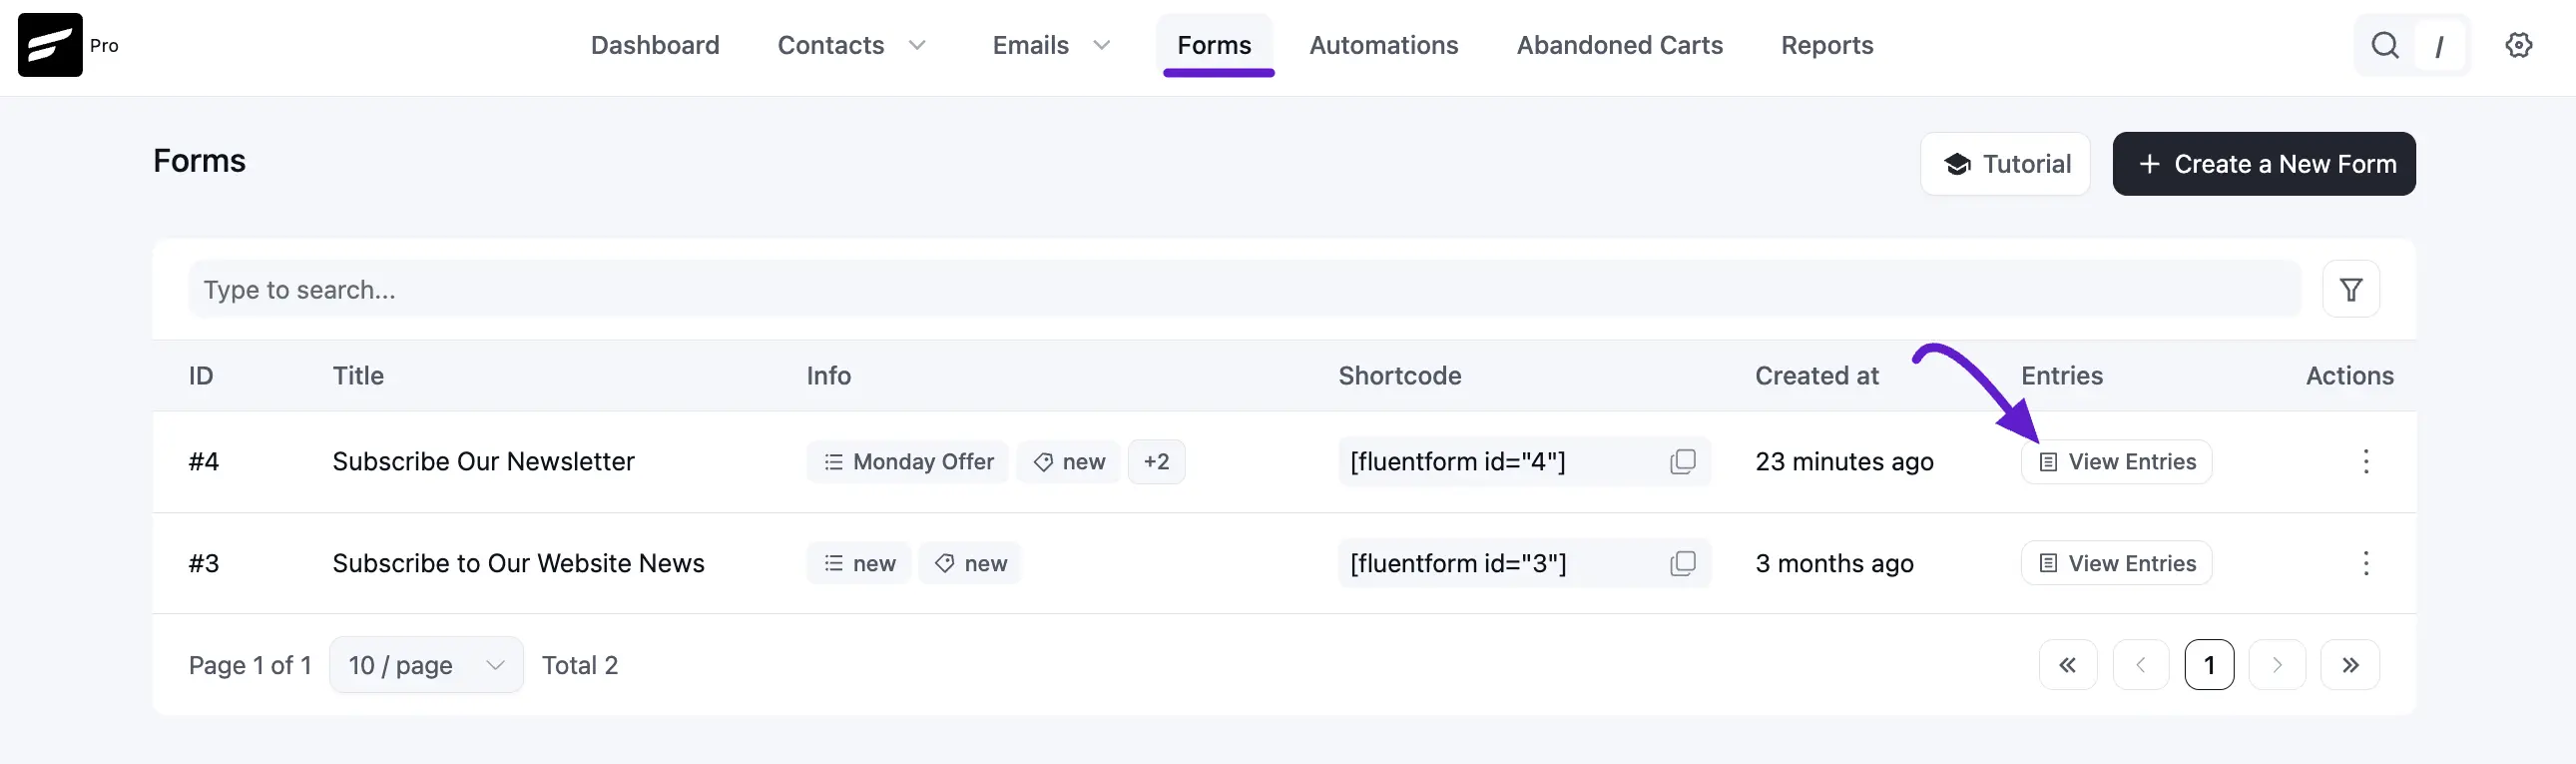
- Accessing Entries: Navigate to Forms in the FluentCRM sidebar to see your list of created forms.
- Viewing Submissions: Click the View Entries button next to your specific form to open a popup window showing all recent submissions, including the contact's email, submission status, and exactly when they signed up.
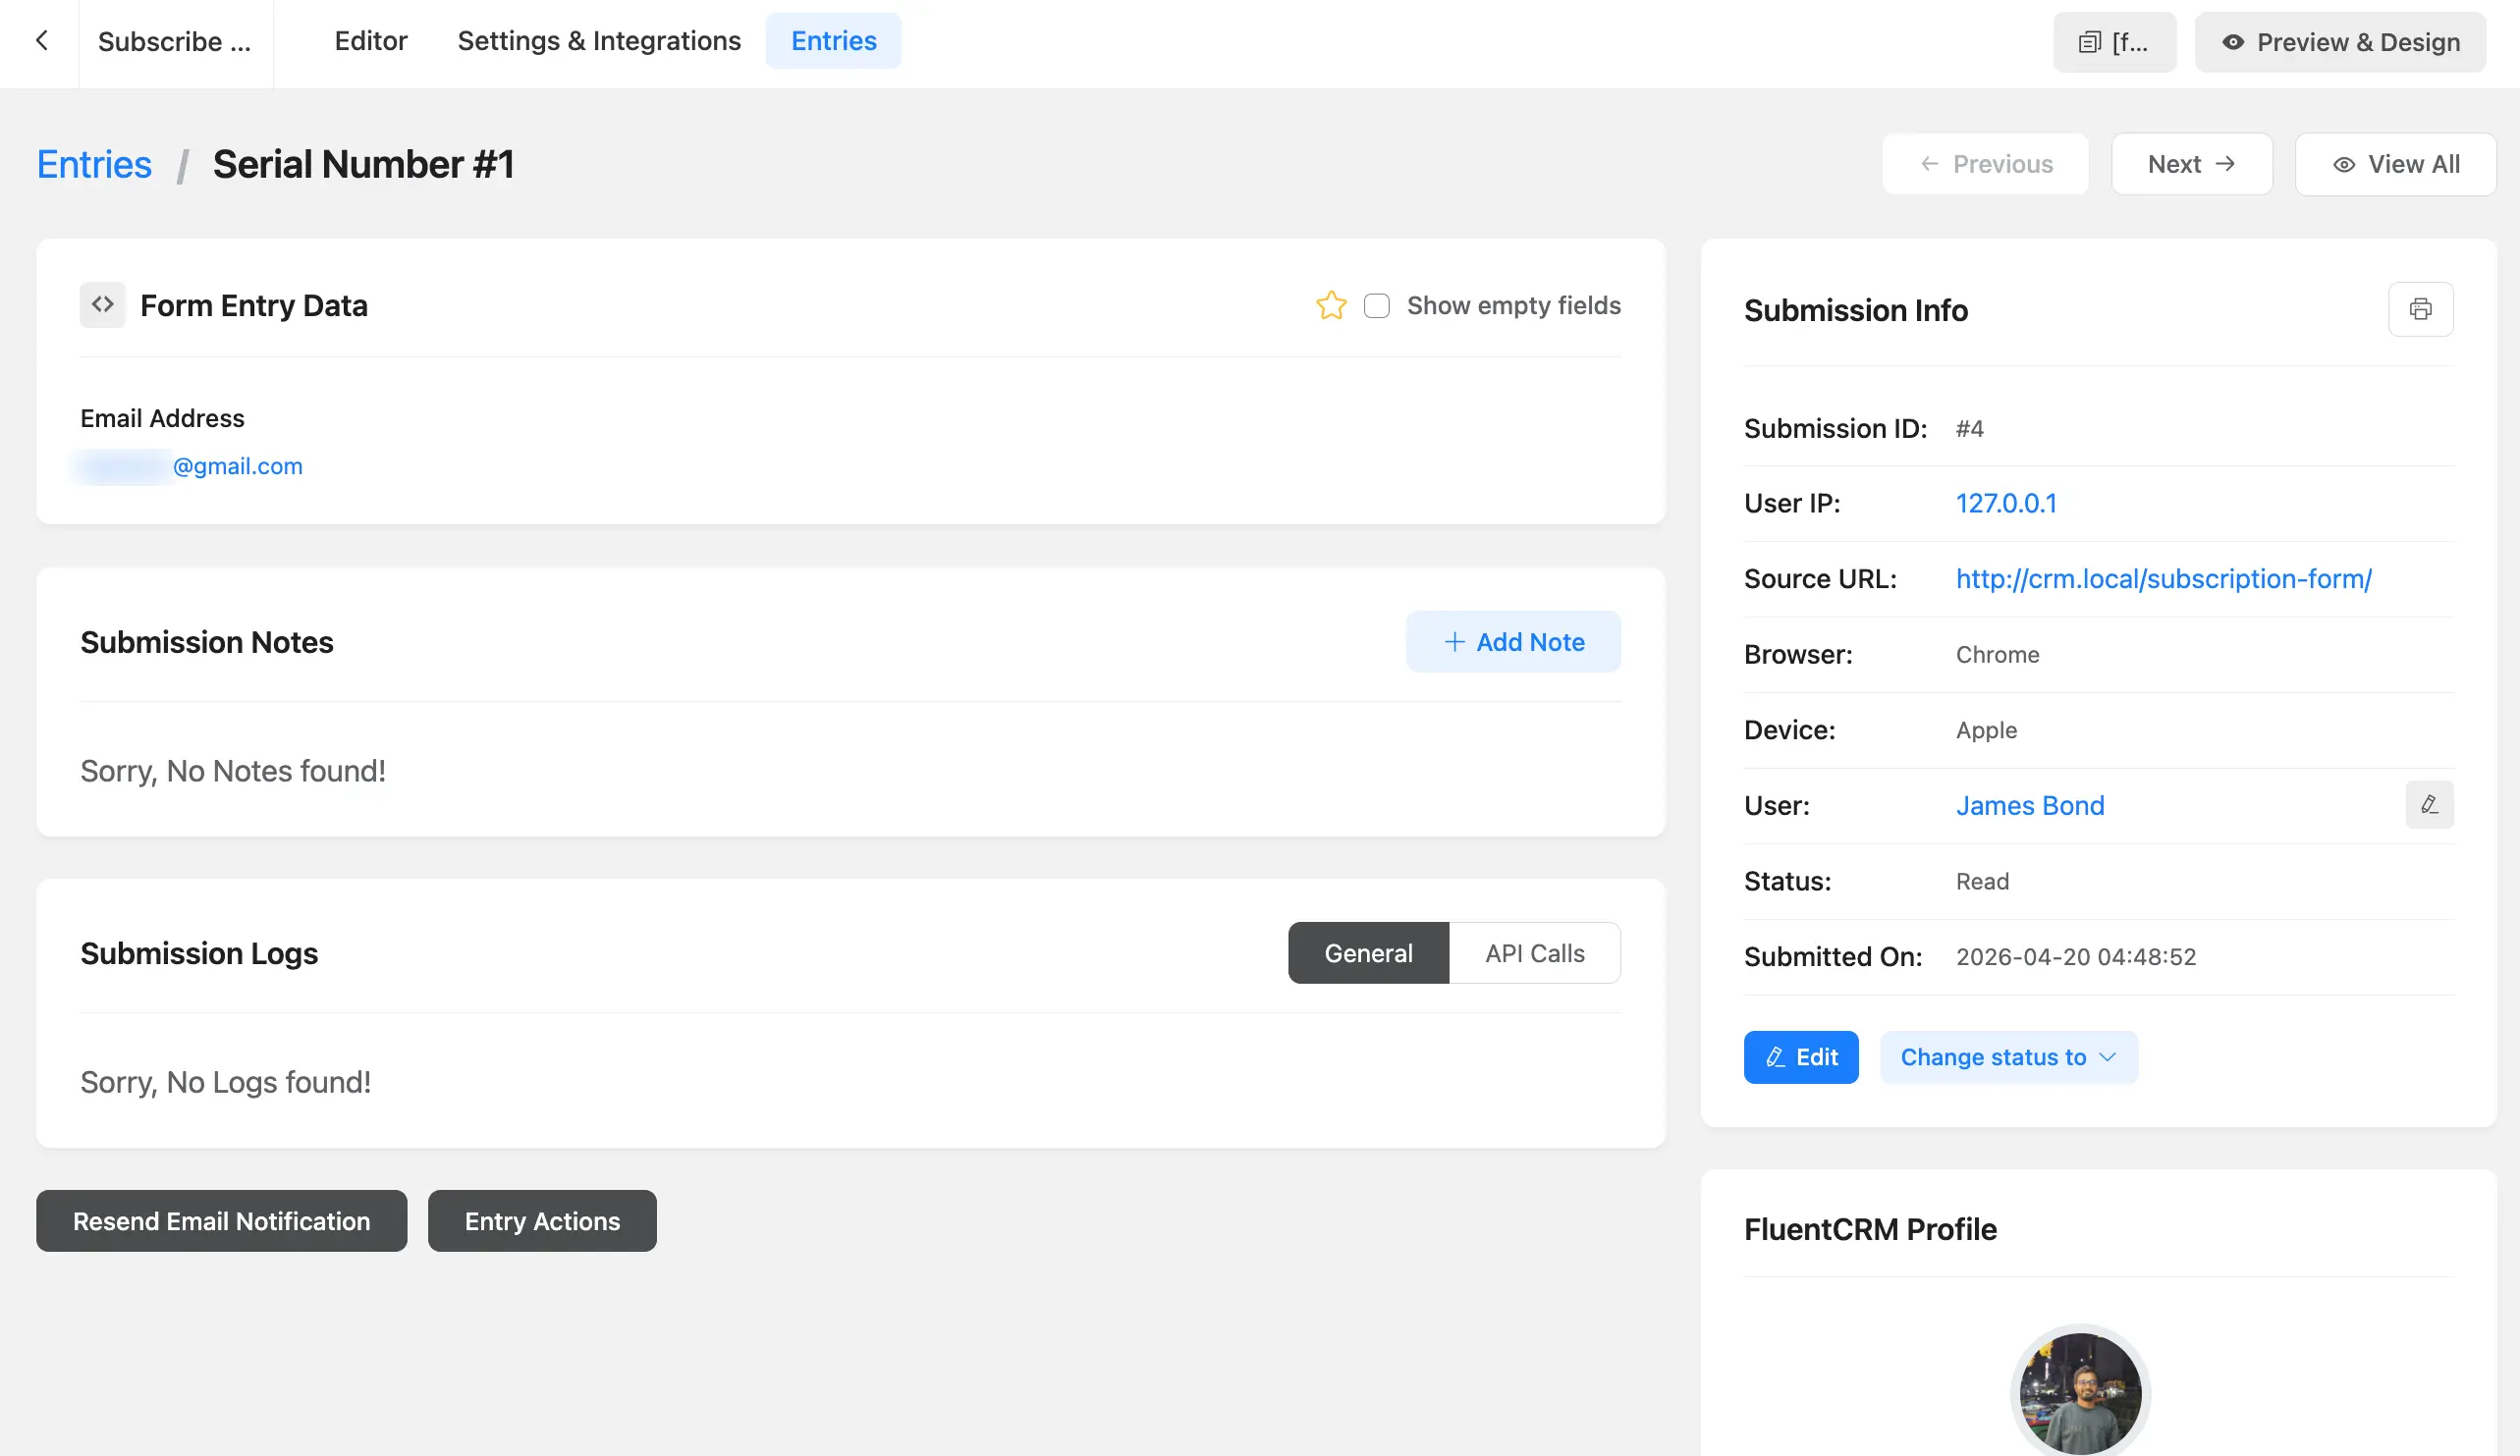
After clicking View Entries, a popup will appear showing all submitted entries. To see more details, click the Action icon for any entry.
![]()
You can also click on a specific contact to view detailed submission logs. Additionally, full entry details are available from the Fluent Forms Dashboard for that contact.
2. Feed Status & Integration Settings
If a contact is not appearing in FluentCRM as expected, you must verify the connection between the form and the CRM:
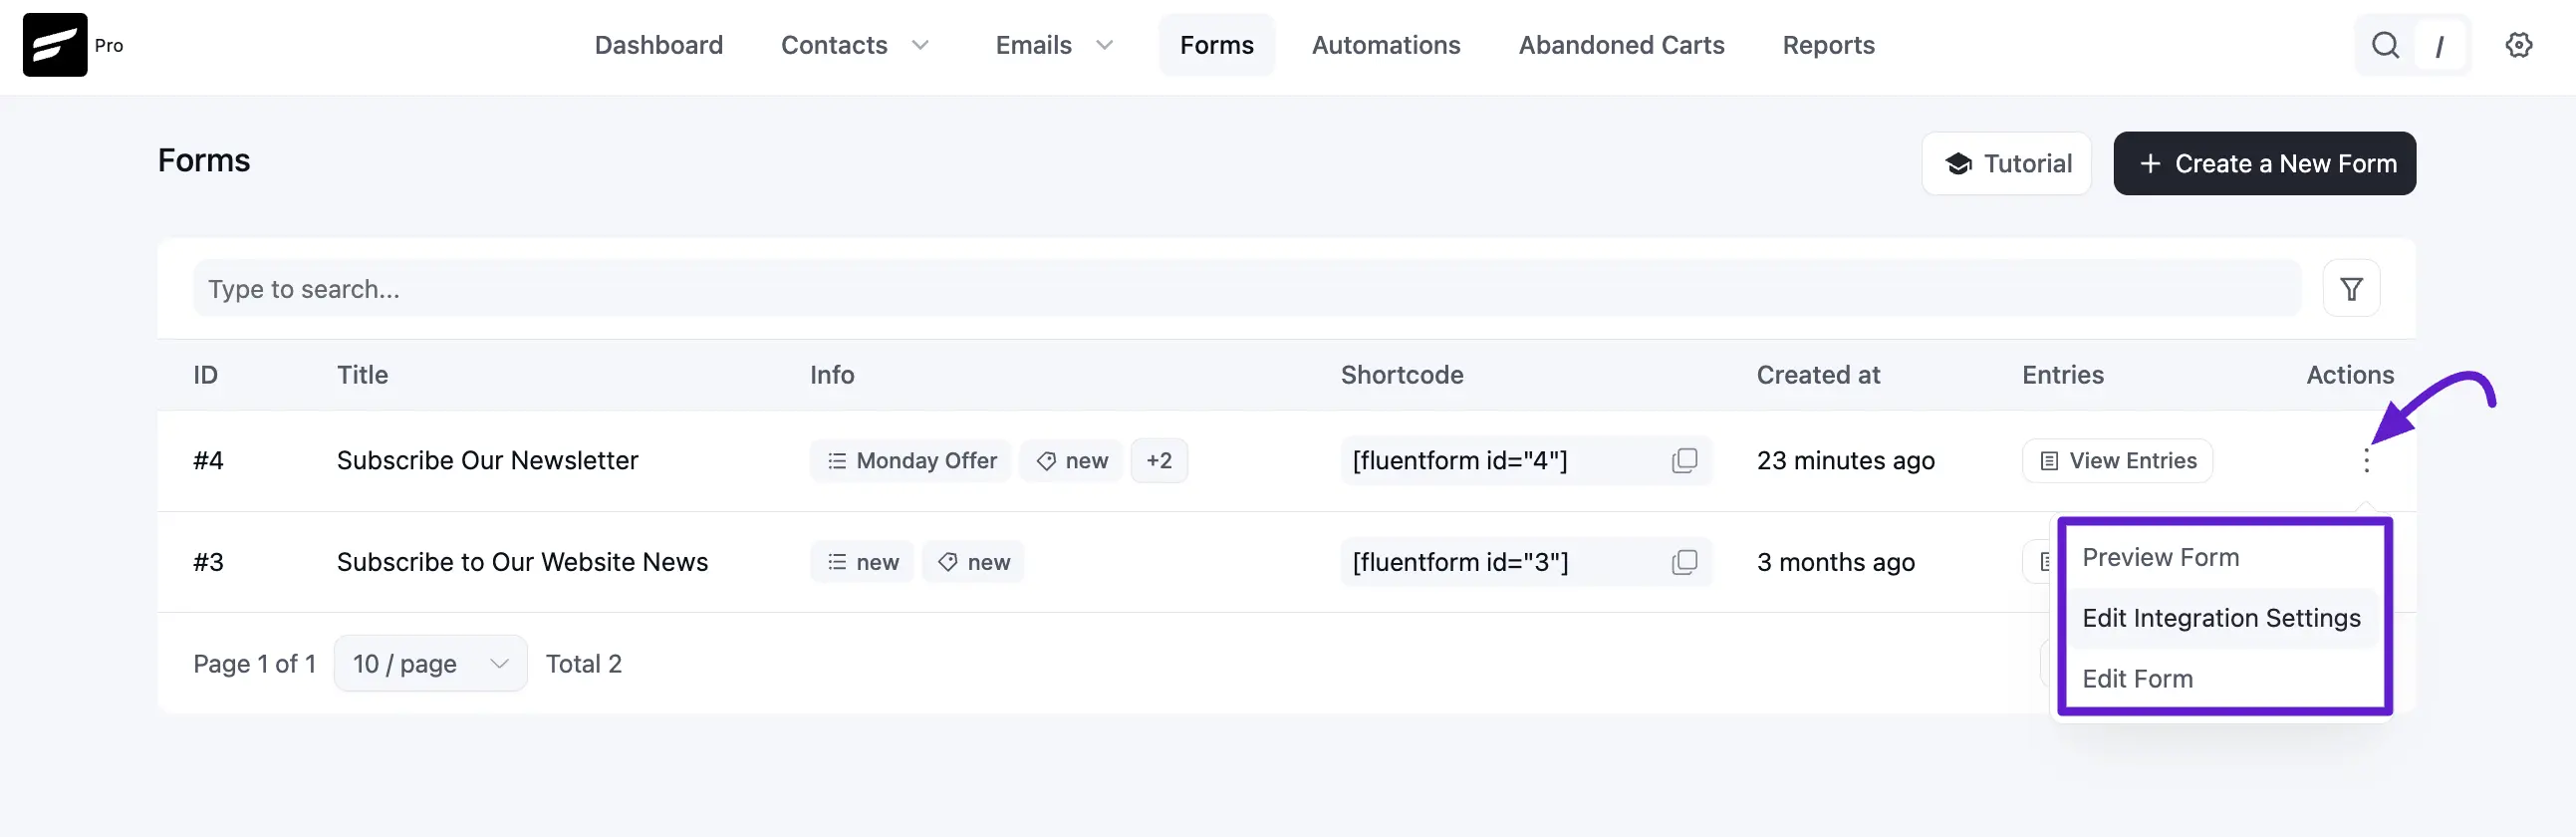
- Integration Logs: Within the Forms dashboard, click the three-dot menu under Actions and select Edit Integration Settings.
- Troubleshooting: This area allows you to review the "Feed" that maps form fields to CRM fields. Checking the Submission Logs here is crucial; it will provide a success or error message explaining why a submission may have failed to transfer to the contact list.
3. Final Contact Verification
Since a successful feed adds the contact immediately, perform a final check in your database:
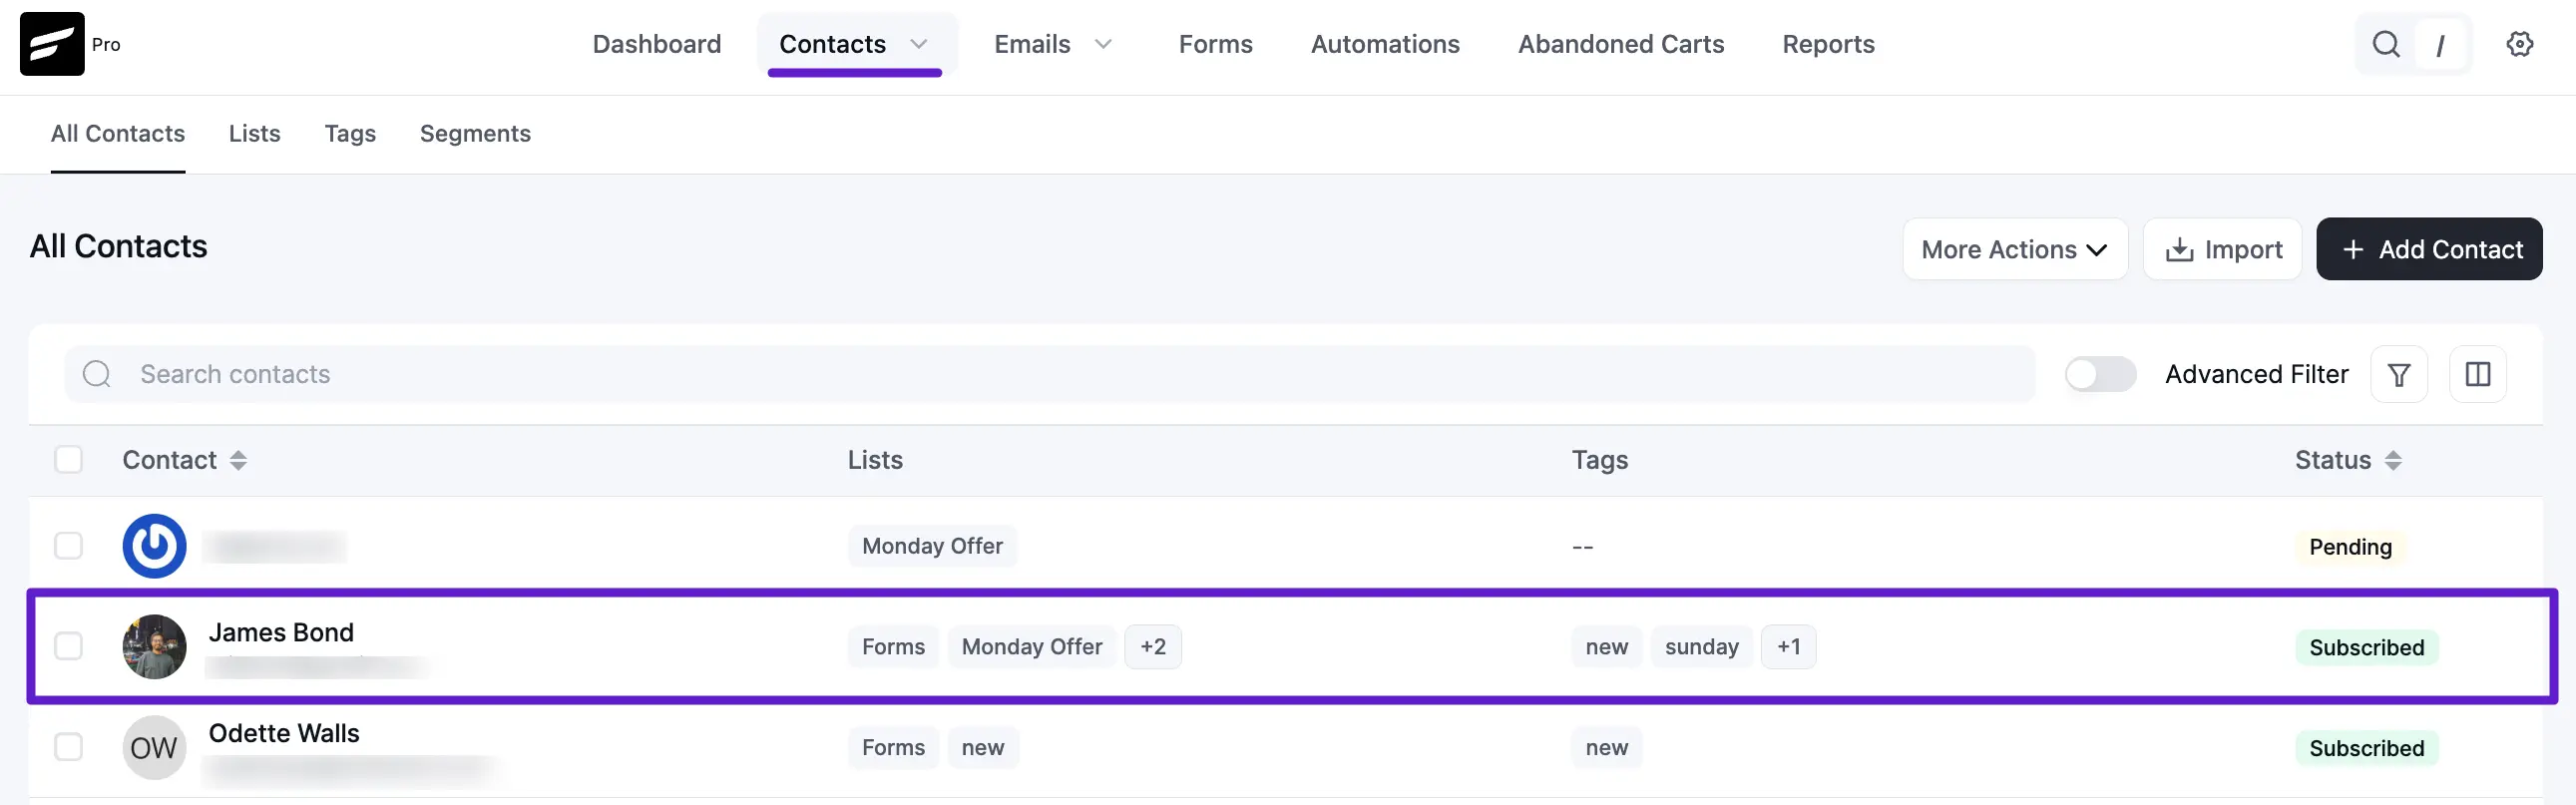
- Navigate to Contacts ➜ All Contacts.
- Your test submission should appear in the list with its assigned Lists, Tags, and current Subscription Status (such as Pending or Subscribed).
For more complex setups, such as dynamic tag selection or conditional logic, please refer to the Fluent Forms Advanced Configuration guide.