Appearance
Capturing Leads Remotely from Fluent Forms
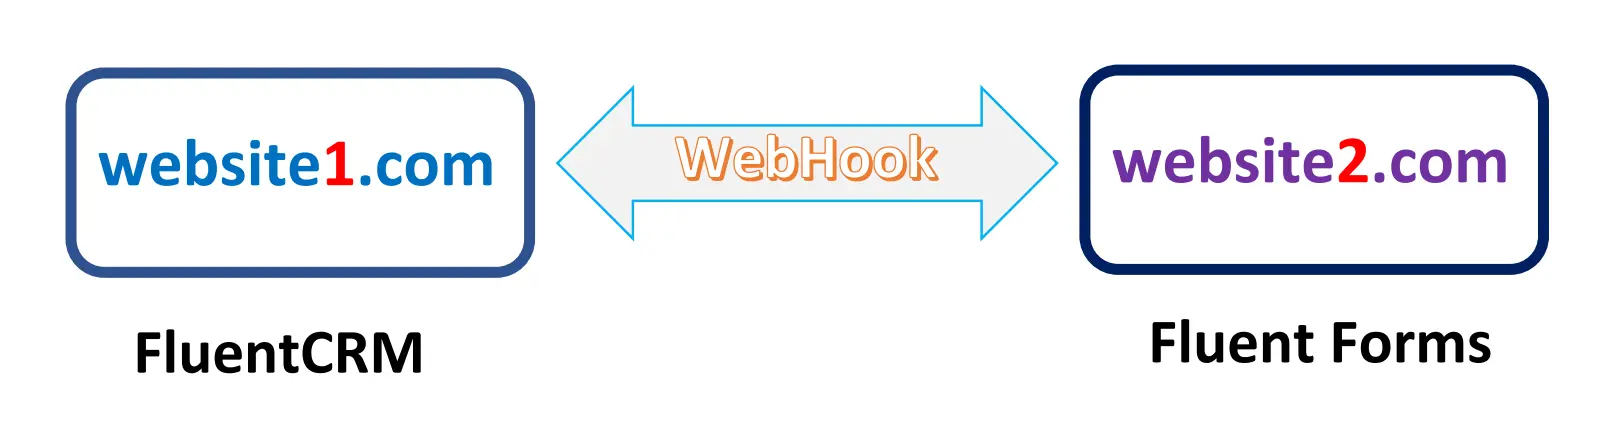
FluentCRM and Fluent Forms work seamlessly when installed on the same site, but you may want to collect leads from different websites or domains and centralize them within a single FluentCRM dashboard. By utilizing the Incoming Webhooks feature in FluentCRM and the Webhook Integration in Fluent Forms, you can capture remote data effortlessly.
For this purpose, we will utilise Fluent Forms' Webhook integration on the source site and FluentCRM's Incoming Webhooks on the destination site.
Step 1: Configure FluentCRM (The Receiver)
On your primary website (where FluentCRM is installed), you must create an entry point for the remote data.
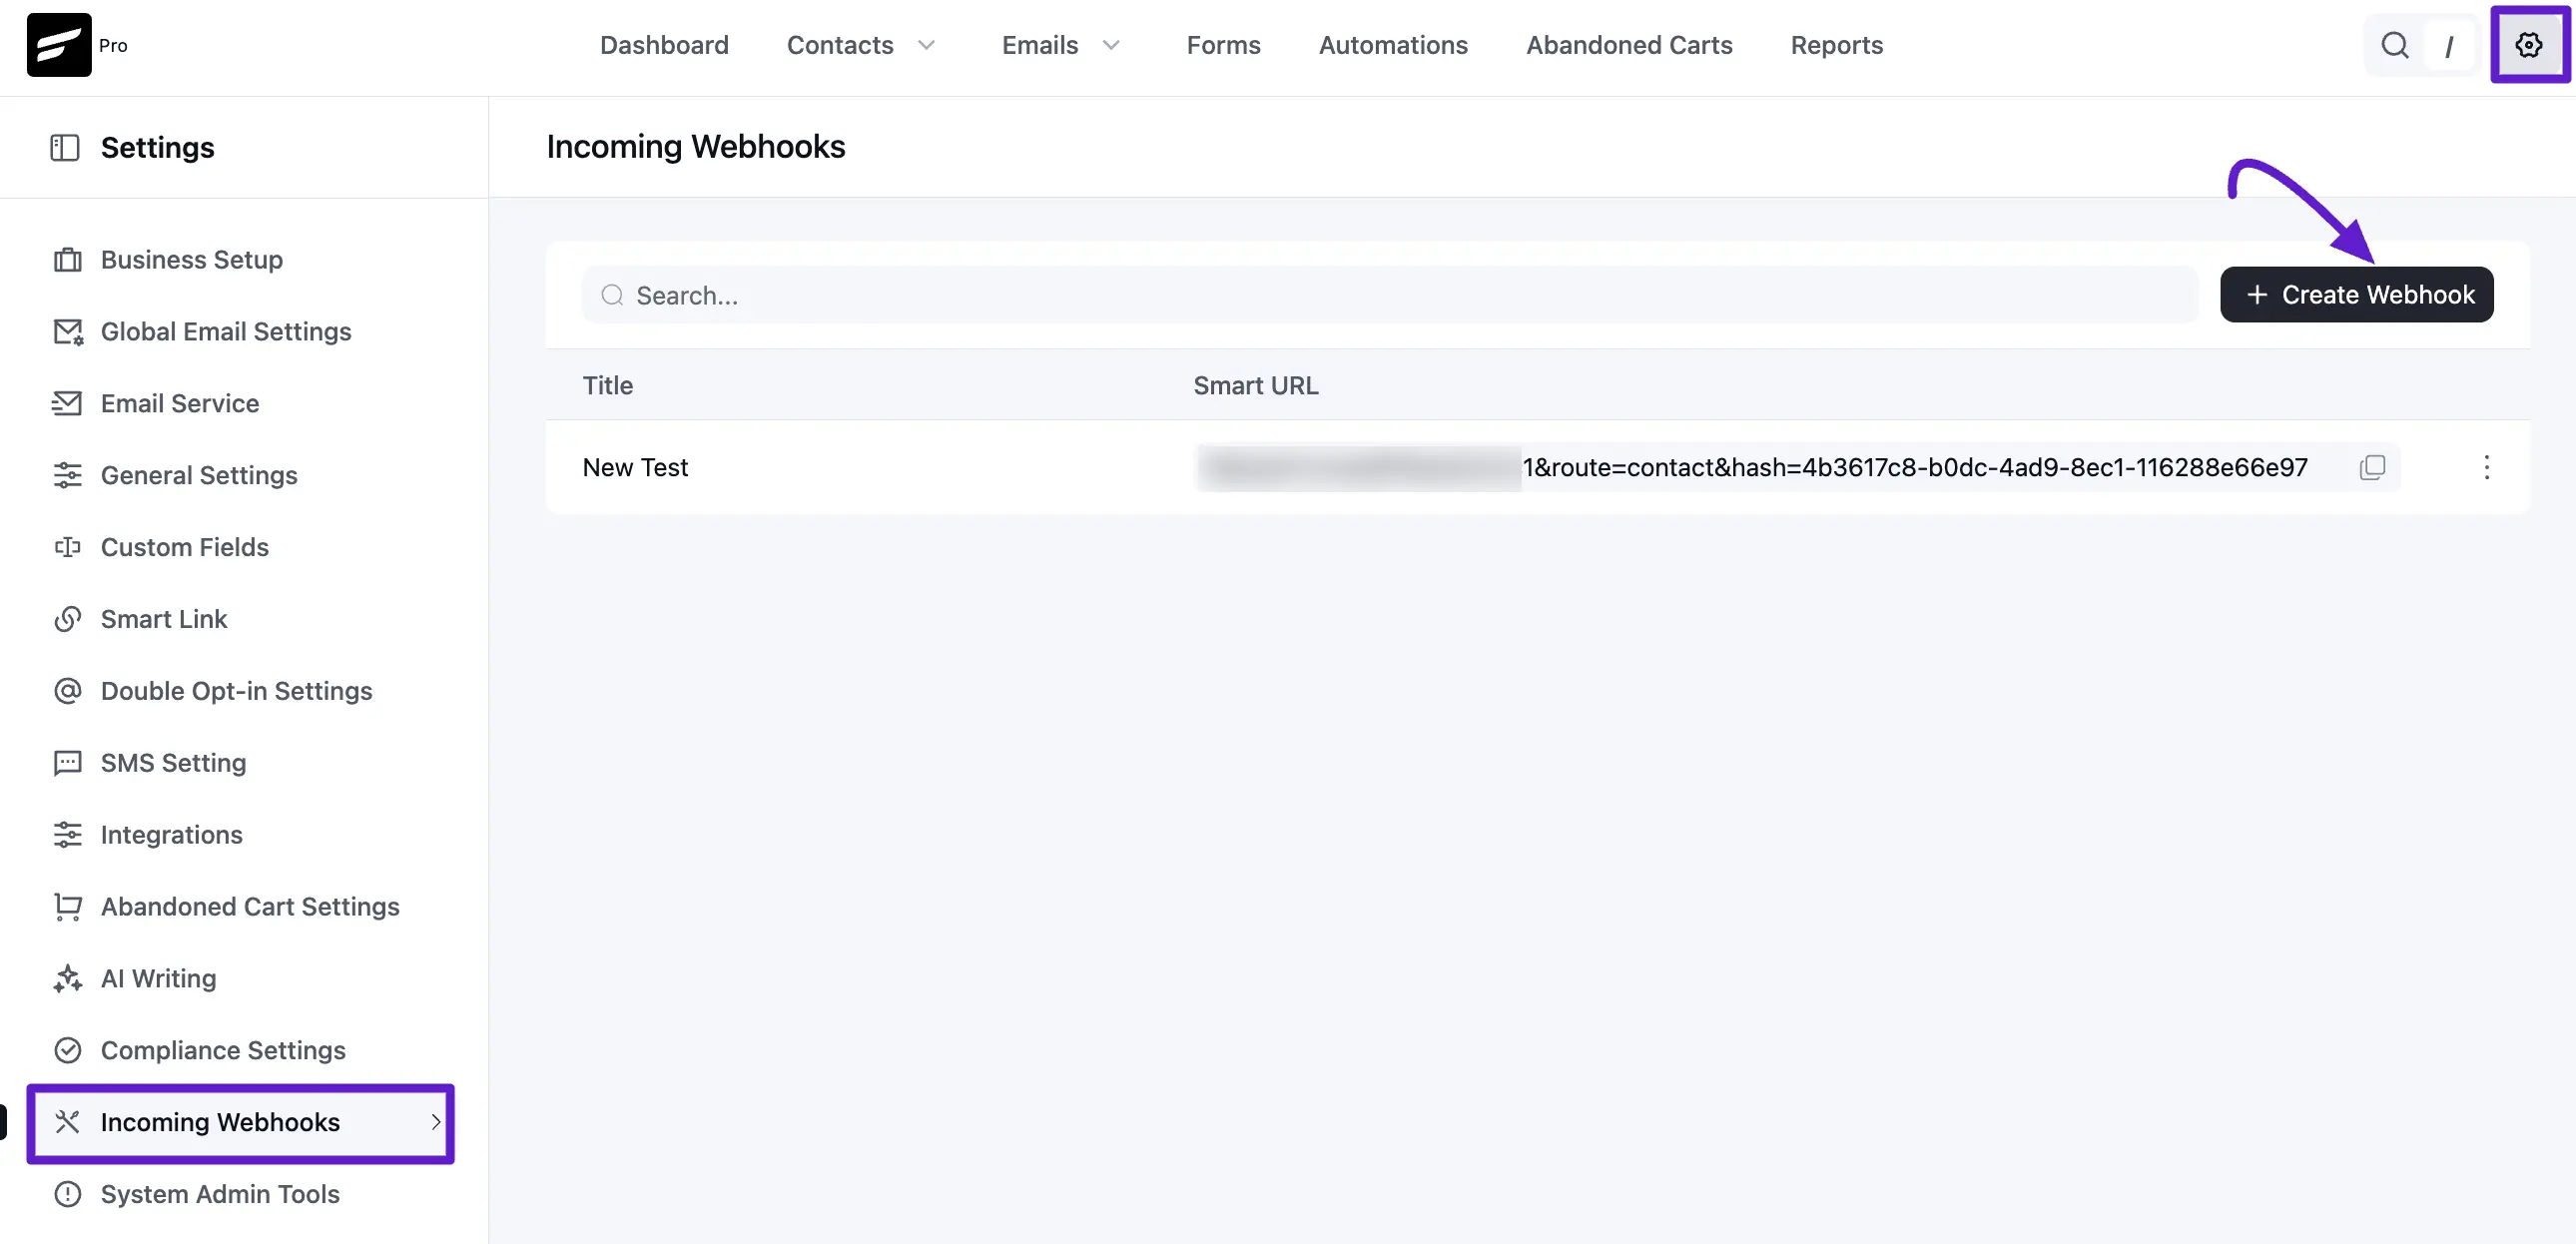
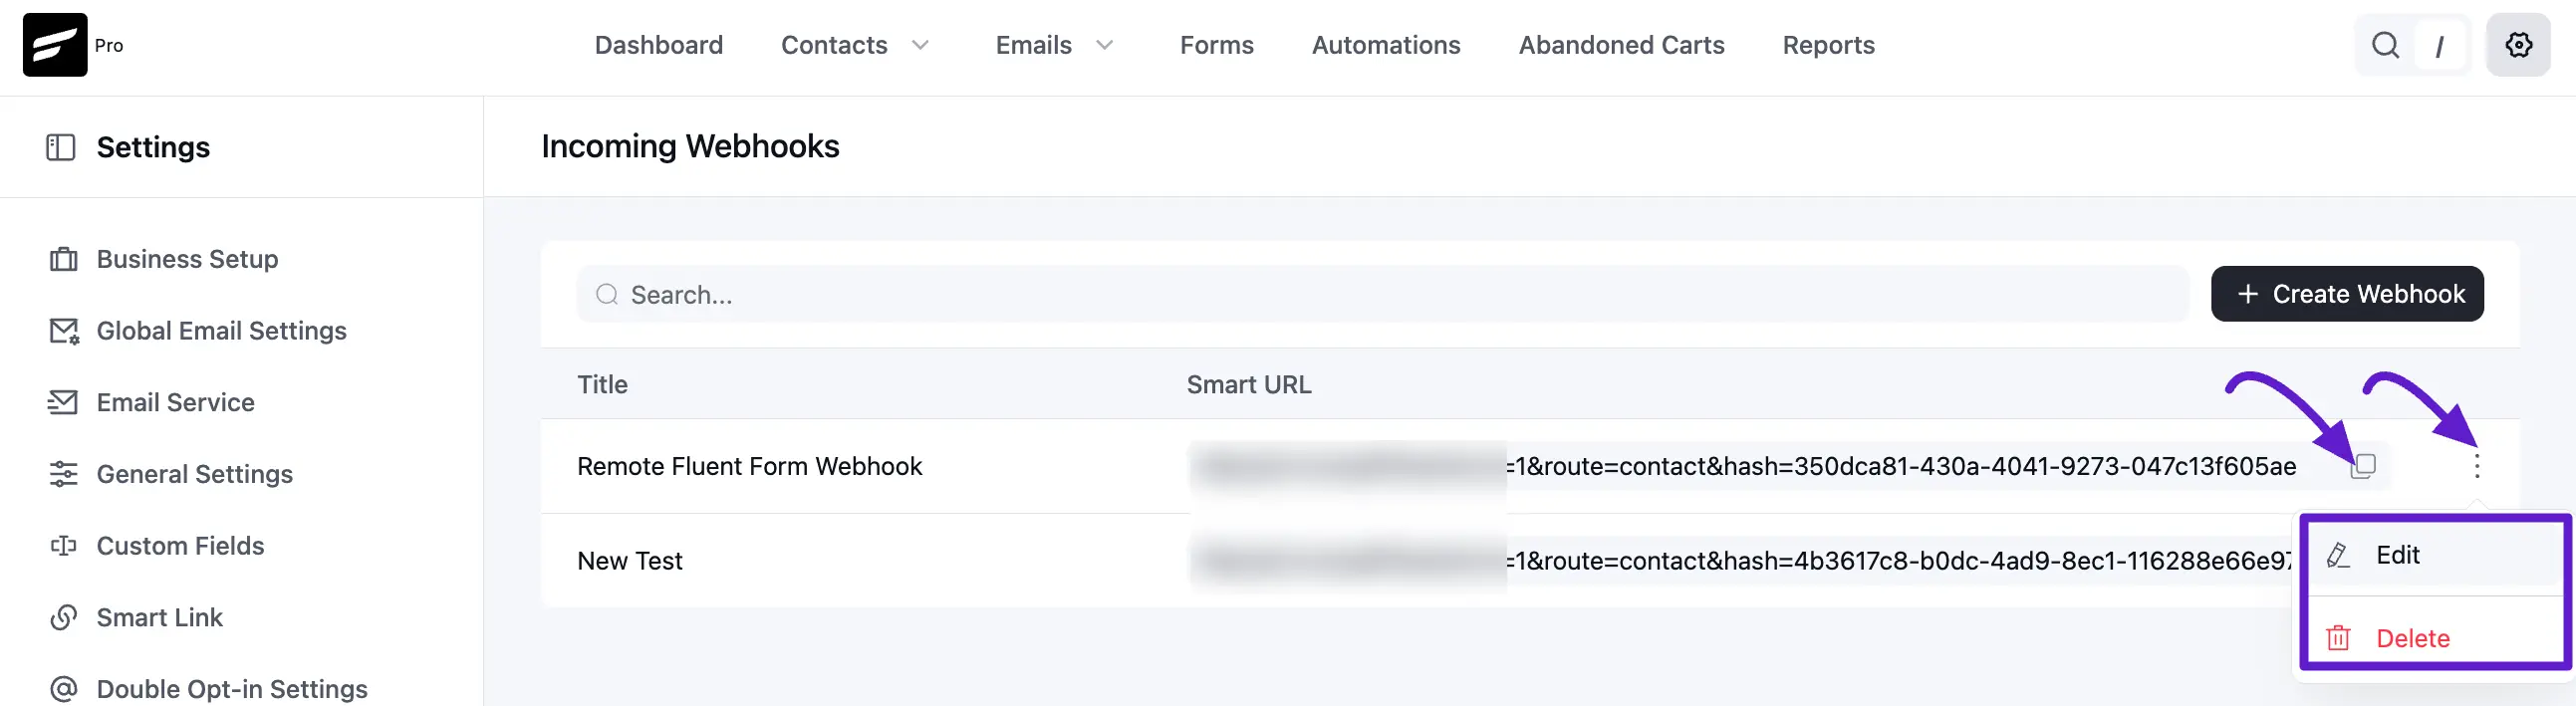
Create an Incoming Webhook
From your FluentCRM dashboard, navigate to FluentCRM Global Settings ➜ Incoming Webhooks. From there, click the Create WebHook button.
Now, Enter a name for the webhook and select the Lists and Tags that should be assigned to any contact arriving through this link. Based on your preference, you can also set the FluentCRM Contacts Status to either Pending or Subscribed. The pending status will send a Double Opt-in Confirmation Email.
NOTE
Setting the status to Pending is recommended if you need to send a Double Opt-in Confirmation Email to remain compliant with marketing standards.
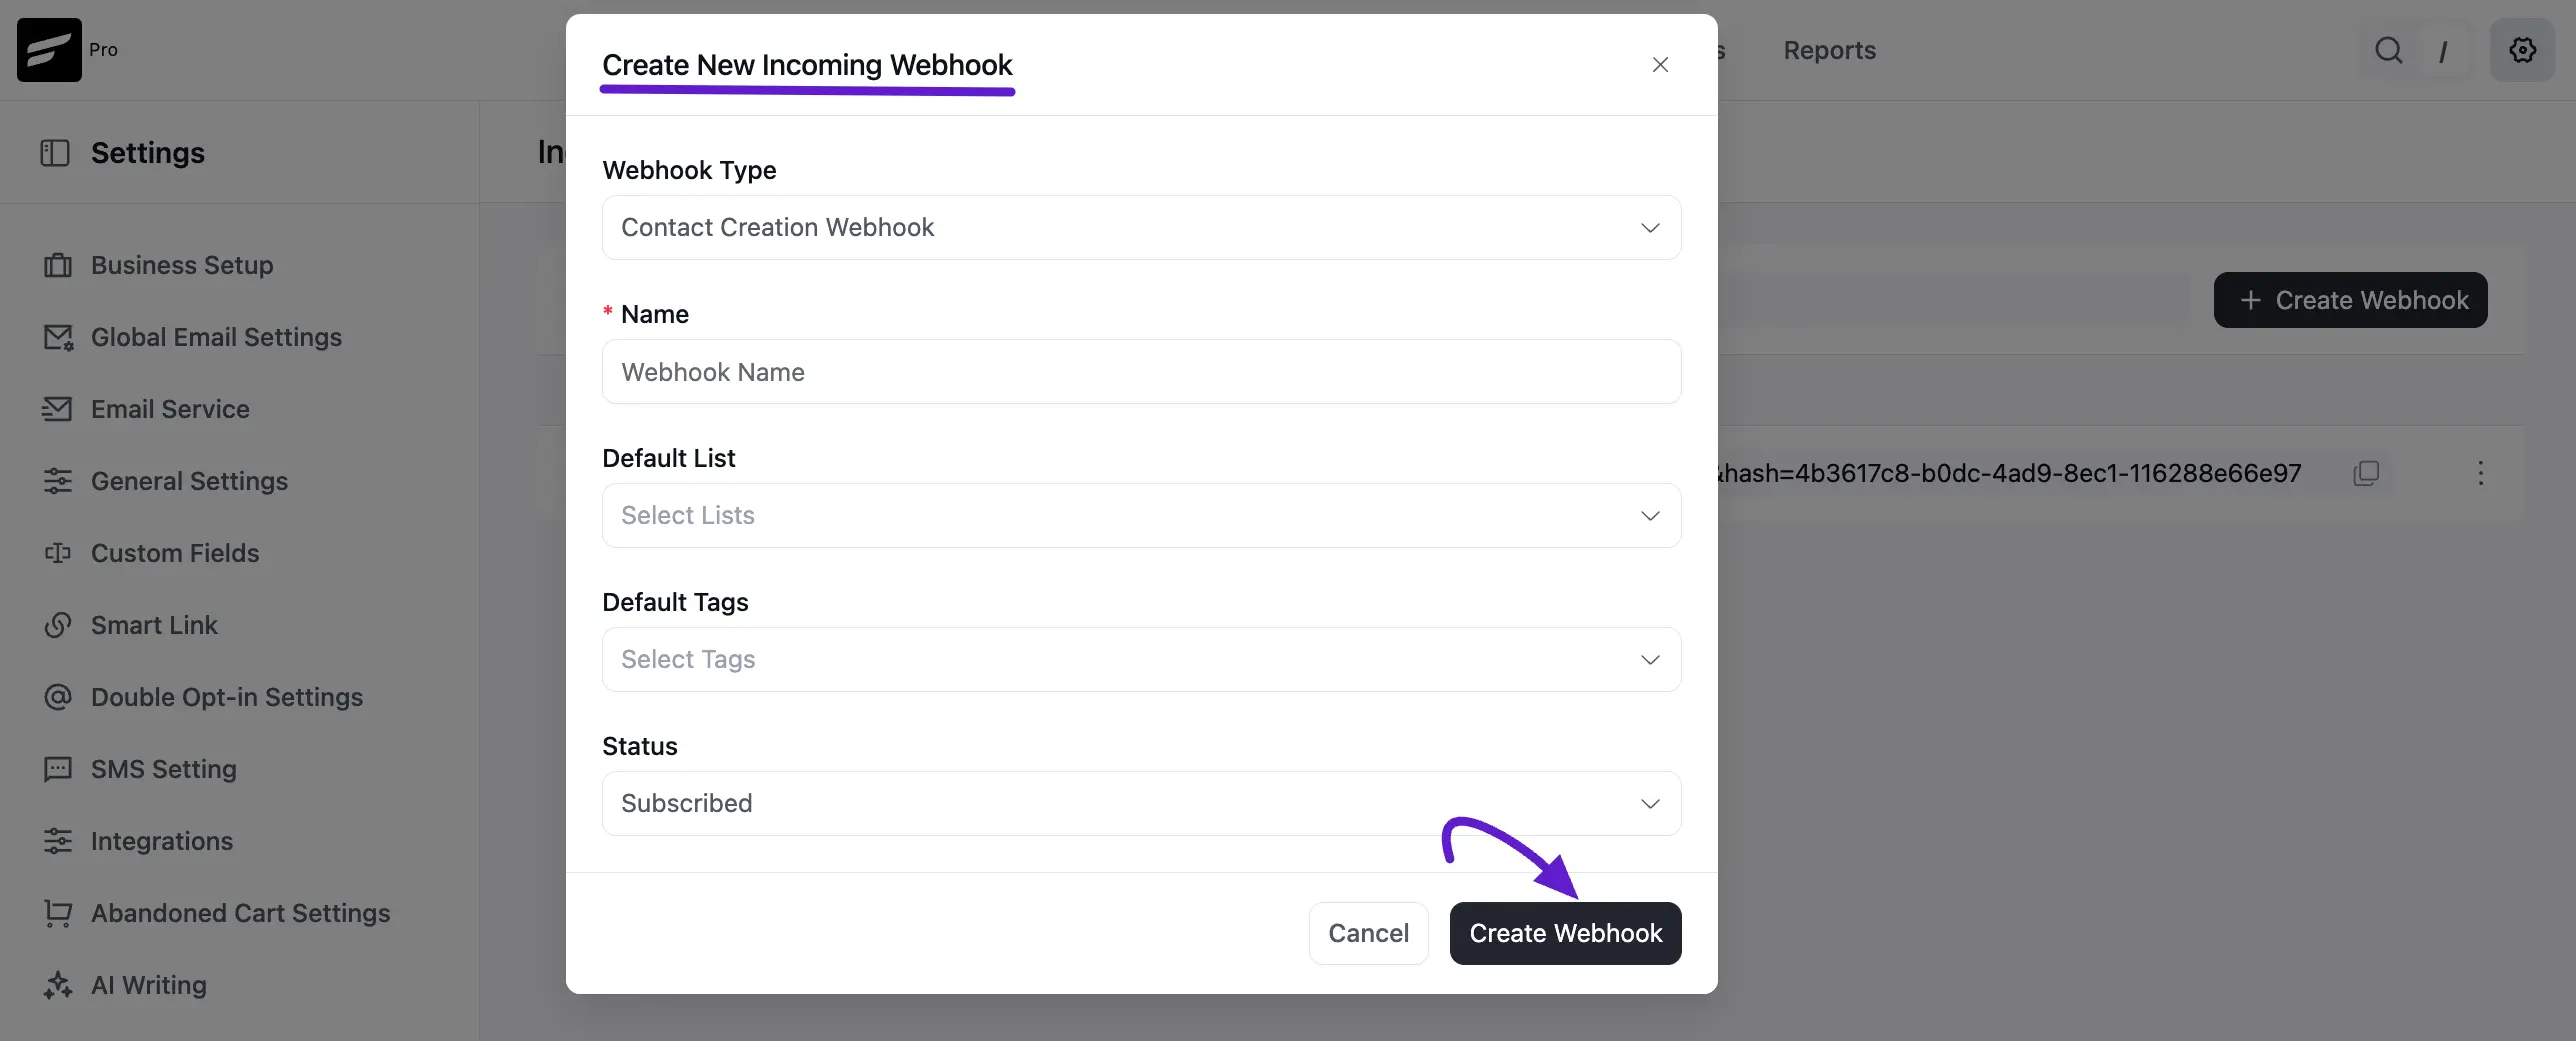
Now, Click the Create Webhook button. Upon creating the webhook, FluentCRM will automatically map the contact fields and show you the details. You can also add or change the selected list, tags, or status here.
Data Properties or Field Keys
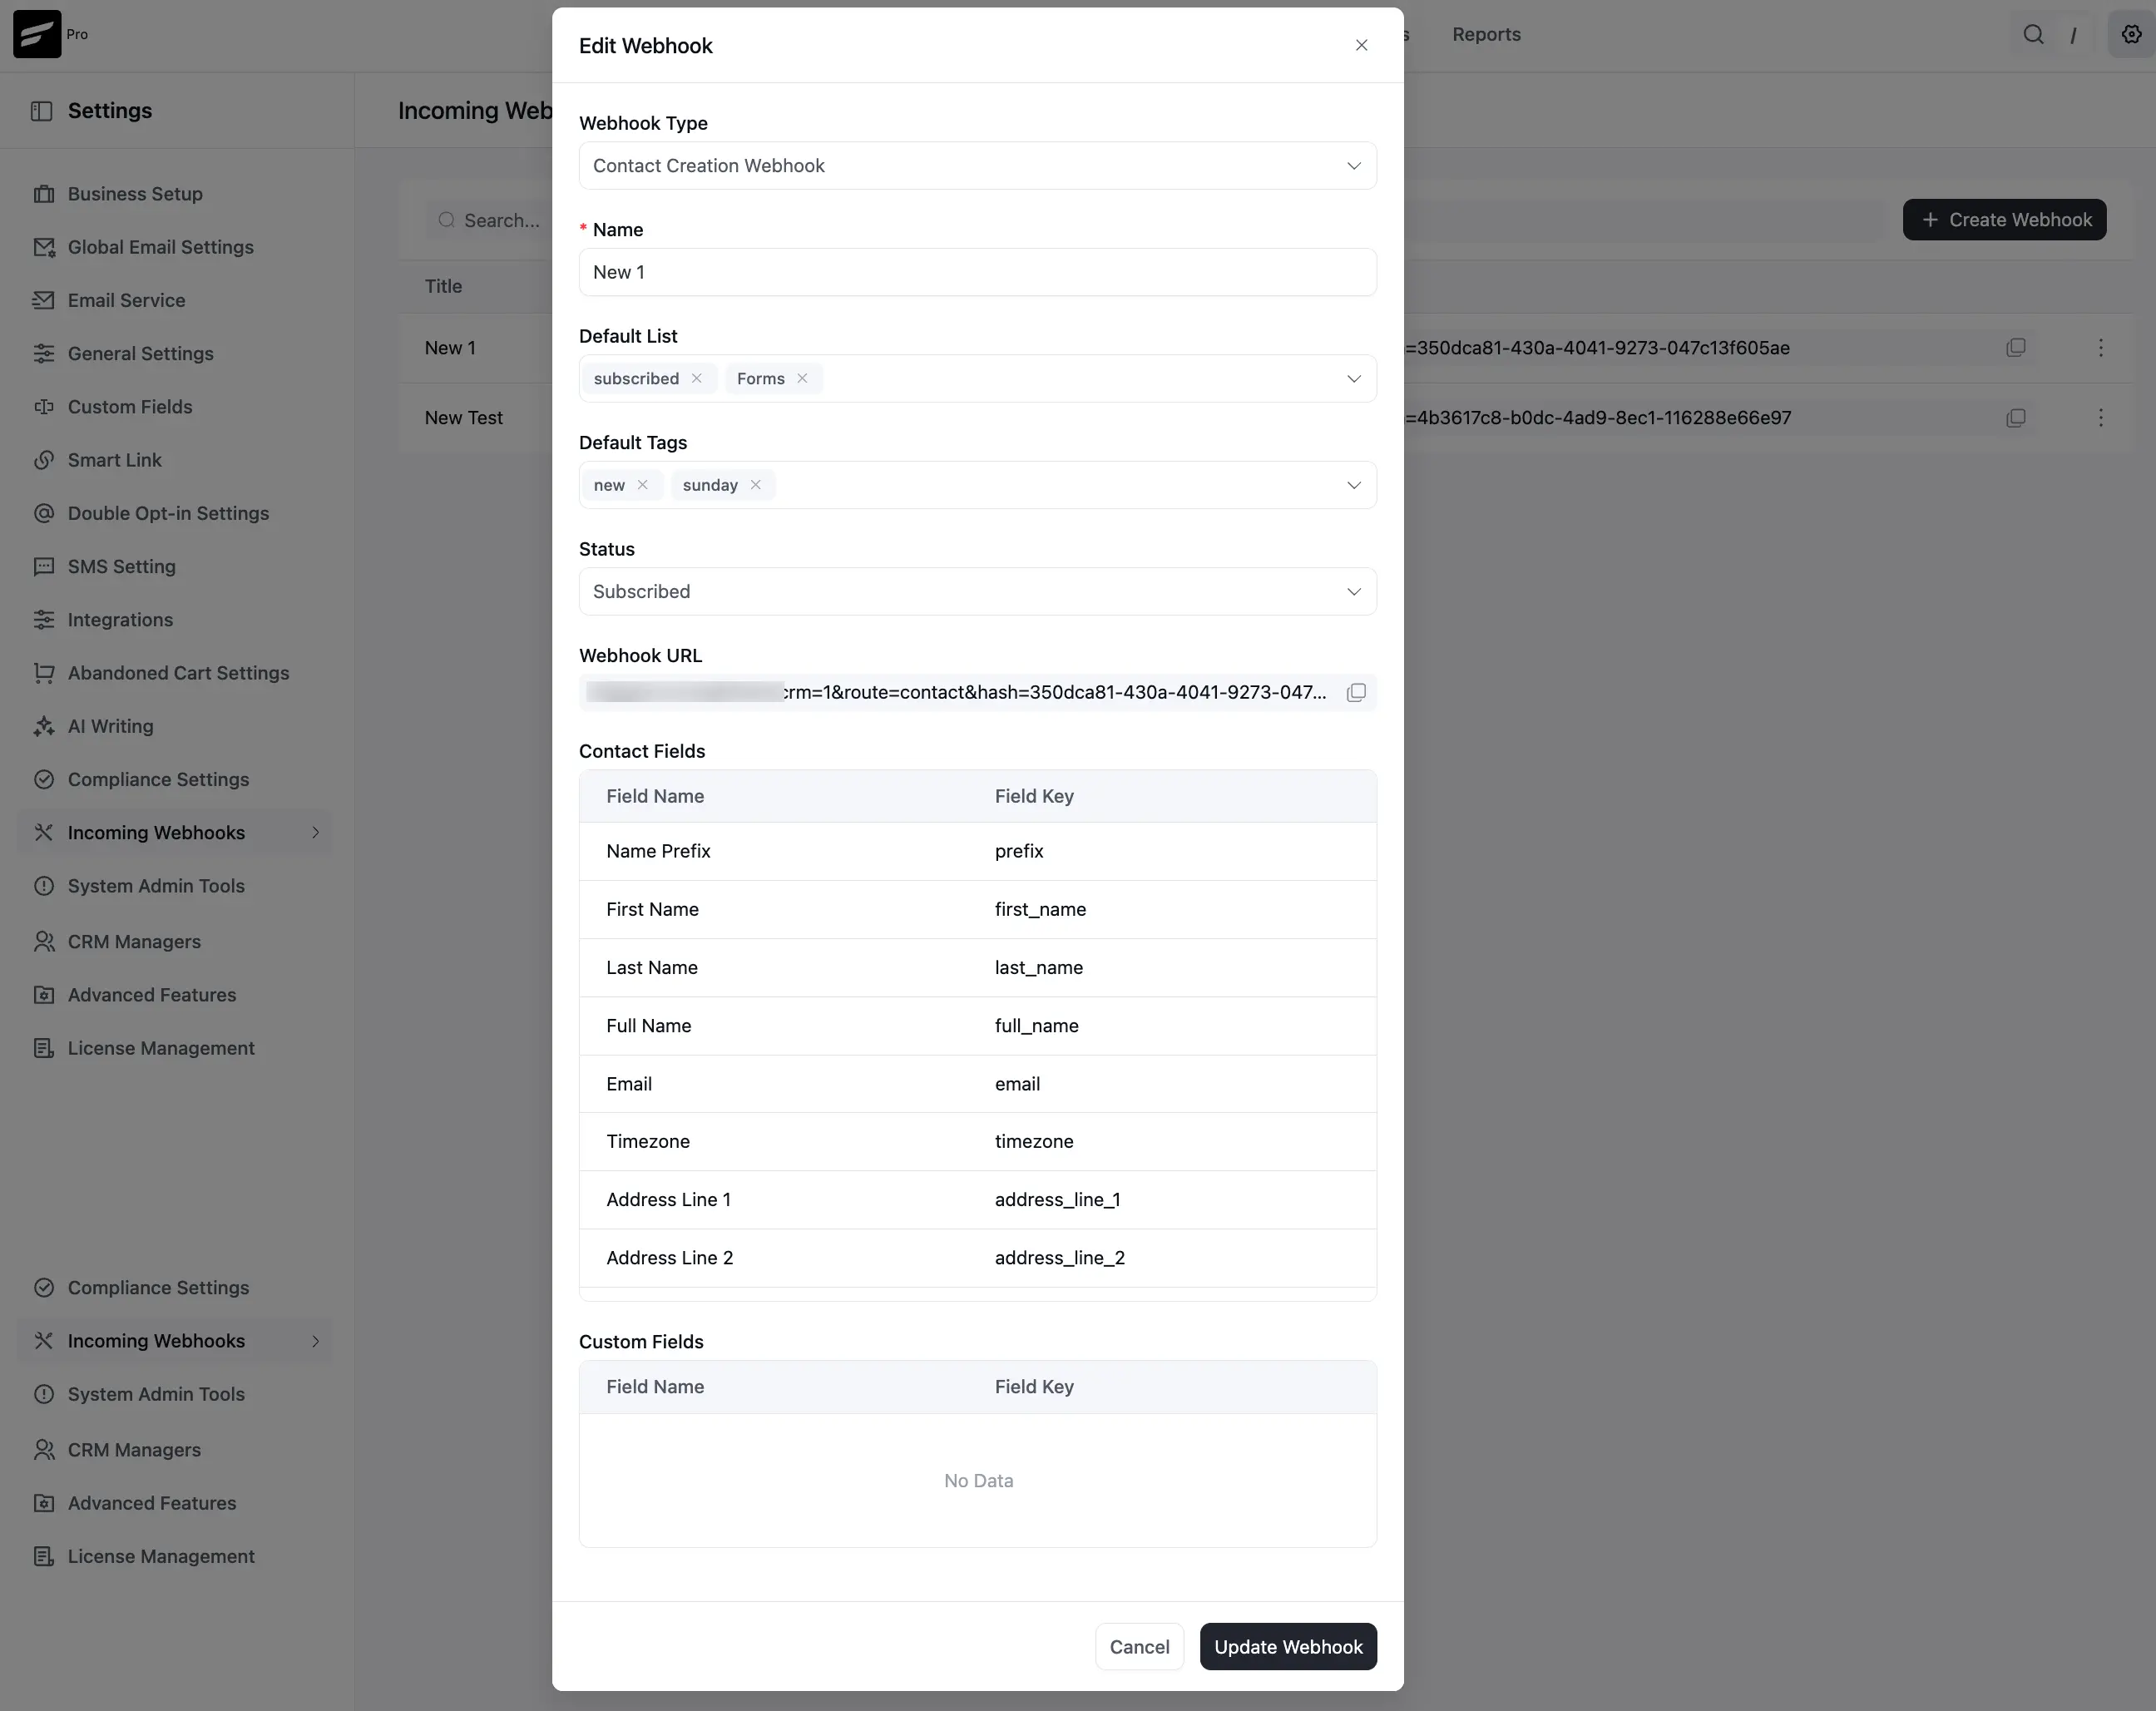
After creating the webhook successfully, you will see a confirmation message in the top-right corner. A unique Webhook URL will be generated, which you will use to send data to FluentCRM. You will also find a list of Fields with Keys that can be used for data mapping.
You can check the available keys from Contacts SmartCodes (use the key names without the when using them in the webhook).
Close the popup to return to the main screen. From there, you can copy the webhook URL using the copy button. You can also edit or delete the webhook anytime if you need to update the configuration.
Step 2: Configure Fluent Forms (The Sender)
On your remote website (where the form is located), you must set up the delivery of data to your primary CRM site.
Enable the Webhook Module
Go to Fluent Forms ➜ Integrations. Locate the WebHooks module and toggle it to Enable.

Create the Webhook Feed
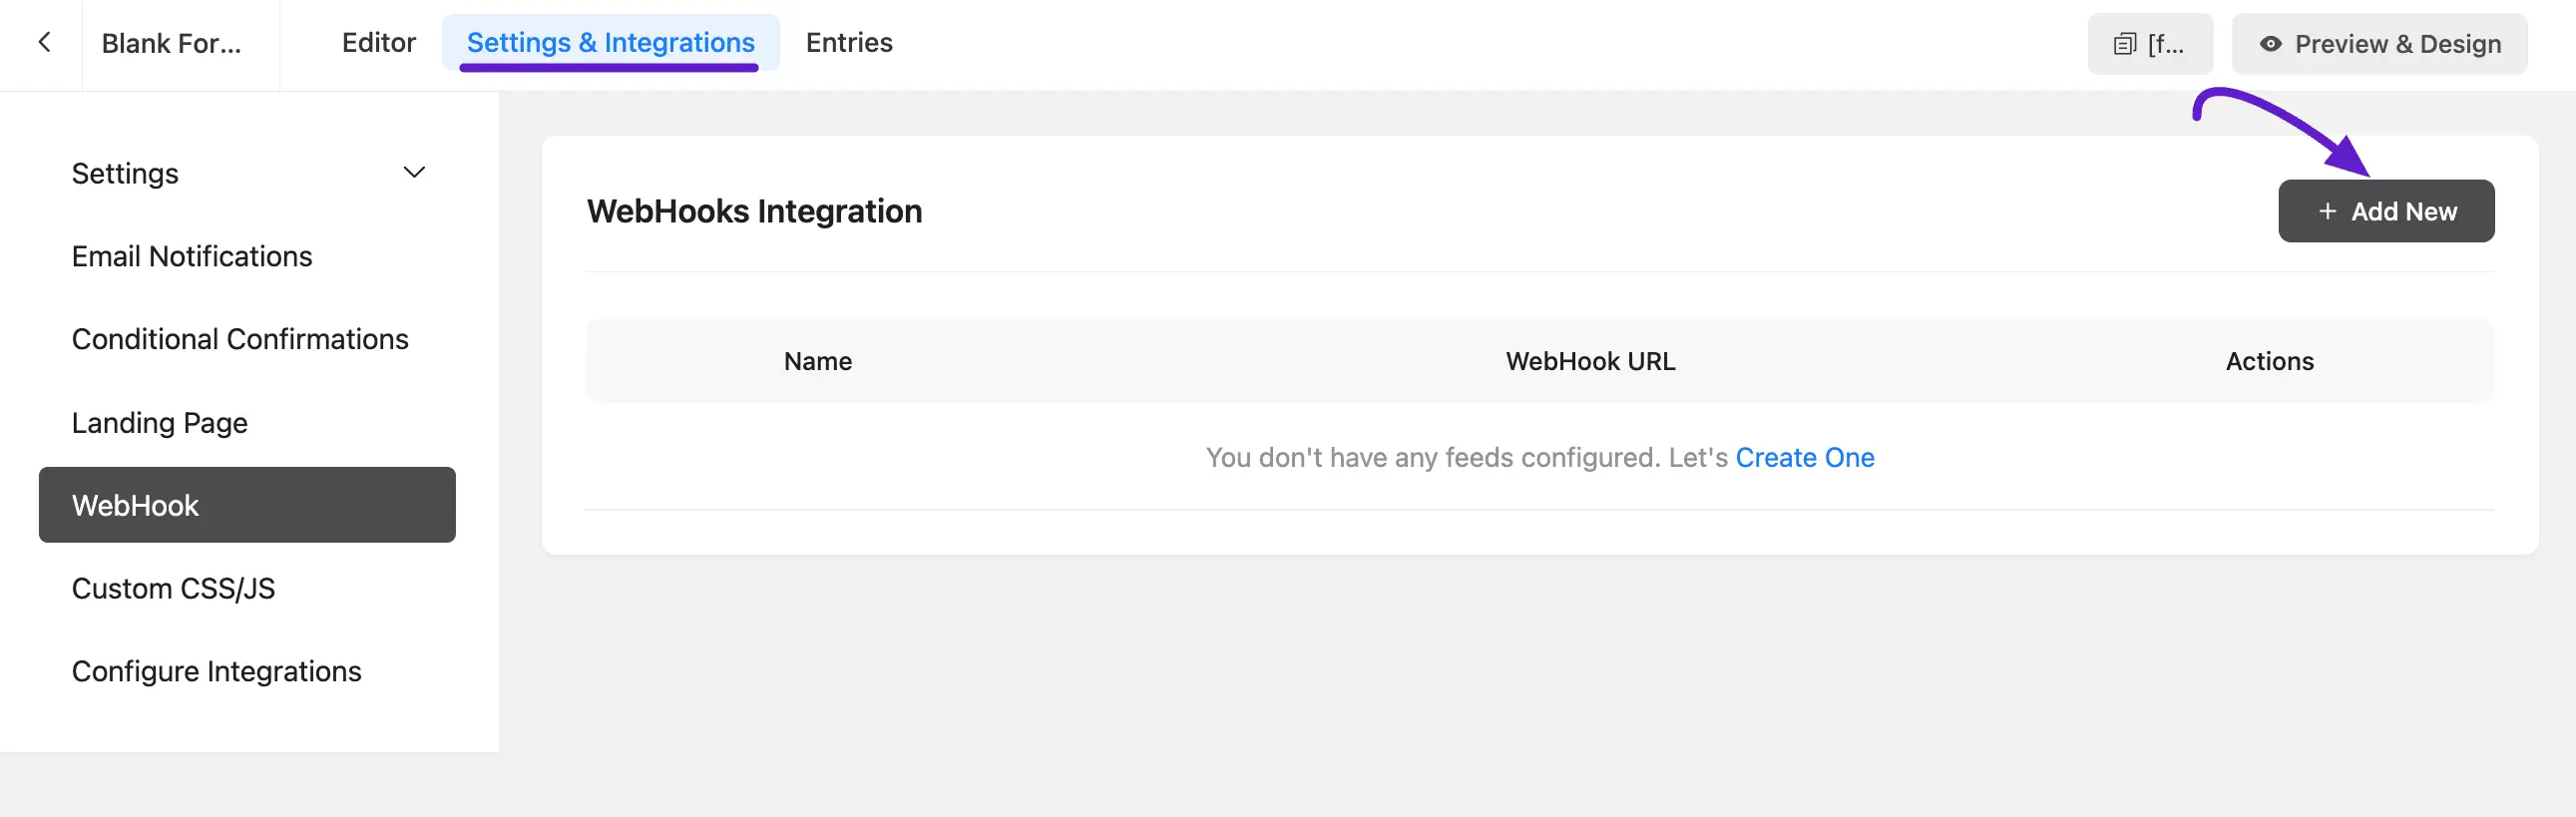
First, open the Settings for the specific form you wish to use. if you want to know how to create a form, read this Documentation.
Now, choose WebHook from the left sidebar and click +Add New.
Configure the Feed
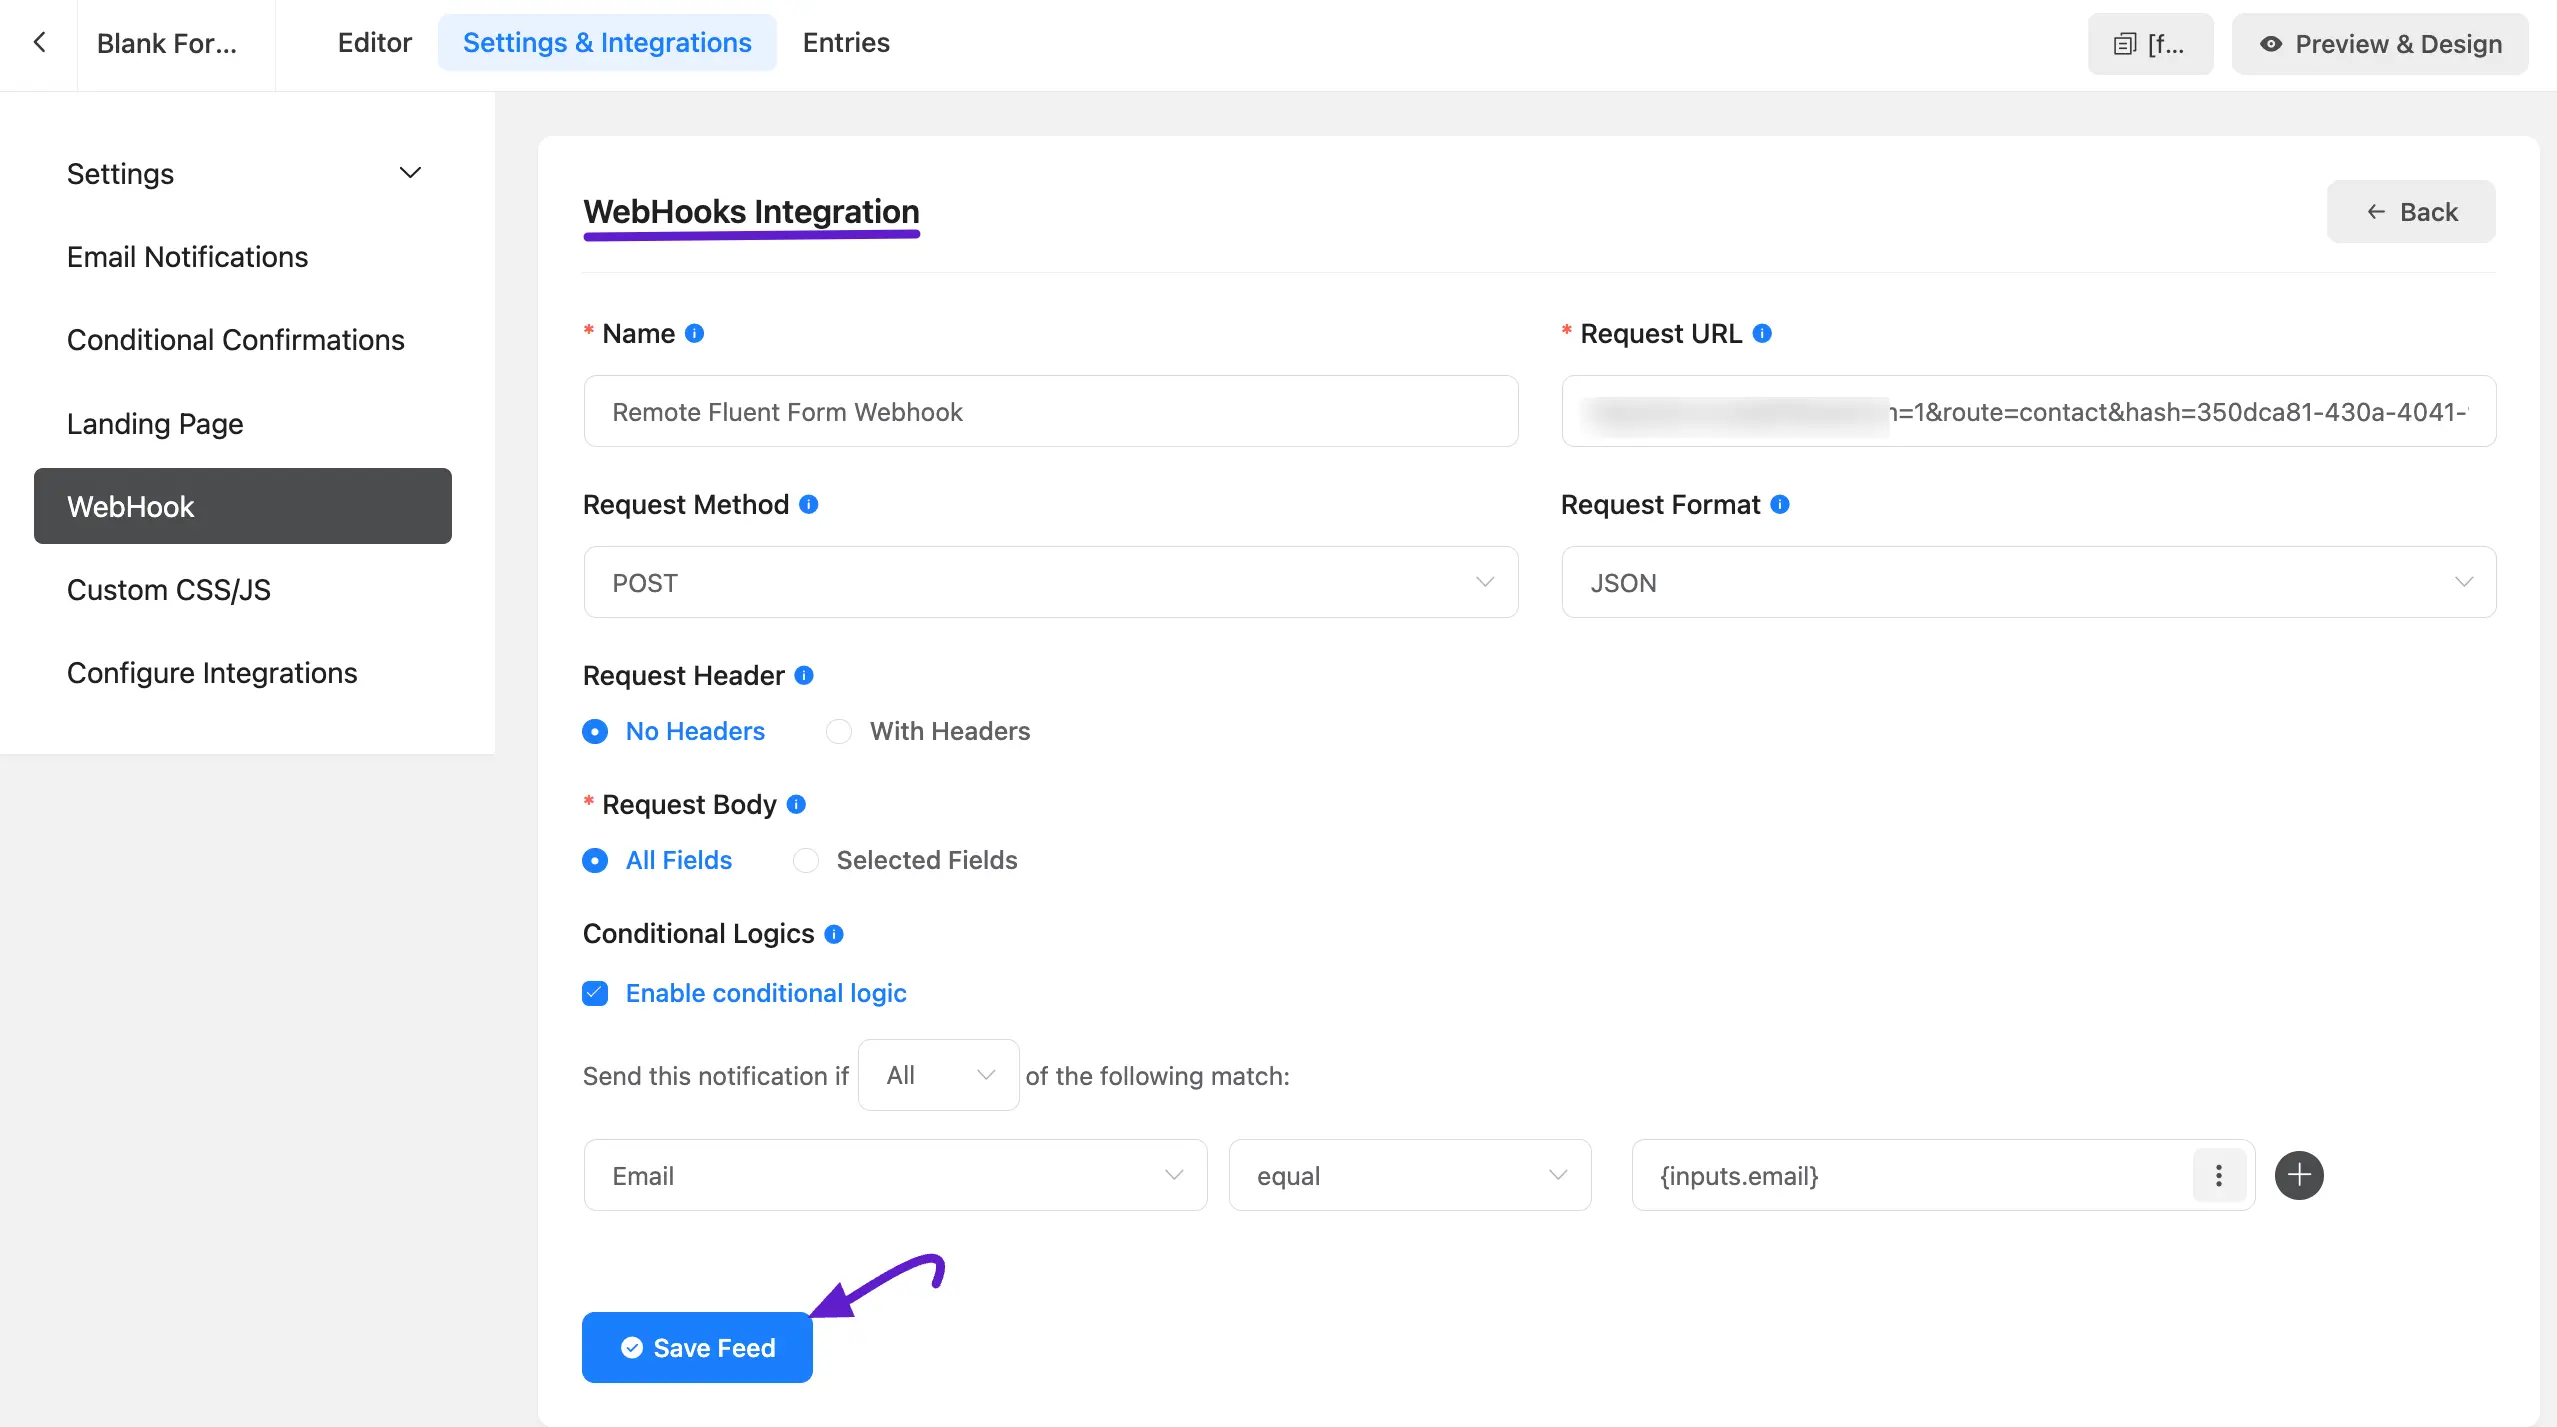
To successfully transmit data from your remote form to FluentCRM, you must configure the Webhook Integration settings with precision.
- Name: Provide a clear internal identifier for the feed, such as "Remote Fluent Form Webhook".
- Request URL: Paste the unique Incoming Webhook URL generated in your FluentCRM global settings.
- Request Method: Select POST from the dropdown menu to send data to the server.
- Request Format: Set this to JSON to ensure the data is structured correctly for FluentCRM.
- Request Header: Choose No Headers unless your specific server environment requires custom authentication.
- Request Body: Select All Fields to send all form data, or choose Selected Fields if you only need to map specific contact properties like email and name.
- Requested Field: The minimum required field to send the data is the Email Address and the key is email.
- Conditional Logics: You can enable this feature to only trigger the webhook if certain conditions are met, such as a specific email address or field value matching your criteria.
Once these fields are accurately populated, click the Save Feed button to activate the connection.
Step 3: Testing and Verification
After configuring the feed, perform a test submission on your remote form.
Form Entry Data
As we have seen in the Feed Status of Basic Configuration this might be confusing as the submission log will not show the webhook data processing in the General Section. The WebHook is a part of API Calls.

Inspecting the Feed
To verify that the data was sent correctly, go to the form's Entries on the remote site. Unlike standard integrations, webhook logs are found under the API Calls tab. Here, you can investigate the submission log to confirm a successful connection or troubleshoot failures.

Verifying the Contact
Check the Contacts dashboard on your primary FluentCRM website. You should see the new contact with the mapped data, assigned lists, and tags as defined in your webhook settings.
By following these steps, you can create multiple webhooks to gather leads from various domains and manage them all within a single, centralized FluentCRM installation.