Appearance
Export-Import Automations
Want to move a high-converting automation from a staging site to your live site? Or maybe you want to share a brilliant funnel with a friend? FluentCRM makes this incredibly easy!
You can seamlessly Export and Import any automation funnel using a simple JSON file. This saves you from having to rebuild complex workflows from scratch. Here is how to do it step-by-step.
How to Export an Automation
Exporting takes just two clicks. It will package your entire funnel structure into a small file downloaded to your computer.
- Go to FluentCRM → Automations from your WordPress dashboard.
- Find the automation funnel you want to export in your list.
- On the far right side of that funnel, click the Three-Dot Menu (⋮).
- Click Export.

A JSON file containing your automation will instantly download to your device!
How to Import an Automation
Importing is just as easy. FluentCRM provides a handy setup wizard to make sure all your tags, lists, and emails are mapped correctly to your current site.
Step 1: Upload Your File
- Go to the Automations dashboard.
- Look at the top right corner of the screen and click the More Action button here you will get the Import click on it.
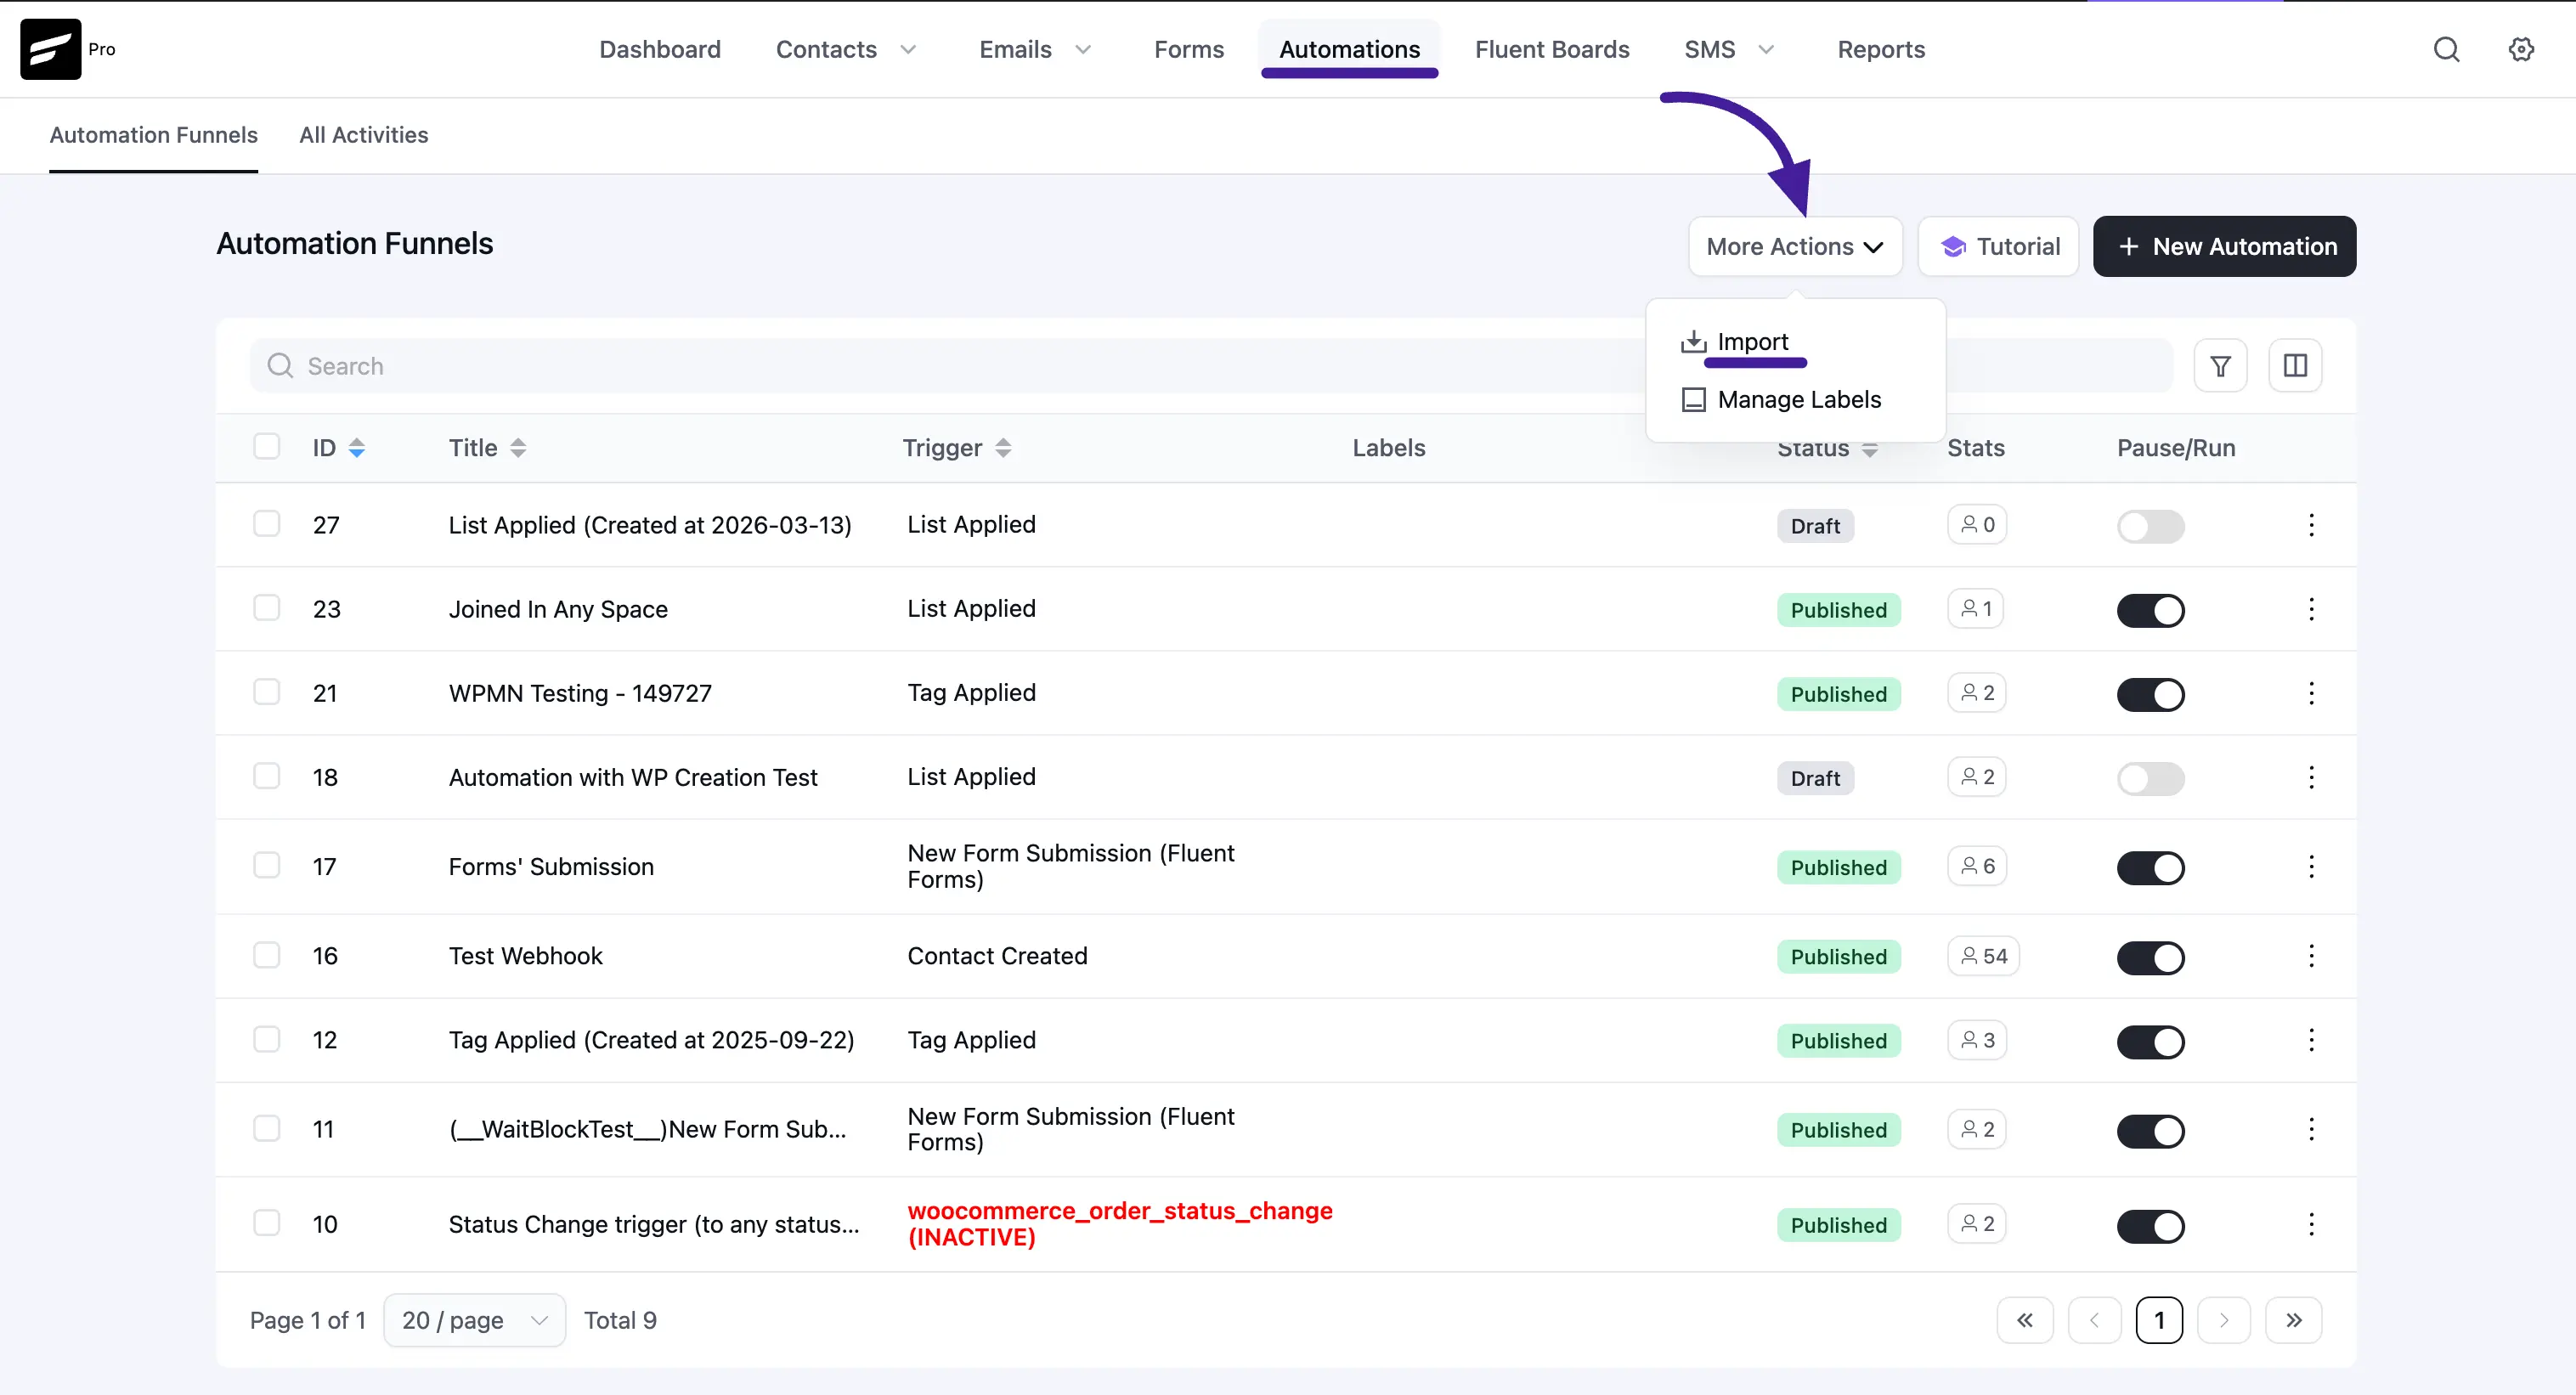
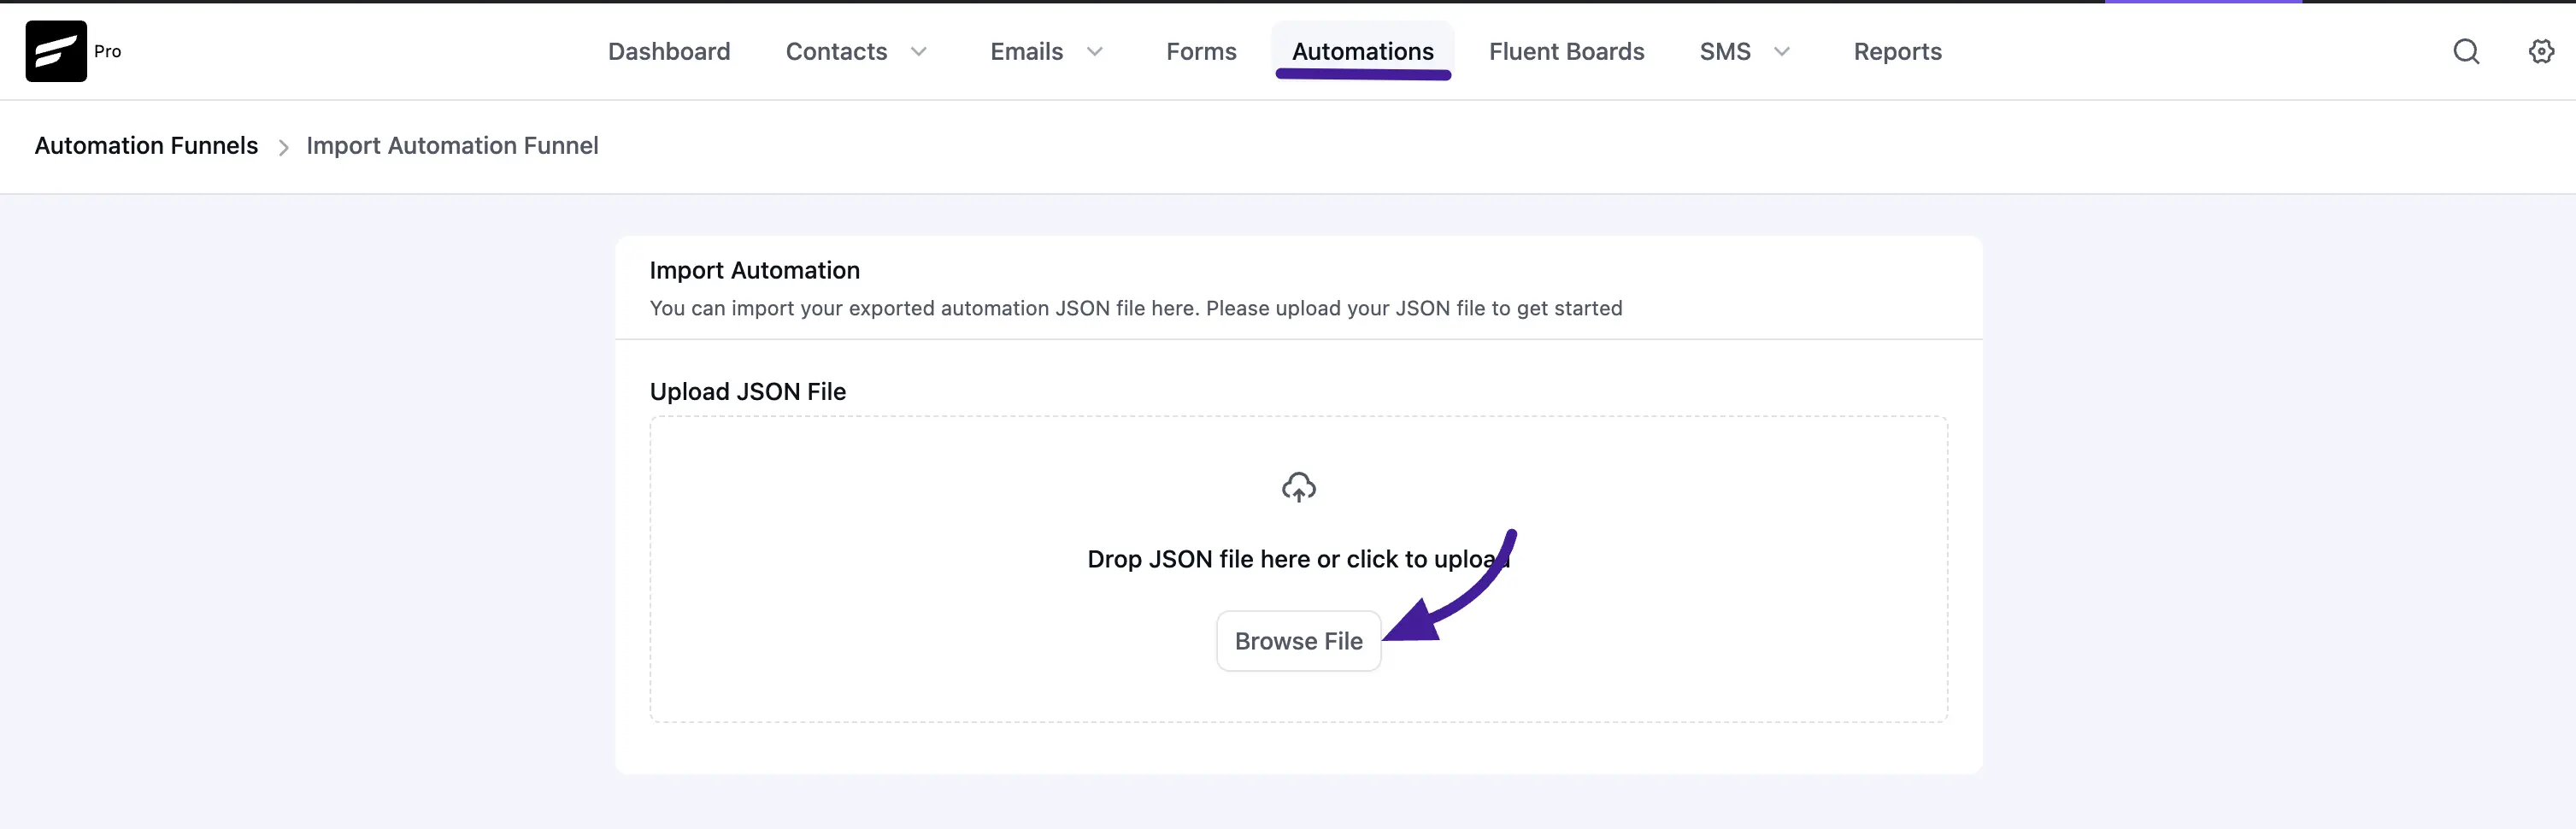
- A pop-up window will appear. You can either drag and drop your saved JSON file into the box or click Click to Upload to select it from your computer.
Step 2: Follow the Setup Wizard
Once you upload the file, FluentCRM will guide you through a quick 3-step wizard to organize your imported funnel:
- Step 1 - Information: Here, you can rename your funnel (Internal Name) and add a quick description (System Label) so you easily recognize it later. Click Next.
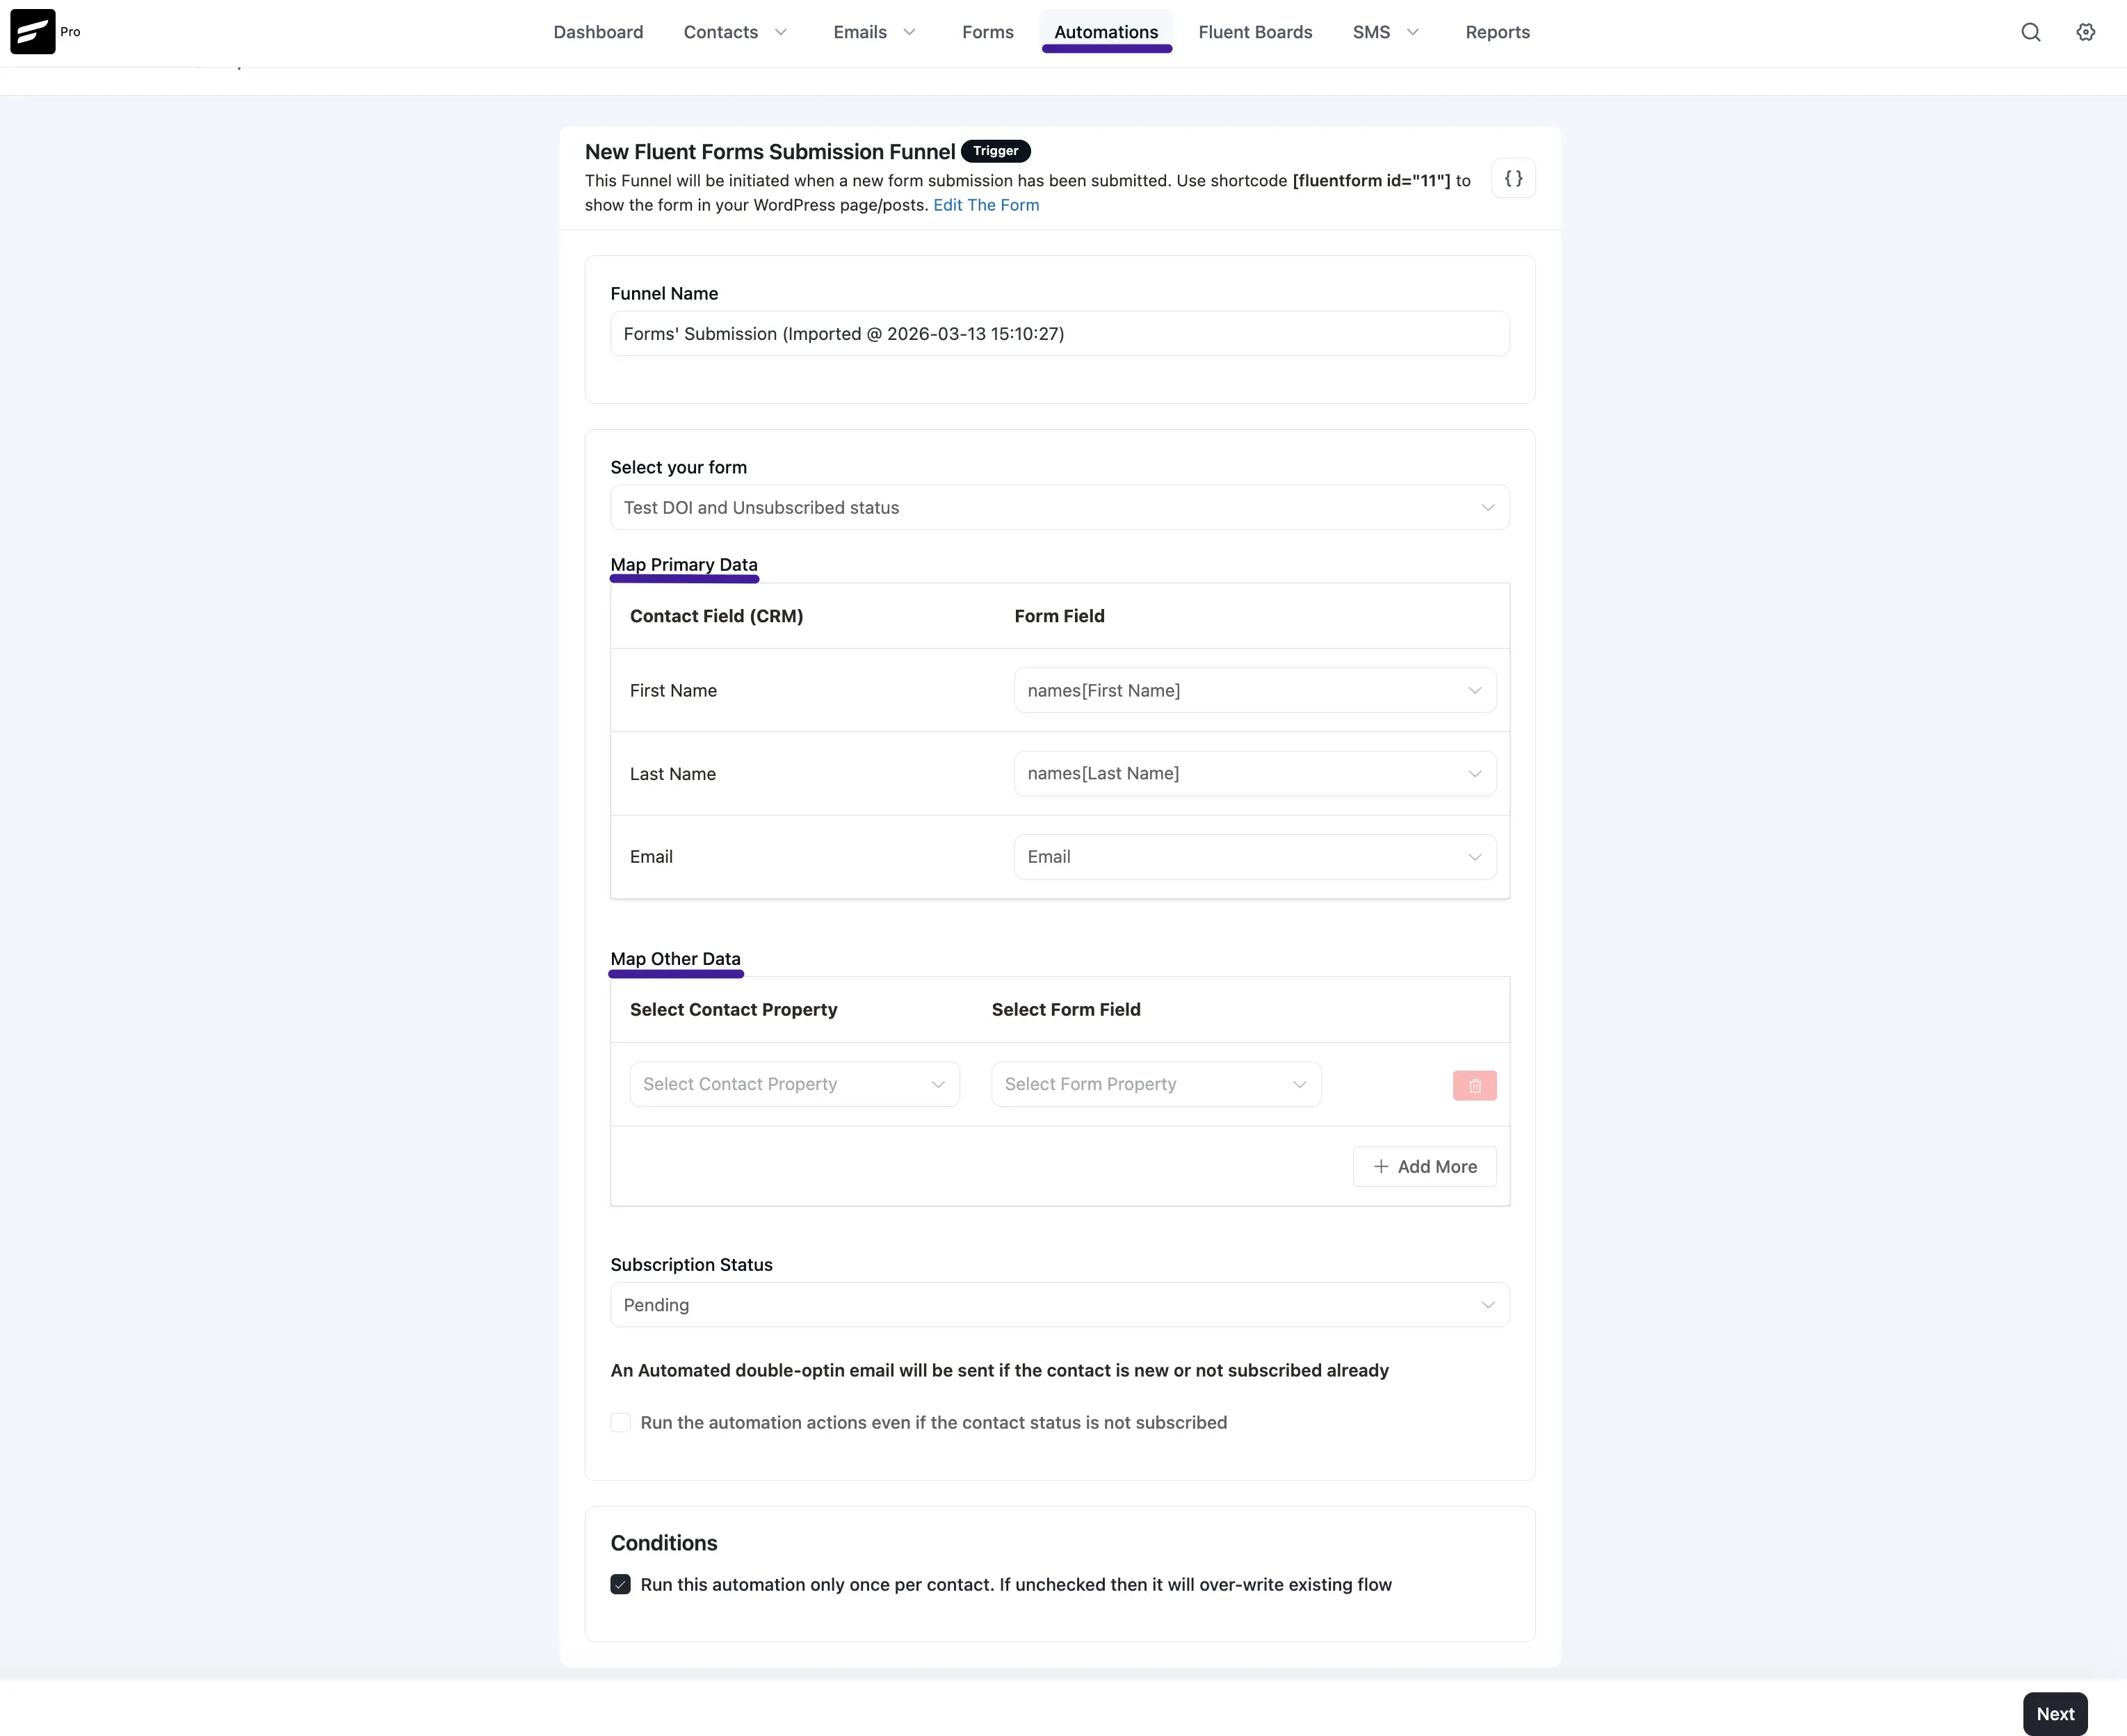
- Step 2 - Map Data: This is a crucial step! FluentCRM will ask you to match the data from the imported file to your current website. For example, you can set the default Subscription Status or map an imported Email Sequence to an existing sequence on your site. Click Next.
- Step 3 - Setup Actions: FluentCRM will show you a summary of the custom emails or specific actions included in this funnel. Review them, and then click the blue Complete Import button.
Note: If you make a mistake during the setup, you can always click the Go Back button at the bottom!
You're Done! (Next Steps)
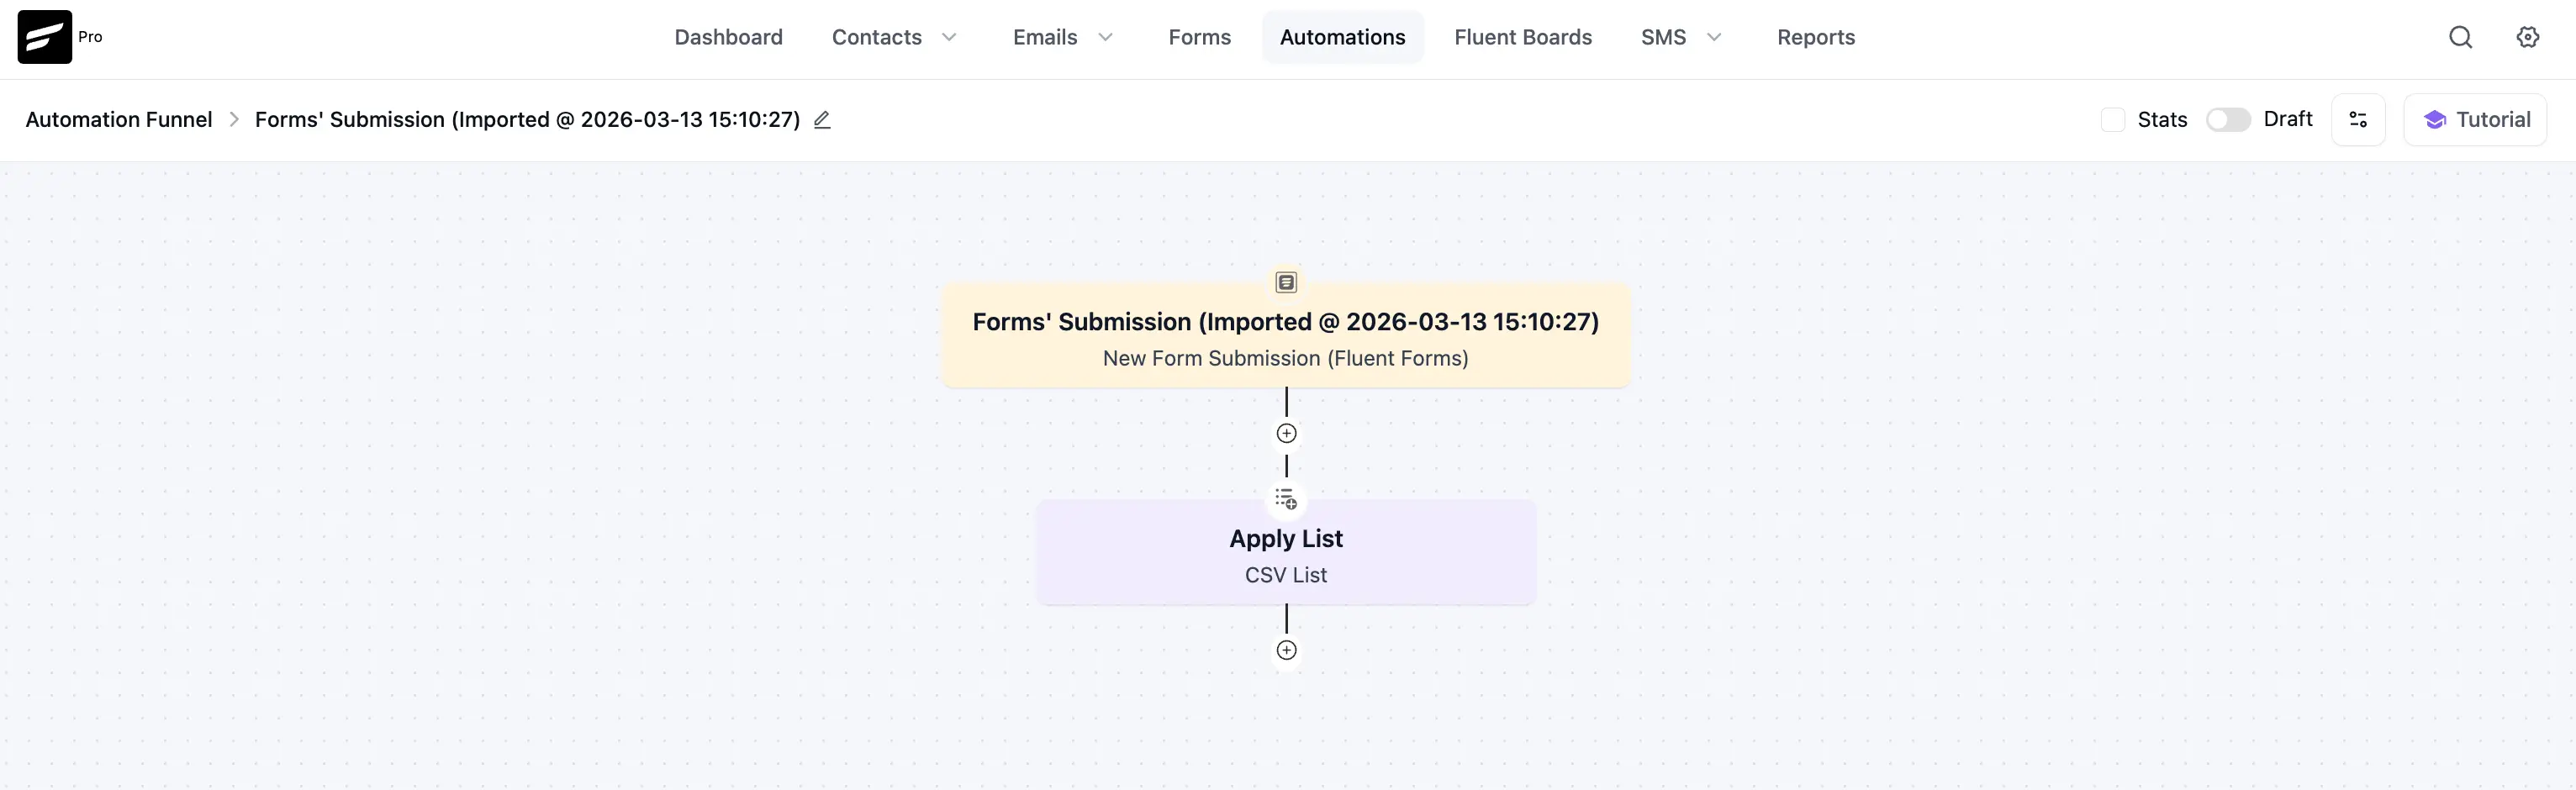
Once you click Complete Import, you will be redirected straight to the Automation Editor with your newly imported funnel ready to go.
⚠️ Important: All imported automations are brought in as a Draft to keep your site safe. Before going live, we highly recommend clicking through your action blocks just to ensure everything is set up perfectly. Once you are happy, toggle the switch in the top right corner to Published!