Appearance
Event Tracking Automation
Event Tracking in FluentCRM lets you record any custom action a contact takes on your site and use that data to trigger or branch your automations. For example: you could track a "watched-demo" event each time a contact views your product demo page, then automatically send a follow-up email the moment they watch it for the second time — without any manual work.
Enable Event Tracking Module
First, navigate to the FluentCRM Dashboard then click on the Addons section from the left WordPress sidebar. Here you'll see the Event Tracking Module. Now click on the Setting button to enable event tracking activity.
A pop-up will appear, enable the Checkbox and click the Save Settings button.
![]()
Event Tracking With Automation
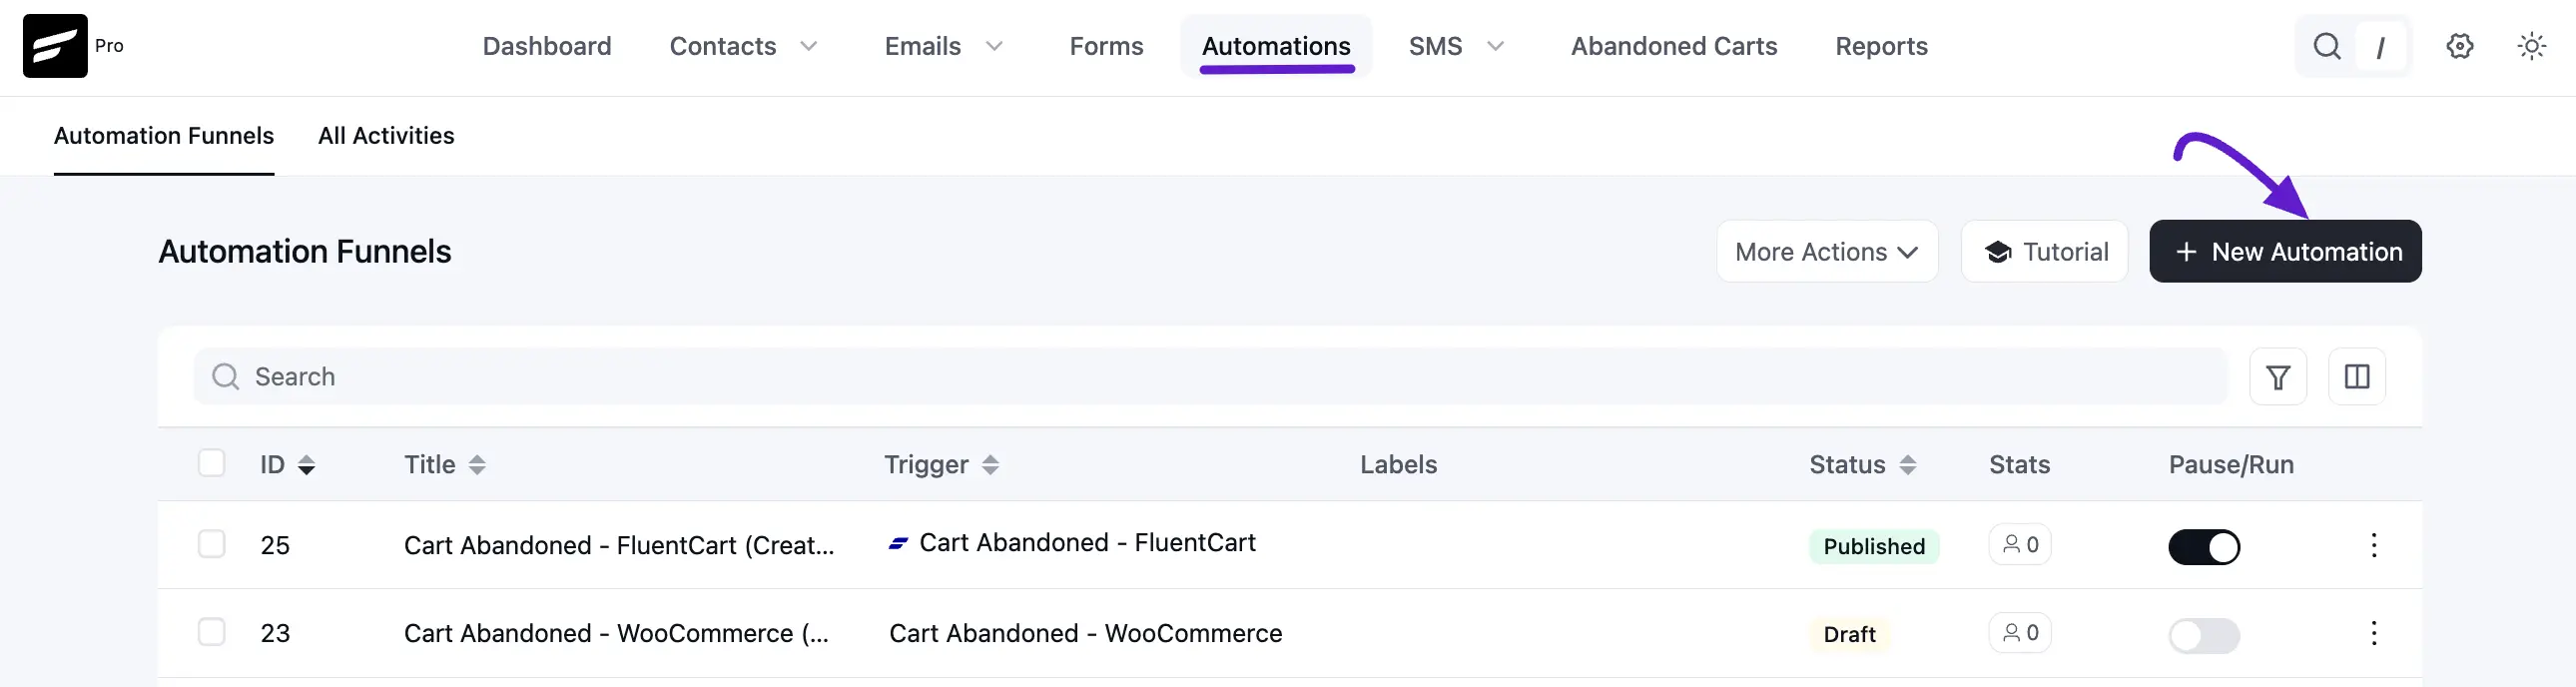
Go to your FluentCRM dashboard and navigate to Automation. Click on the + New Automation button.
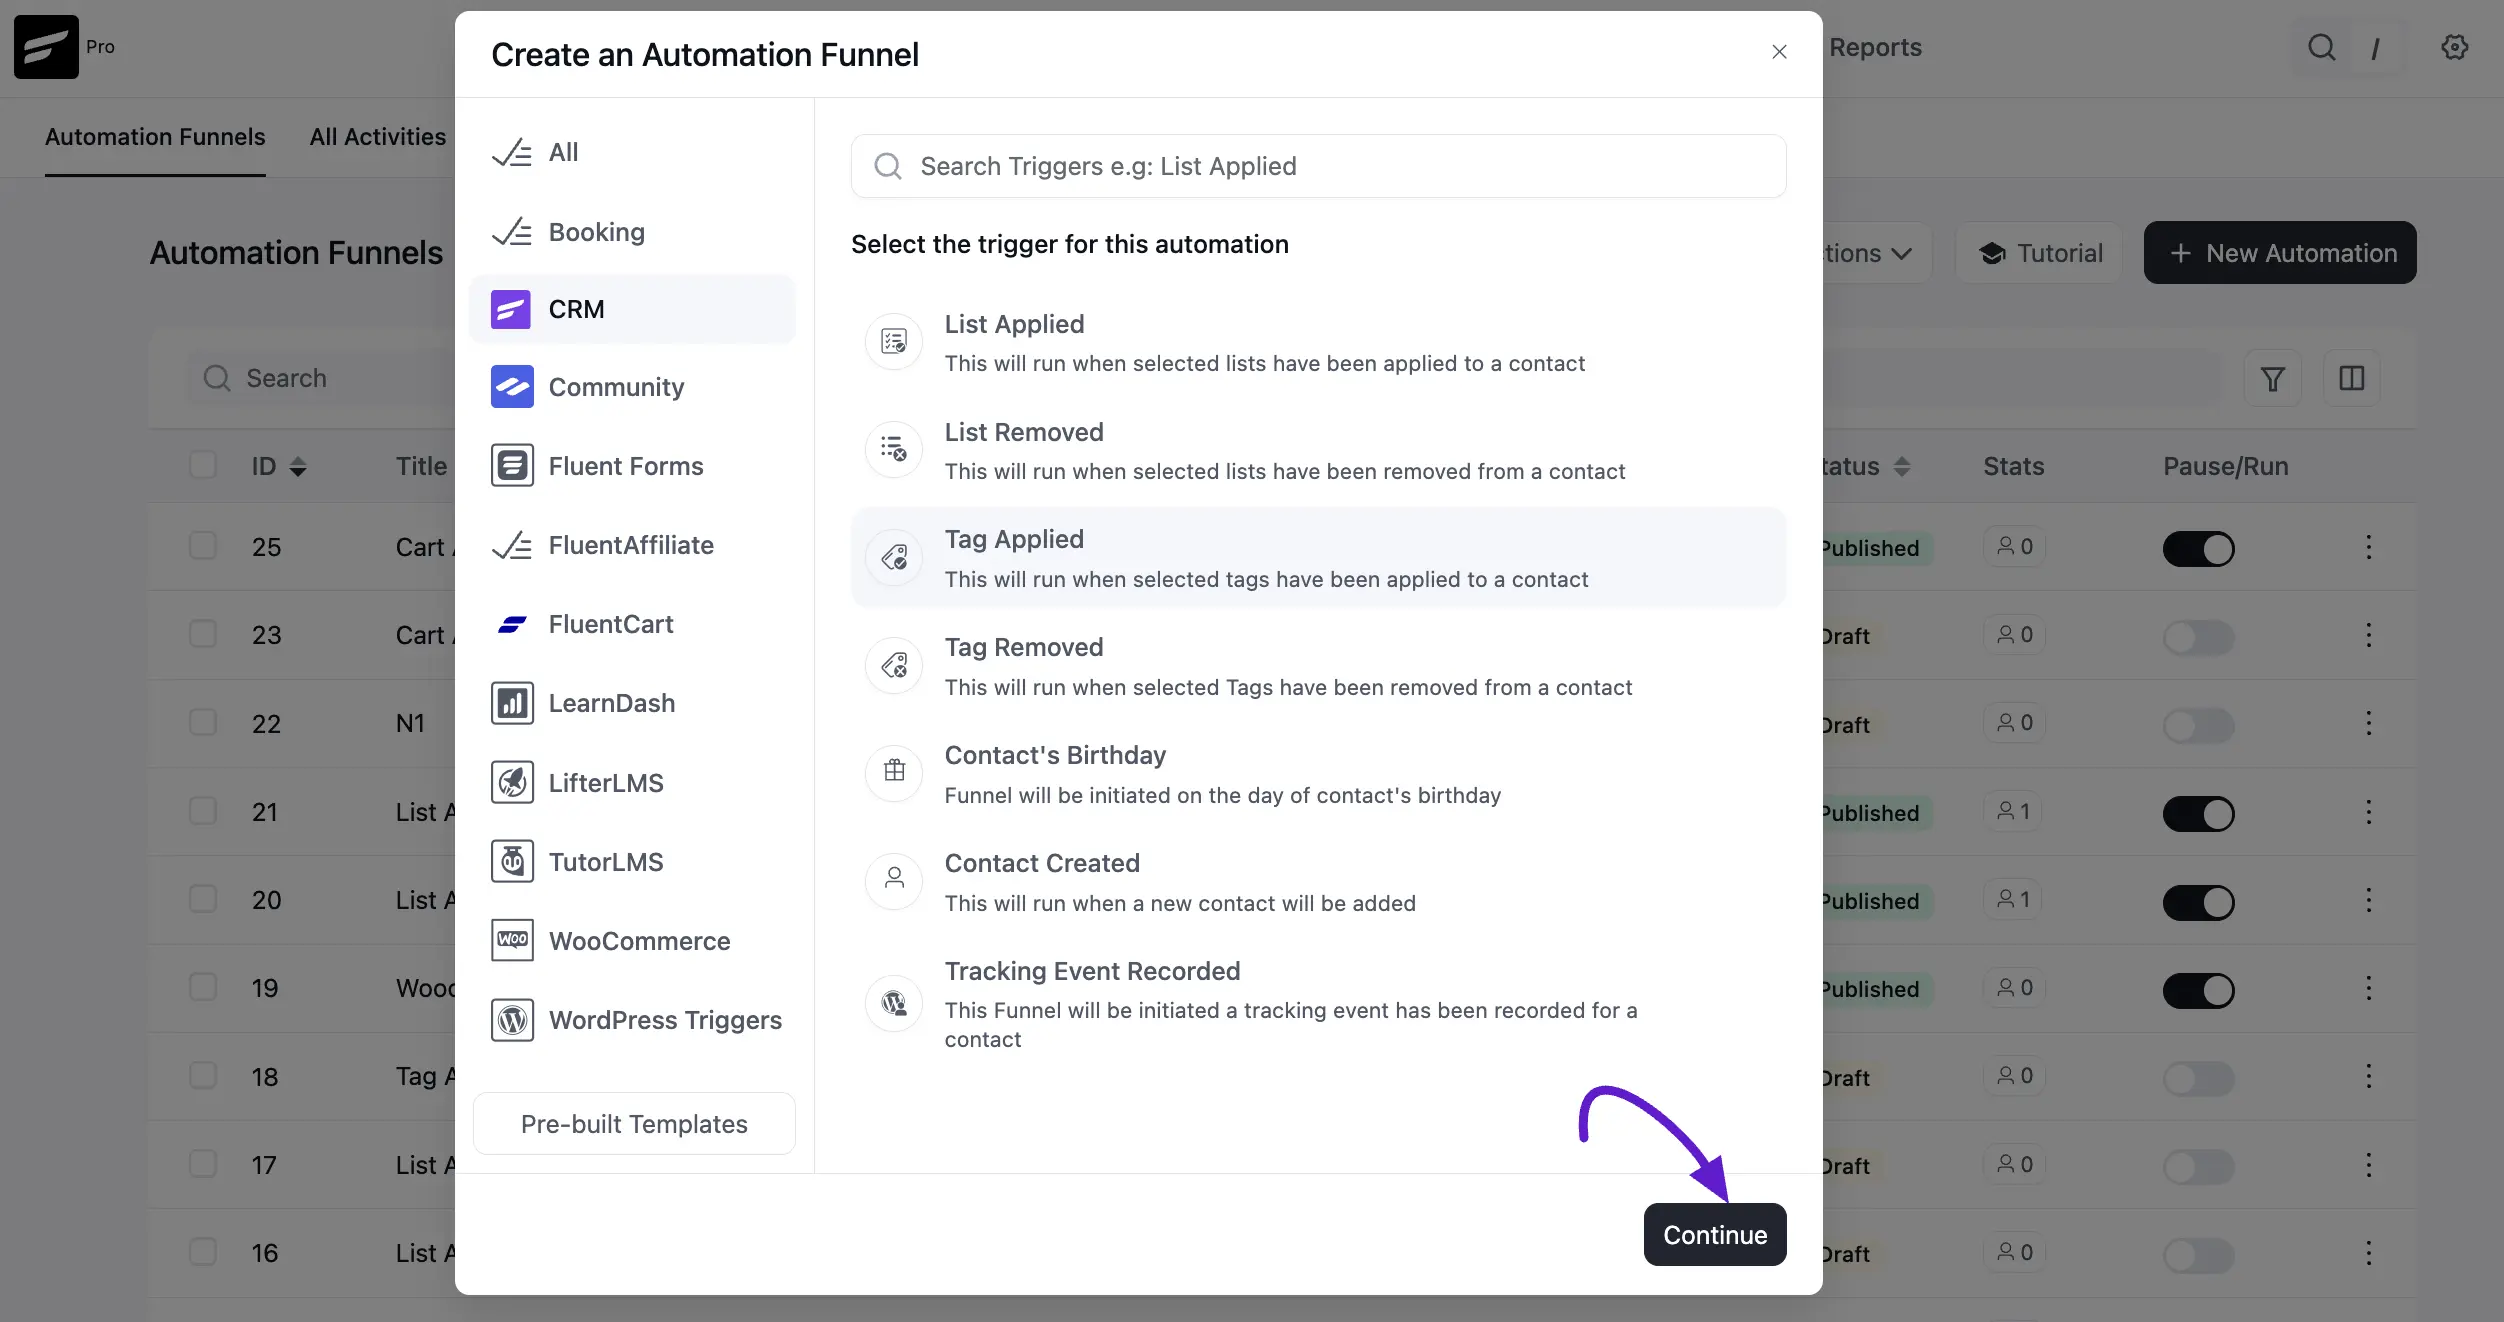
A popup will appear. Now select the Tag Applied automation trigger and press the Continue button to start the automation.
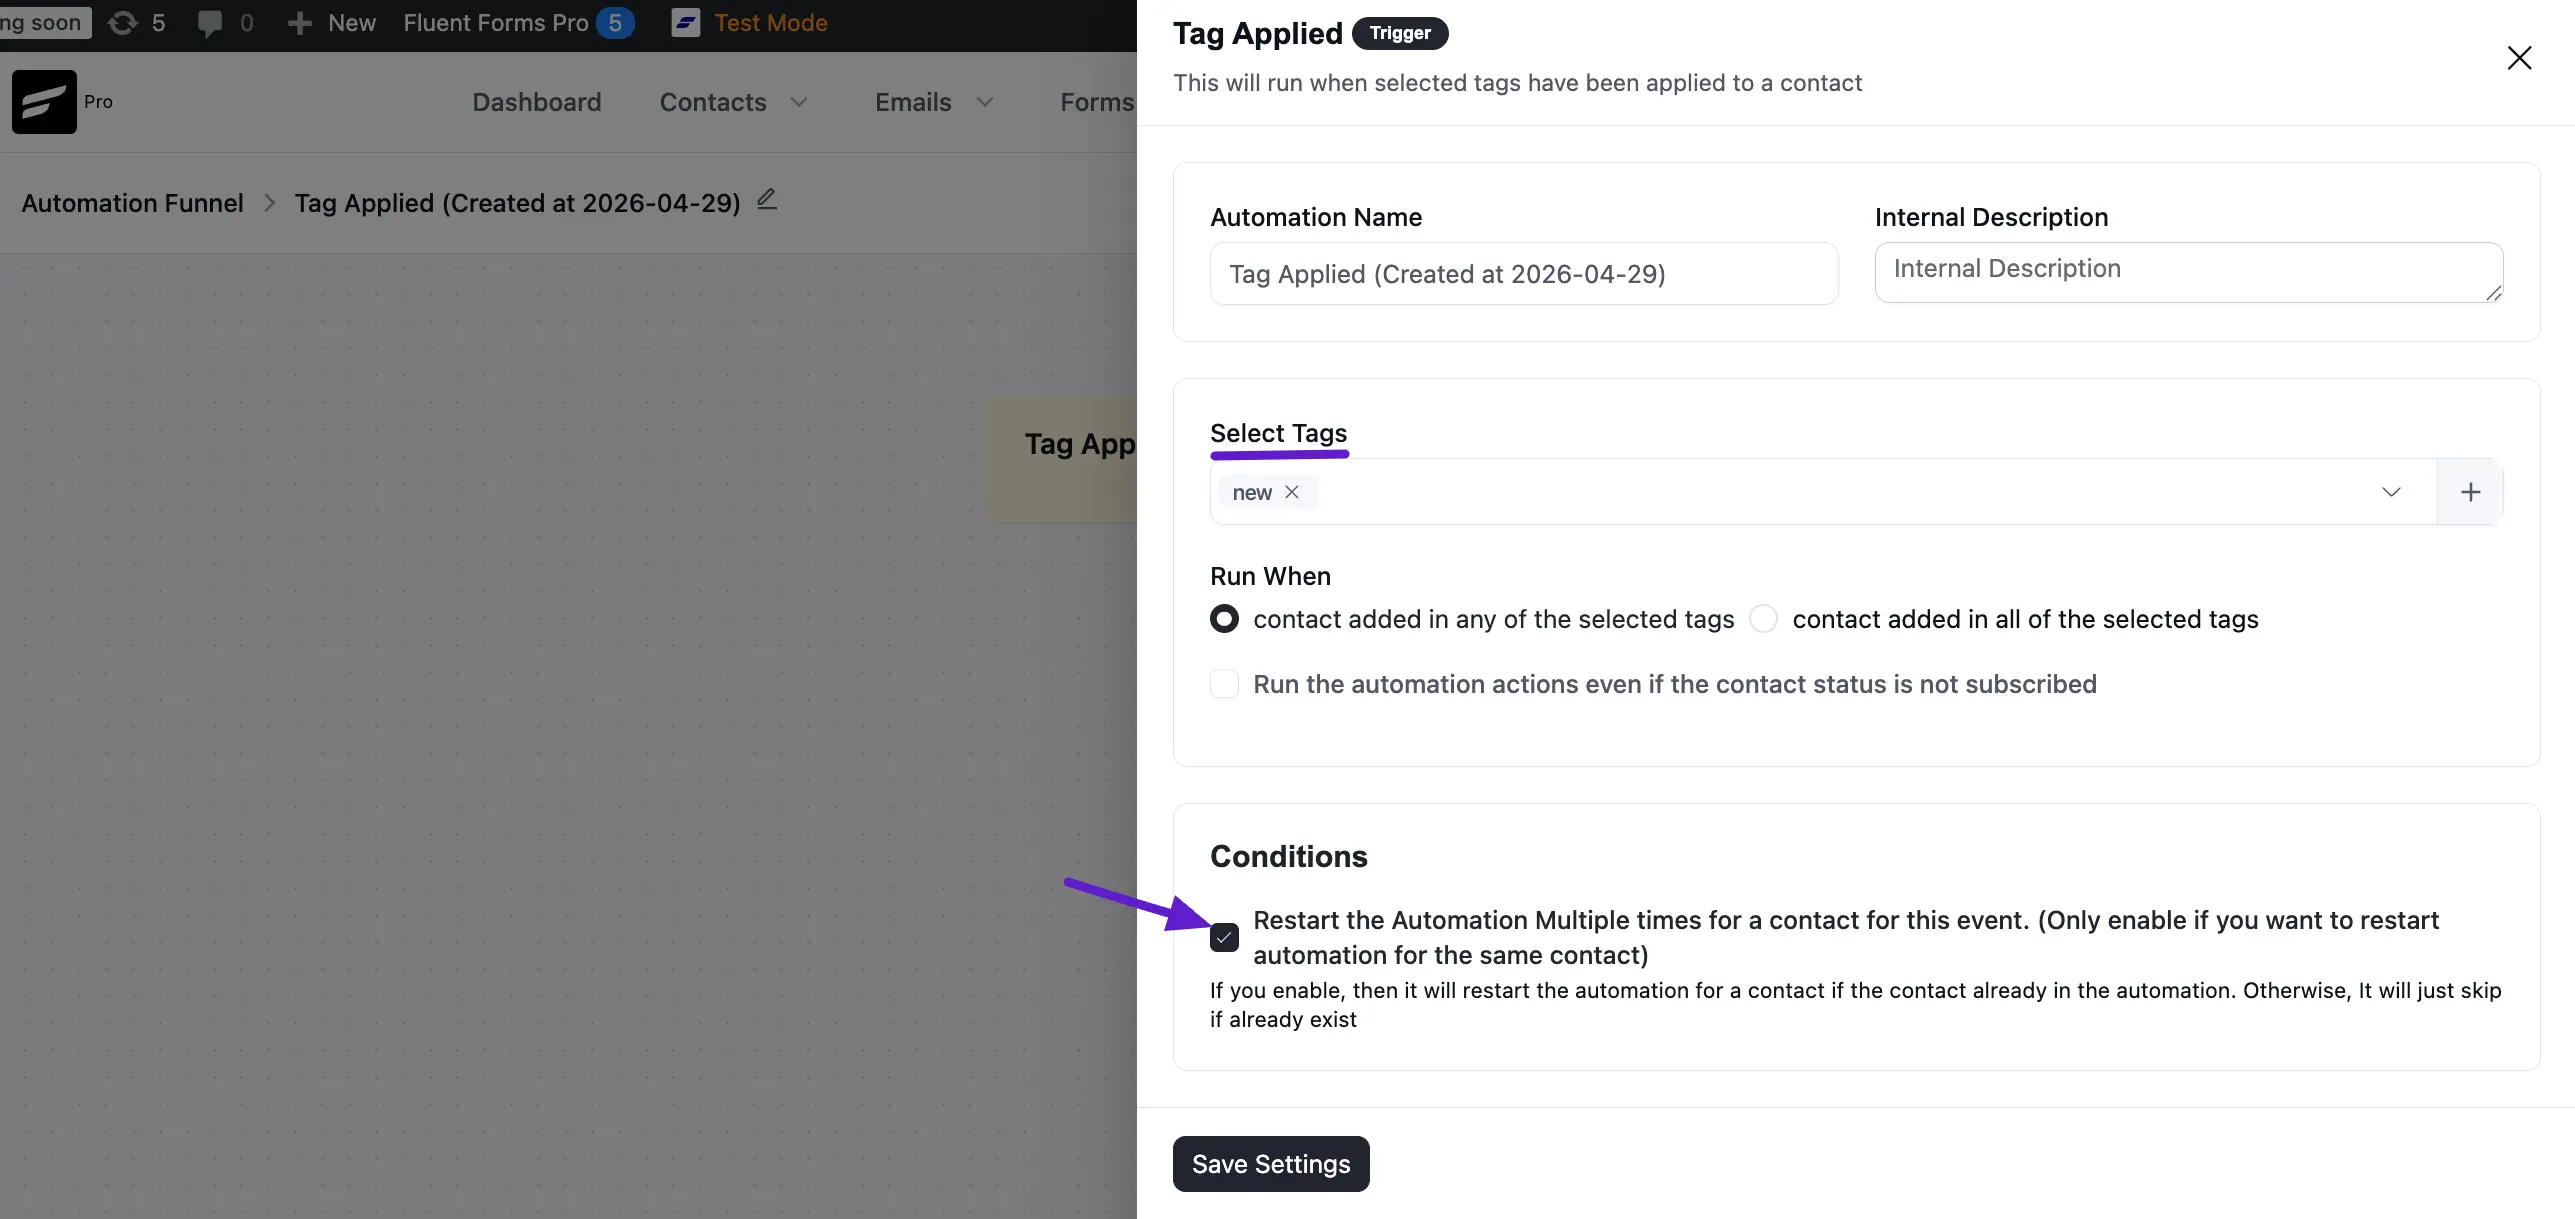
Now here opens a new popup. Set the Automation name and put a Description in the Internal Description boxes. Now select Tags for your FluentCRM contact base. You can add multiple Tags from your CRM contacts.
Next, select the Run When tag option and tick the radio button. Here you'll see three options:
- Contact added in any of the selected tags
- Contact added in all of the selected tags
- Run the automation actions even if the contact status is not subscribed.
If you want to automatically restart the automation multiple times check the conditions checkbox.
Now Click the Save Settings button to save it.
Event Tracking Action
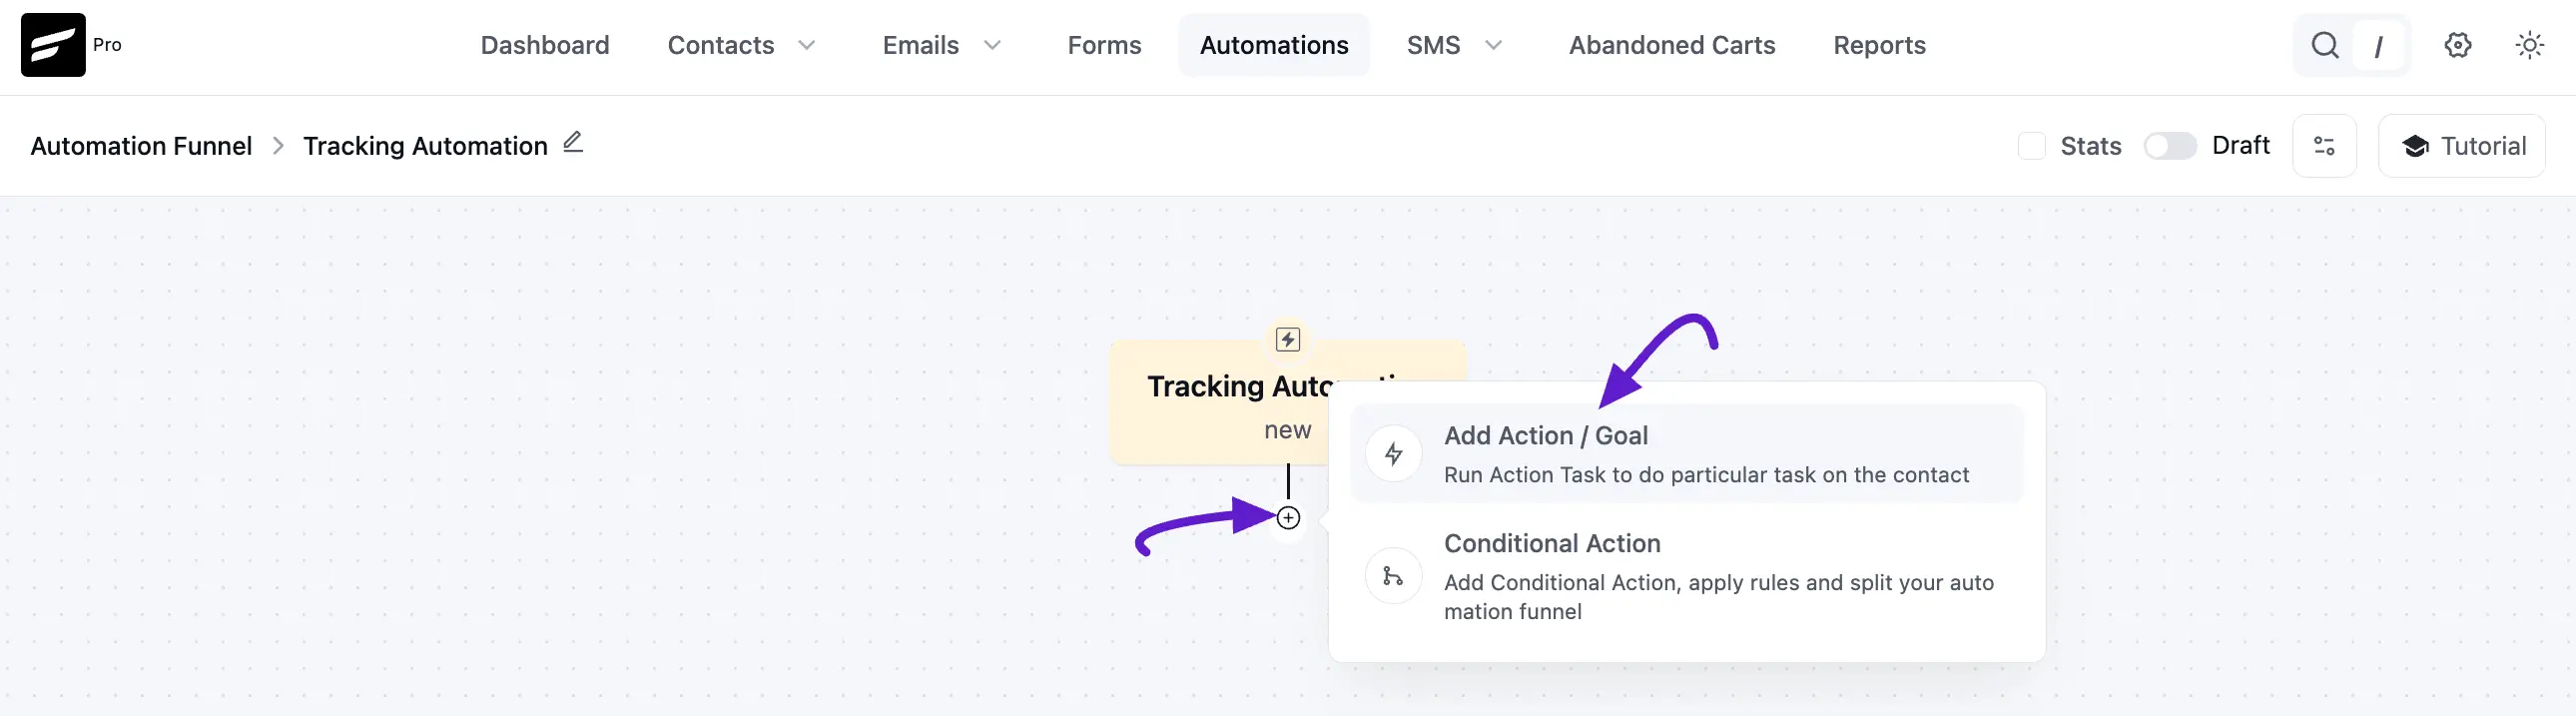
After that you will see the Automation funnel page, click on the plus button and Add Action/Goal for Event Actions.
Click the Add Event Tracking action blocks for your target contact.
![]()
Here also appears a new popup and see Add Event Tracking to Contact Profile. Now enter the Event Tracking Key (example: new_event_key) and Give an Event Tracking Title. These two things are Required.
Then enter details about this event or numeric value in the Event Value section. Click the Save Settings button to save it.
![]()
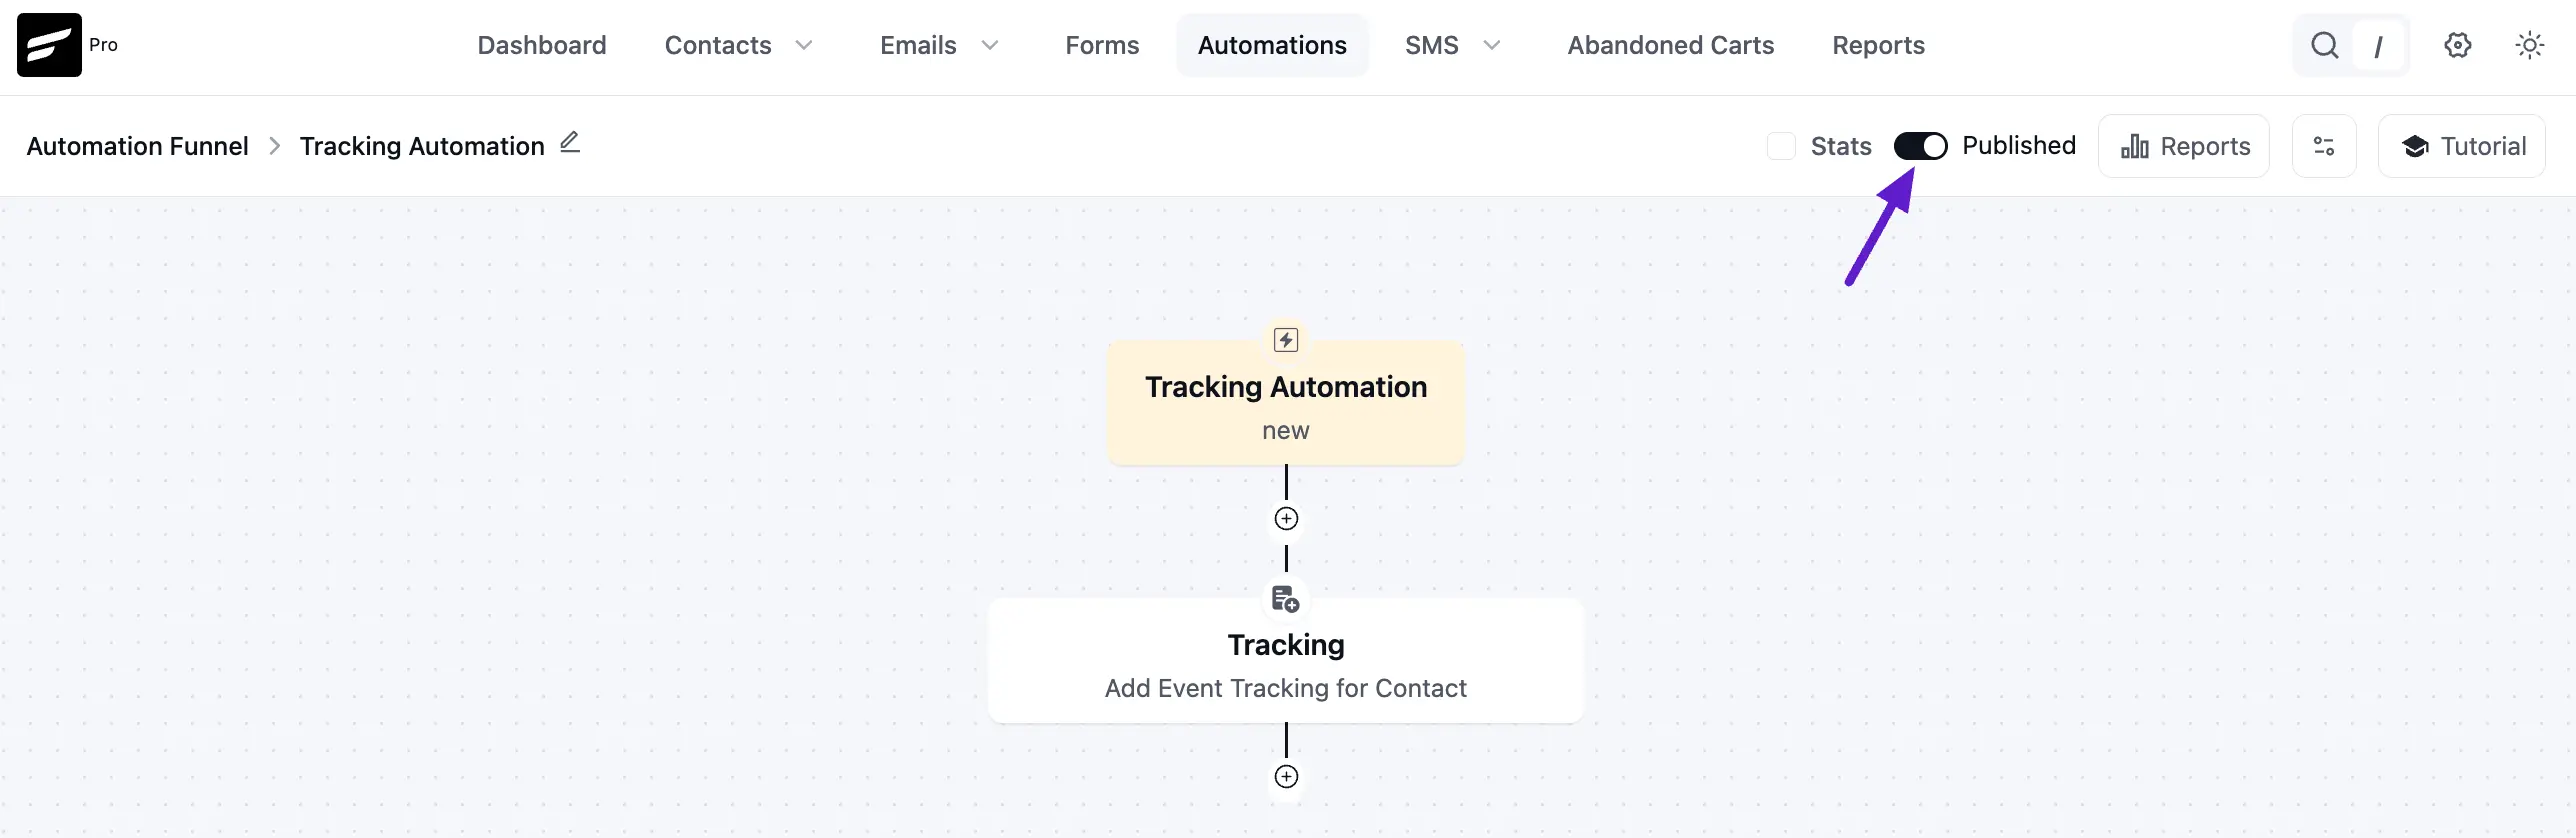
Now publish the automation by enabling the toggle in the top right corner.
If you want to see your Event Tracking details, go to your FluentCRM contacts profile.
You will track your event using your contacts subscriber ID or Contacts ID instead of your email address.
![]()