Appearance
LifterLMS Integration with FluentCRM
LifterLMS is one of the most popular LMS plugins for WordPress. If you have created an eLearning course platform on WordPress using LifterLMS, FluentCRM can help you automate your course marketing with activity monitoring, contact segmentation, email marketing, and many more. Follow this simple guide to learn how to automate these tasks with FluentCRM!
Lead generation and segmentation
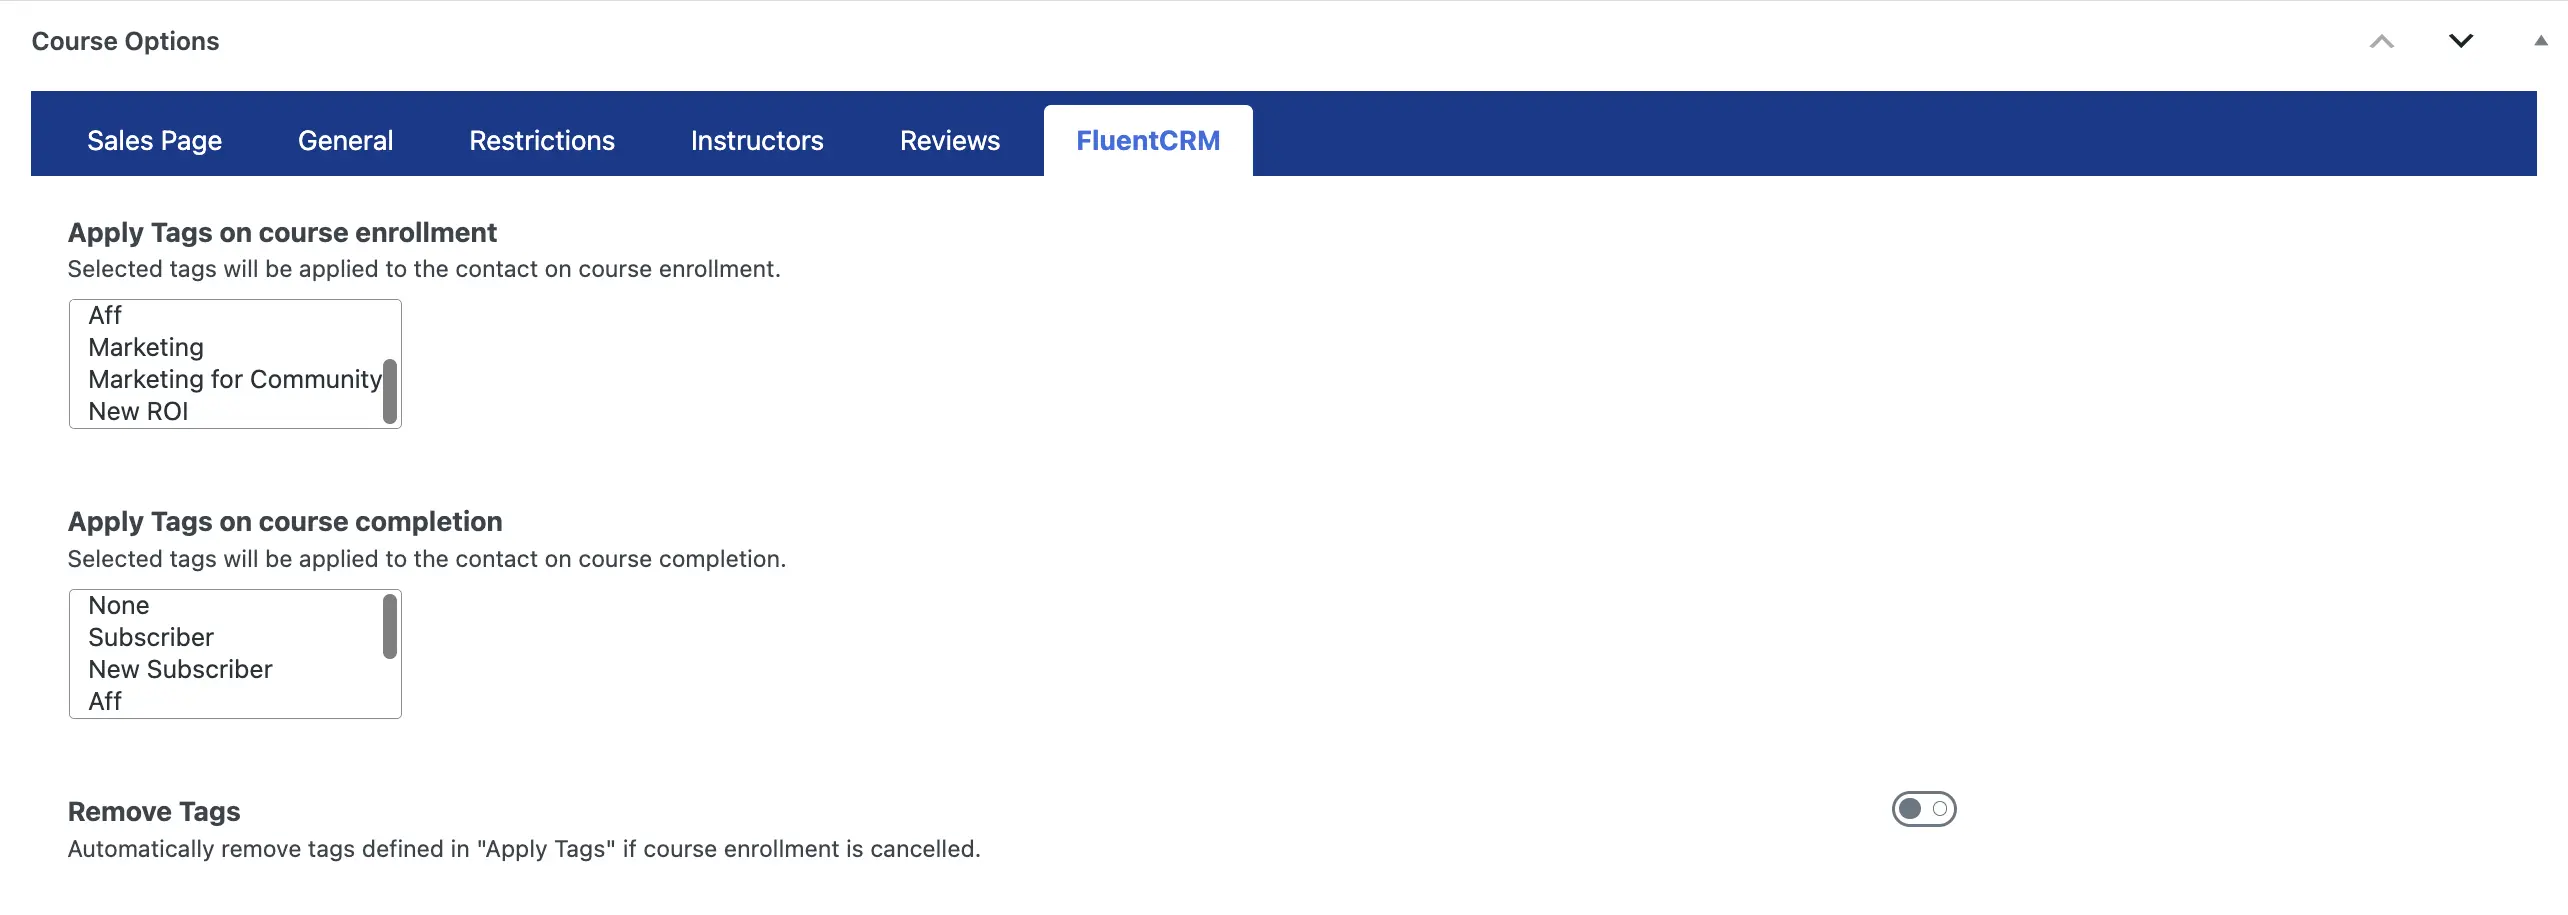
FluentCRM lets you capture your LifterLMS students as leads and tag contacts based on course enrollment and completion.
In order to capture and apply tags based on course enrollment and course completion, go to edit your LifterLMS course and jump to the Course Options. Then, from Course Options, you’ll need to select the FluentCRM tab. And finally, select the tags you want to apply when course enrollments and course completions happen.
Marketing Automation
FluentCRM also lets you automate a wide range of tasks, such as sending behavioral emails, email sequences, contact property updates, and many more.
FluentCRM’s email marketing automation includes four major elements. These are:
- Automation Editor: The editor where you will be able to add, edit or modify your desired actions or activities in automation. To know more about this please visit Automation Editor.
- Triggers: Triggers are essential for initiating email marketing automation. There are a lot of triggers that can start or initiate automation in FluentCRM such as Primary Automation Triggers, Ecommerce Triggers, Membership Triggers, and LMS Triggers.
- Actions: Once an Automation is initiated you can add various actions that you want to run when such activities are triggered like Primary Actions, WordPress Actions, Email Actions, Goals or BenchMark Actions, LMS Actions, Miscellaneous Actions, and Conditional Automation Actions.
- Goals: Generally FluentCRM automation starts with a single and specific trigger. What if you want to run the same automation triggering based on another trigger? This way you could also benchmark the automation. To know more about this please visit Goals or BenchMark Actions.
- Conditionals: One of the most useful features of FluentCRM is that you have advanced and more control over what you want to do or customize your target more with the flexibility of the FluentCRM data. Please visit Conditional Automation Actions to learn more about such flexibility in using data-based conditions in automation.
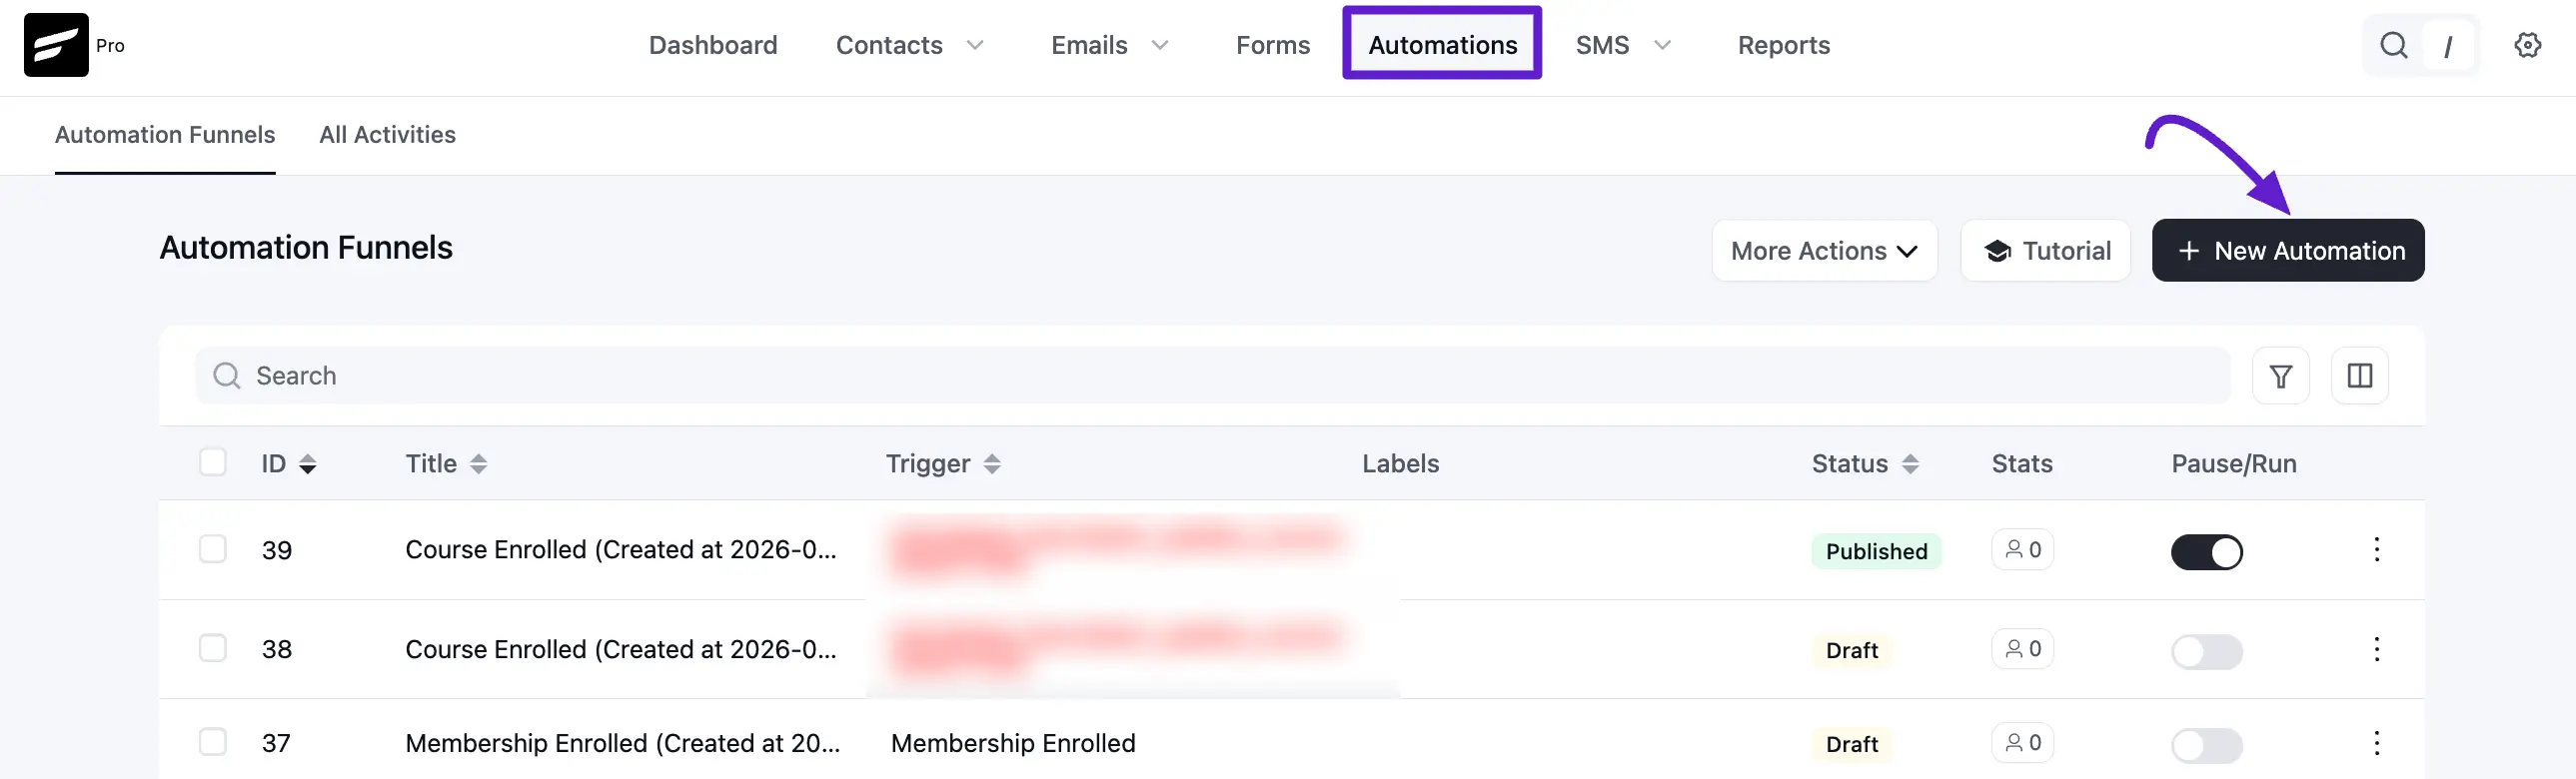
At first, from your FluentCRM dashboard & go to the Automations option. Then click on the New Automation button to add an automation funnel.
You will notice a pop-up window appear, where you have to add a suitable Internal Label and choose the trigger that will initiate an automation funnel. You can choose one from four available LifterLMS Triggers.
- Course Enrolled: This will let you trigger an automation funnel when someone enrolls in a LifterLMS course.
- Joined membership: This will let you trigger an automation funnel when someone joins as a member in LifterLMS.
- Lesson Completed: This will let you trigger an automation funnel when a student completes a lesson in LifterLMS.
- Course Completed: This will let you trigger an automation funnel when your LifterLMS student completes a course.
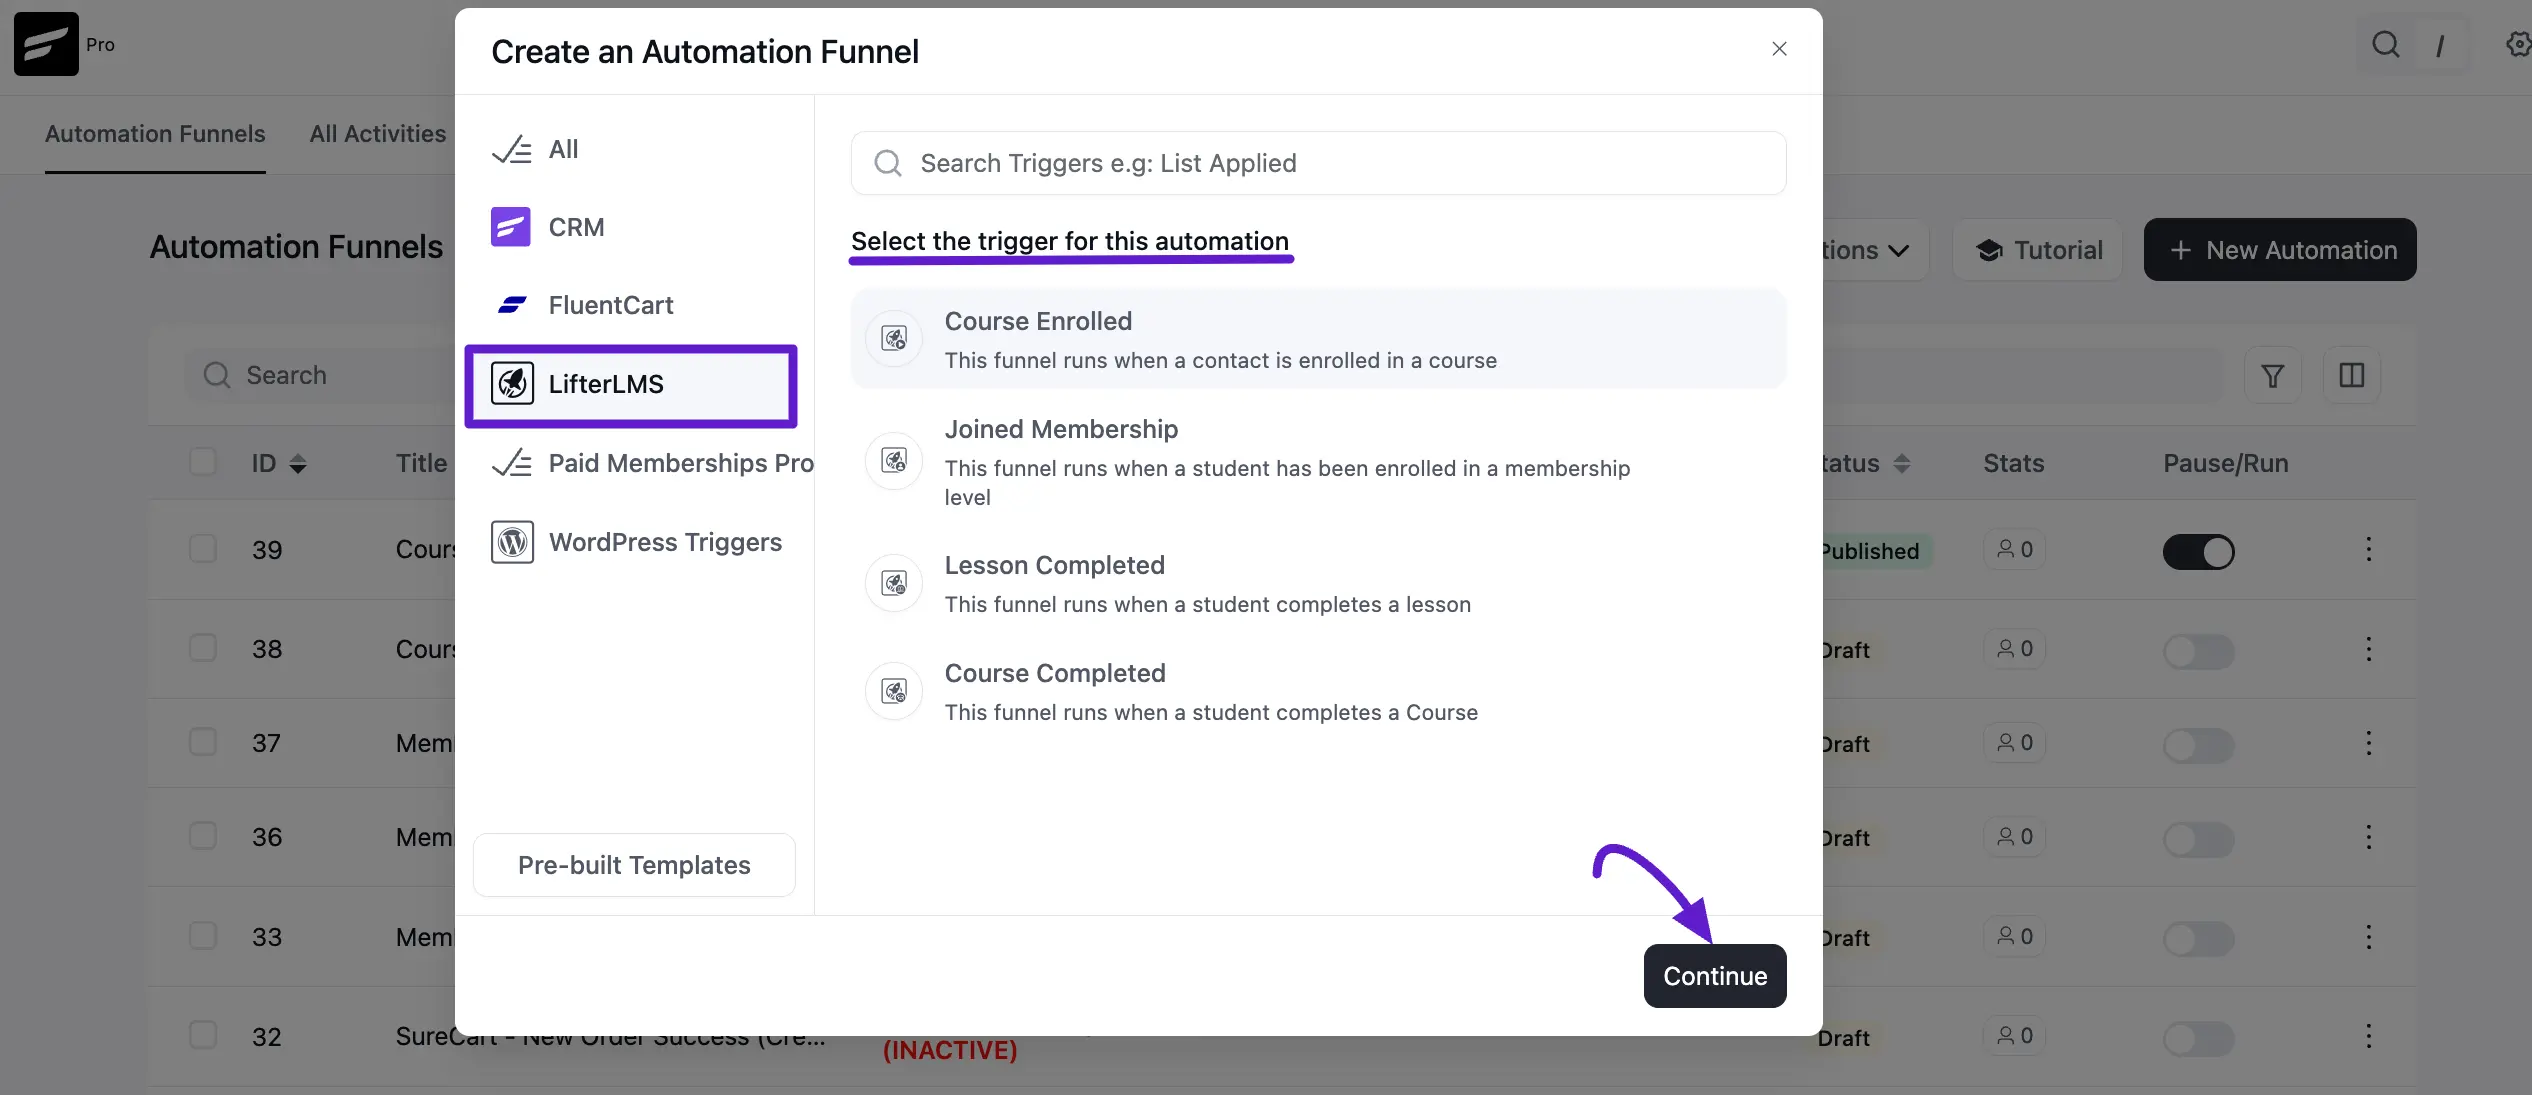
Apart from these triggers, FluentCRM also comes with lots of other triggers. To see the full list of triggers and learn how to configure them, please check this documentation.
When you select a trigger and click Continue, a pop-up box will appear with some options to set up the trigger. Once you're done setting up the trigger, you can use Actions, Goals, and Conditionals to design your marketing automation Funnel.
Action Block
Actions blocks are tasks that you wish to trigger from your side. Click on the plus icon on the Automation Funnel page. Then you will notice a pop-up appear with a set of action blocks to choose from.
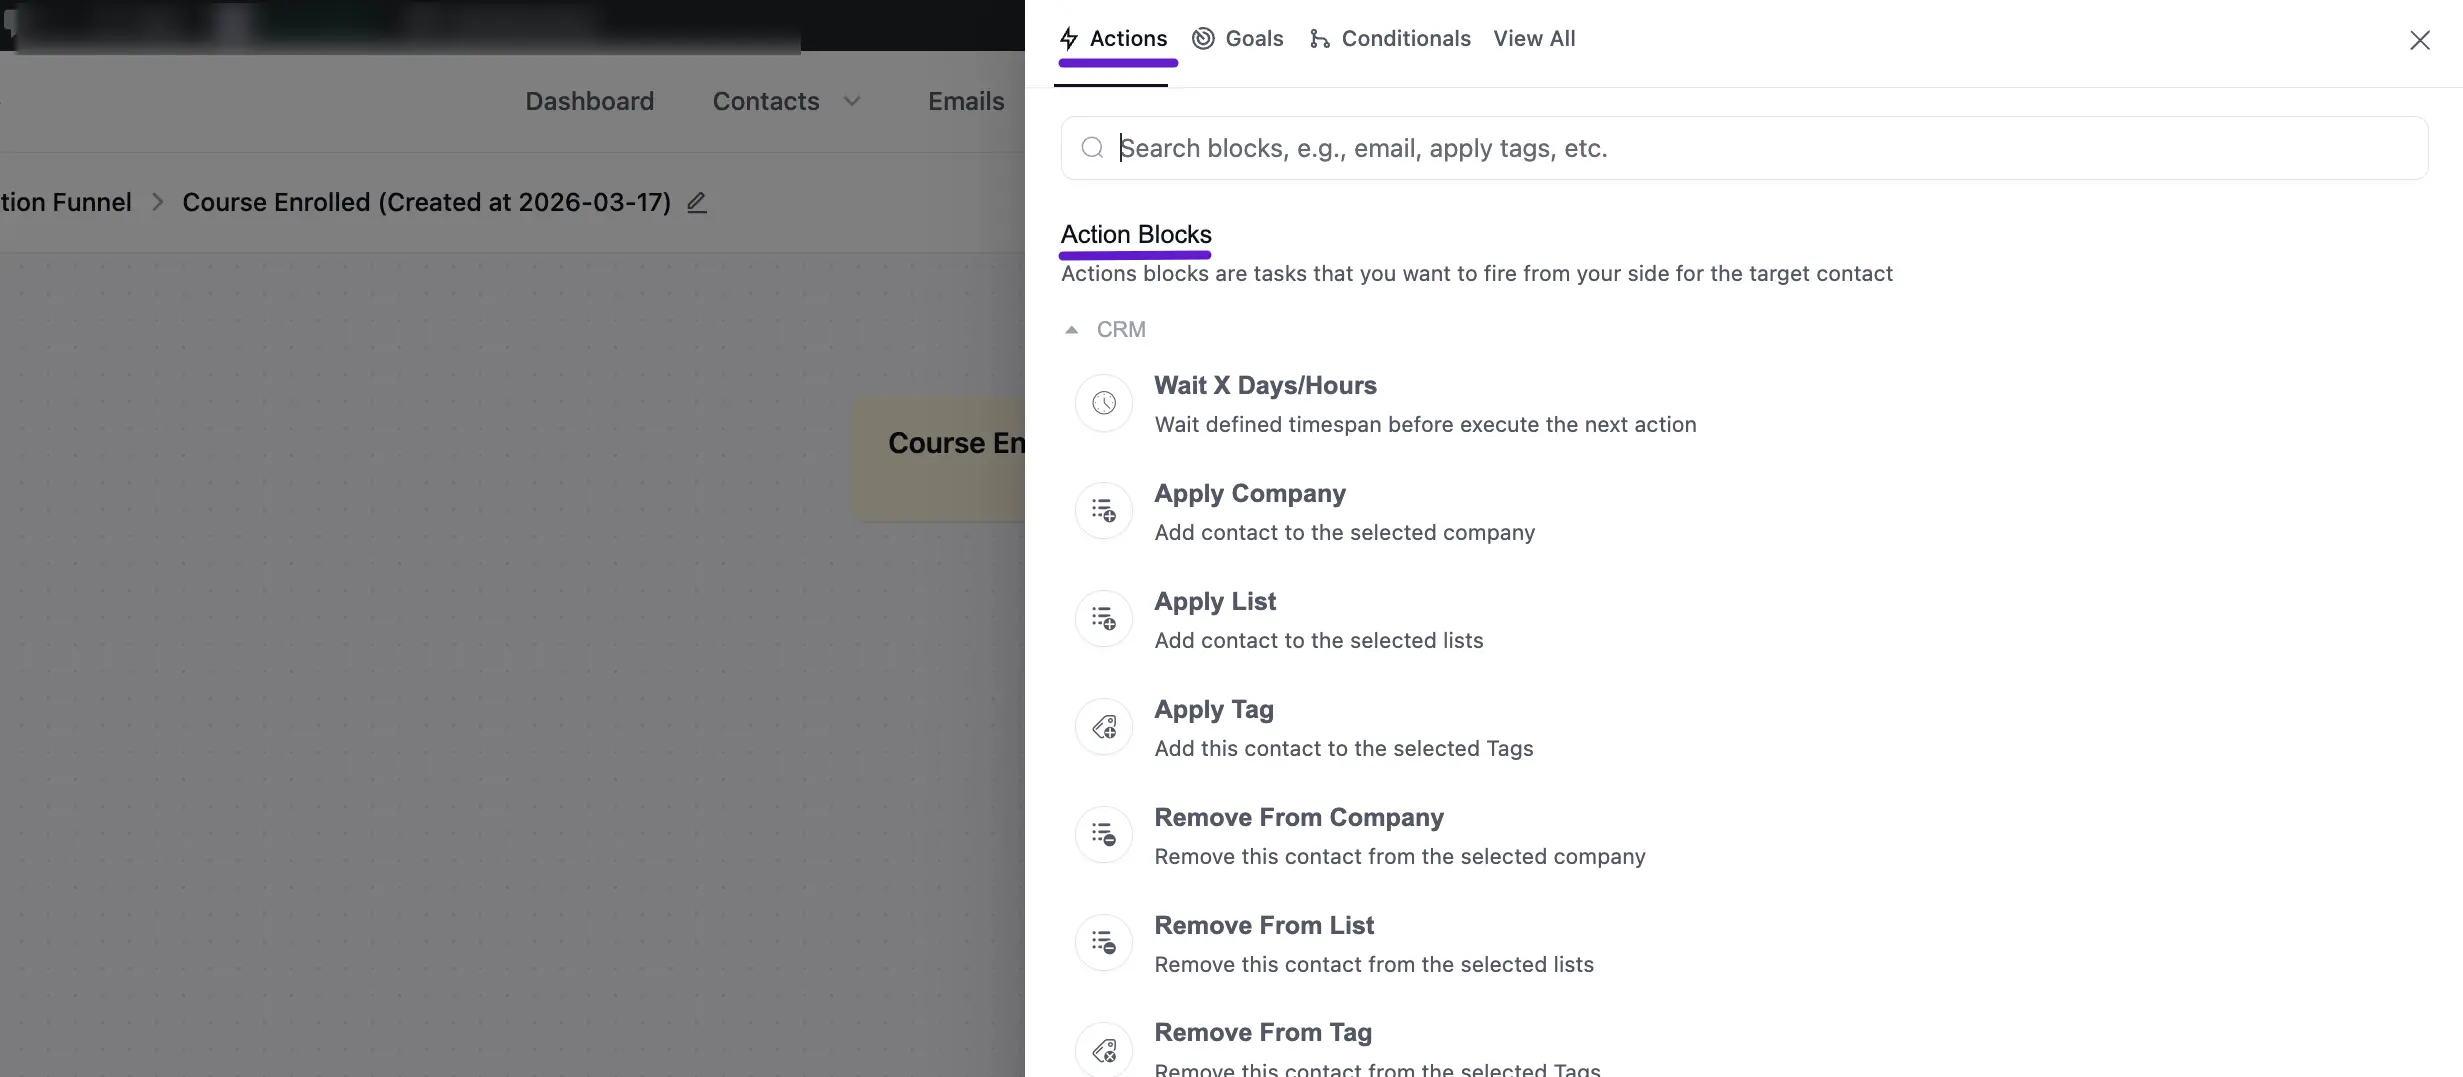
From here, you can choose any type of action block. FluentCRM offers 15 action blocks for LifterLMS marketing automation. Please check our funnel action blocks documentation to find out how to use action blocks.
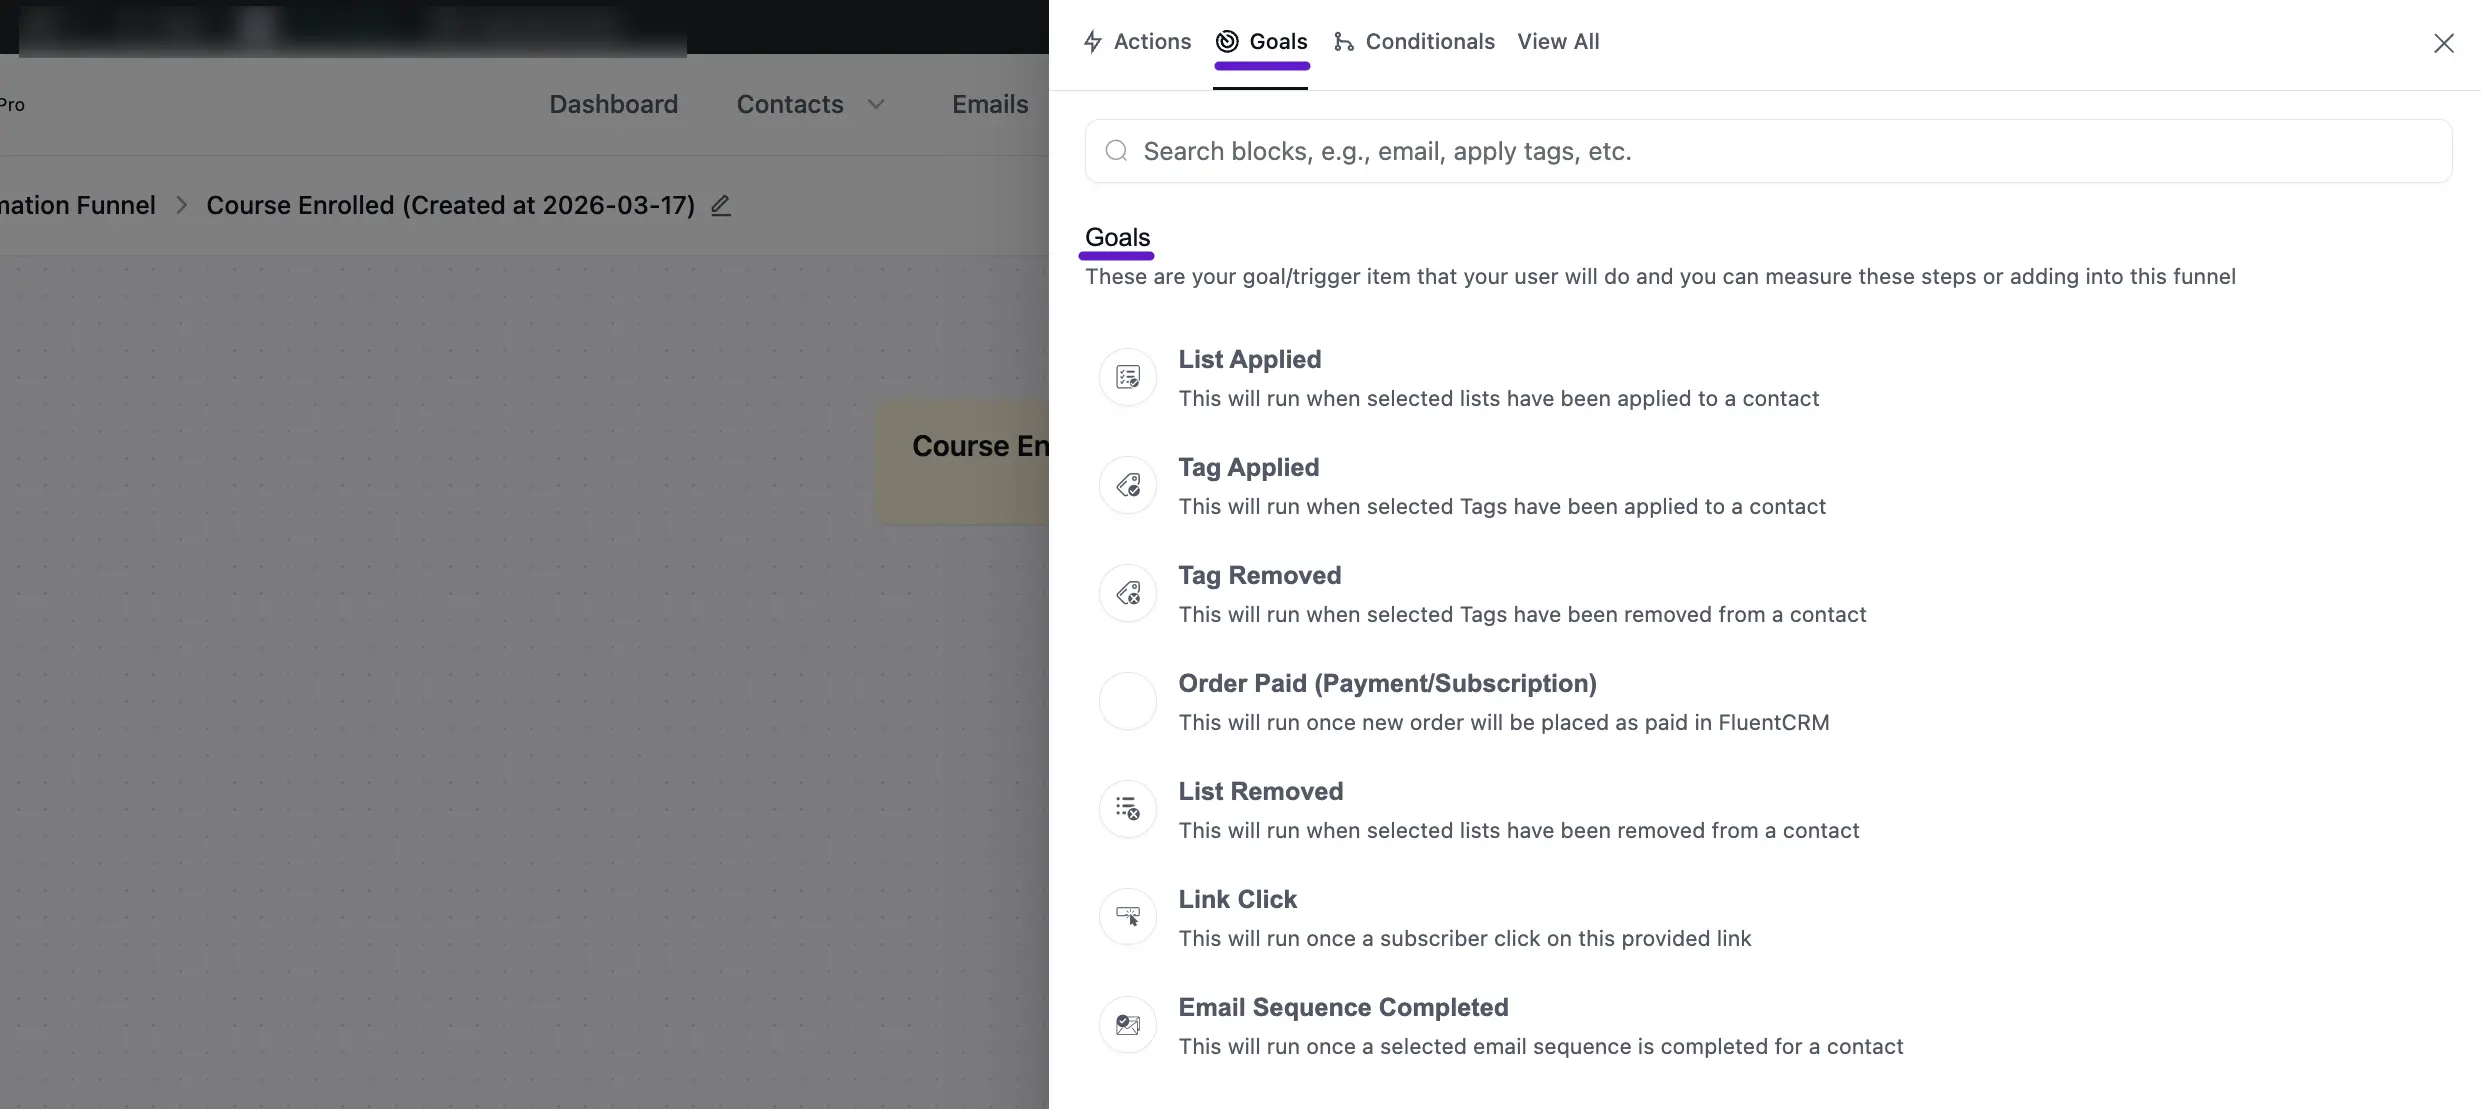
Goals/Trigger Block(Benchmark)
Goals/Trigger blocks are goal or trigger items that your user might do. They let you measure these steps and automate the funnel based on goal completion.
Click on the plus icon(+) to open the pop-up for selecting the Goals. For LifterLMS, you can choose List Applied goal. This trigger block will run once a list is applied to a contact within the automation funnel. In this block, you can add an internal label, specify the list for which the goal applies, and Benchmark Type.
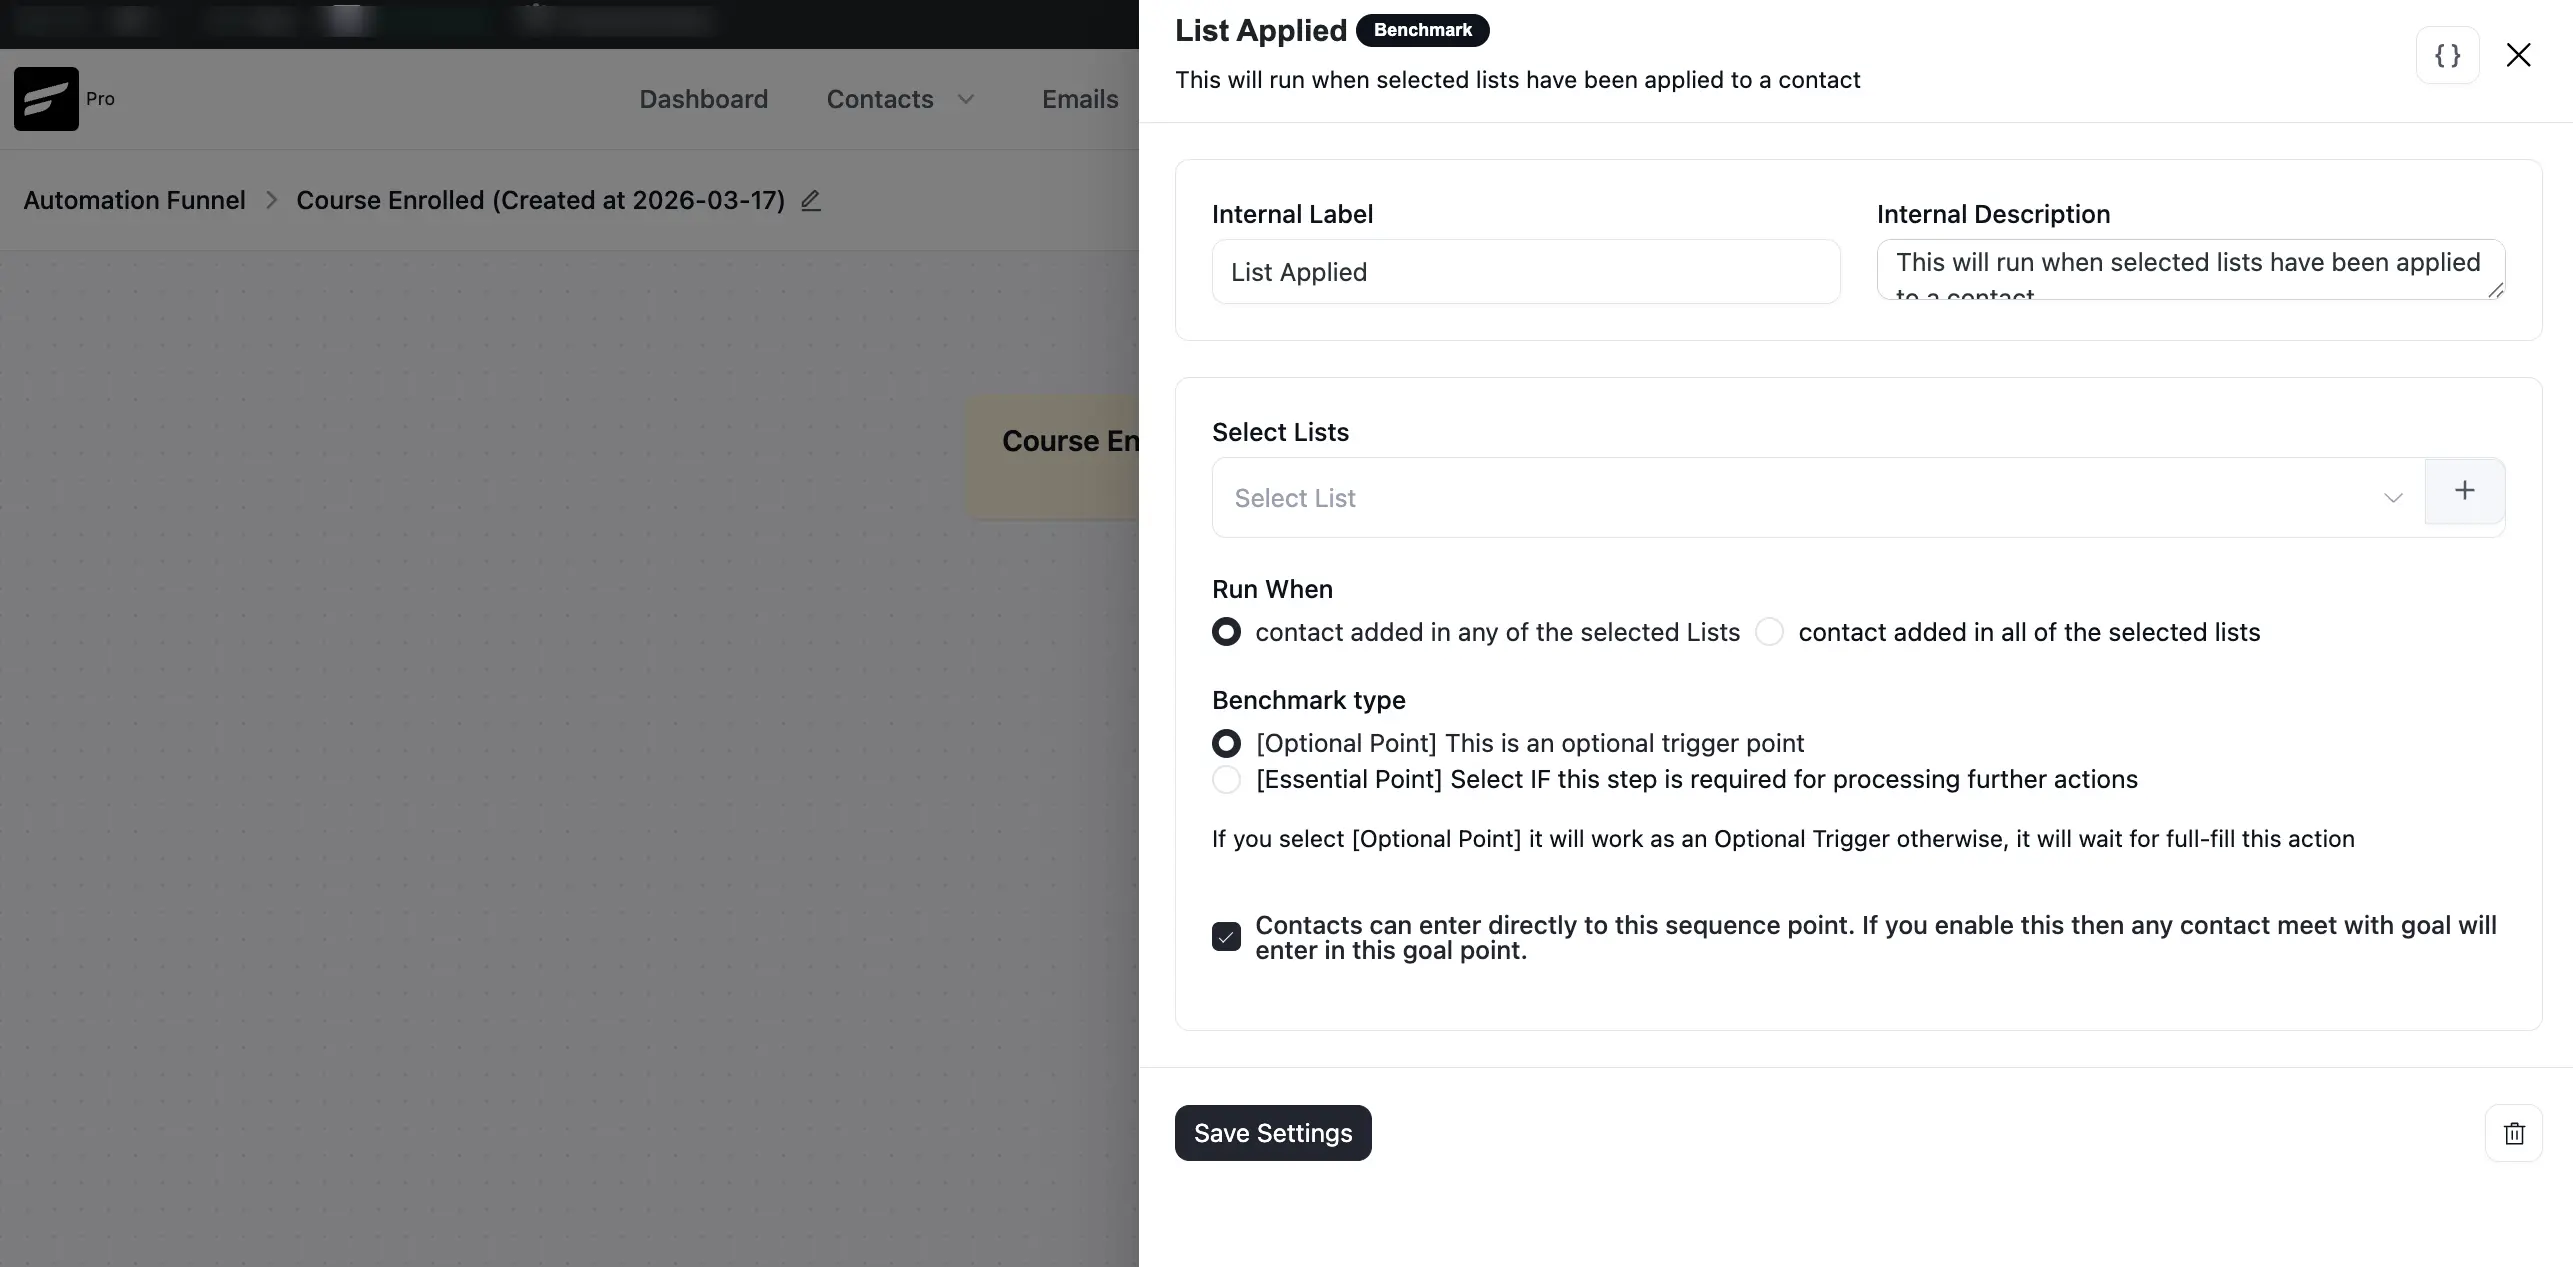
Click Save Settings when you’re done.
If you want to use other goals or benchmarks, please check our goal/benchmark documentation.
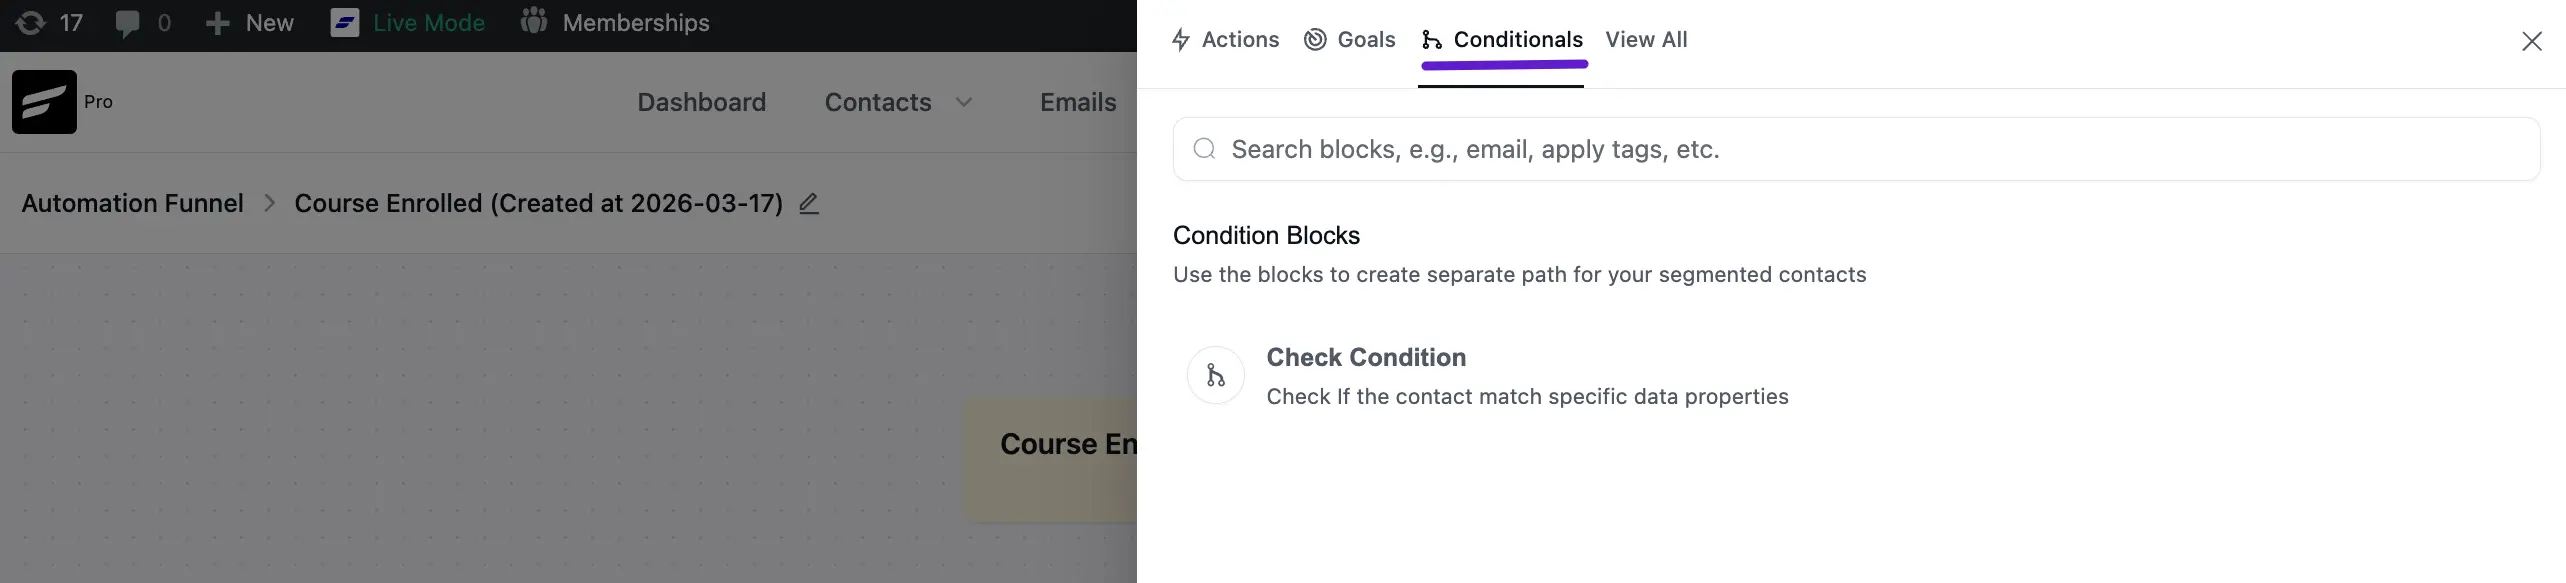
Conditionals
Conditionals are conditional logic. If you want to automate different activities based on If/Else conditions, you can choose a conditional. For LifterLMS, FluentCRM allows you to automate different activities based on conditionals.
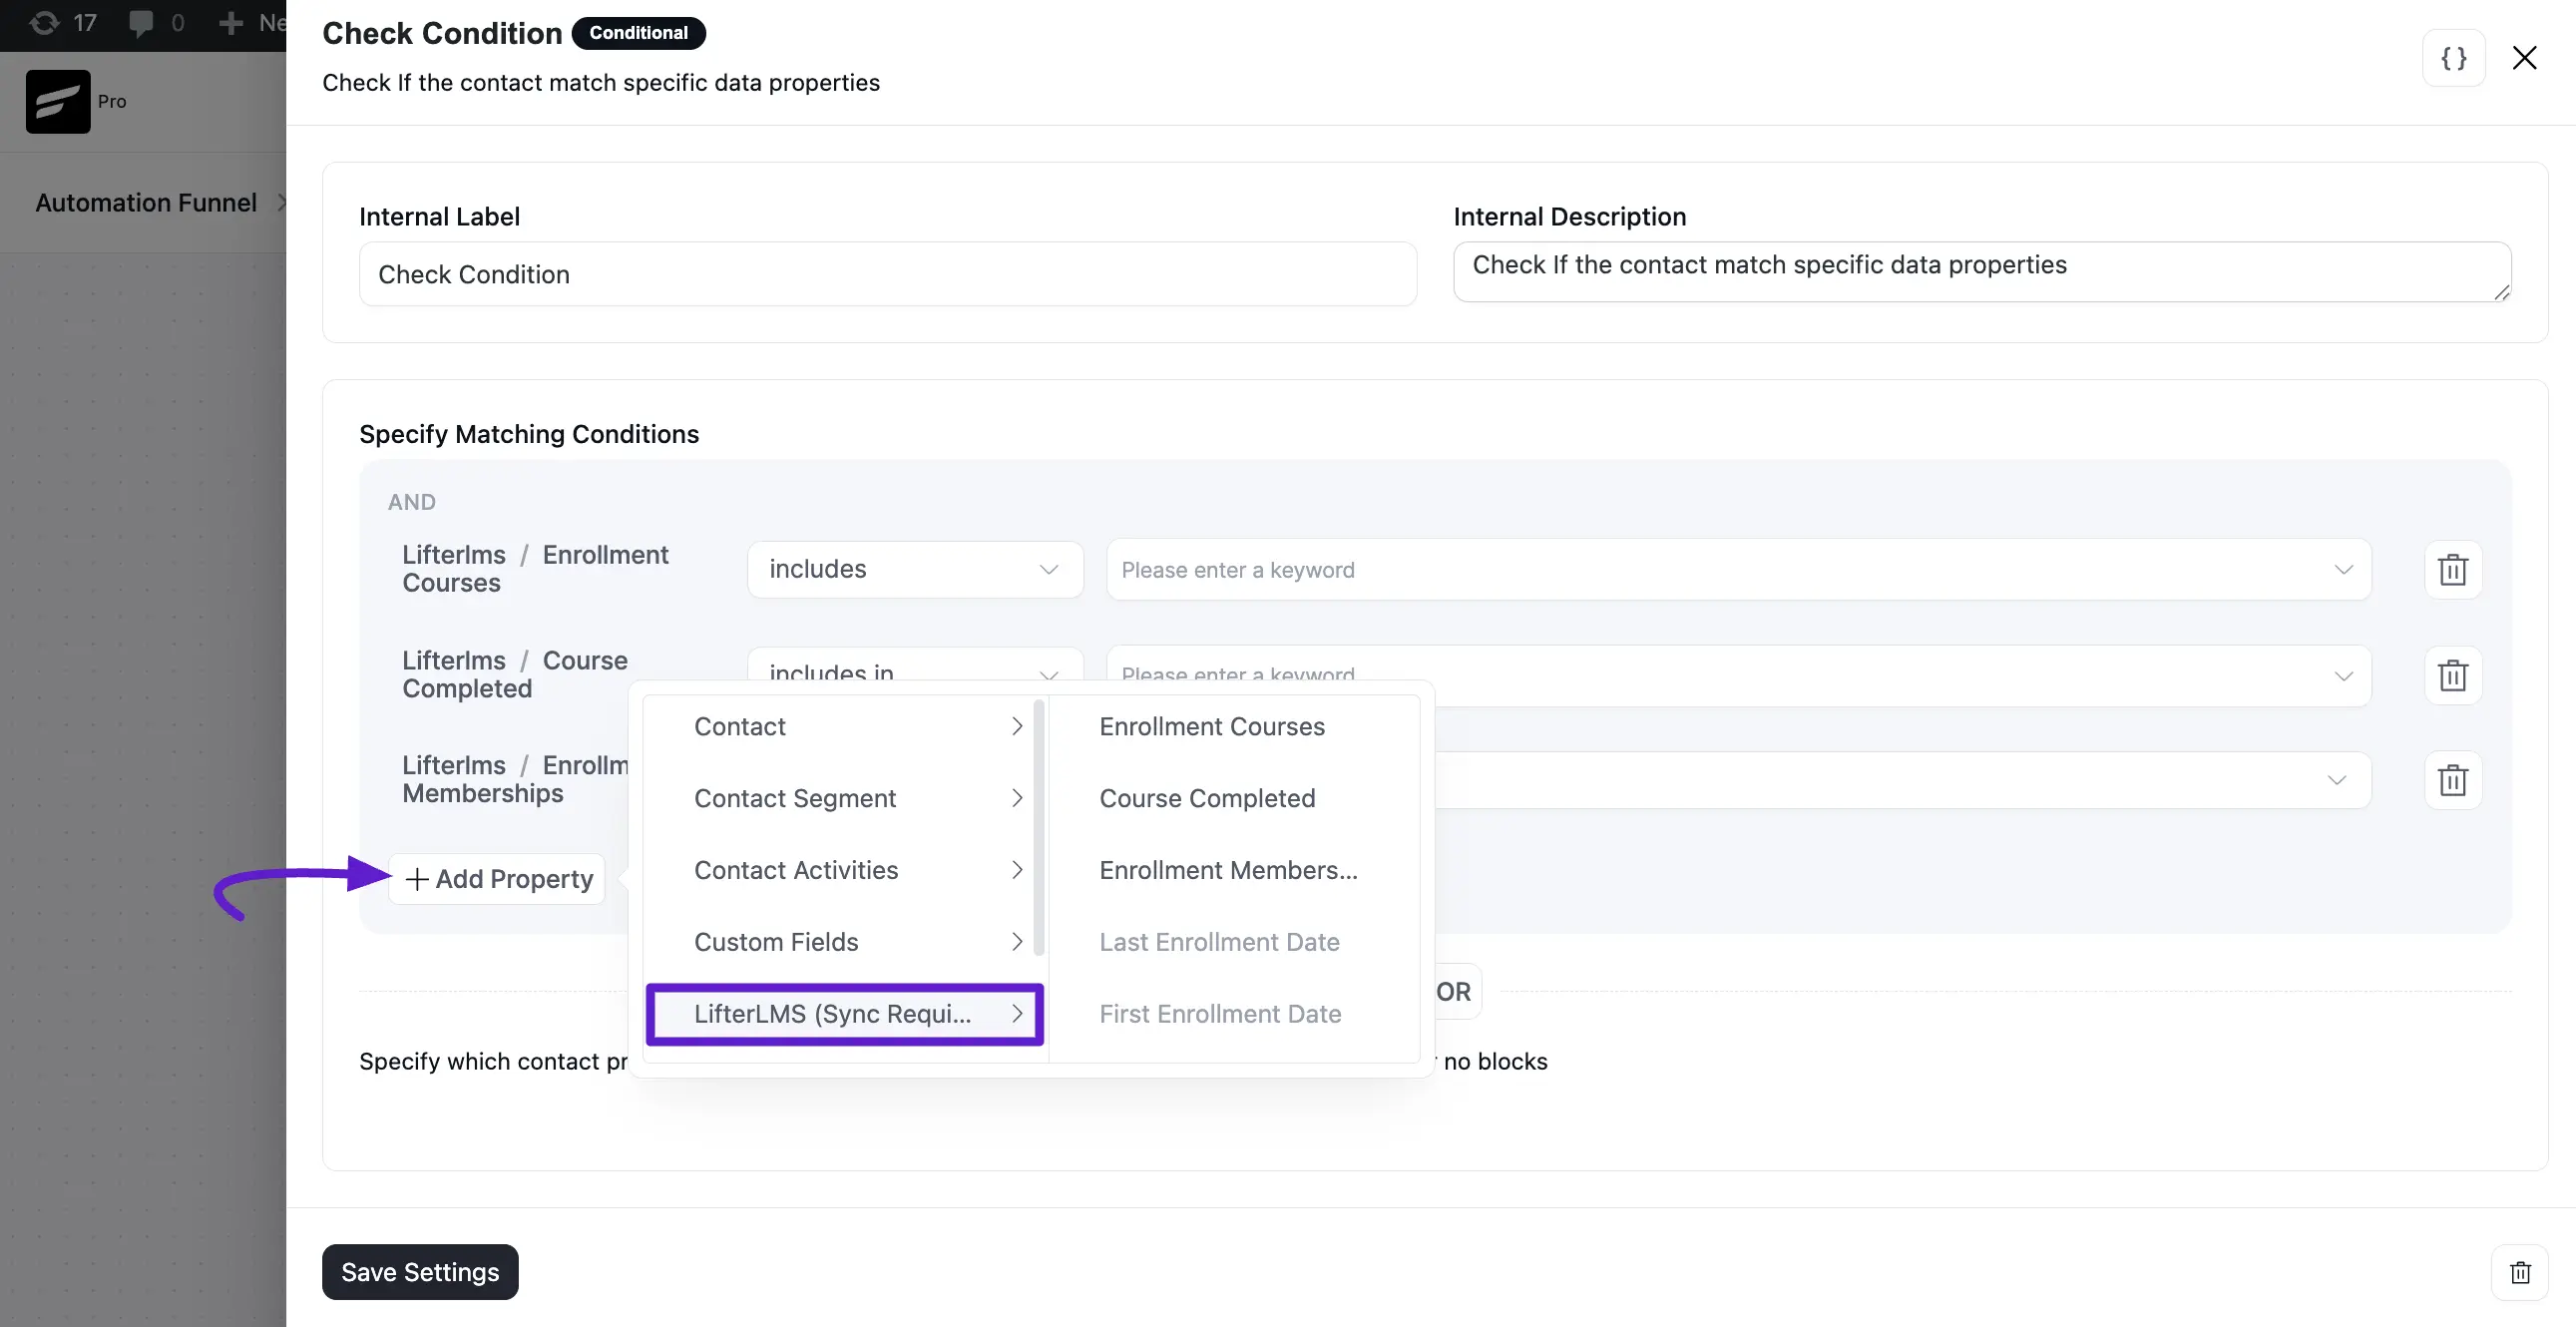
Check Condition:
The Check Condition block allows you to segment contacts in your automation based on LifterLMS data. This helps you create different paths depending on a contact’s course enrollment or progress.
To configure this, click Add Property and select LifterLMS from the dropdown. You can then define conditions using properties such as Enrollment Courses, Course Completed, Enrollment Memberships, Last Enrollment Date, and First Enrollment Date.
Once the conditions are set, contacts will proceed through different paths in the automation based on whether they meet the defined criteria.
If you want to use other conditionals please check out this documentation.