Appearance
Email Sequence
An email sequence is a series of automated emails sent to specific contacts when they opt in, purchase a product, or perform other specific activities.
In FluentCRM, these sequences allow you to nurture your audience through structured, sequential communication—such as a course welcome series or an onboarding flow triggered directly within your automation funnels.
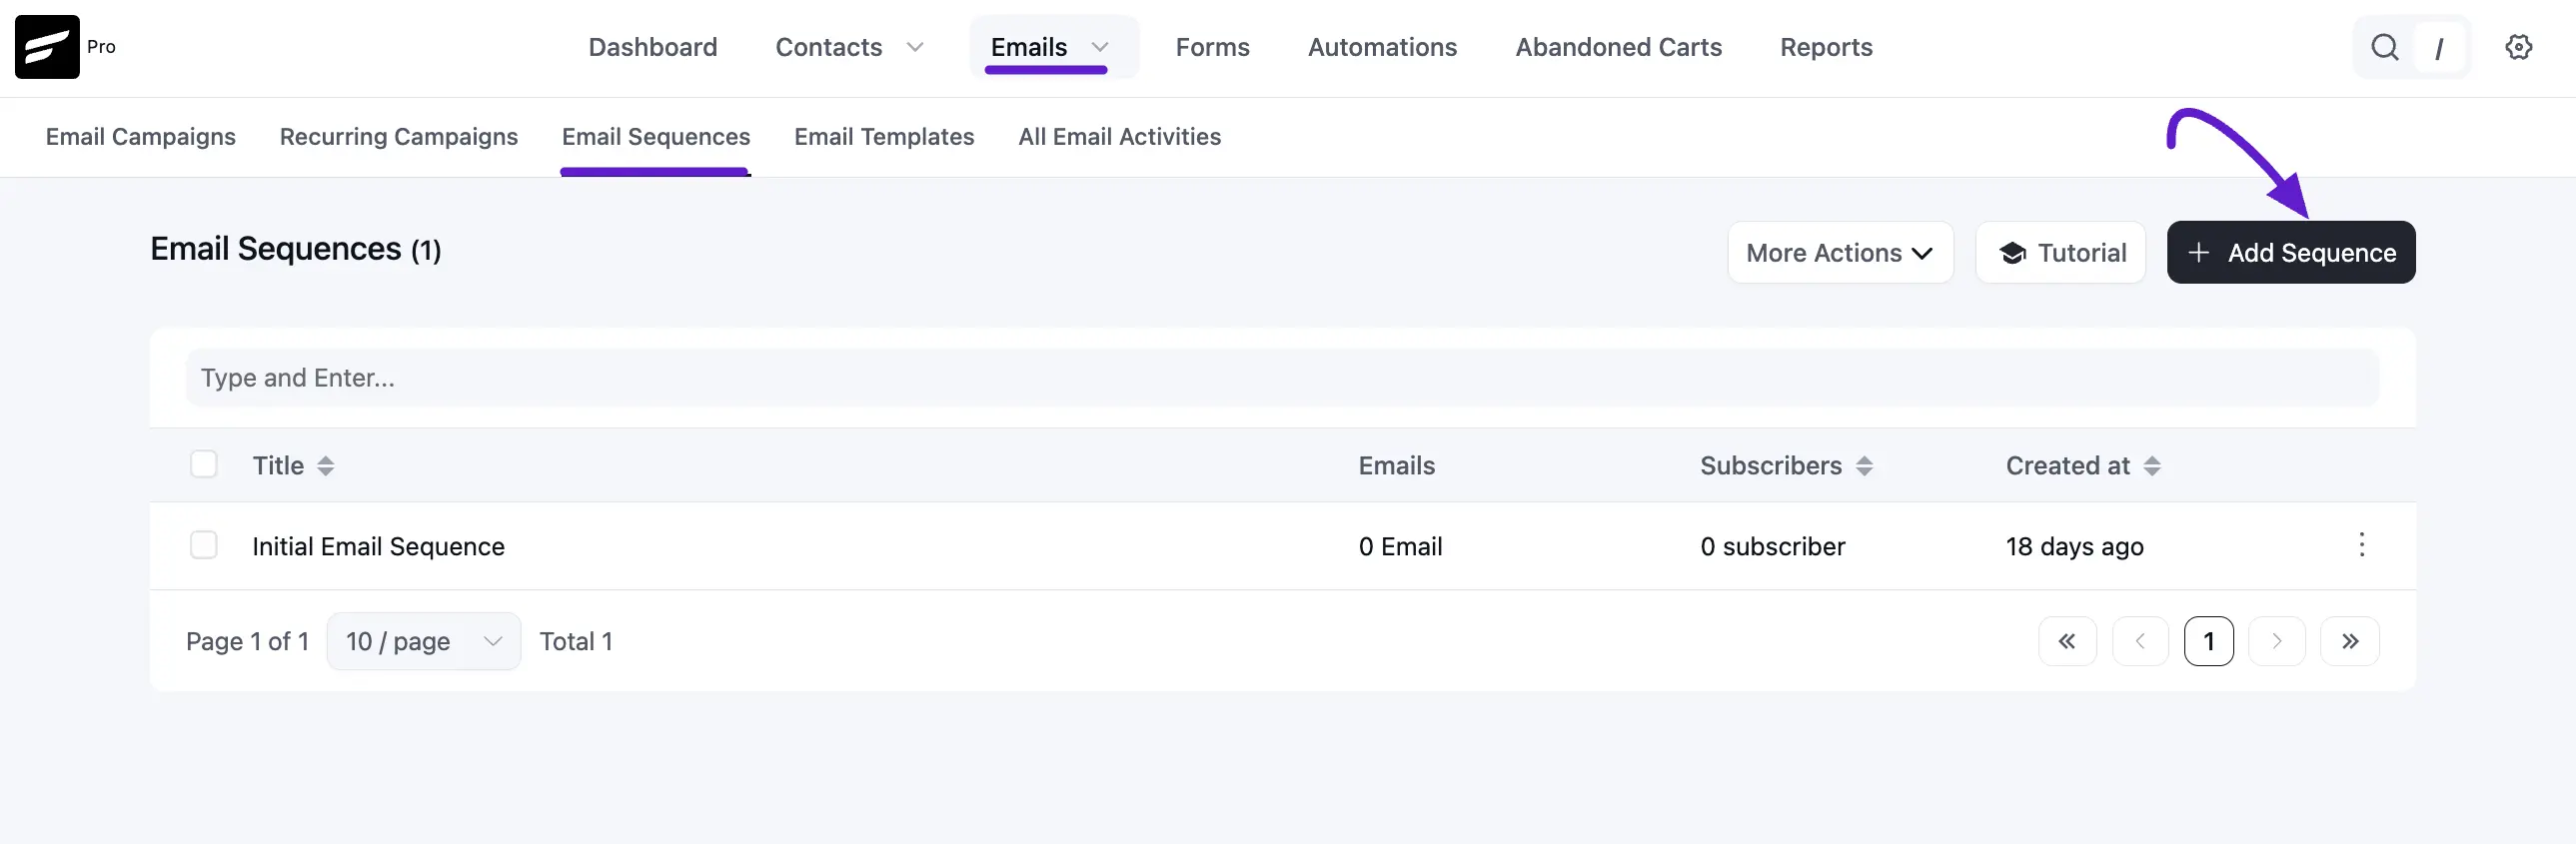
Create New Email Sequence
To get started, navigate to Emails ➜ Email Sequences from your FluentCRM dashboard. Click the + Add Sequence button.
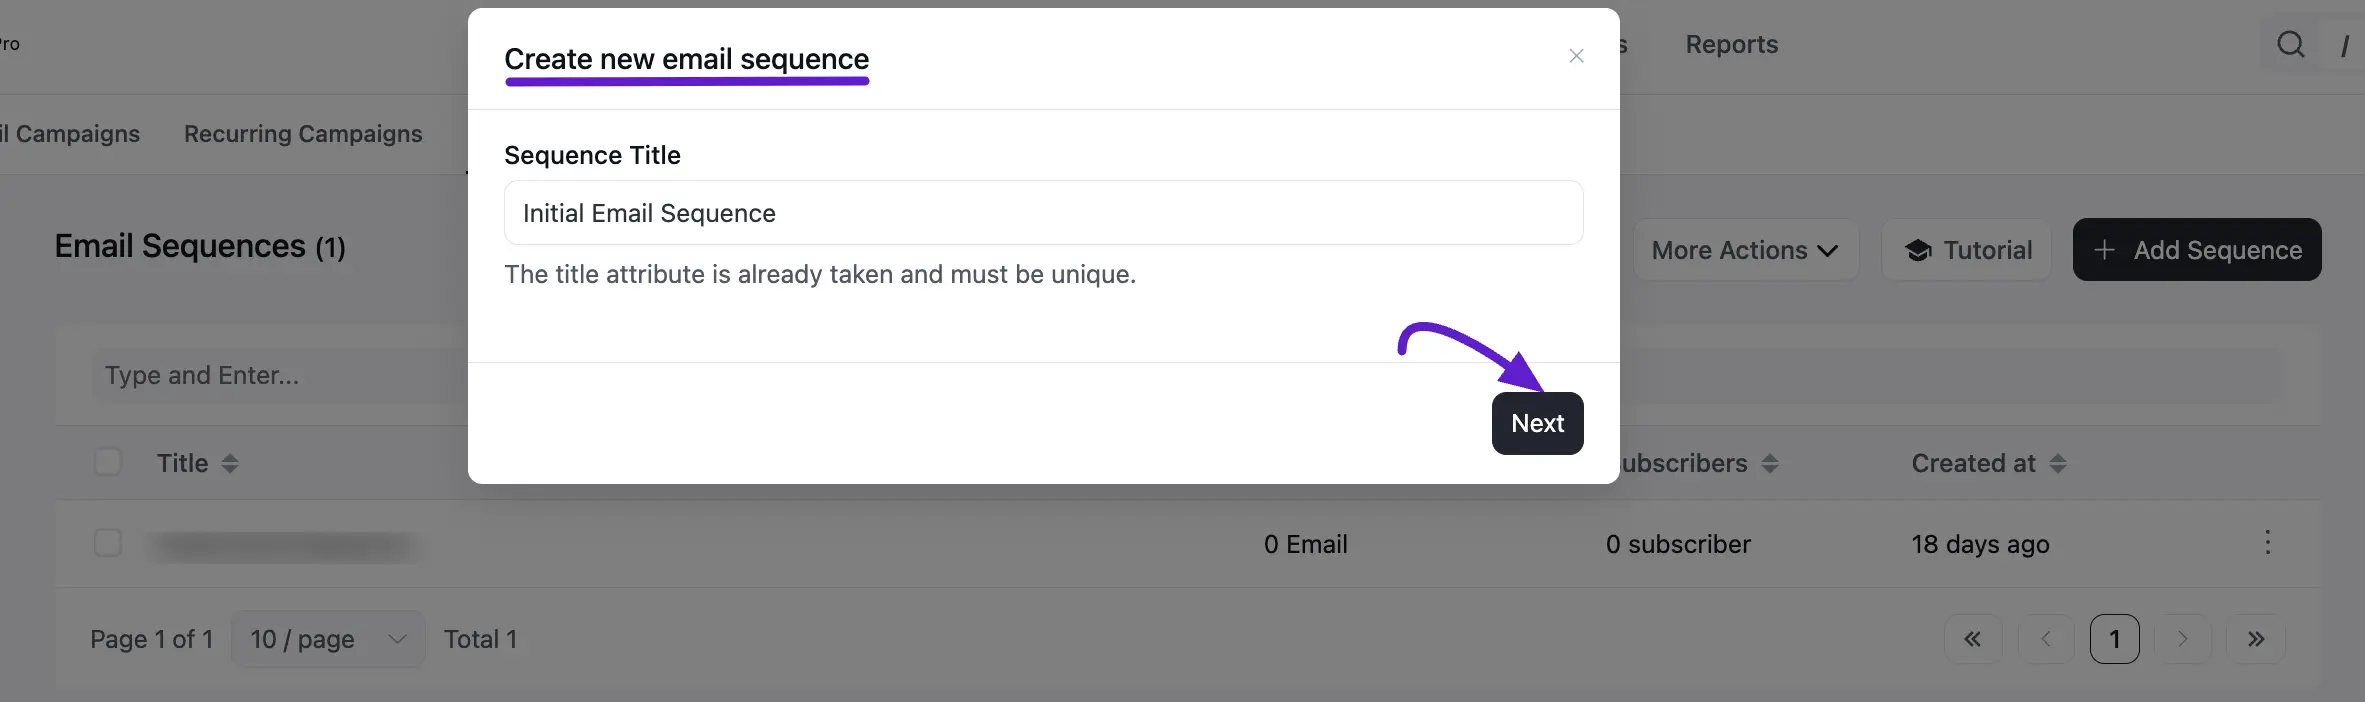
A popup will appear asking for a Sequence Title. This serves as an internal identifier for your sequence. Once named, click on the Next button. Now, you will be redirected to a fresh sequence dashboard where you can begin adding individual emails.
Adding and Composing Sequence Emails
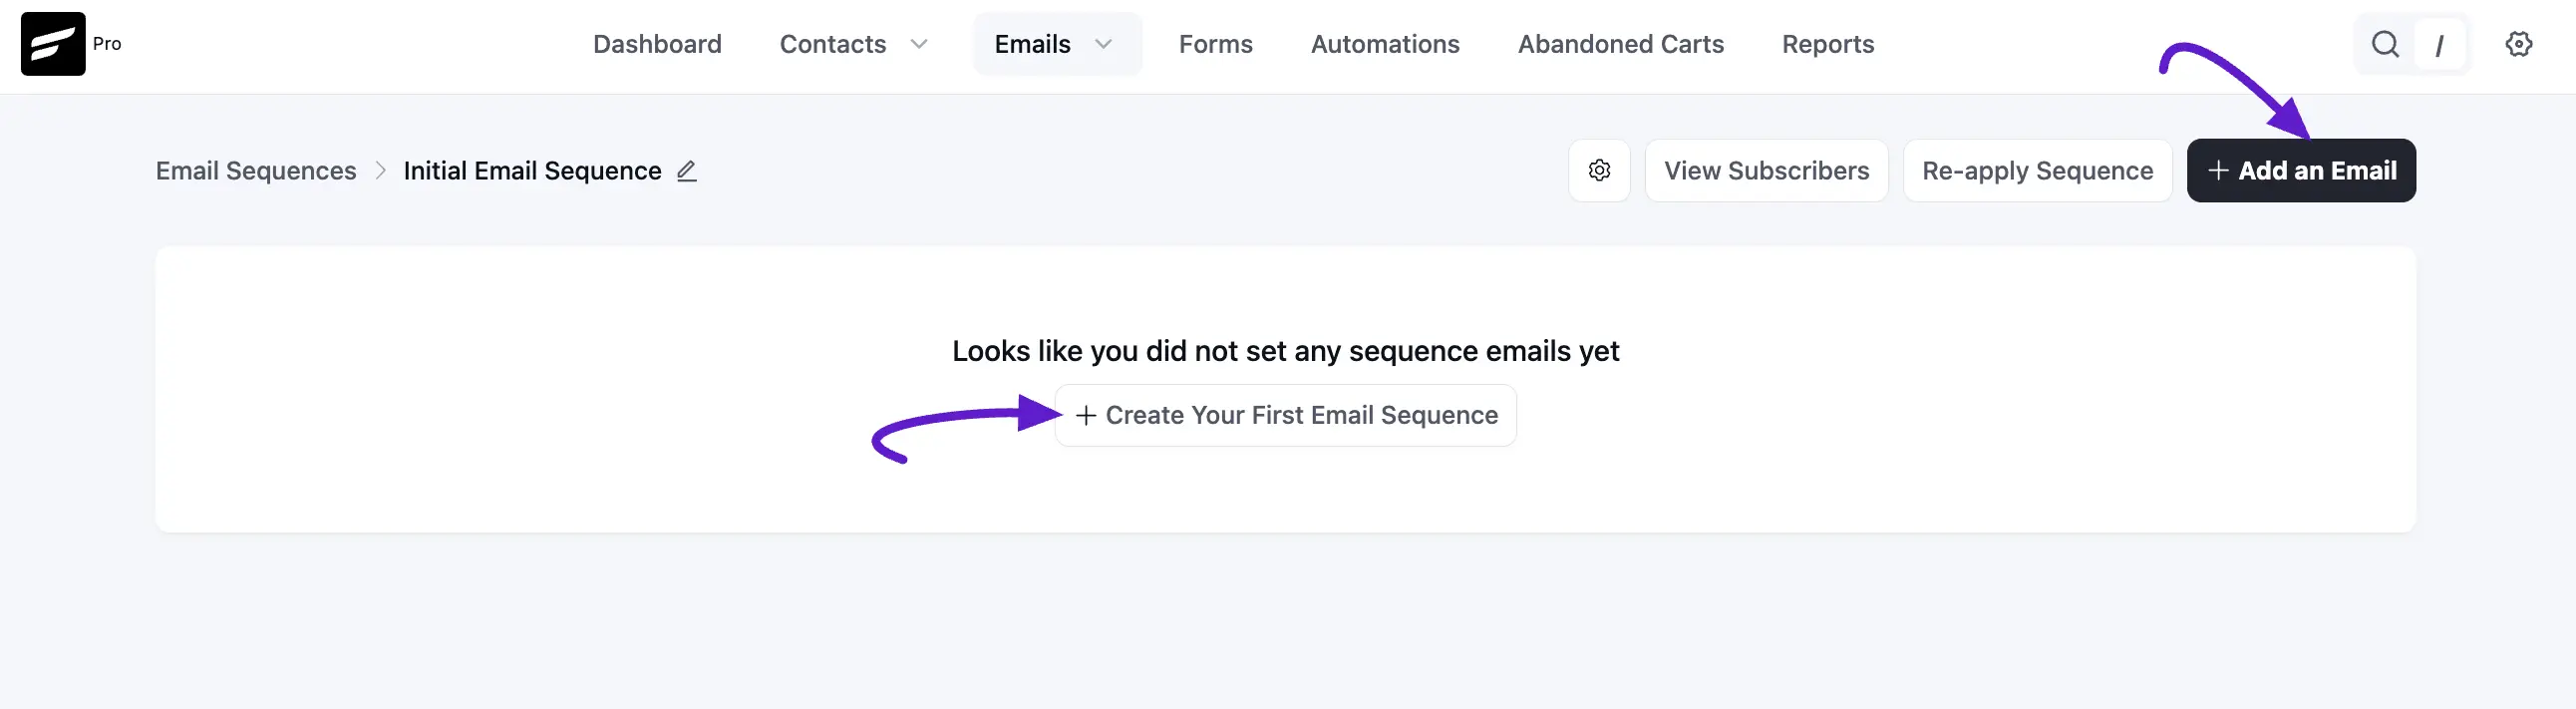
Click + Add an Email to create the first message in your series.
For each email, you will need to configure the following:
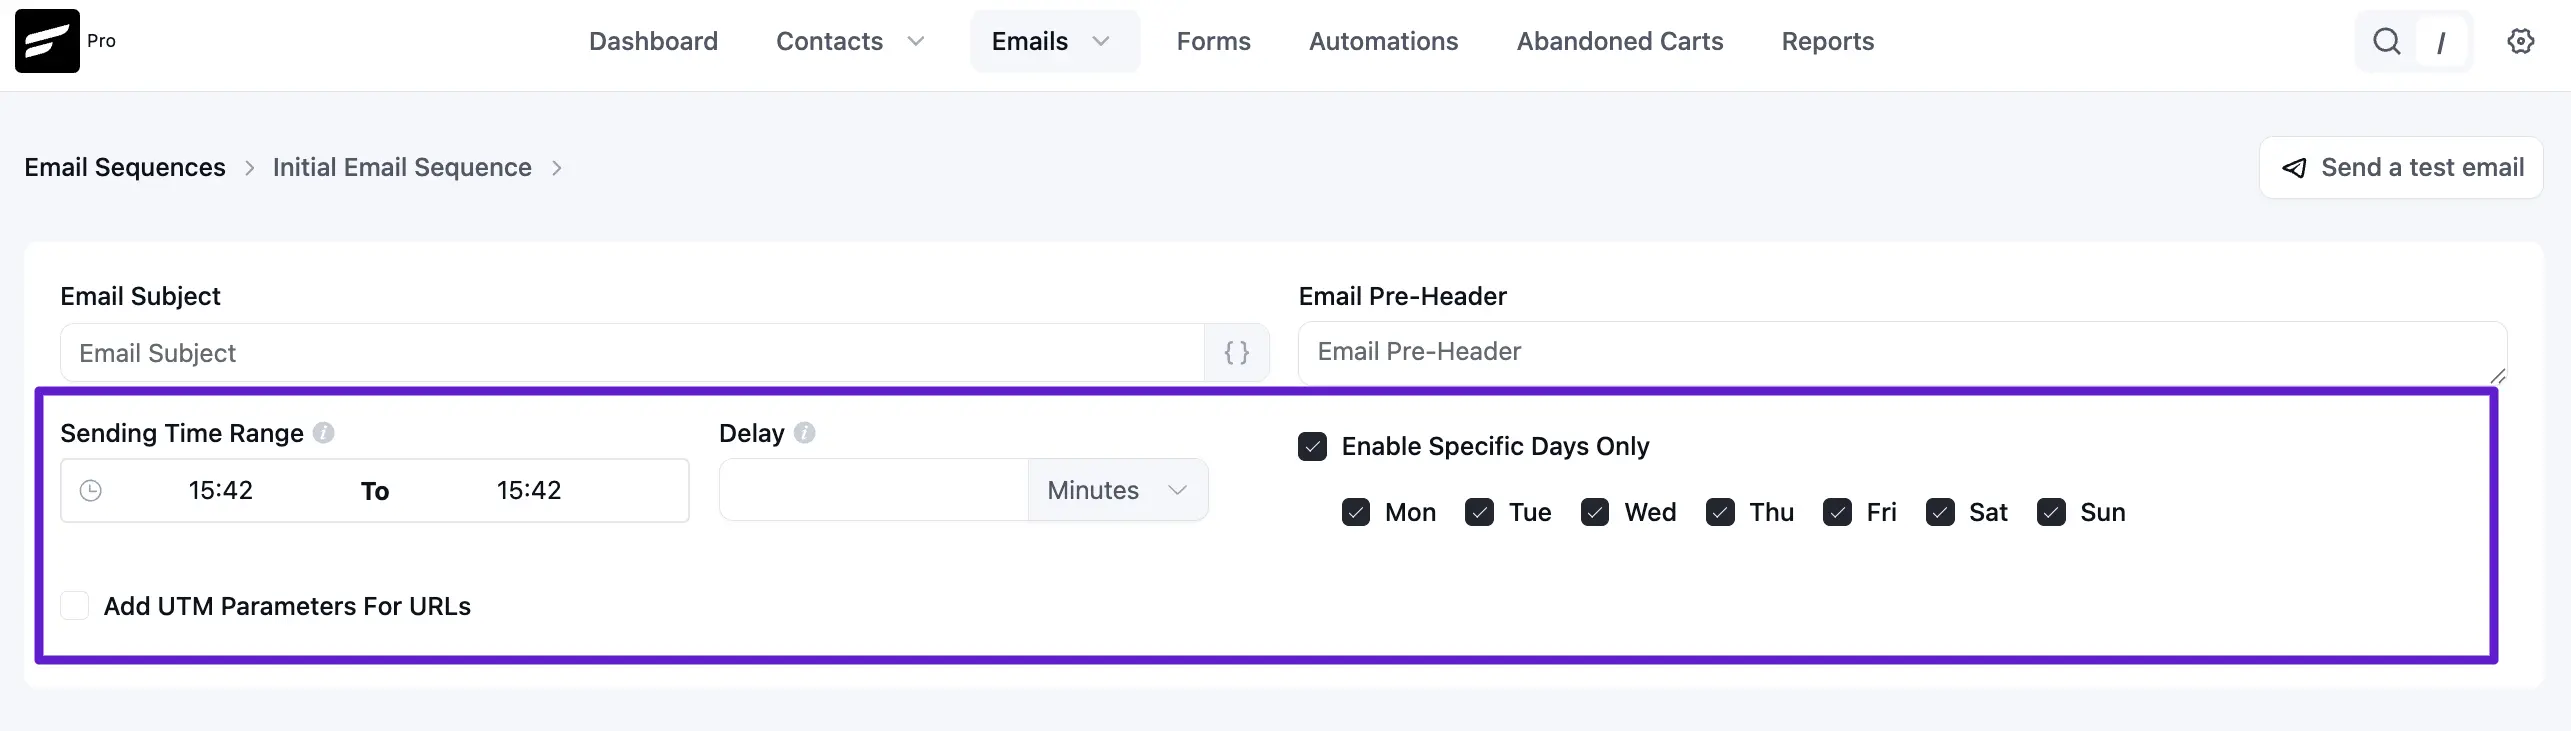
- Email Subject: Choose a compelling subject line to encourage high open rates.
- Email Pre-Header: Provide short summary text that appears after the subject line in the recipient's inbox.
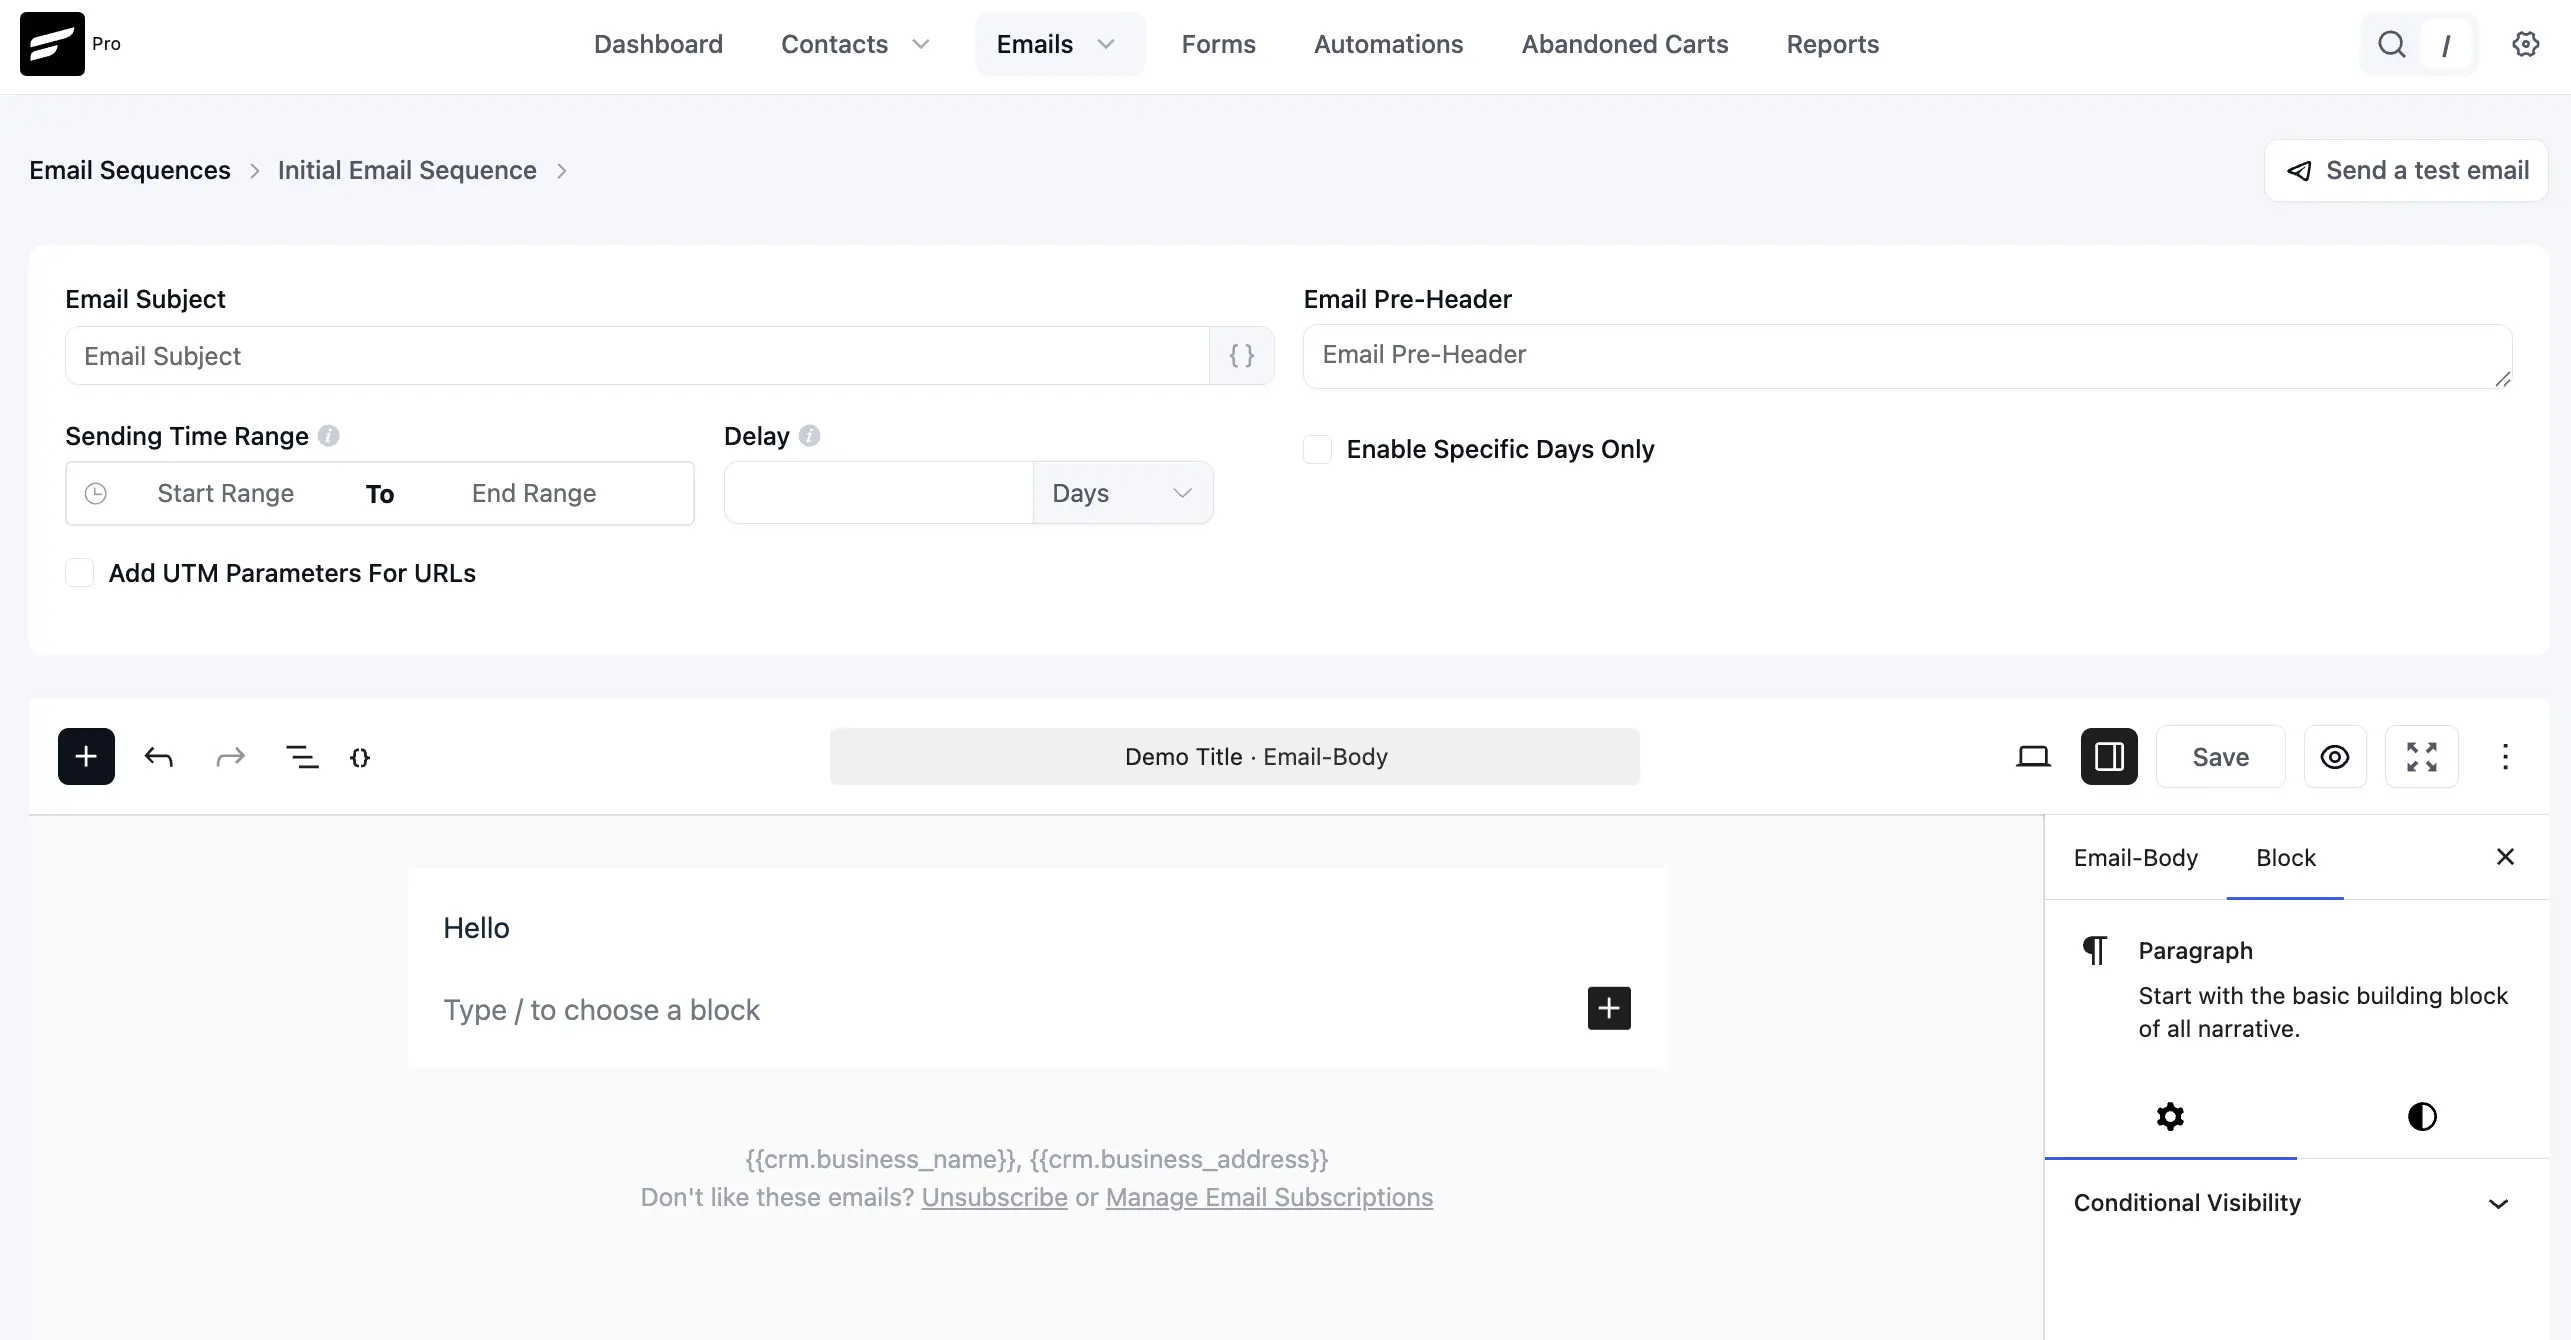
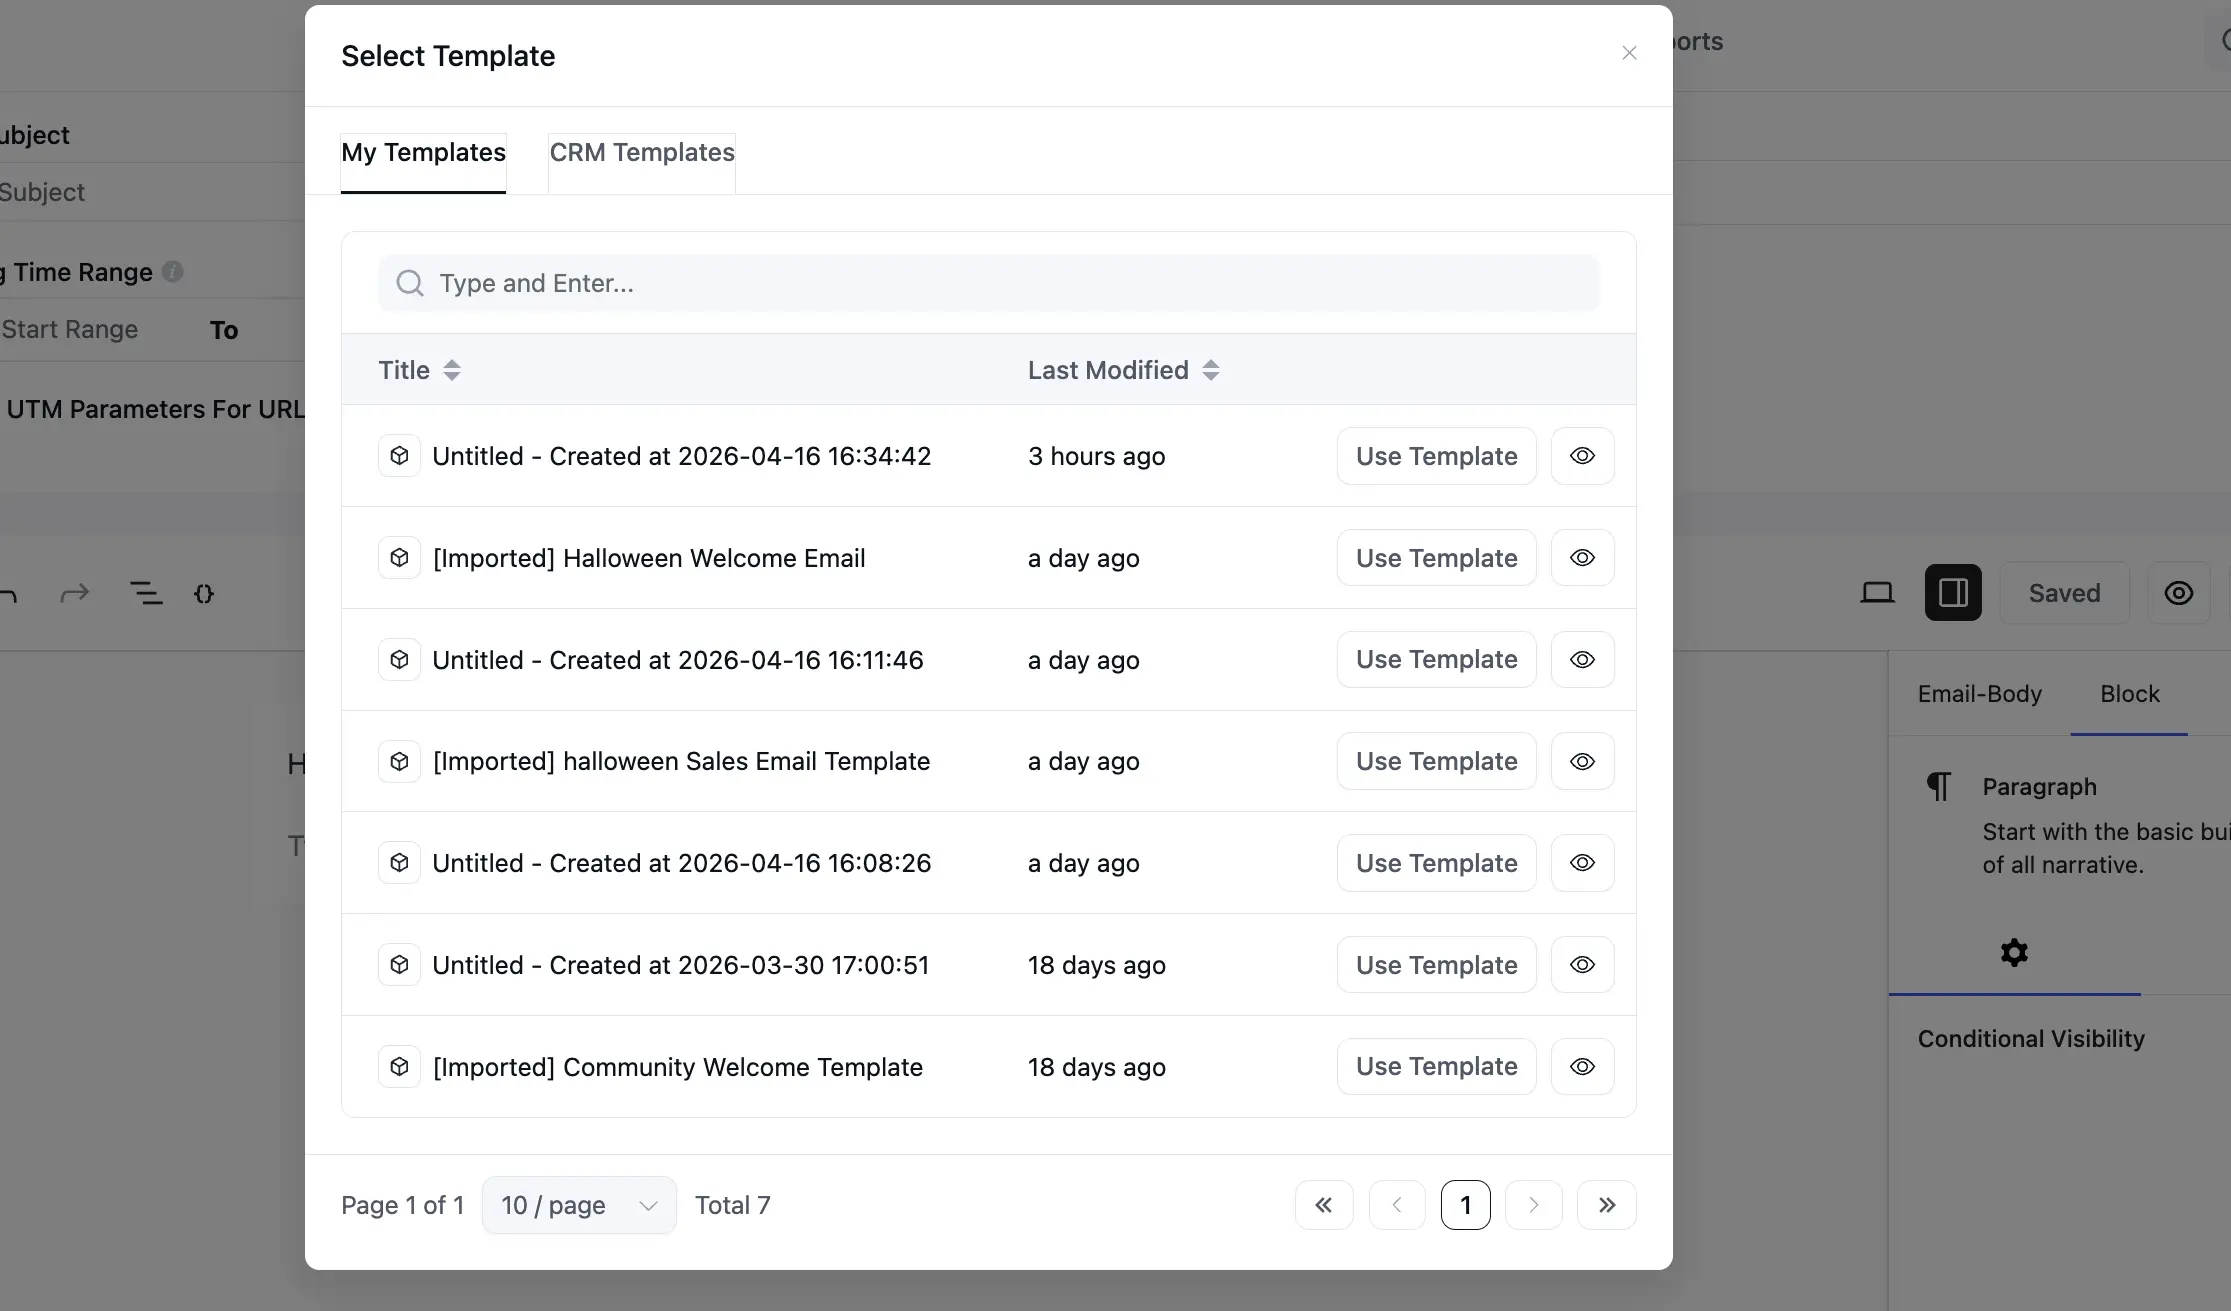
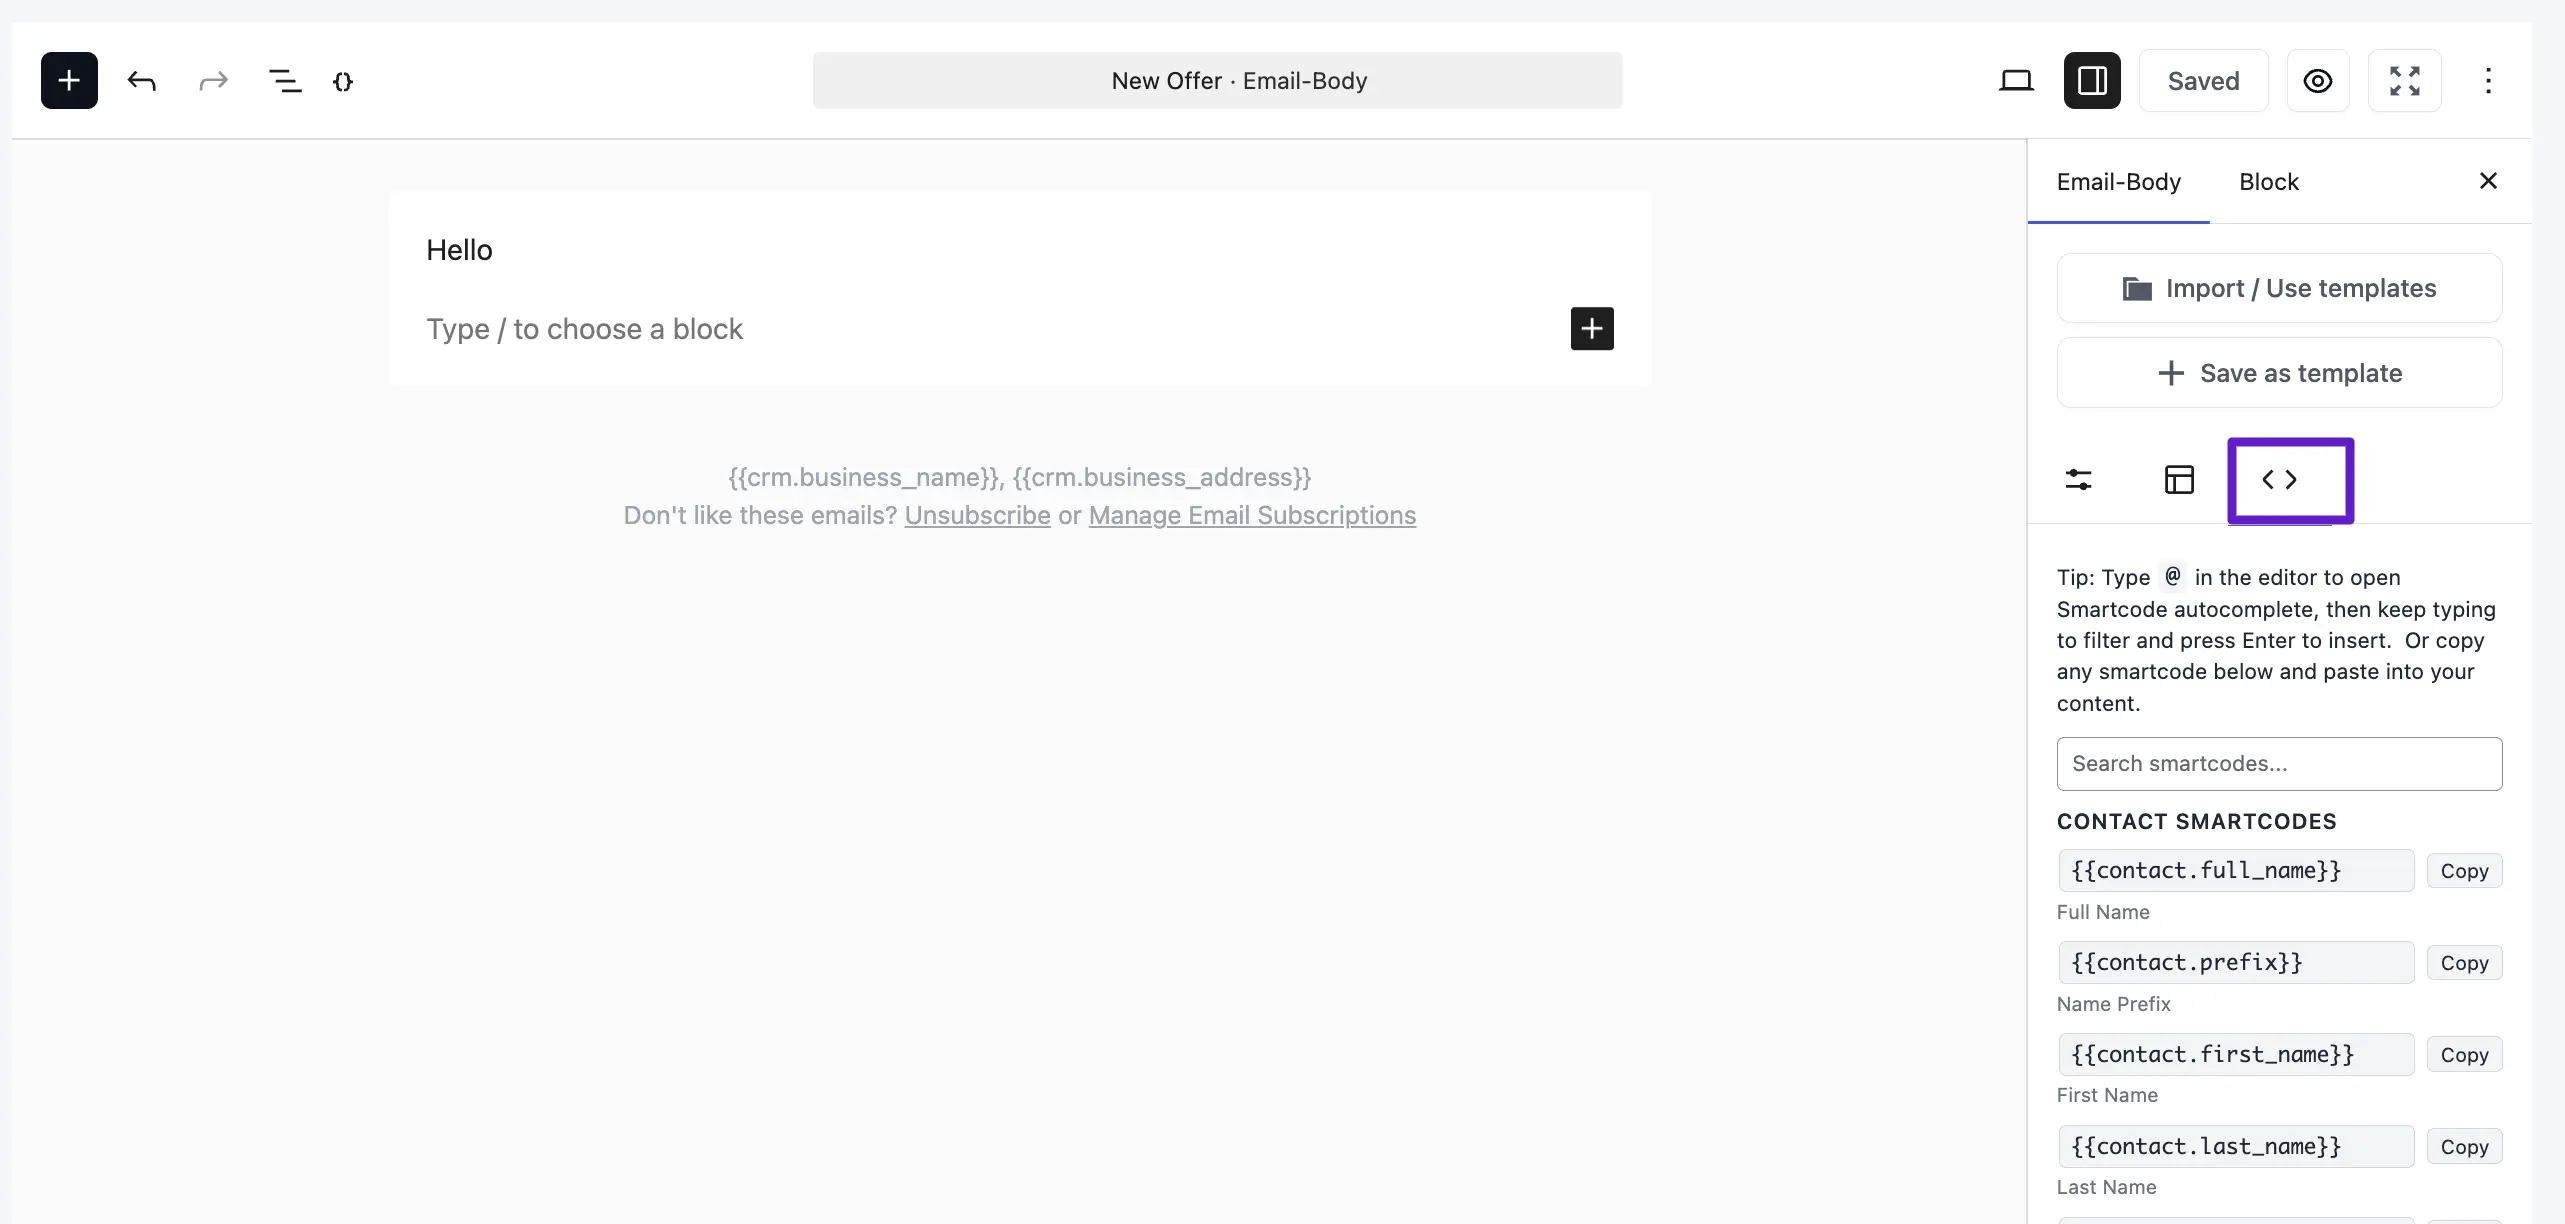
- Compose Content: You can write your content from scratch or Import Email Templates you have previously created. If you want to learn more about Compose Email, read this Documentation.
- SmartCodes: Use dynamic data (like
{{contact.first_name}}) to personalize each message for the recipient. To learn more about dynamic data using by SmartCode please visit SmartCode in Email Editor.
Defining the Delivery Schedule
Scheduling is the most critical part of an email sequence, ensuring messages reach subscribers at the right time without overwhelming them.
- Delay: This is mandatory for sequential emails. You can set delays in Minutes, Days, Weeks, or Months. For example, a 1-day delay means the email is sent 24 hours after the trigger event.
- Time Range: Specify a window (e.g., 9:00 AM – 11:00 AM) to ensure emails land in inboxes when people are most likely to check them.
- Specific Days: You can restrict delivery to certain days of the week. If a sequence is triggered on a day you've unchecked (like a Saturday), the email will wait and deliver on the next available allowed day (e.g., Monday).
Testing and Managing Your Sequence
Before going live, use the Send a test email button in the top right corner of the email settings. Enter your email address to receive a preview and ensure everything looks correct.
Once your sequence is built, the dashboard provides a high-level overview of performance for each email, including:
- Schedule Delay: The timing for each specific step.
- Recipients & Stats: Total contacts reached, along with Open Rate, Click Rate, and Unsubscribe percentages.
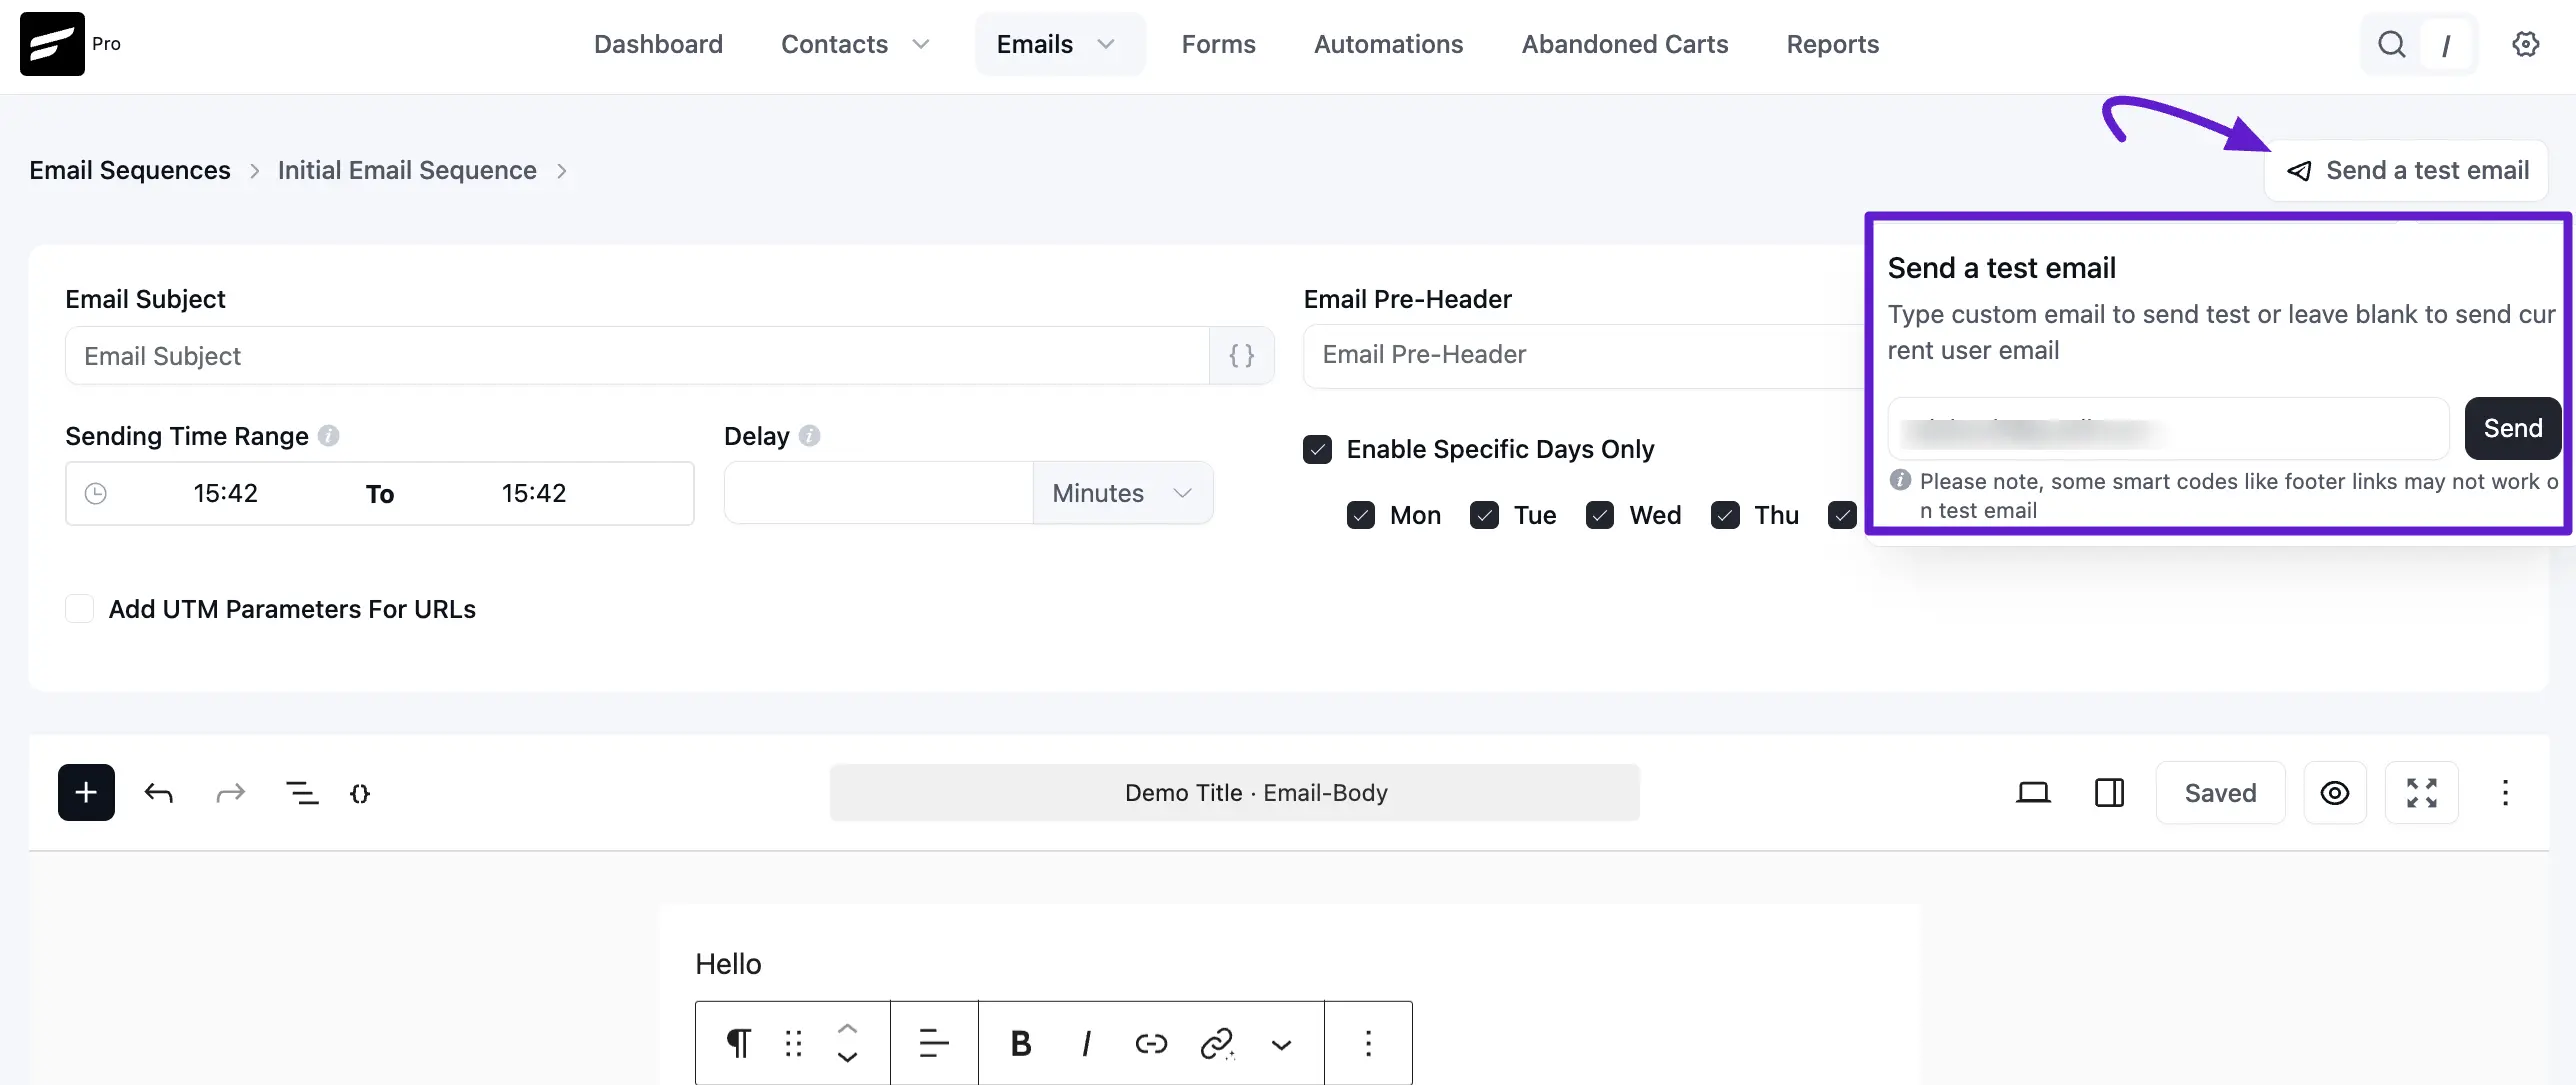
Once the email is sent successfully you will see a Success Message saying the Test email is sent successfully in the top right corner.
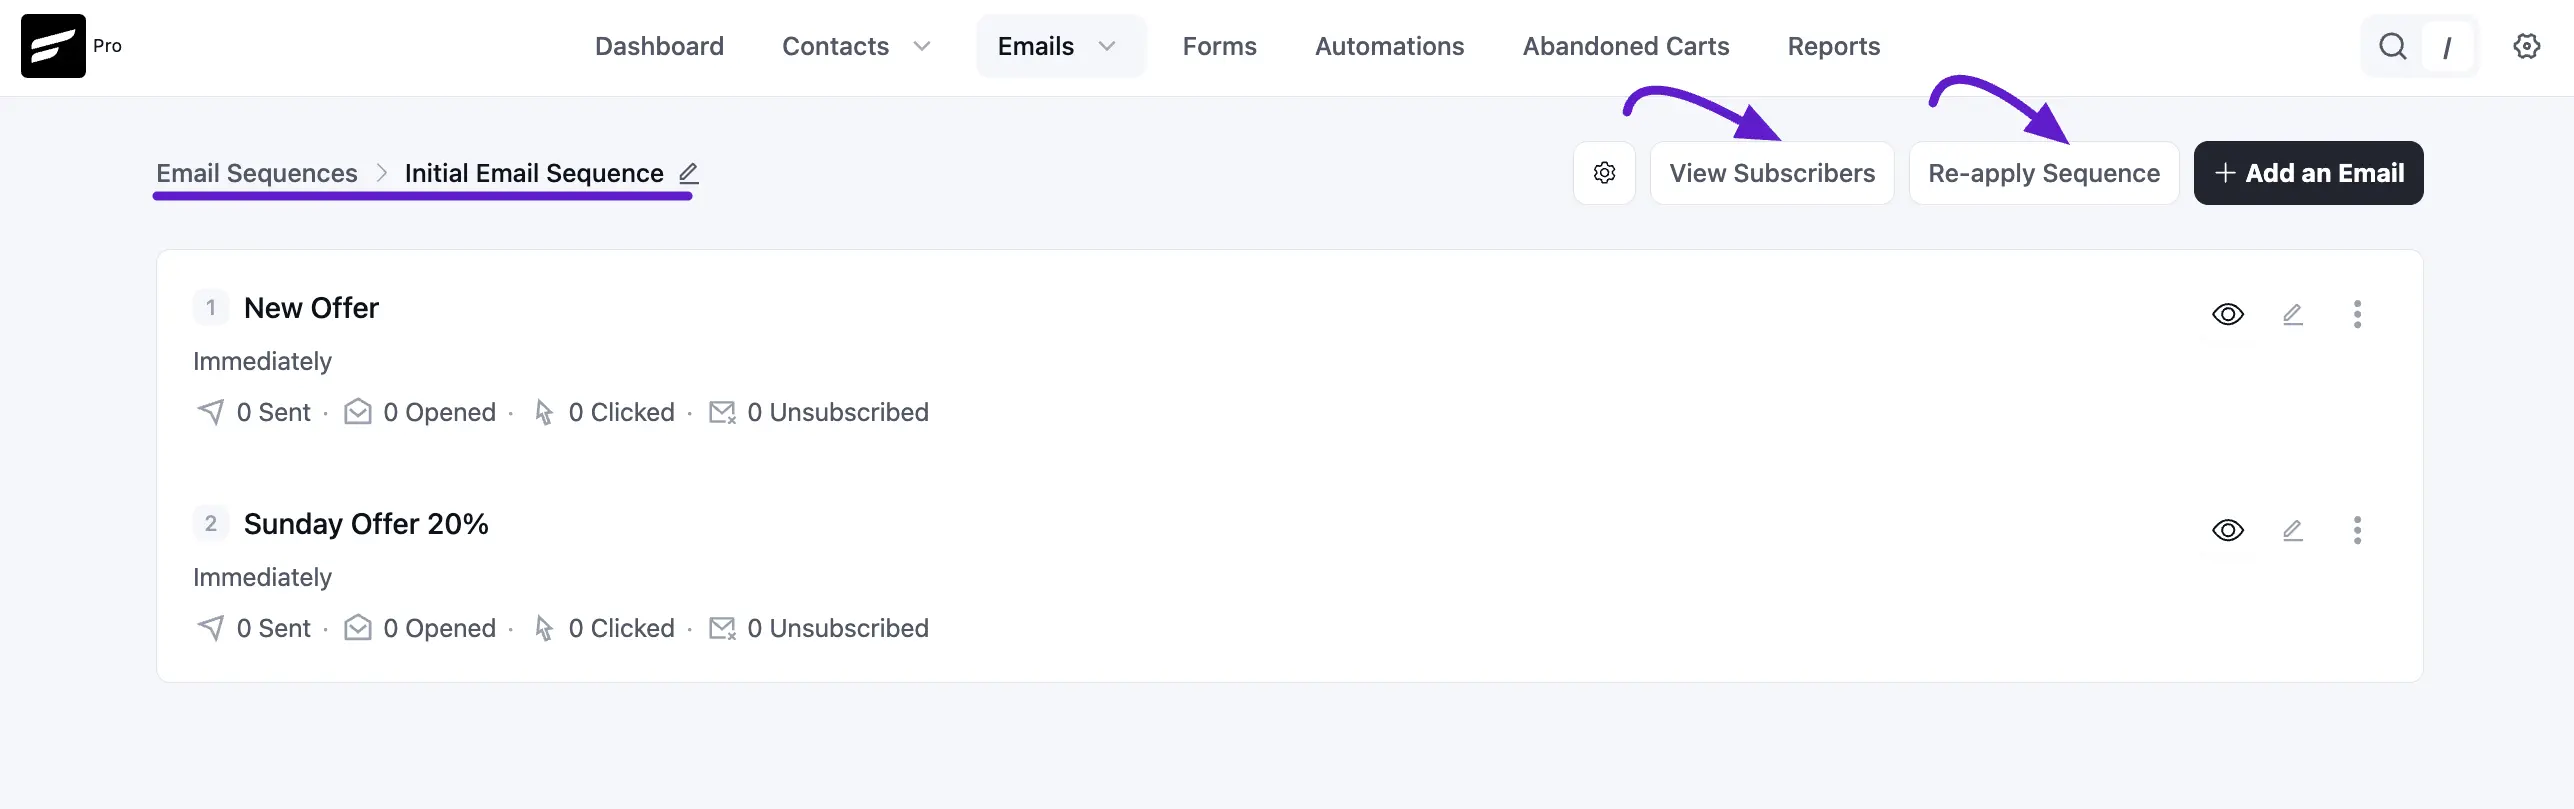
Sequence Emails
So now we just created our first Email of the Email Sequence. Now we can add as many emails as we want following the above guide.
From here you will be able to see the below data properties:
- Subjects: The Email Subject for the Sequence Email.
- Schedule Delay: The delay defined or scheduled for the sequence email.
- Recipients: Total Number of recipients.
- Email Opened: Percentage of the Email Opened against the total number of recipients.
- Link Clicked: Percentage of the Link Clicked against the total number of recipients.
- Unsubscribed: Value of the Unsubs from this Sequence Email.
Advanced Sequence Settings
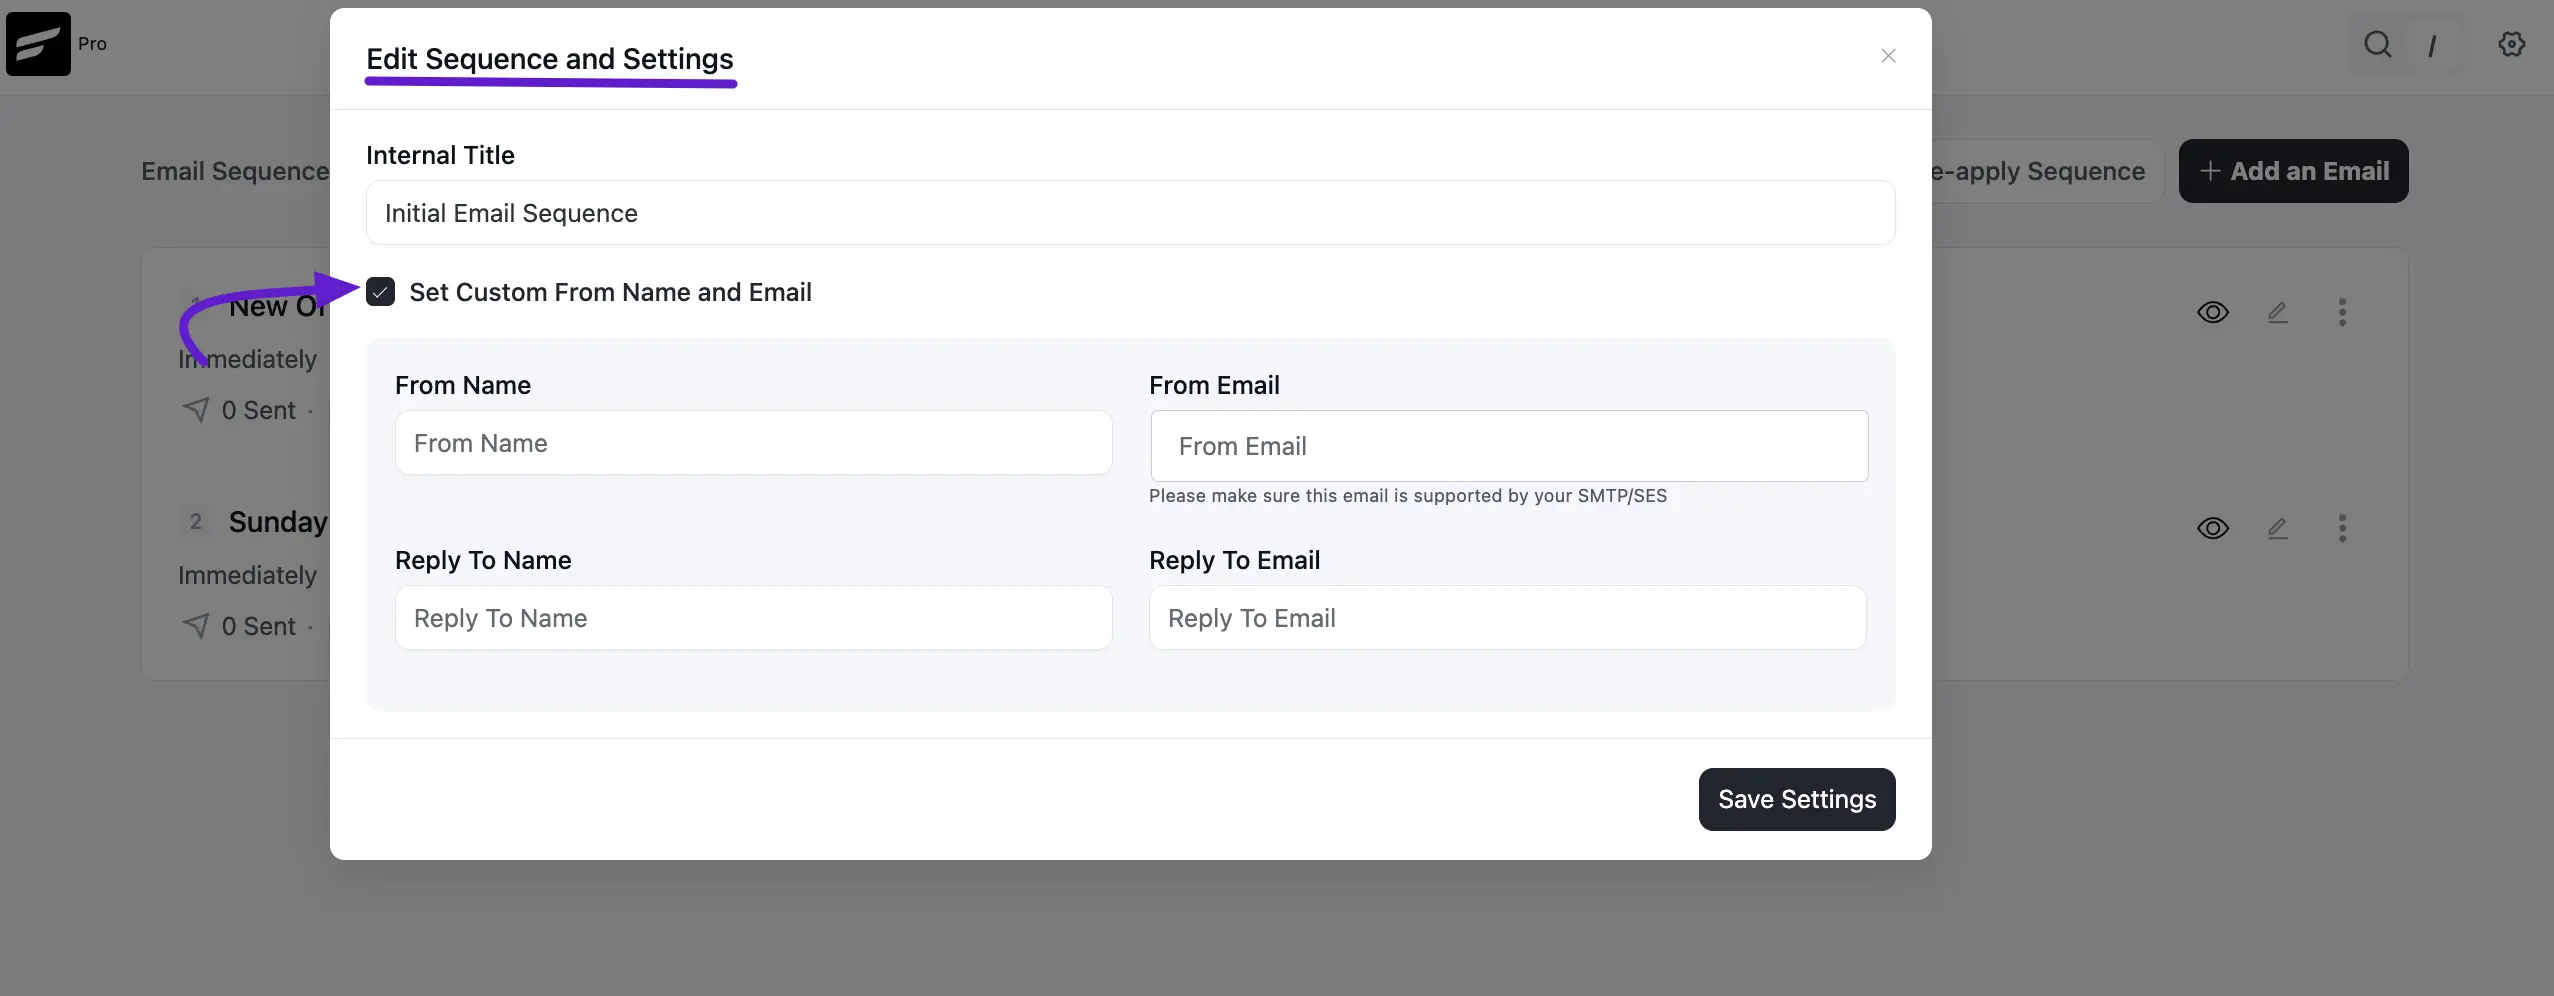
- Custom "Mail From" Settings: Click the Settings (Gear)Icon on the dashboard to set a unique From Name, From Email, or Reply-To address specifically for this sequence.
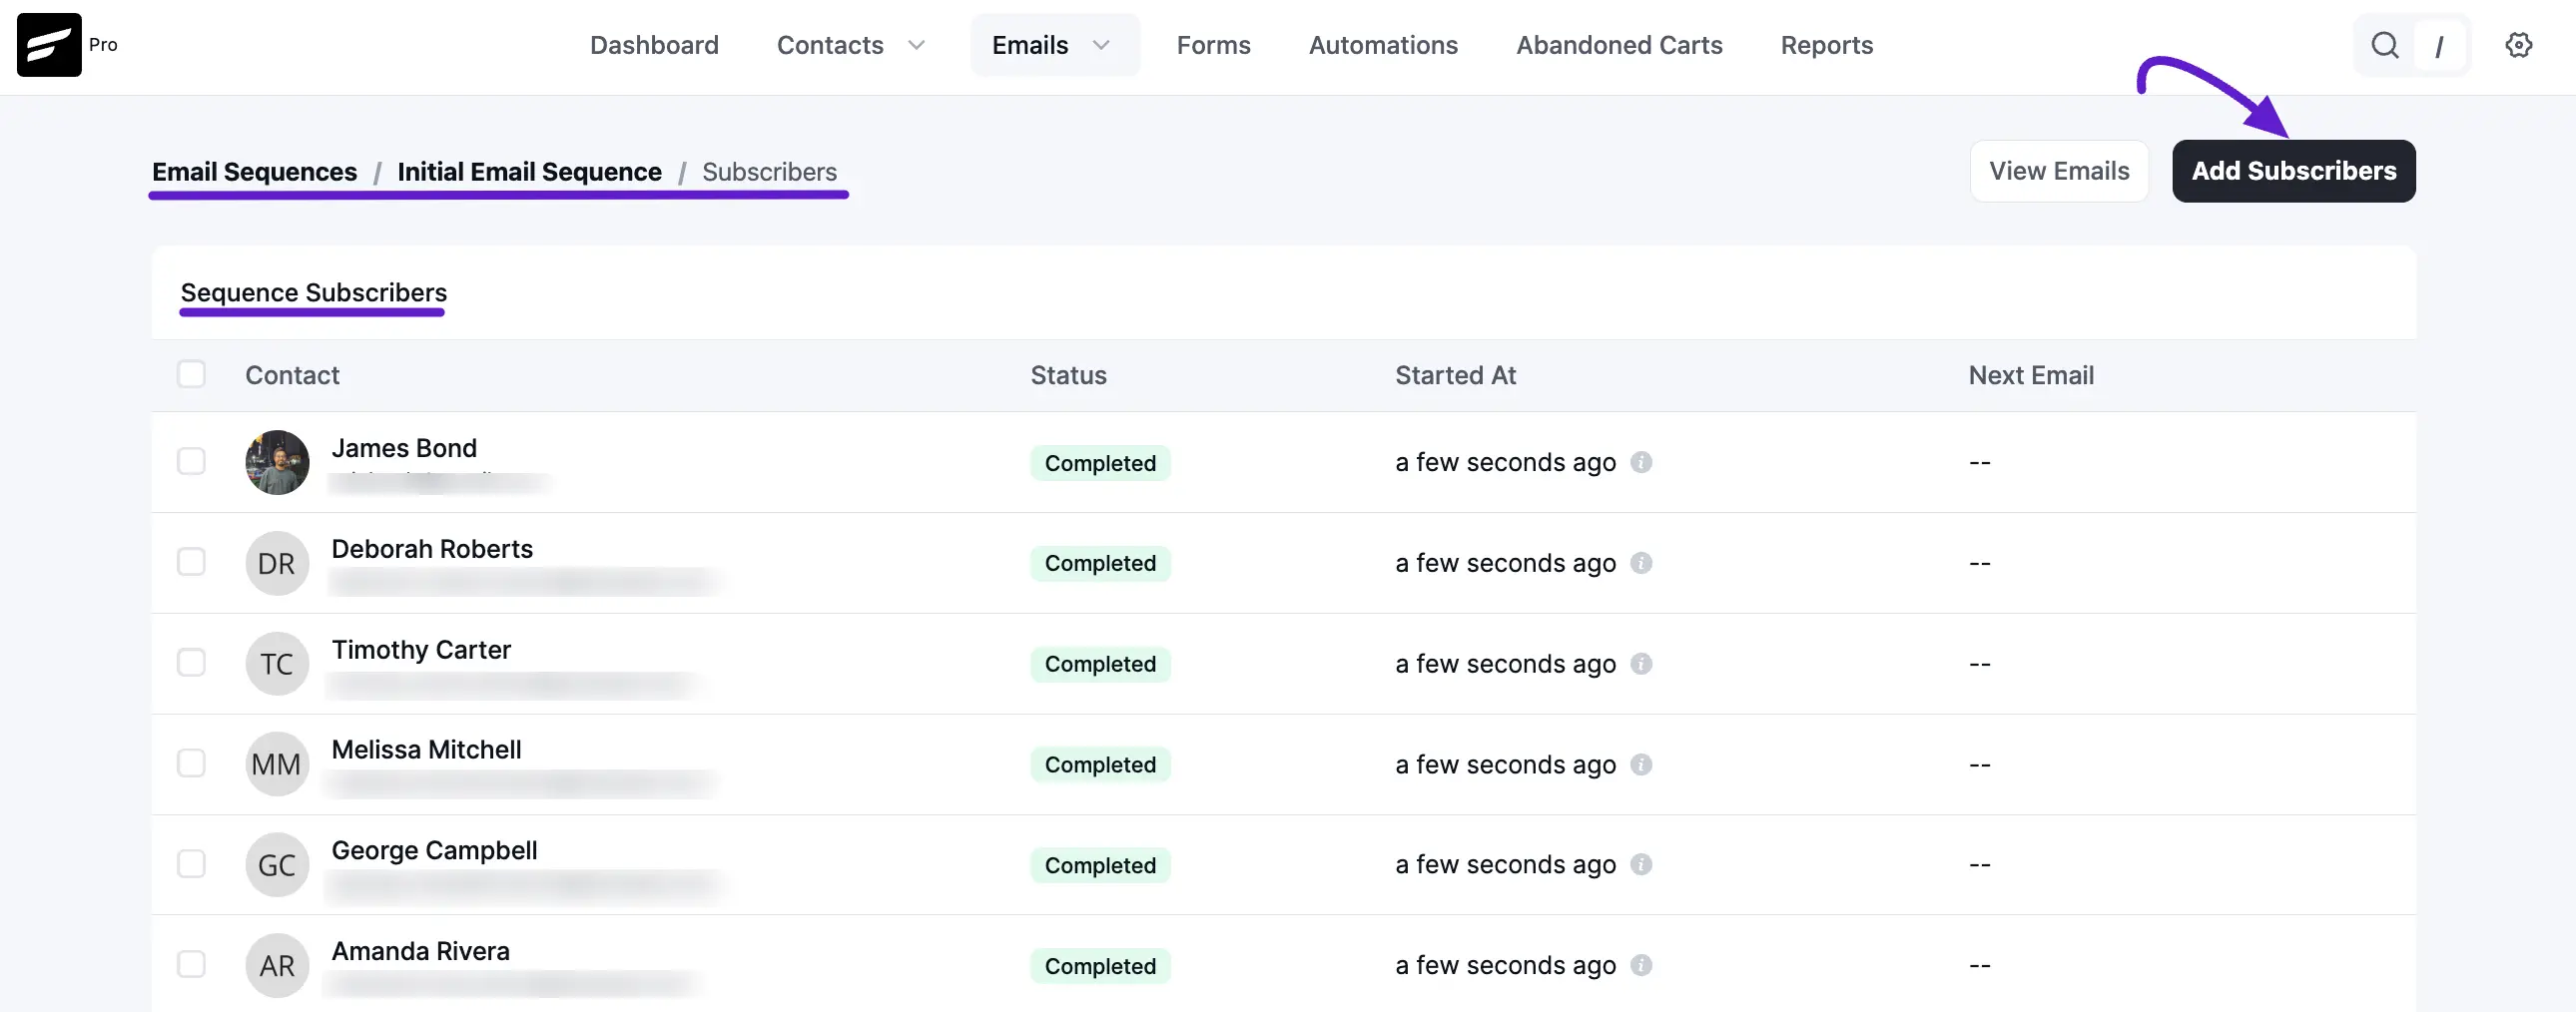
- View Subscribers: Click View Subscribers to see all contacts currently in the sequence. From here, you can see their status (Active or Completed), their start date, and when their next email is scheduled. You can also manually Add or Remove subscribers.
- Name: The name of the contact that is in this Email Sequence.
- Email: The email address for the contact.
- Status: The status is either active or completed for the sequence.
- Started at: When the Sequence started for this contact.
- Next Email: The schedule of the next email in from the sequence.
You can add more contacts to the Sequence by clicking on the Add Subscribers button. You can also select one or more contacts from the list and then Remove them From the Sequence.
Triggering Sequences in Automation
To make your sequence live, you must connect it to an Automation Funnel:
- Go to Automations and create a new funnel (e.g., triggered by "Joined a List" or "Enrolled in a Course").
- Click the (+) button at the point in the funnel where you want the sequence to start.
- Choose the Set Sequence Emails action and select the sequence you created.
Your automated nurturing process is now active! Use these sequences to provide value, share resources, and guide your contacts through their customer journey.
Once you've created email sequences, you can trigger them inside Automation. To add an email sequence within an automation funnel, simply hit the (+) button and choose Set Sequence Emails from the Email Actions.
So that's all about email sequences. Go ahead and nurture your audience with any kind of email sequence!
*Tutorial: 4 Excellent Email Sequences and How to Create Them in FluentCRM.