Appearance
Primary Automation Triggers
FluentCRM offers several Primary Triggers that let you start an automation funnel based on your user’s behavior. Besides primary triggers, there are plenty of other Triggers available in FluentCRM that you can use to create automation funnels for automating your workflows according to your requirements.
This article will provide detailed information about all Primary Triggers of FluentCRM Automation.
Remember, to use all the CRM Triggers, you need to have FluentCRM Pro Plugin installed and activated in your WordPress Site.
Primary Triggers of FluentCRM
To learn how you can use all the primary Triggers of your FluentCRM, follow the steps with screenshots below –
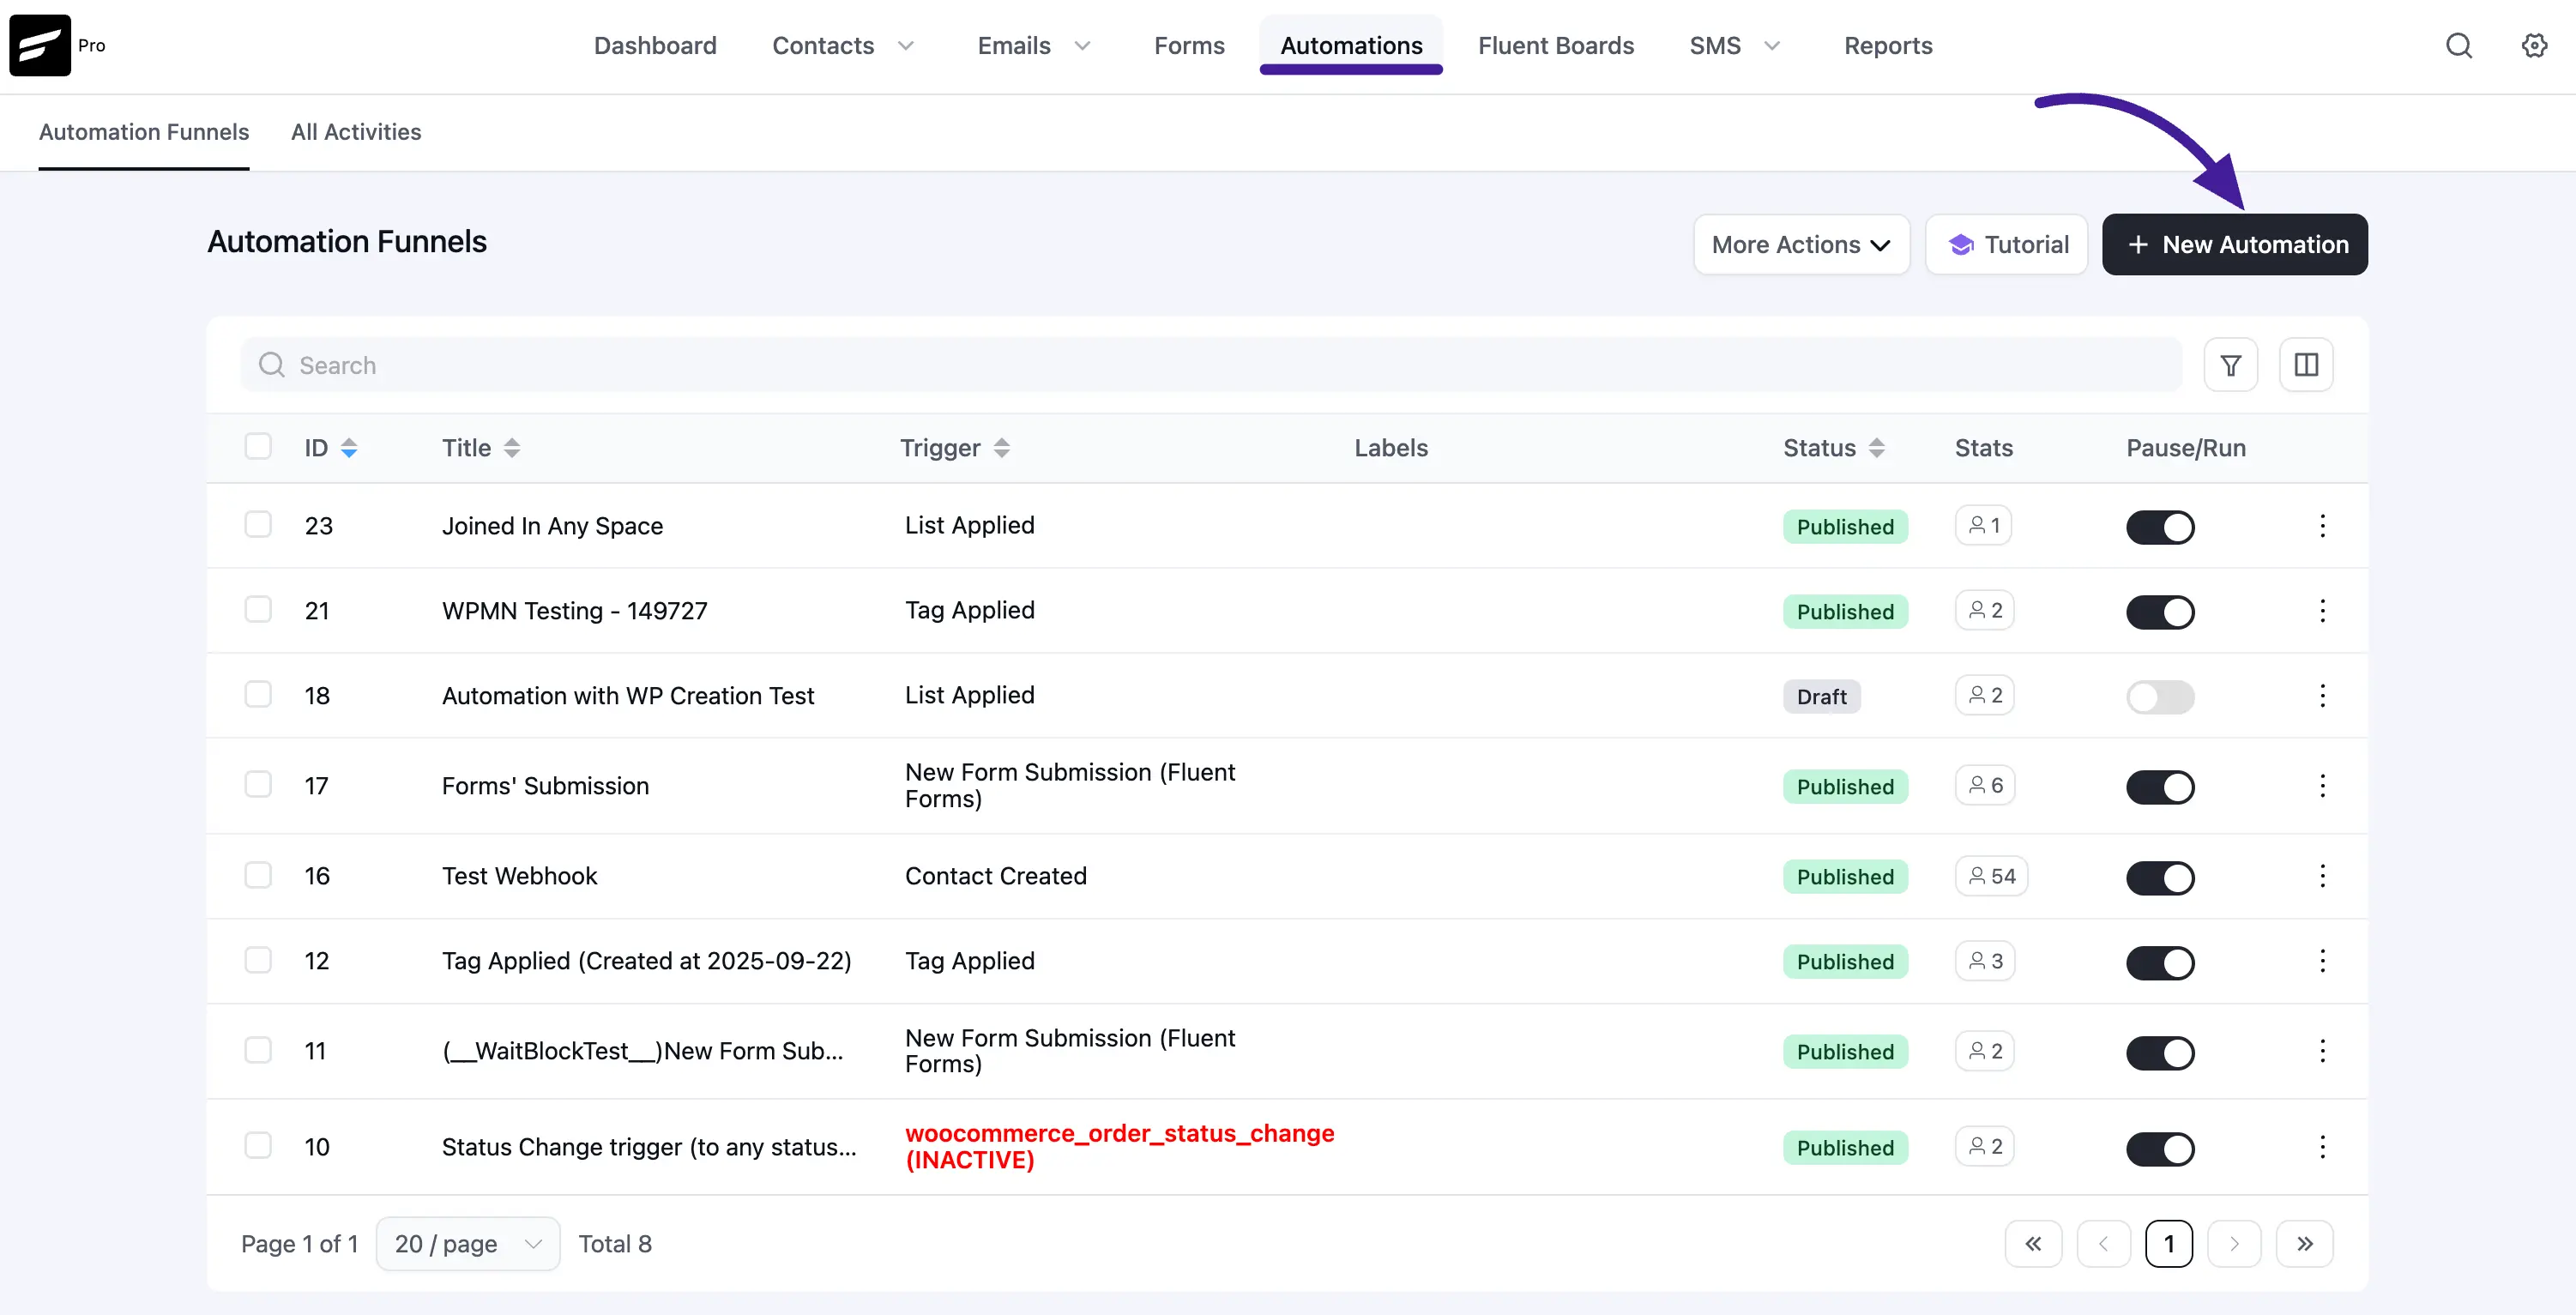
First, go to the Automation section from the FluentCRM Navbar, and click + New Automation.
To learn the detailed process of creating a new automation funnel, read this Documentation.
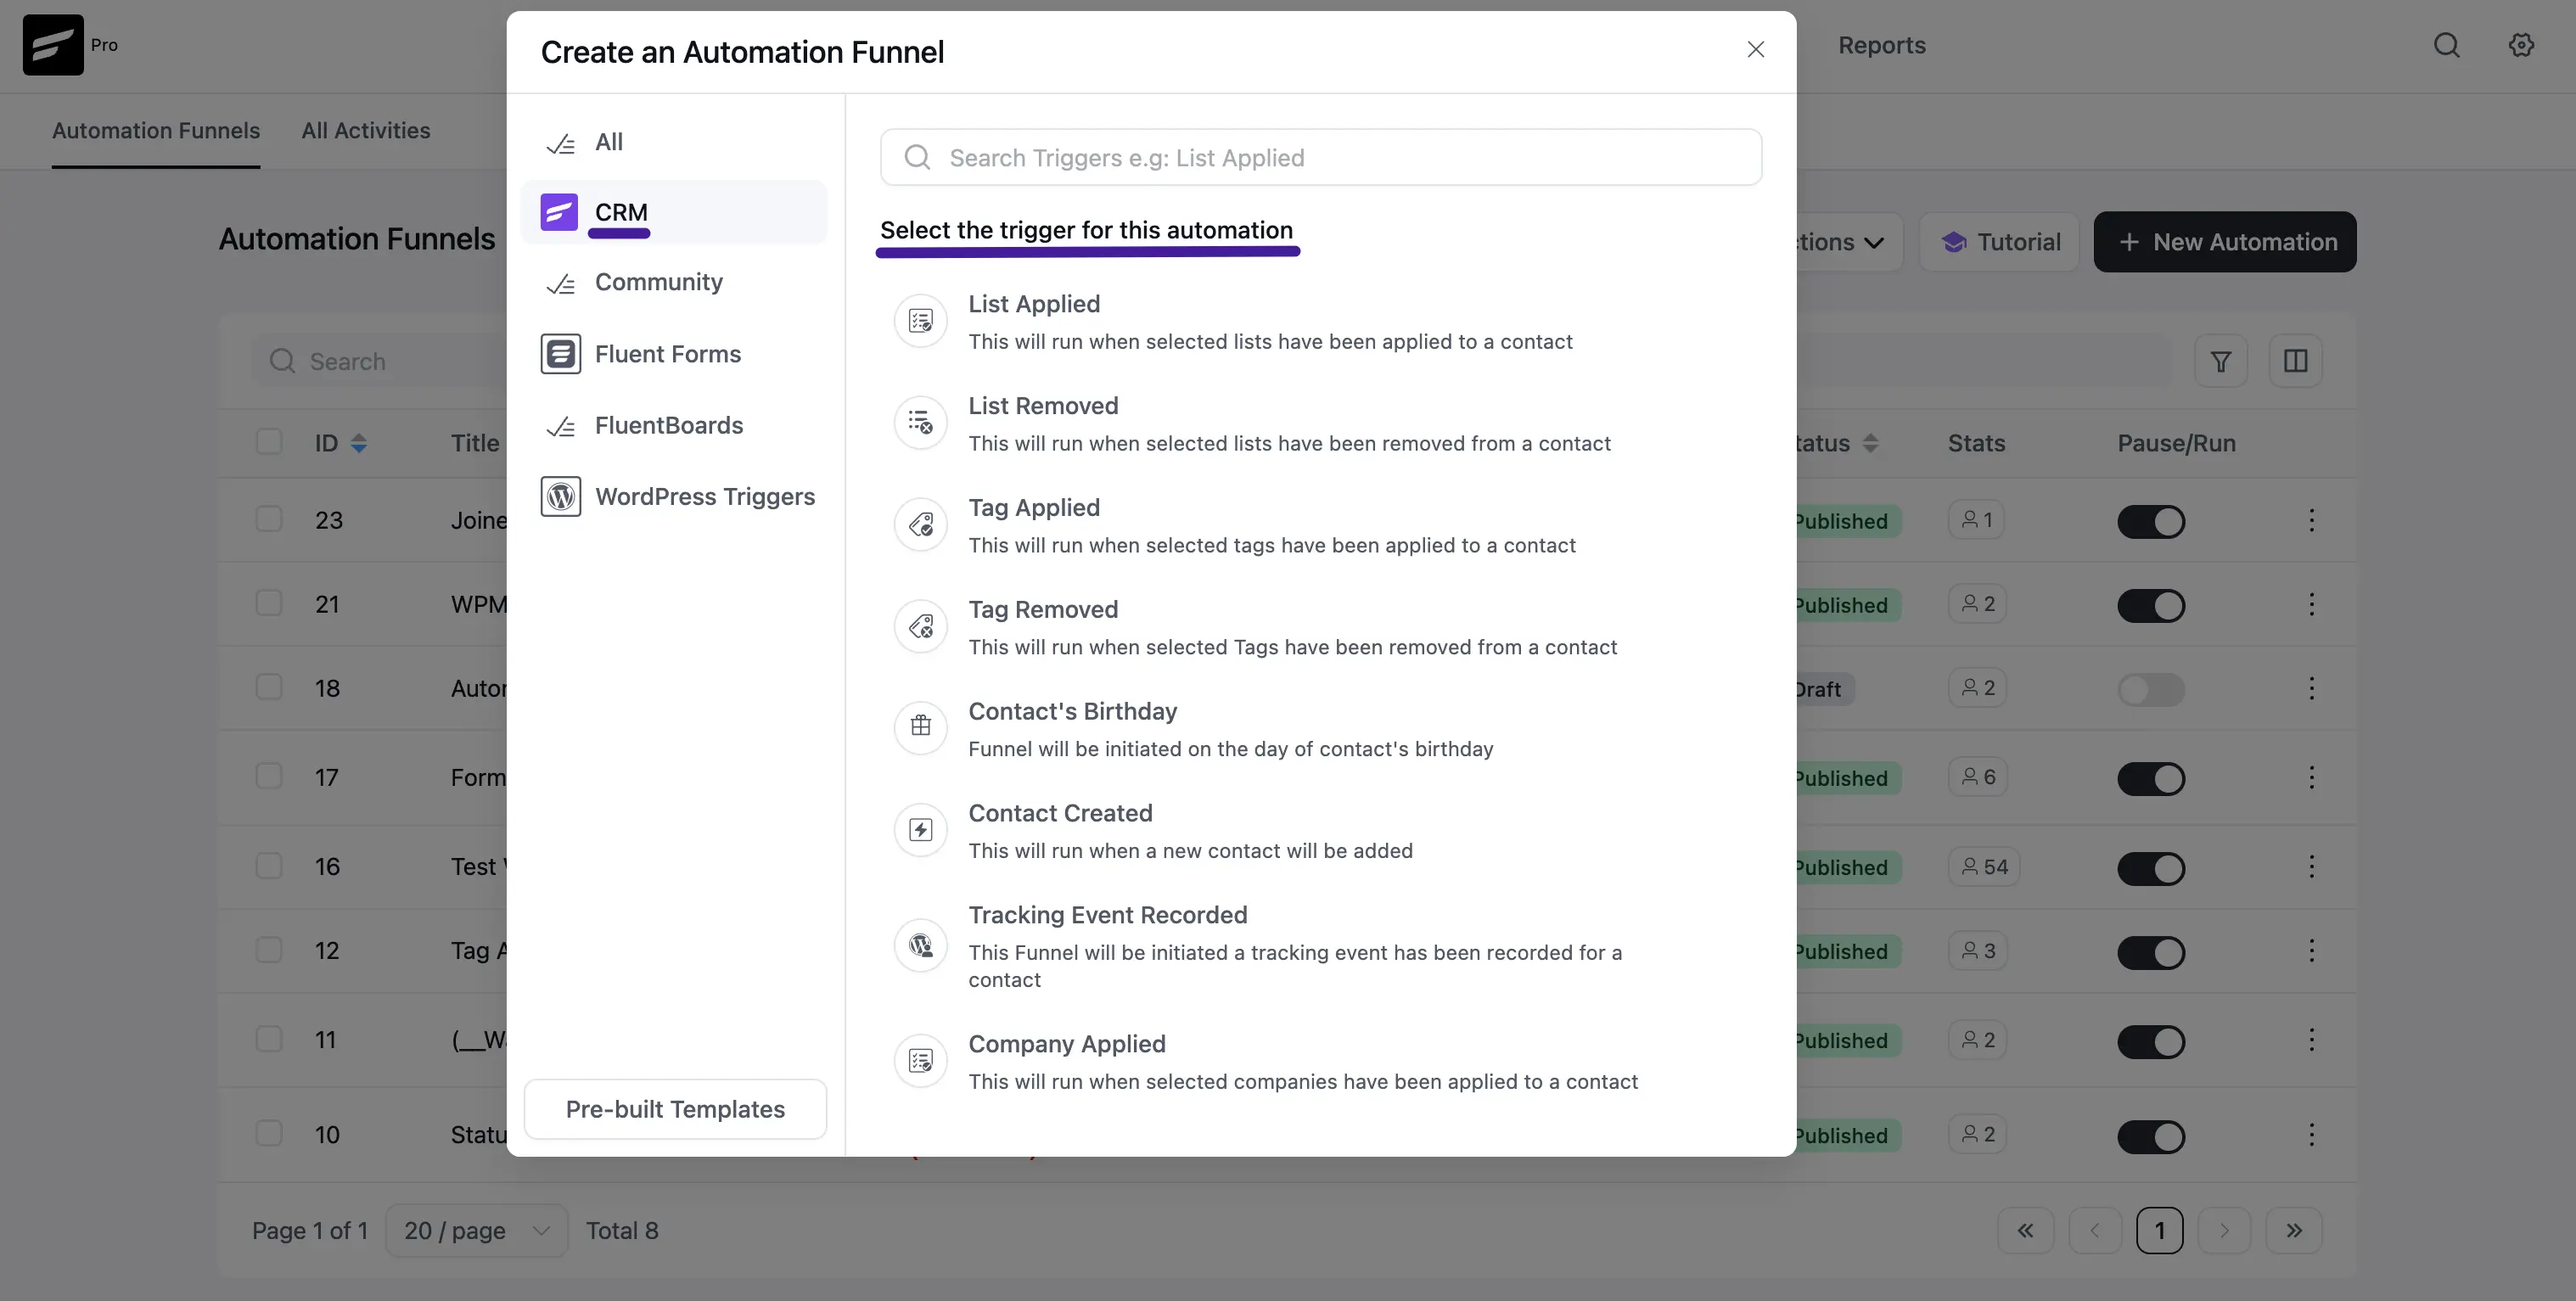
Now, a pop-up page will appear with all the triggers and Pre-built Funnel Templates for creating automation. If you want to create your automation funnel then simply click on the trigger you want to start with.
All the Primary Triggers for creating an automation funnel are divided into two major categories in the left sidebar. These are:
- CRM Trigger
- WordPress Trigger
Once you select your desired Trigger, click the Continue button, and put a Title under the Internal Label field for this automation funnel so that you can easily find it later.
If you leave it blank, it will be automatically titled based on the trigger you selected.
1. CRM Trigger
Here is a detailed look at each CRM trigger:
List Applied
This automation funnel will start once the selected lists have been applied to a contact.
Once you select this trigger, a tab will appear on the right-hand side with options to set your trigger.
Settings of List Applied Trigger
Automation Name: Provide a Name for the Automation so that you may find it later easily.
Internal Description: Write a description that will be used as a Subtitle in the Block Diagram in the Automation Editor.
Select Lists: Select the Lists (single or multiple) using the dropdown arrow for which you want to trigger this automation funnel. If you do not have any existing Contact List in your FluentCRM, you can directly create one from here by clicking the Plus icon.
Run When: Select whether the contact needs to belong to one list or all of the lists you’ve selected.
Run the automation actions even contact status is not in subscribed status: Check this option if you want to run the automation even when the contact's status is not in subscribed status.
Restart: Check this option if you Restart the automation multiple times for the same contact that triggers the automation.
Once you are done, click the Save Settings button to save all your changes.
List Removed
This automation funnel will start once the selected lists have been removed from a contact.
Once you select this trigger, a tab will appear on the right-hand side with options to set your trigger.
To learn the use of all the settings mentioned in the screenshot below, read this Section.
Once you are done, click the Save Settings button to save all your changes.
Tag Applied
This automation funnel will start once the selected tags have been applied to a contact.
Once you select this trigger, a tab will appear on the right-hand side with options to set your trigger.
Here, are the Settings of Tag Applied Trigger
- Select Tags: Select the Tags (single or multiple) using the dropdown arrow for which you want to trigger this automation funnel. If you do not have any existing Tags in your FluentCRM, you can directly create one from here by clicking the Plus icon.
To learn the use of all the settings mentioned in the screenshot below, read this Section.
Once you are done, click the Save Settings button to save all your changes.
Tag Removed
This automation funnel will start once the selected Tags have been removed from a contact.
Once you select this trigger, a tab will appear on the right-hand side with options to set your trigger.
To learn the use of all the settings mentioned in the screenshot below, read this Section.
Once you are done, click the Save Settings button to save all your changes.
Contact’s Birthday
This automation funnel will be initiated on the day of the contact's birthday. With this funnel, you can send each of your subscribed contacts a custom birthday email or promotional offer on their birthday. Additionally, birthday marketing is a powerful technique to enhance customer experience and increase revenue.
Once you select this trigger, a tab will appear on the right-hand side with options to set your trigger.
To learn the use of all the settings mentioned in the screenshot below, read this Section.
Once you are done, click the Save Settings button to save all your changes.
Contact Created
This automation funnel will start once a new contact will be added. To learn the detailed process of adding contacts, read this Documentation.
Once you select this trigger, a tab will appear on the right-hand side with options to set your trigger.
To learn the use of all the settings mentioned in the screenshot below, read this Section.
Once you are done, click the Save Settings button to save all your changes.
New Form Submission (Fluent Forms)
This automation funnel will start once a new form is submitted in Fluent Forms.
Once you select this trigger, a tab will appear on the right-hand side with options to set your trigger.
Remember, to use this trigger you must install and activate the FluentForms plugin in your website. Plus, if you want to learn how to integrate FluentForms with FluentCRM, read this Documentation.
Here are the Settings of the New Form Submission trigger
Automation Name: Provide a Name for the Automation so that you may find it later easily.
Internal Description: Write a description that will be used as a Subtitle in the Block Diagram in the Automation Editor.
Select your Form: Select the desired Form using the dropdown arrow for which you want to trigger this automation funnel.
Map Primary Data: The field will be available for mapping with the Form’s corresponding field. The left-hand side is FluentCRM fields and the right-hand side is user-submitted data from the selected Fluent Form. Click the Dropdown Arrow to see all the mappable field items.
Map Other Data: Use this option if you want to add your FluentCRM fields beside the primary fields. Here, you can also select the Value according to the FluentCRM fields using the Dropdown arrow. Add as many Other Fields as you need by clicking the +Add More button and delete any field by clicking the Trash Icon.
Subscription Status: Change the subscription status using the dropdown list for the contact that submits the form according to FluentCRM Contacts Status.
Run the automation actions even contact status is not in subscribed status: Check this option if you want to run the automation even when the contact's status is not in subscribed status.
Conditions: Specify what will happen if the subscriber already exists in the database or submitted the form before. Checking this option means that the contact’s form submission will not trigger the automation if he/ she already submitted the form before triggering this automation.
Once you are done, click the Save Settings button to save all your changes.
Company Applied
This automation funnel will start once the selected companies have been applied to a contact.
Once you select this trigger, a tab will appear on the right-hand side with options to set your trigger.
Here, are the Settings of the Company Applied Trigger
Select Companies: Select the Company (single or multiple) using the dropdown arrow for which you want to trigger this automation funnel. If you do not have any existing Company in your FluentCRM, read this Documentation to create one.
Run When: Select whether the contact needs to belong to one Company or all of the Companies you’ve selected.
To learn the use of all the settings mentioned in the screenshot below, read this Section.
Once you are done, click the Save Settings button to save all your changes.
Company Removed
This automation funnel will start once the selected companies have been removed from a contact
Once you select this trigger, a tab will appear on the right-hand side with options to set your trigger.
To learn the use of all the settings mentioned in the screenshot below, read this Section.
Once you are done, click the Save Settings button to save all your changes.
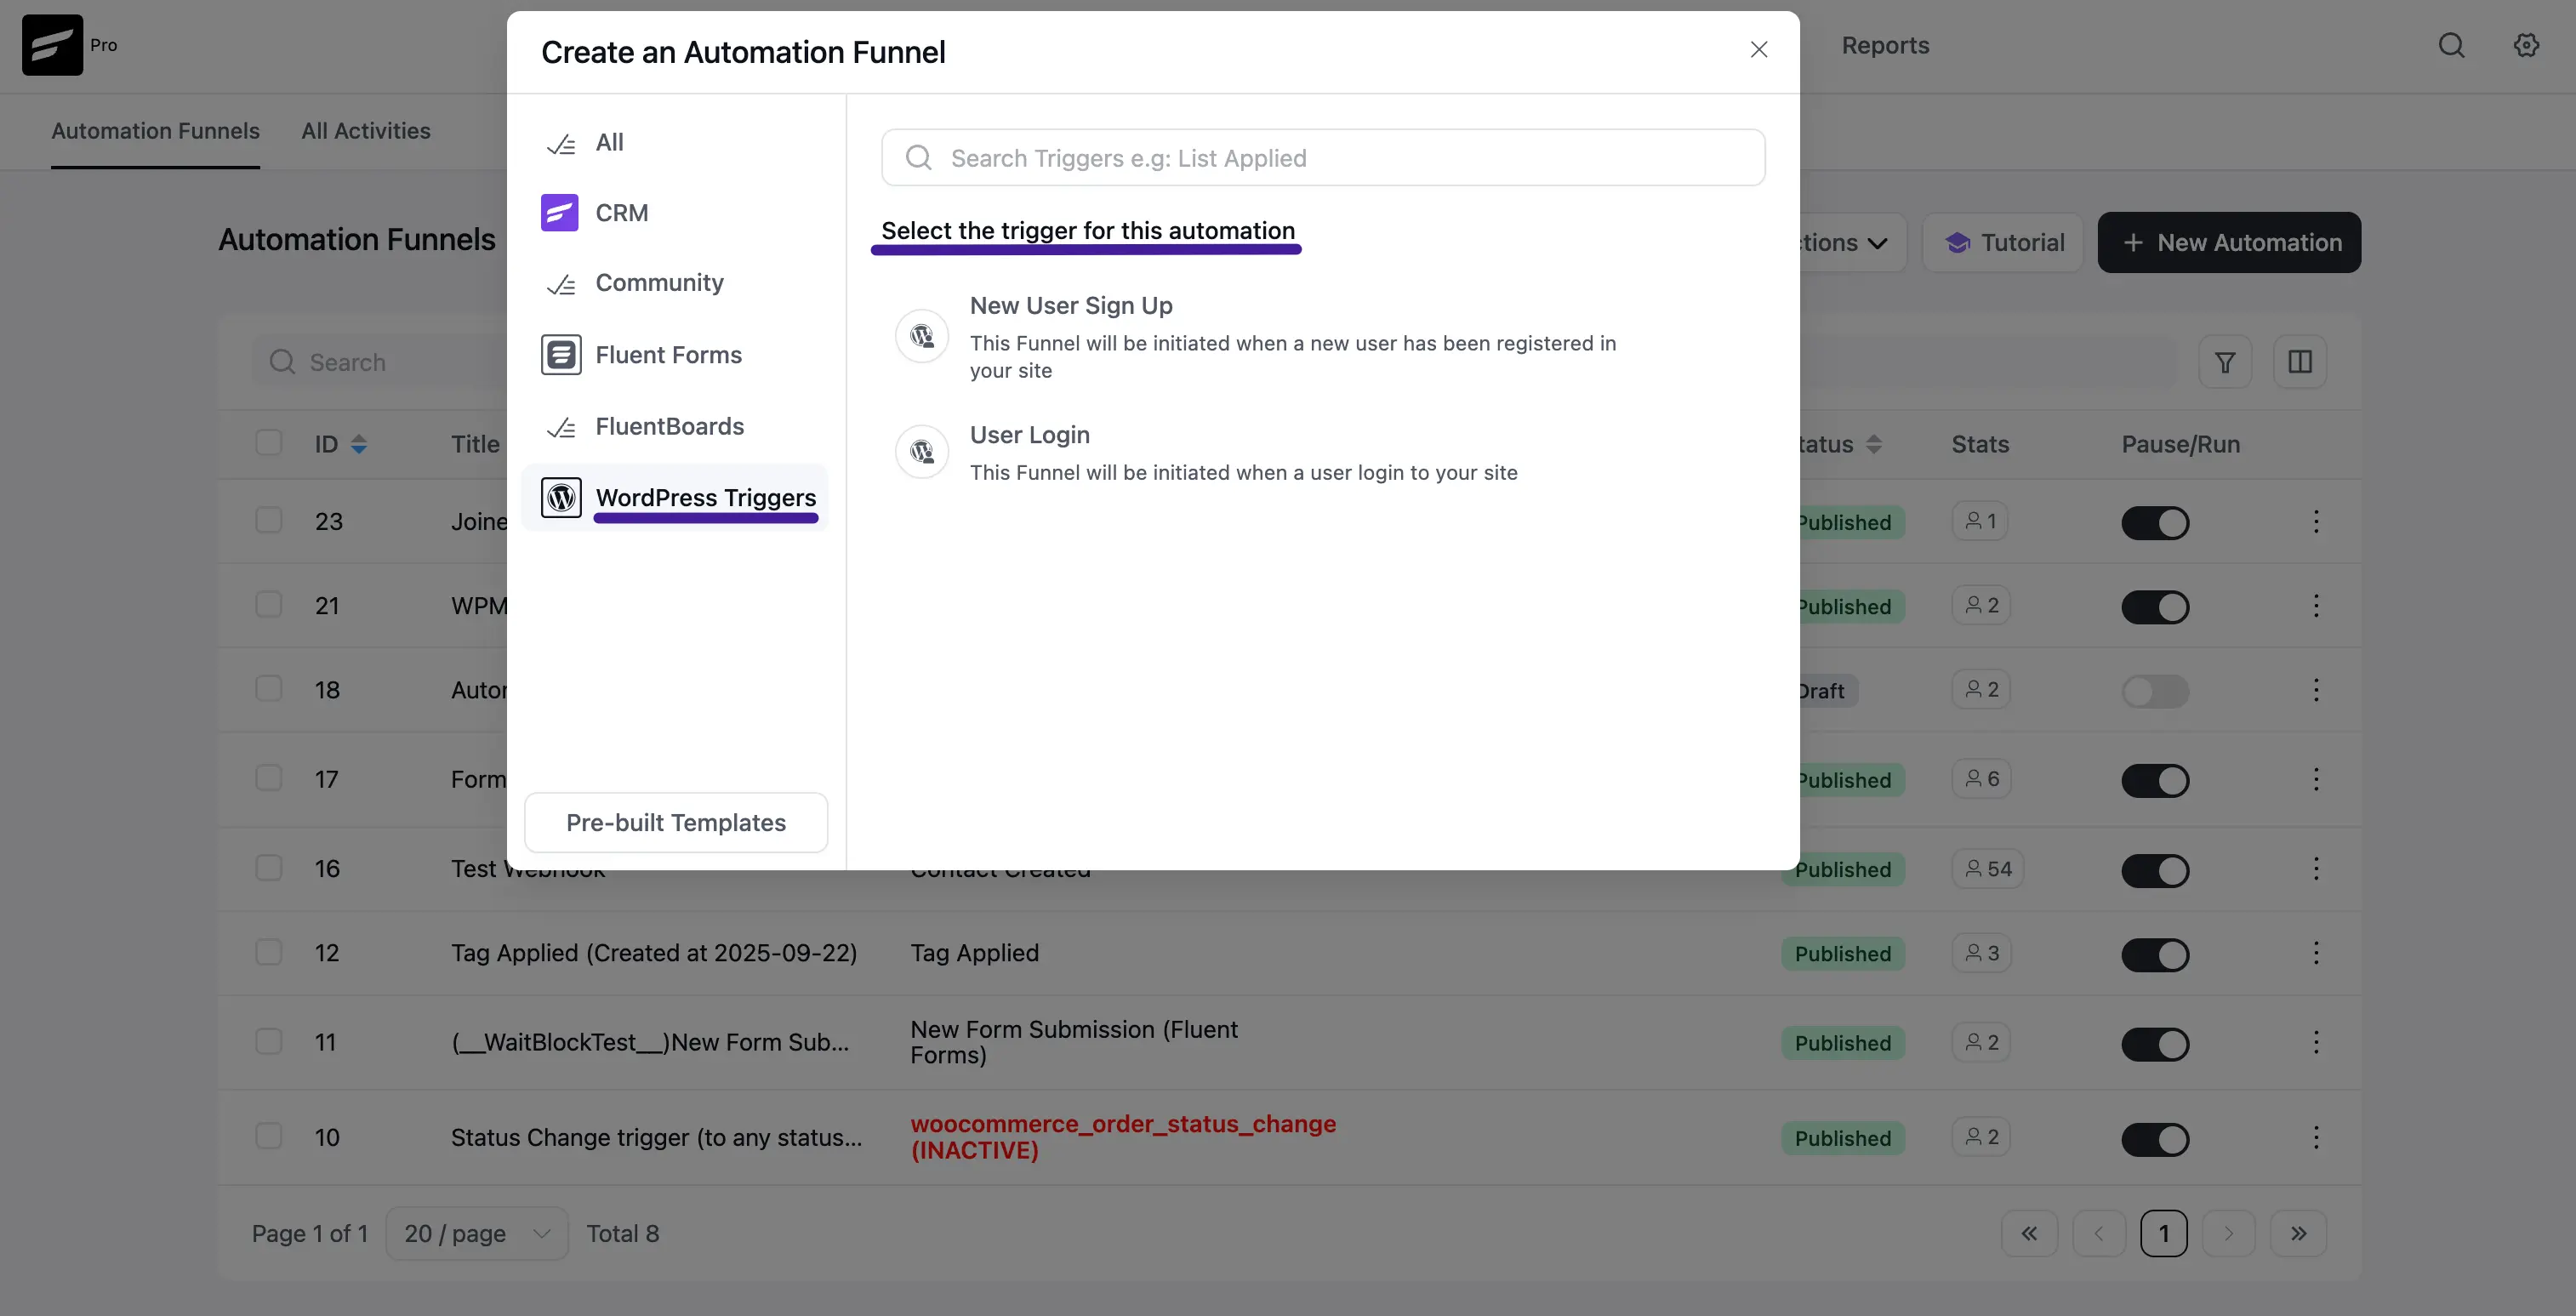
2. WordPress Trigger
There are also a few primary Triggers for creating an Automation Funnel that appear under the WordPress Triggers options from the left sidebar. These are:
- New User Sign Up
- User Login
Once you select your desired Trigger, click the Continue button, and put a Title under the Internal Label field for this automation funnel so that you can easily find it later.
If you leave it blank, it will be automatically titled based on the trigger you selected.
A detailed explanation of the WordPress Triggers mentioned above is given below –
New User Sign-Up
This automation funnel will start once a new user signs up for your WordPress Site.
Once you select this trigger, a tab will appear on the right-hand side with options to set your trigger.
Here, are the Settings of the New User Sign-Up Trigger
Subscription Status: Change the subscription status using the dropdown list for the contact that submits the form according to FluentCRM Contacts Status.
If Contact Already Exist?: Specify what will happen if the subscriber already exists in the database. You can either update if the contact is already present in the FluentCRM Contacts which means recurring triggering for the automation or Skip the automation for this contact.
Targeted User Roles: Select which user roles registration will trigger this automation Funnel. Leave blank to run for all user roles.
To learn the use of all the settings mentioned in the screenshot below, read this Section.
Once you are done, click the Save Settings button to save all your changes.
User Login
This automation funnel will start once a user logs into your WordPress Site.
Once you select this trigger, a tab will appear on the right-hand side with options to set your trigger.
To learn the use of all the settings mentioned in the screenshot below, read this Section.
Once you are done, click the Save Settings button to save all your changes.