Appearance
Configure SMS Module
The SMS Module is a powerful feature in FluentCRM Pro that allows you to deliver SMS campaigns and automate messages directly to your subscribers or customers. This feature is crucial for time-sensitive or high-priority communications, complementing your existing email marketing efforts.
In this article, you will learn how to enable the SMS Module in your FluentCRM installation before configuring your preferred SMS provider.
Note: The SMS Module is a FluentCRM Pro feature. The free FluentCRM plugin does not include SMS campaigns or SMS automation actions.
Enabling the SMS Module
To activate SMS functionality within your CRM, you need to navigate to the plugin settings and enable the module.
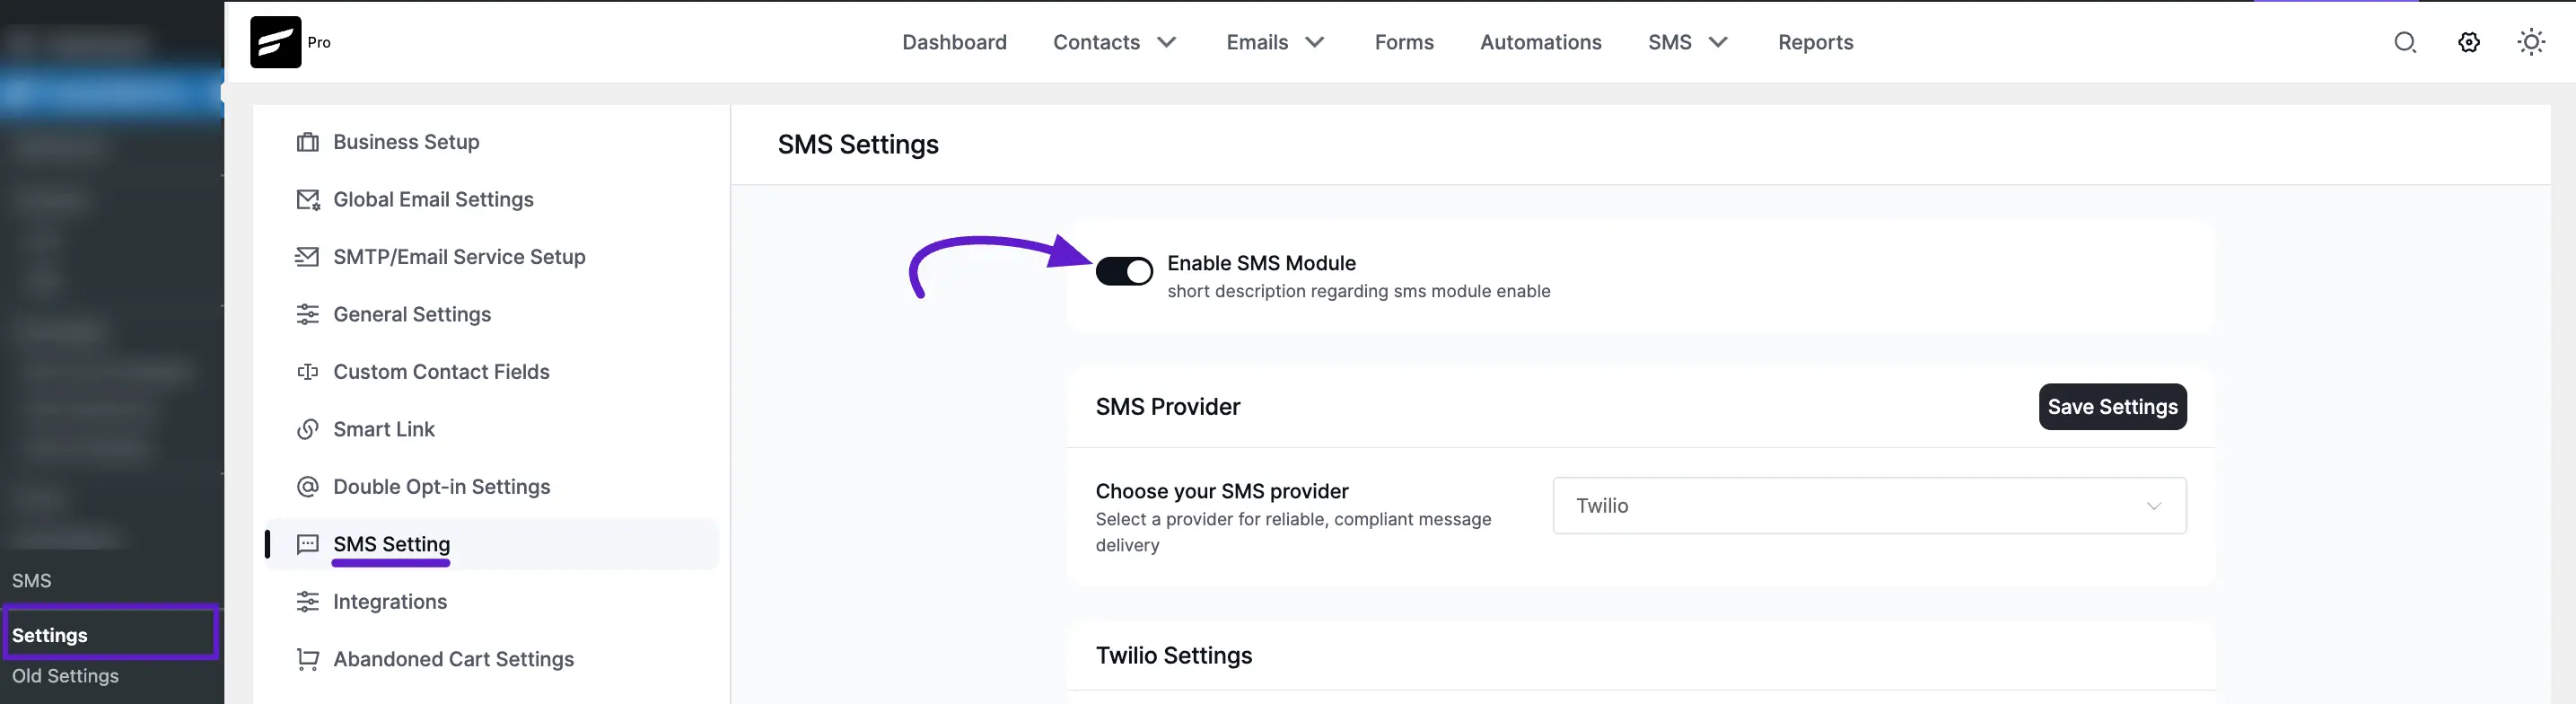
From your WordPress dashboard, go to FluentCRM → Settings. The settings URL fragment is /settings/sms_settings – click SMS Setting in the left-hand sidebar.
On the SMS Setting page, locate the toggle switch for Enable SMS Module. Enabling this module unlocks the ability to create and send SMS campaigns and use SMS in your automations.
After enabling the module, you must select an SMS Provider from the dropdown menu below. FluentCRM supports two providers out of the box:
- Twilio – Global SMS leader with strong deliverability.
- Amazon End User Messaging (SNS) – AWS-native SMS service.
Once you have enabled the module and selected a provider (configured in separate steps), be sure to click the Save Settings button to apply your changes.
Enabling the SMS Module is the essential first step to using this feature for delivering SMS Campaigns to specific subscribers based on tags or lists, and viewing SMS Activities within your dashboard.
NOTE
You must configure either Twilio or Amazon End User Messaging before enabling these SMS settings. Without setting up one of these services, the SMS options will remain disabled.
Twilio incoming webhook
When you save Twilio credentials, FluentCRM also generates a unique SMS Incoming Webhook URL at the bottom of the SMS Setting page. Paste this URL into your Twilio messaging service's A message comes in webhook field if you want FluentCRM to receive replies and inbound messages from contacts. See the full walkthrough on the Twilio SMS Integration page.
SMS Smart Codes
You can personalise every SMS just like an email. Click the { } smart-code icon next to the message field to insert tokens like ##contact.first_name##, ##contact.email##, custom field values, or any other smart code FluentCRM ships with. The full token list is documented at Merge Codes / Smart Codes Usage.
SMS Campaigns: Creating and Managing your SMS
The SMS Campaigns area is your central hub for creating, scheduling, and managing targeted SMS broadcasts. This feature allows you to reach specific segments of your audience instantly with time-sensitive information, special offers, or critical updates.
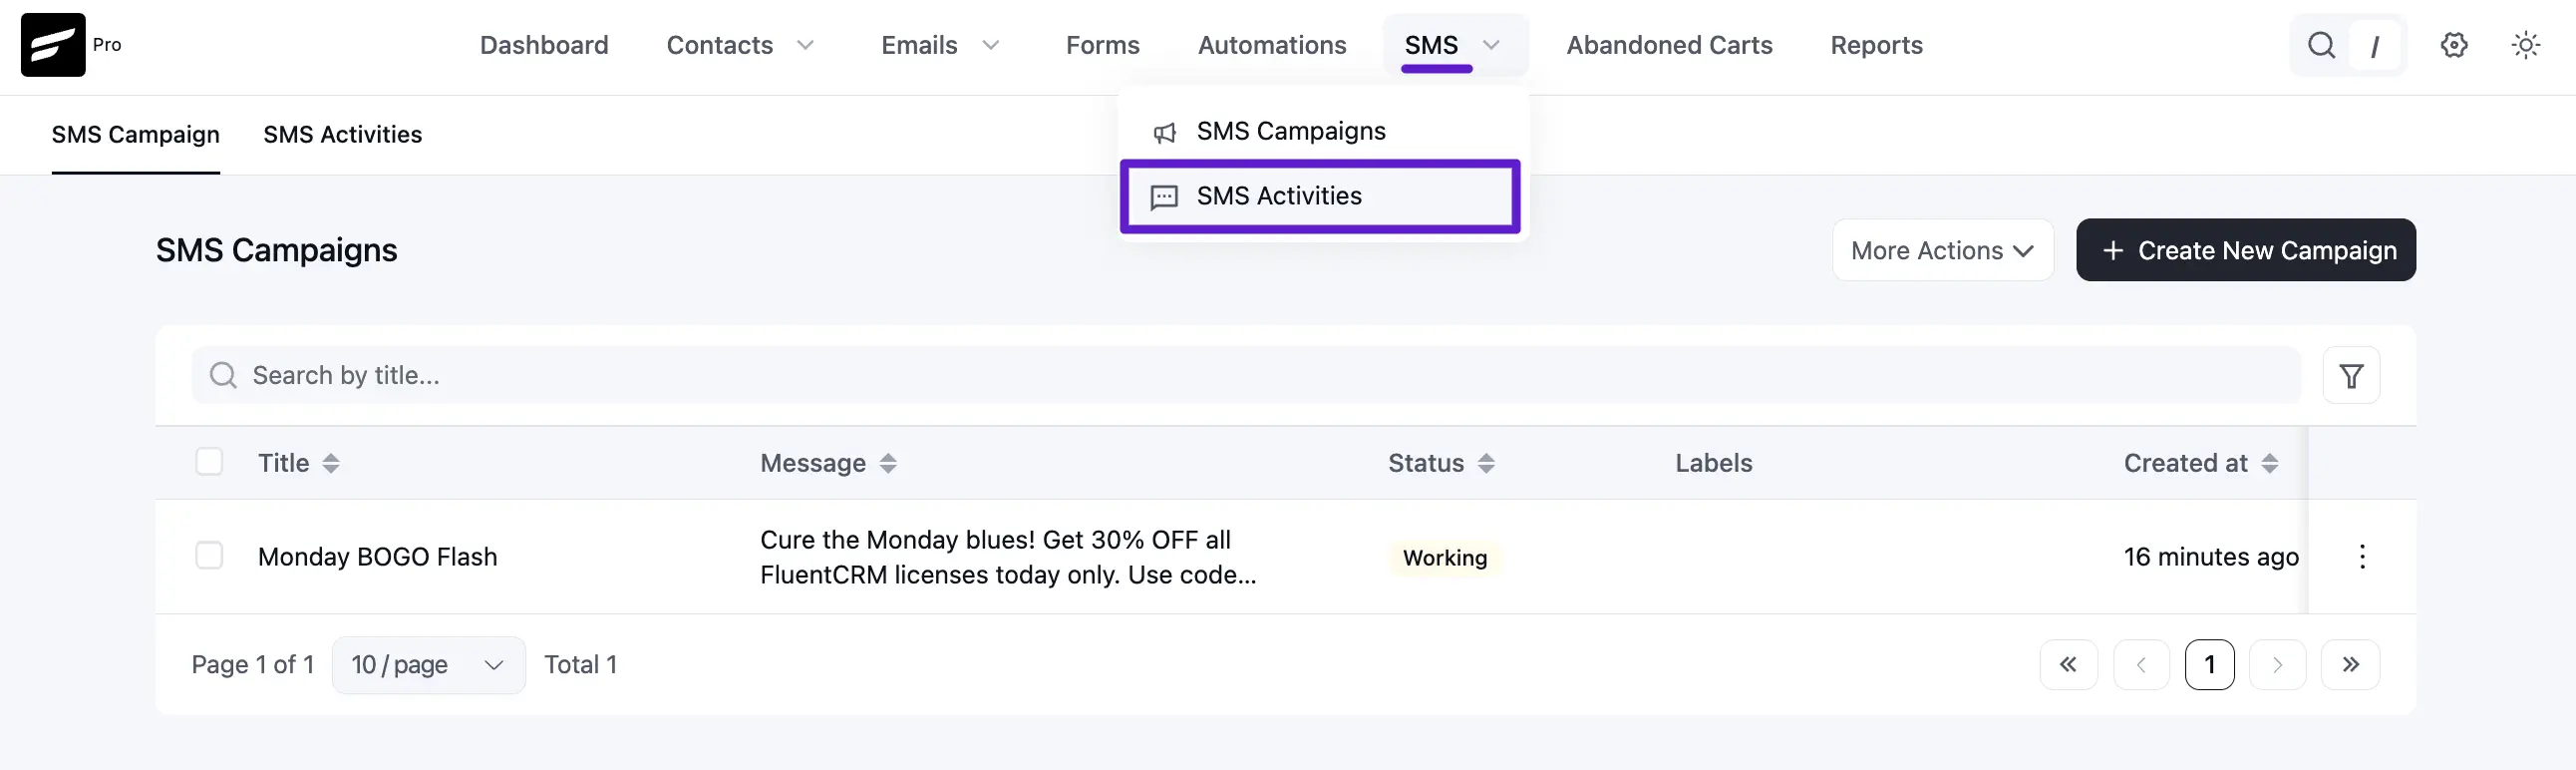
Overview
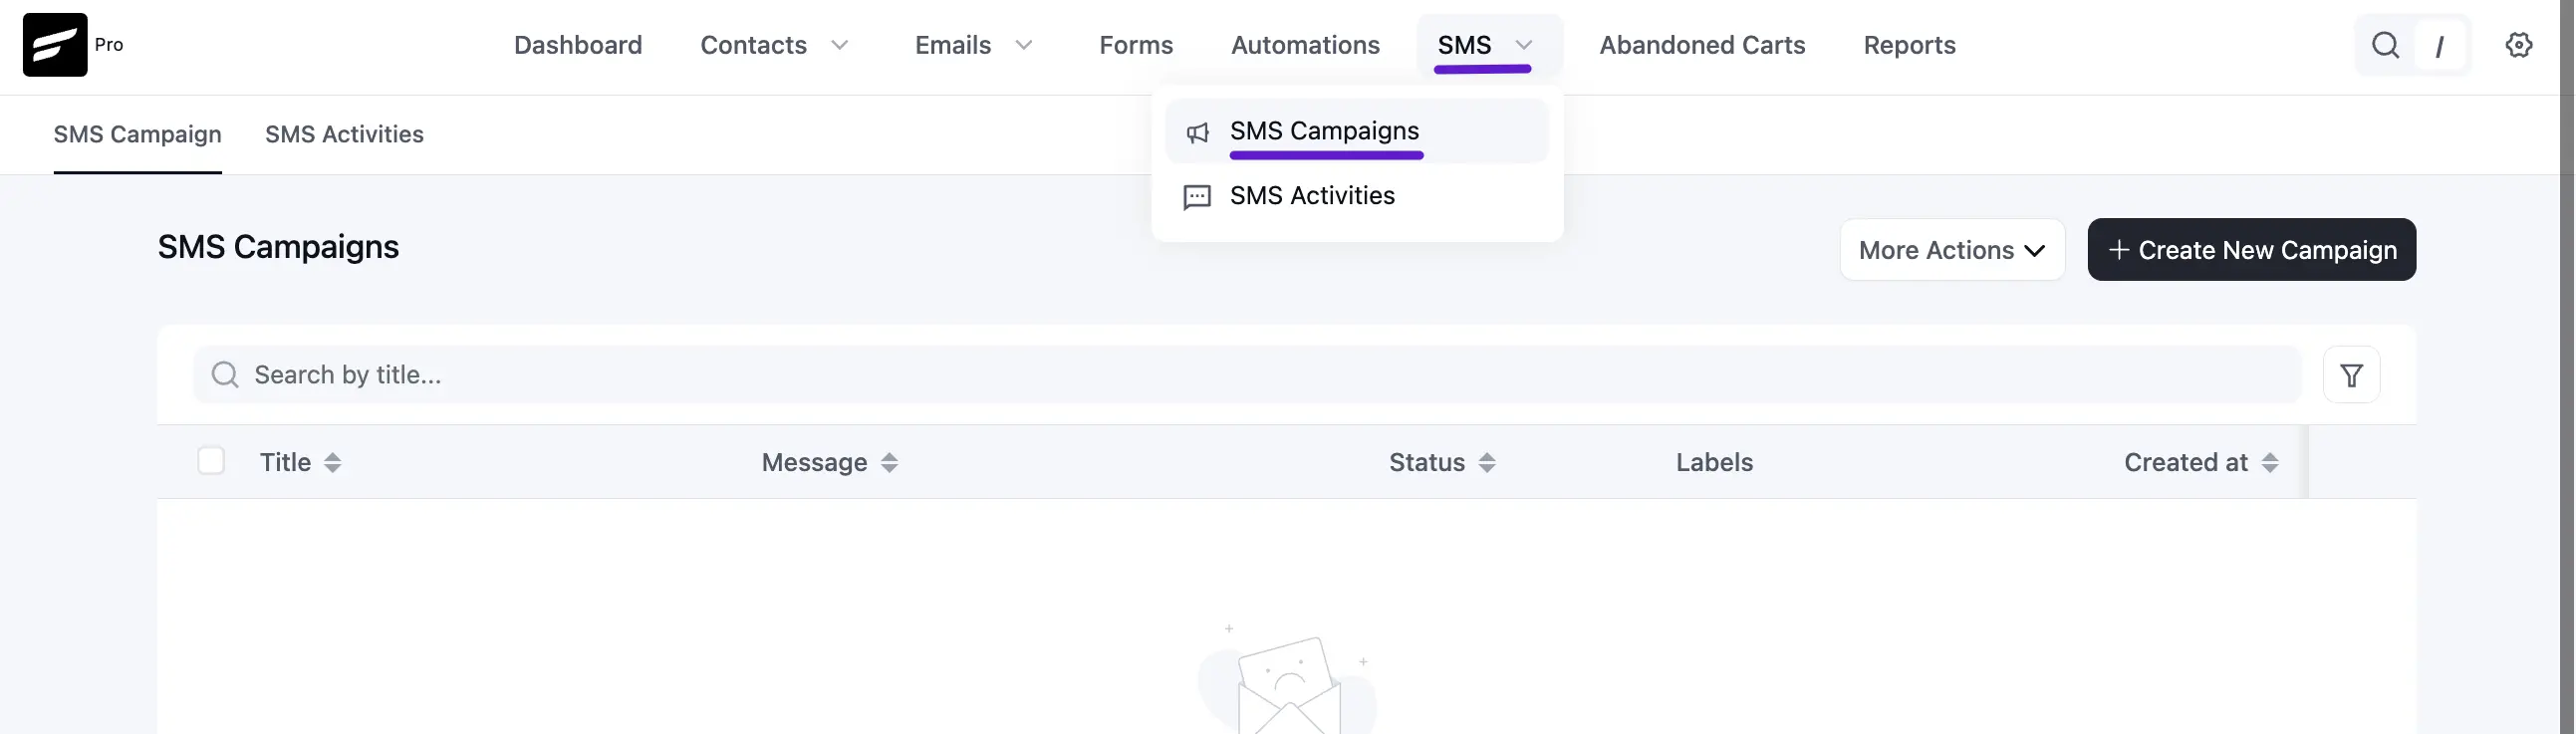
You can access this feature from the main menu on the FluentCRM top menu bar and selecting the SMS dropdown submenu. Here, you will find a dashboard listing all your drafted, scheduled, and completed SMS campaigns.
Creating a new SMS campaign
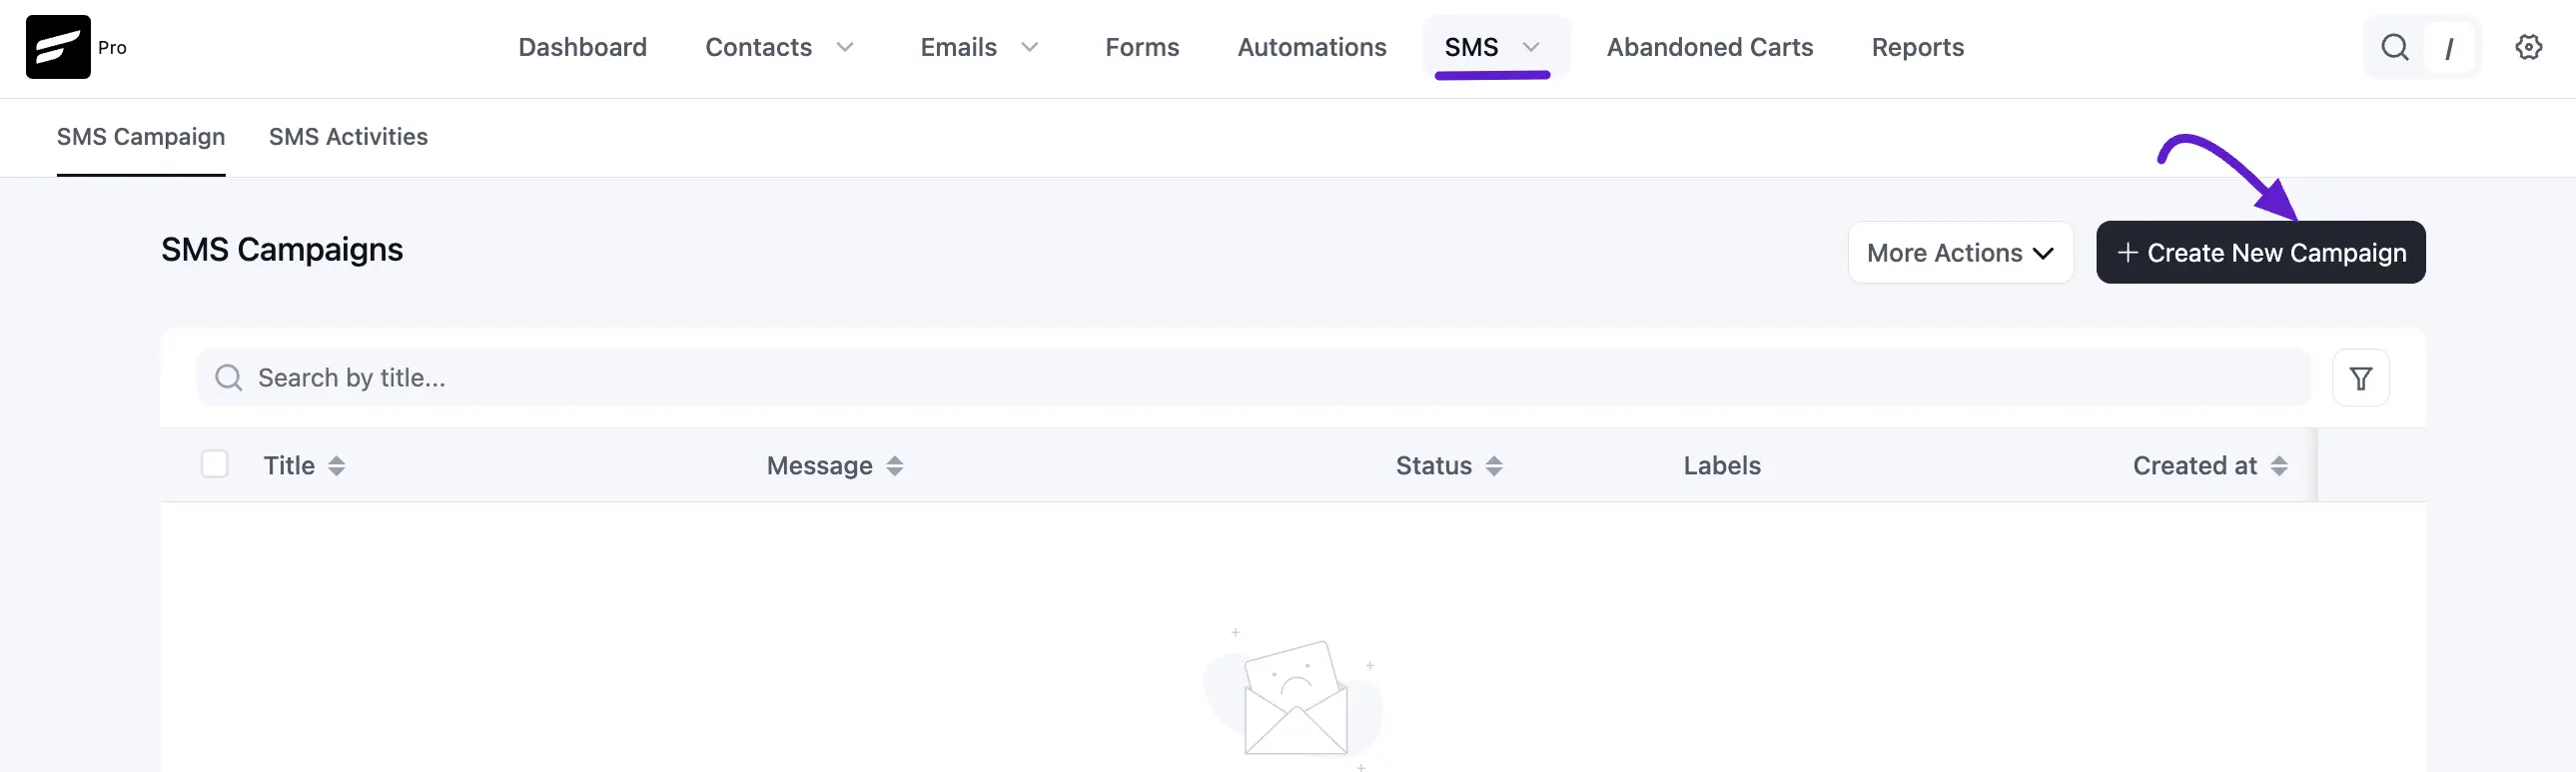
To start a new campaign, click the Create New Campaign button on the main SMS Campaigns dashboard. The process involves three guided steps: Start, Recipients, and Review. While you work through the wizard, a progress indicator (for example 1/3 Completed) shows how far you are.
Step 1: Start (SMS title and body)
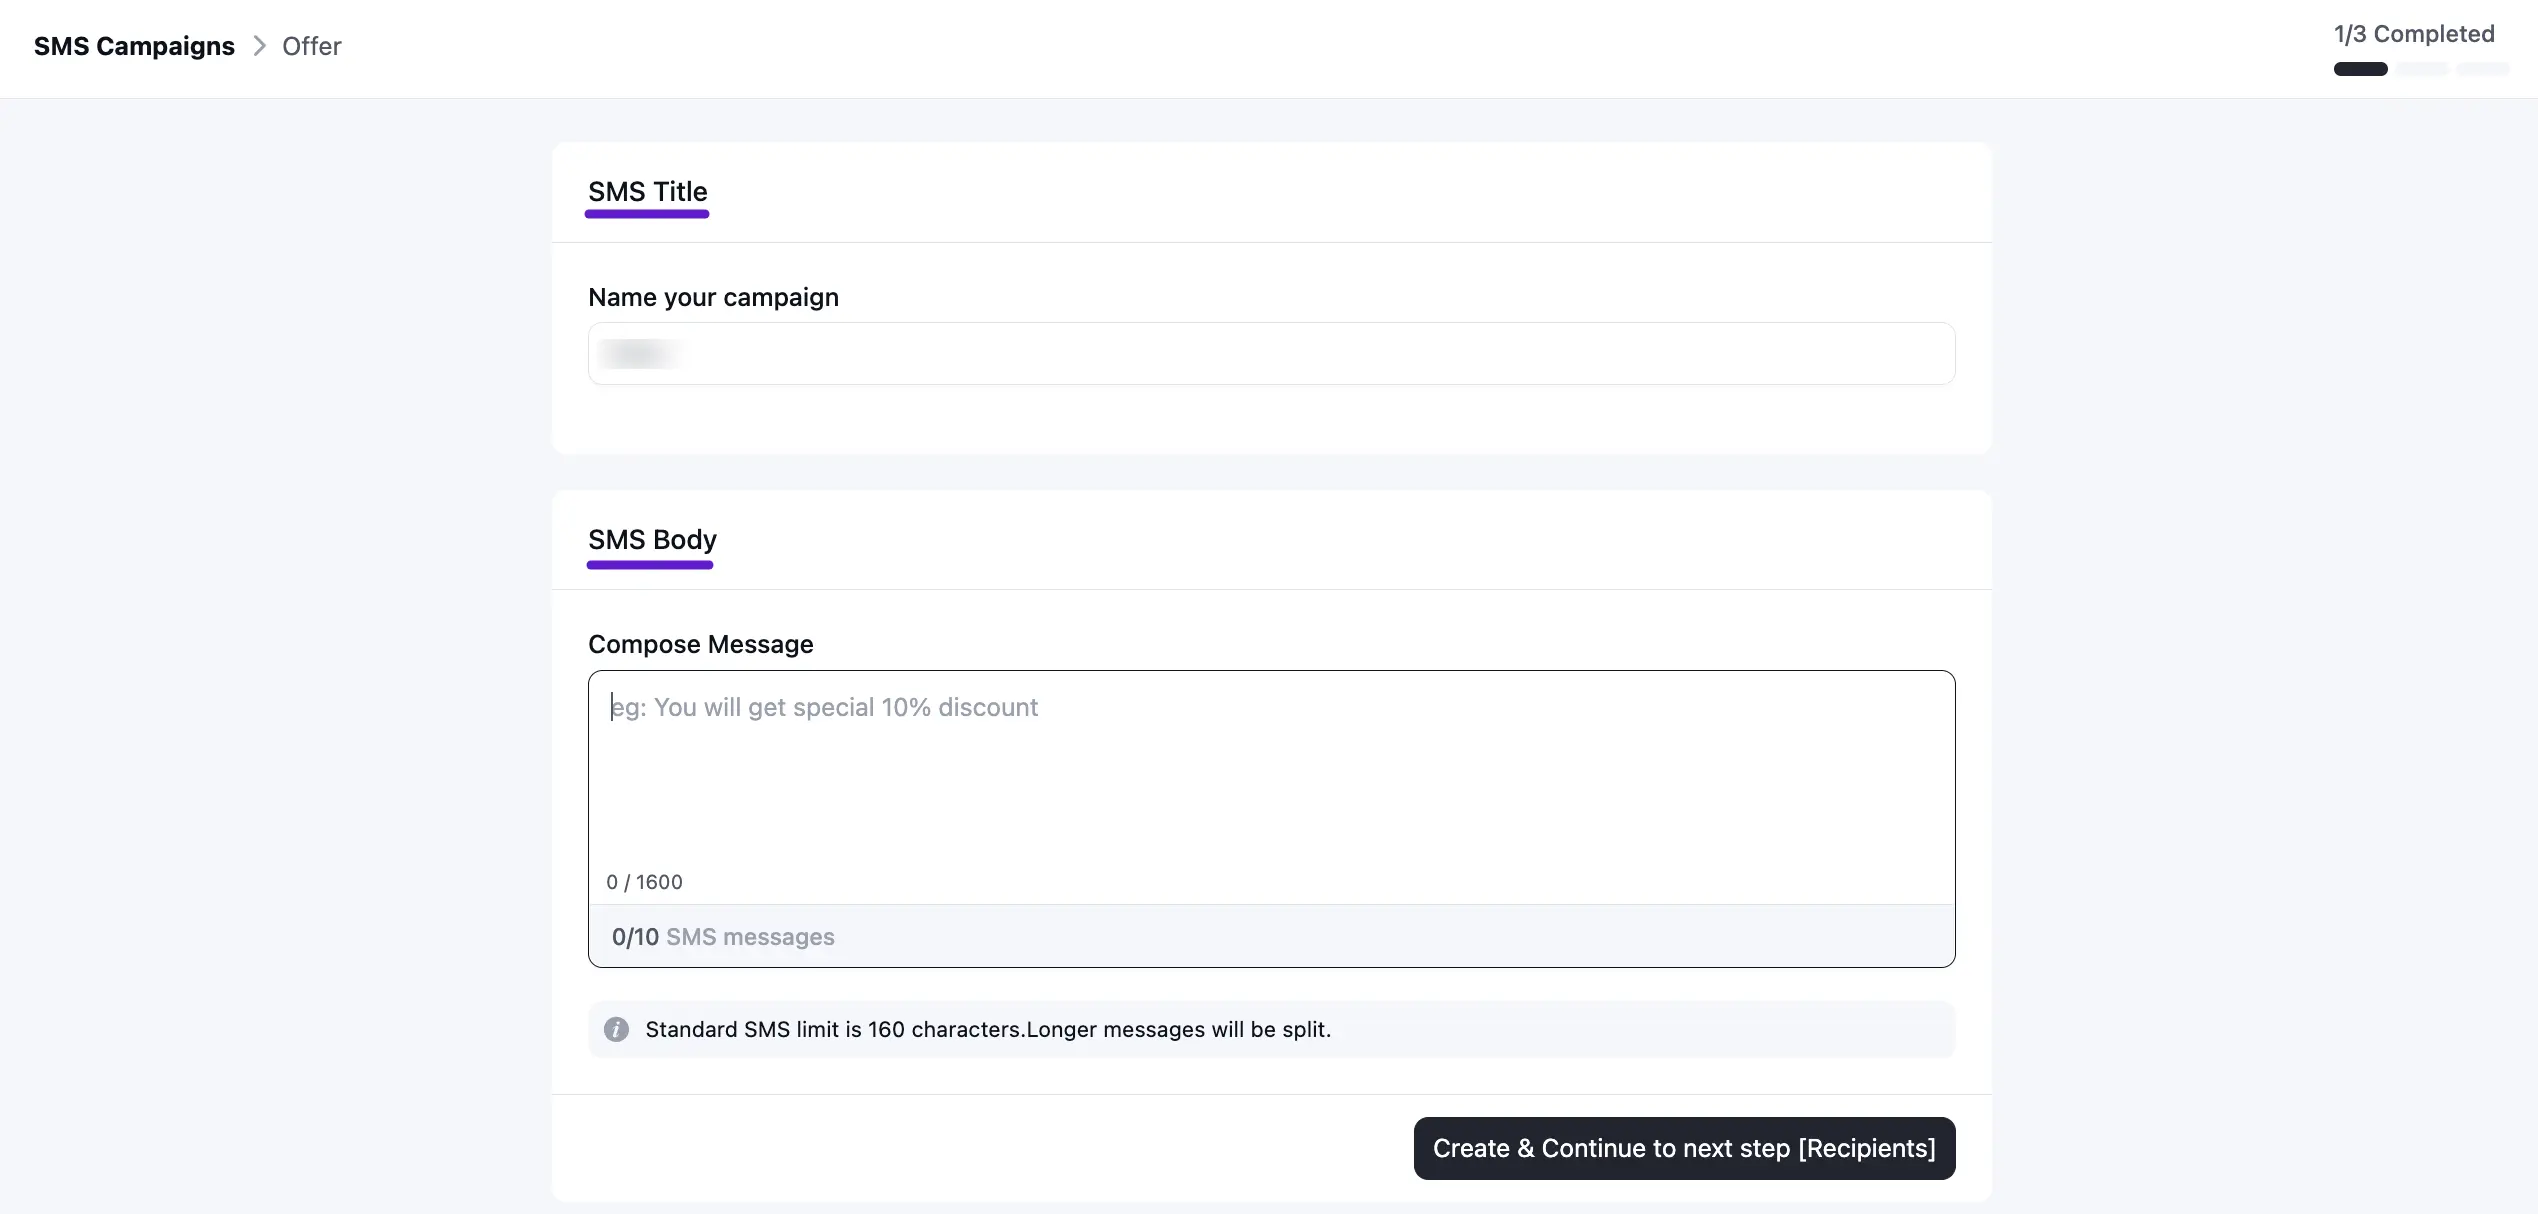
The first screen is where you name the campaign and write the message. The layout is grouped into SMS Title and SMS Body, with live feedback as you type.
- SMS Title — Name your campaign: Enter an internal name only you see on the dashboard (for example, “Black Friday offer” or “Offer”). It is not the text subscribers receive.
- SMS Body — Compose Message: Enter the SMS copy contacts will get. As you type, FluentCRM shows a character counter (for example 0 / 1600) and an SMS segment counter (for example 0/10 SMS messages) so you can see length and how many SMS units the send will consume. Long messages are split automatically; an info note on the screen reminds you that a standard SMS segment is about 160 characters before splitting applies.
You can still insert personalisation tokens from the { } smart-code control next to the message field when it is available; see SMS Smart Codes above.
When you are ready, click Create & Continue to next step [Recipients] to open the Recipients step.
Step 2: Recipients (selecting subscribers)
In this step, you define your target audience. You have three methods for selecting subscribers:
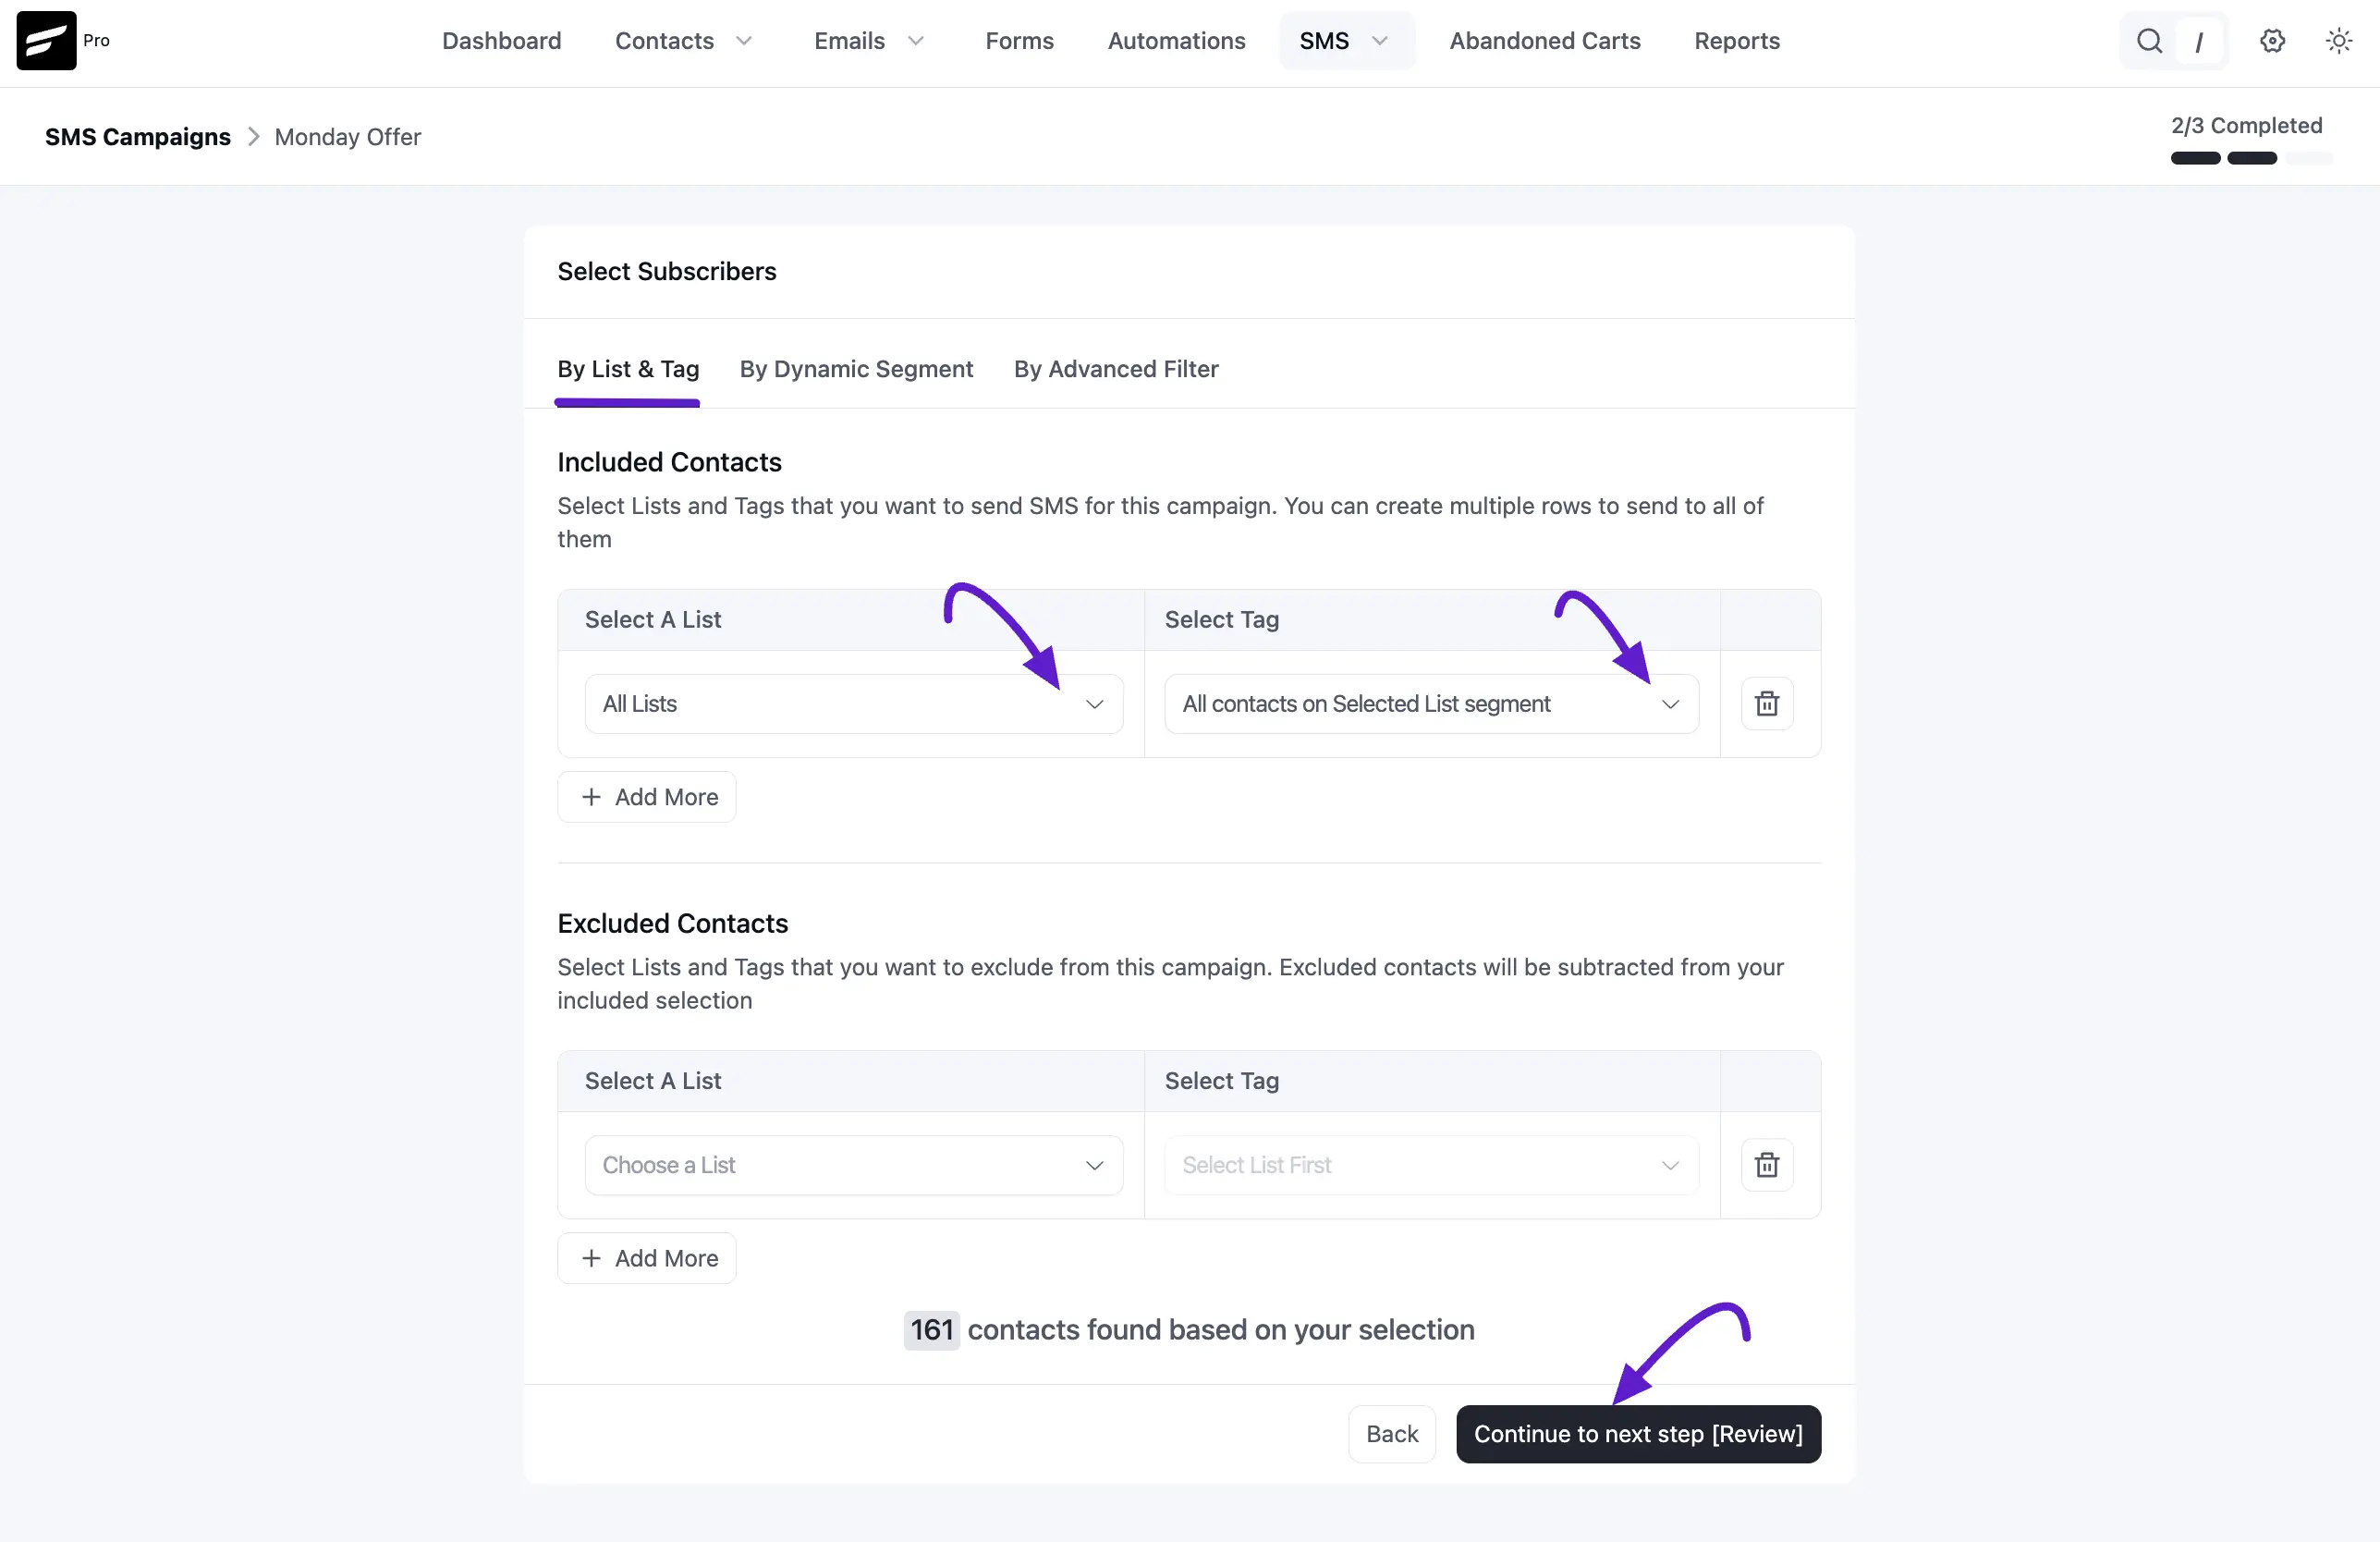
- By List & Tag: Select Included Contacts based on specific lists and tags. You can also choose contacts to exclude, which removes specific lists or tags from your selection. To add multiple lists and tags, click the Plus (+) icon.
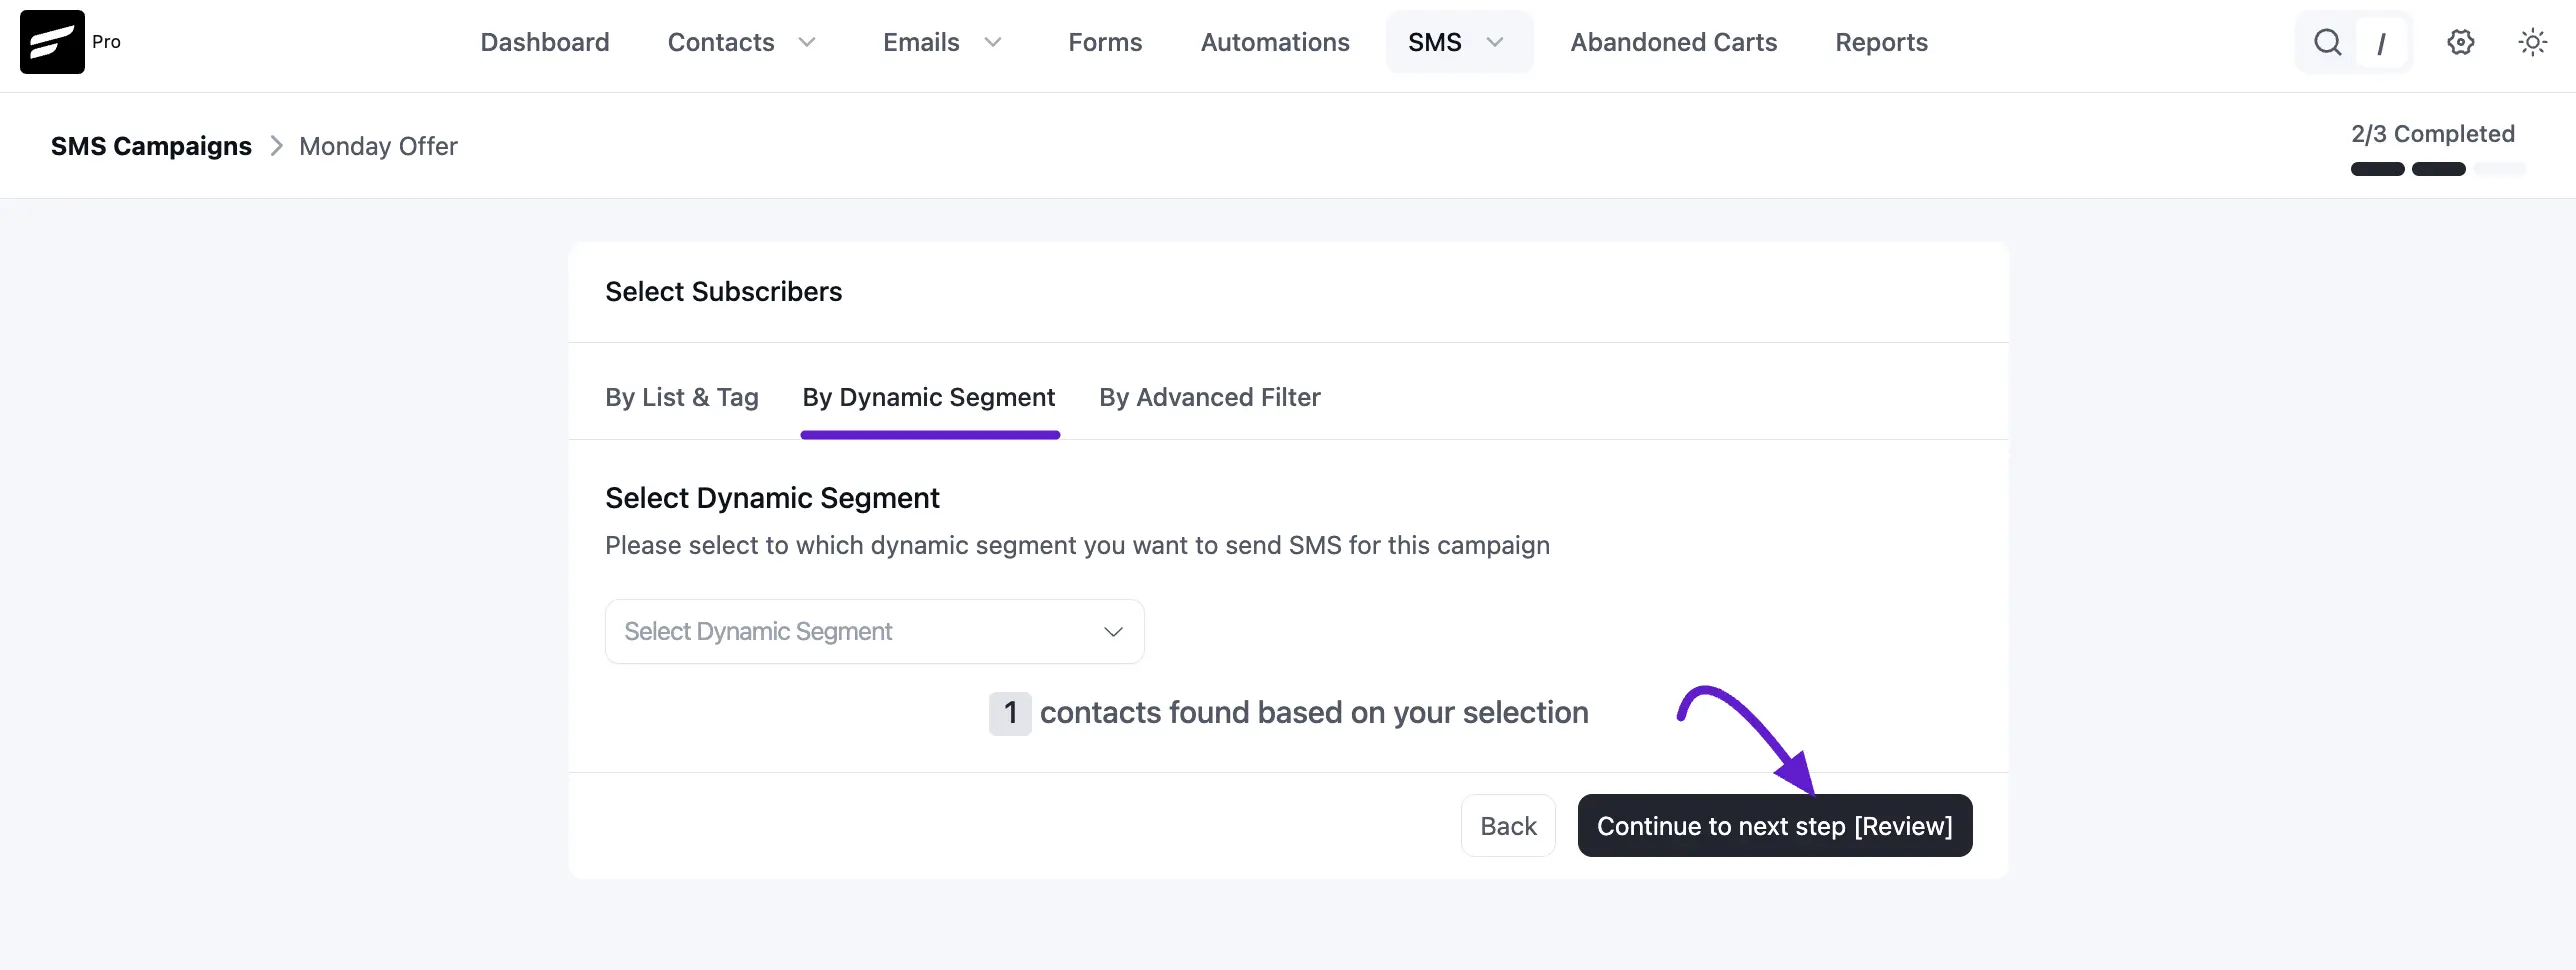
- By Dynamic Segment: If you have pre-configured dynamic segments in FluentCRM, select one from the dropdown. The system targets all contacts currently matching that segment’s criteria.
- By Advanced Filter: Build conditional filters using data from modules like Contact Activities, FluentAffiliate, and FluentCart to target subscribers by actions, purchases, or engagement.
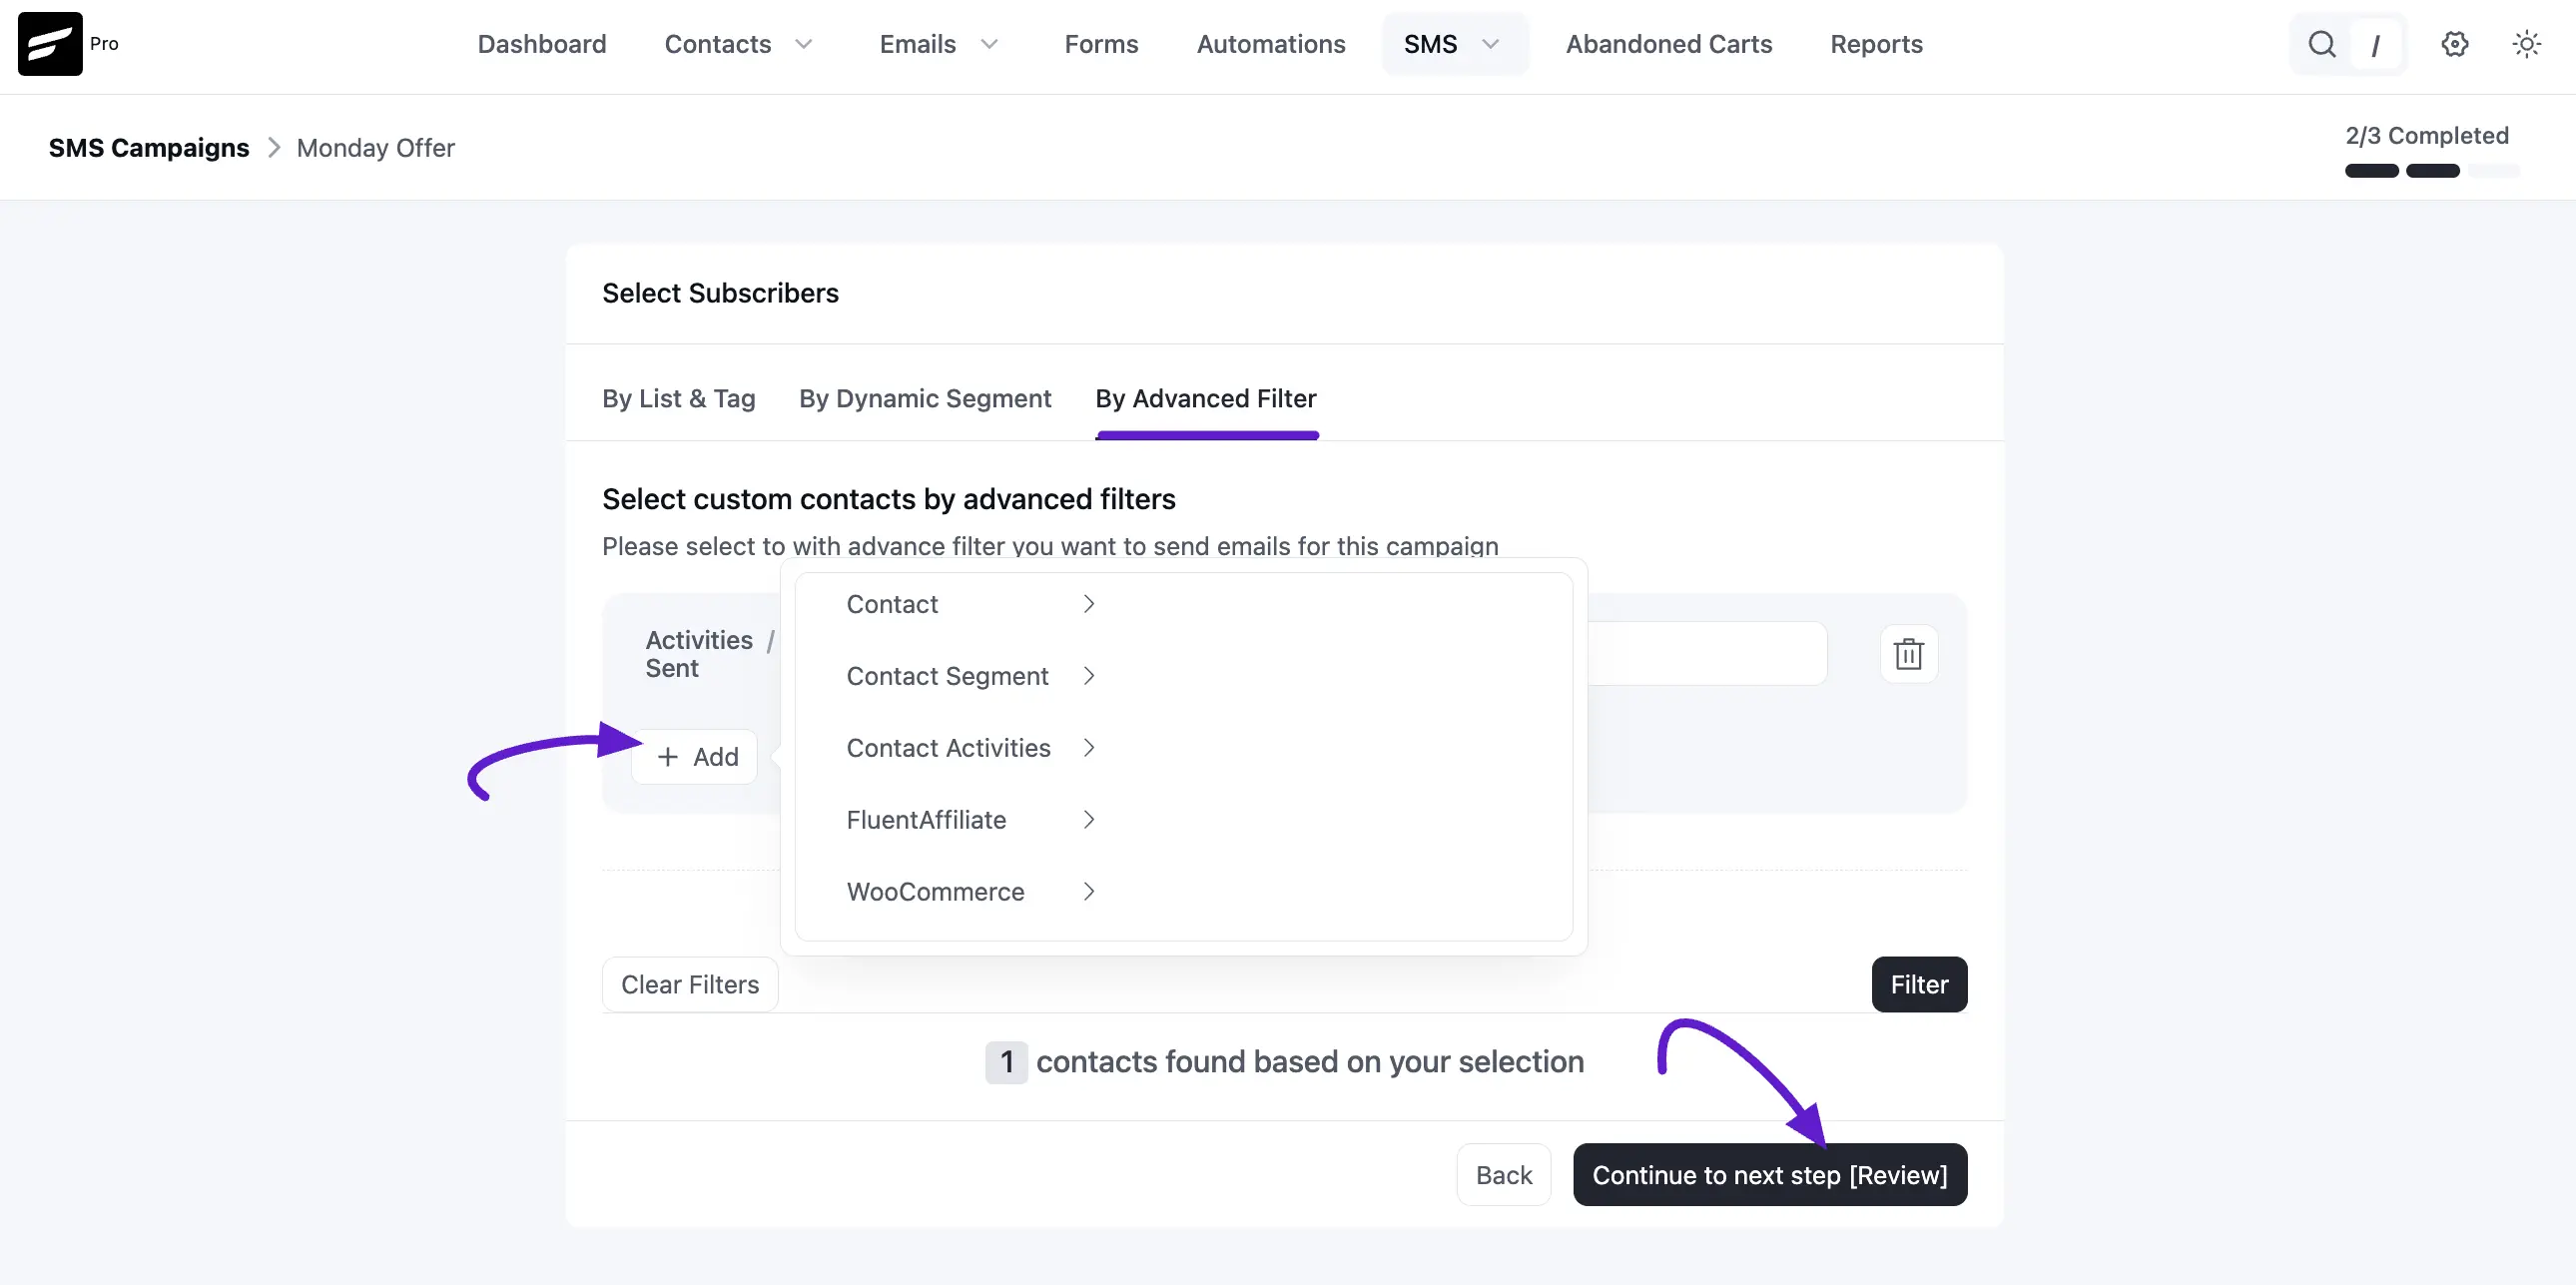
As you define your criteria, the system shows a live count (for example, “109 contacts found”) to validate your selection. When you are satisfied, click Continue to go to the next step (Review).
Step 3: Review & broadcast (scheduling and sending)
This is the final step where you verify campaign details and set the broadcast time.
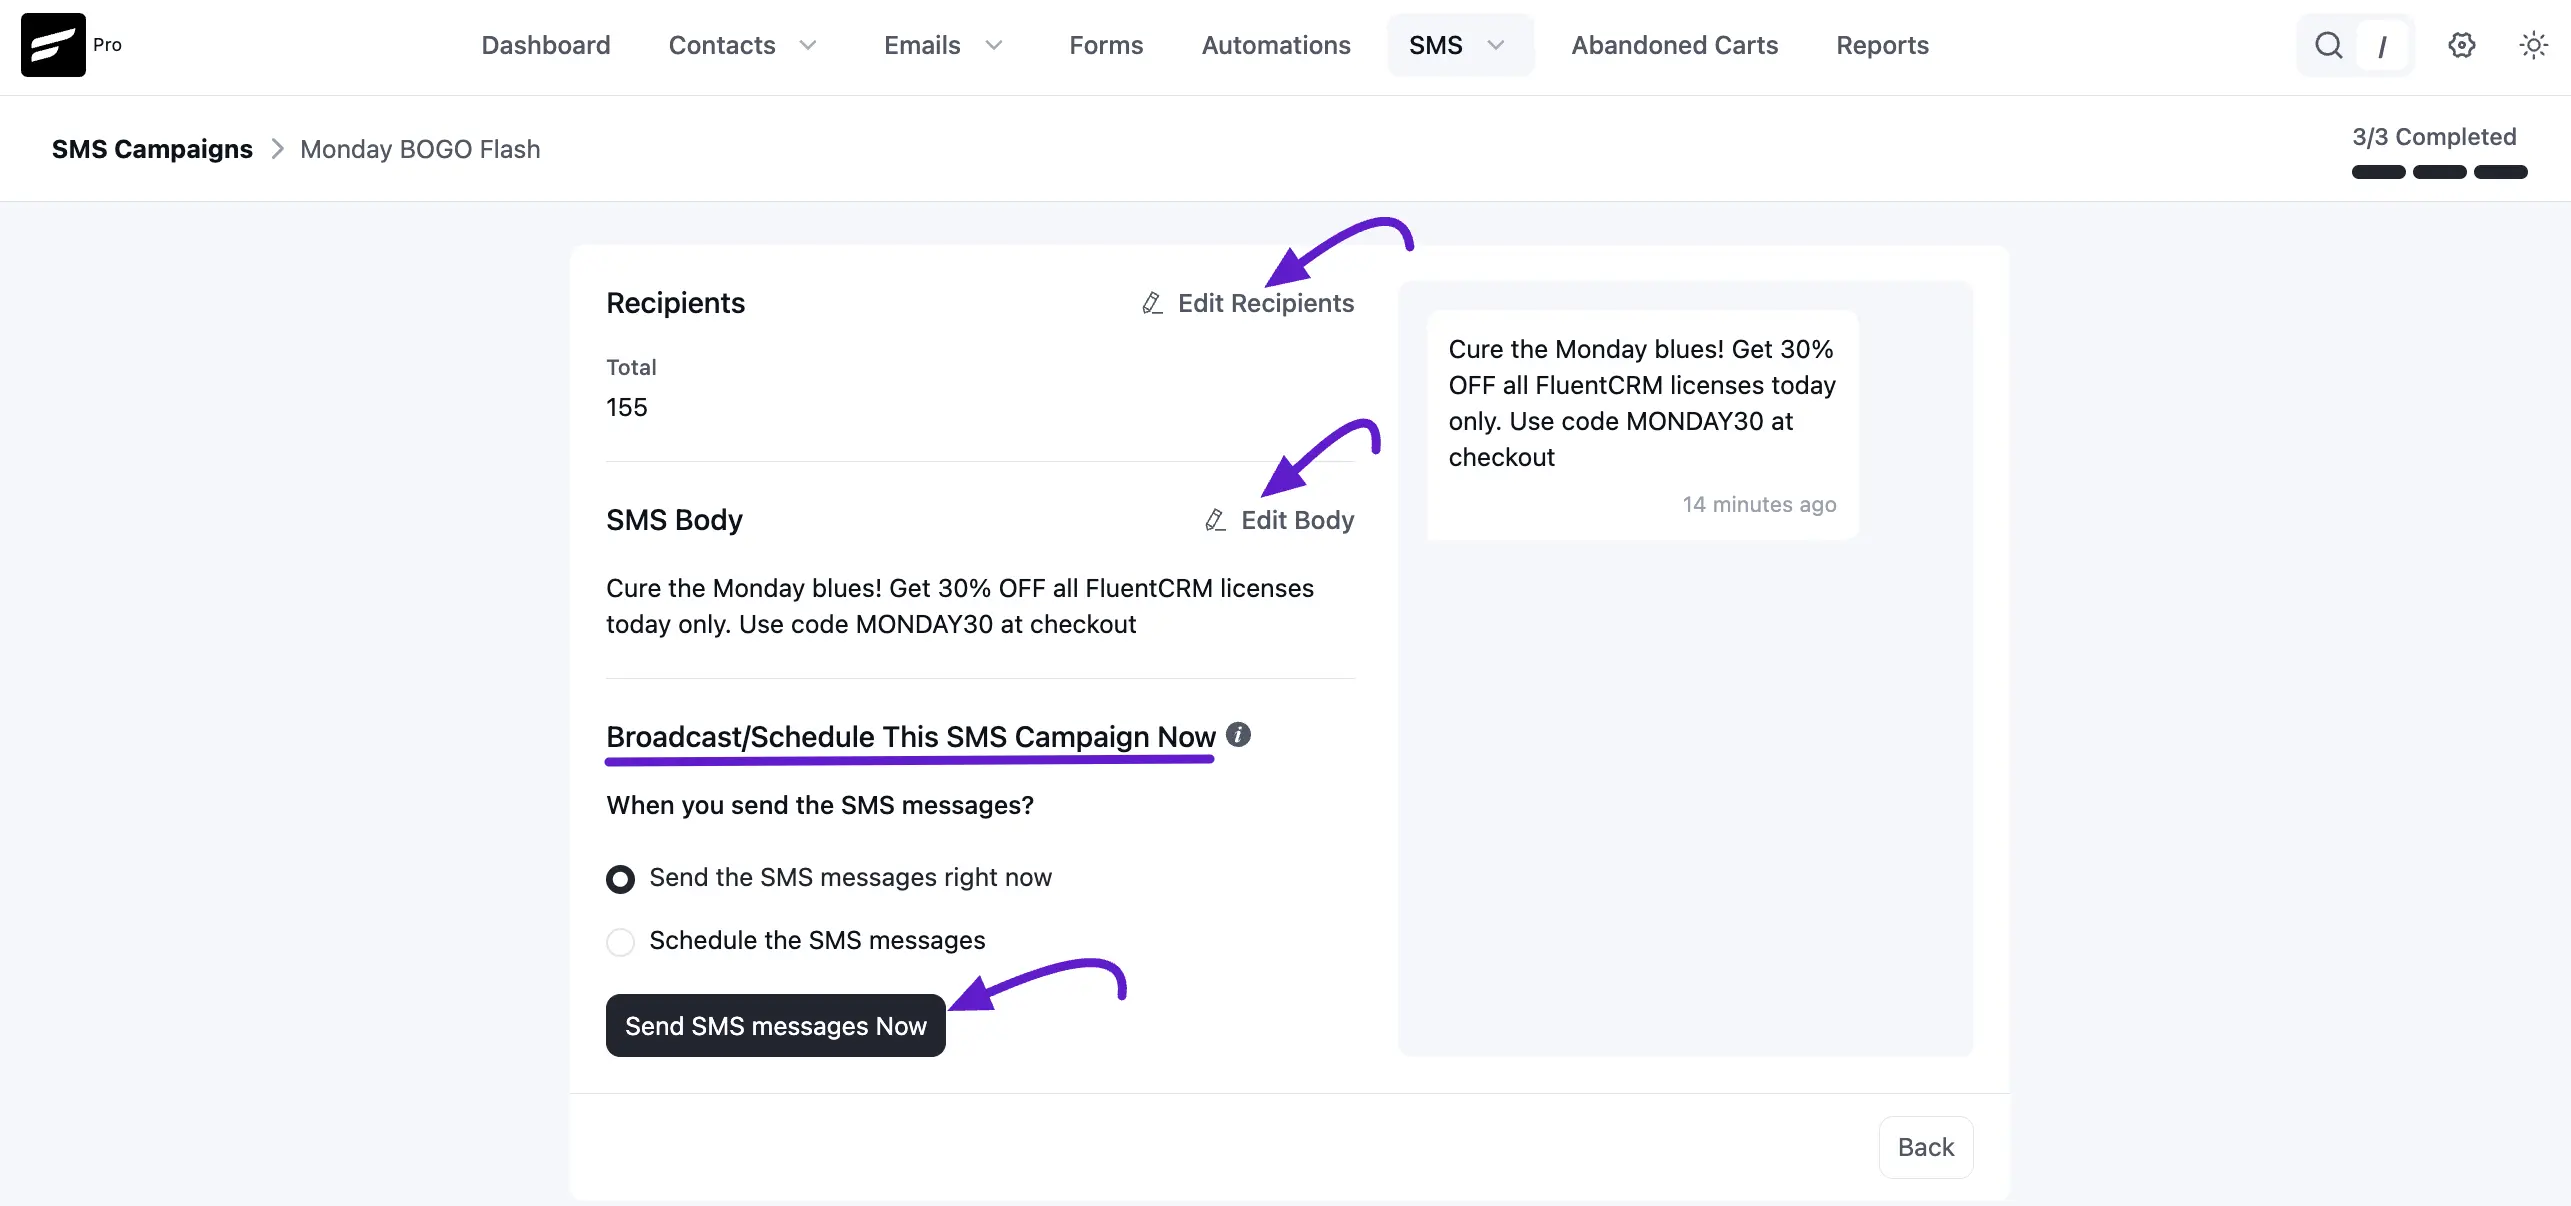
- Review summary: The page summarizes total Recipients and the SMS body. Use the Edit links next to either section to jump back and make changes.
- Scheduling options: Under Broadcast / schedule this SMS campaign now, choose when and how messages are delivered:
- Send the SMS messages right now: Sends the campaign immediately when you confirm.
- Schedule the SMS messages: Sets a single date and time for the broadcast using the available fields.
When you have chosen your scheduling method and verified recipients and content, click Send SMS messages now or Schedule this campaign to finalize.
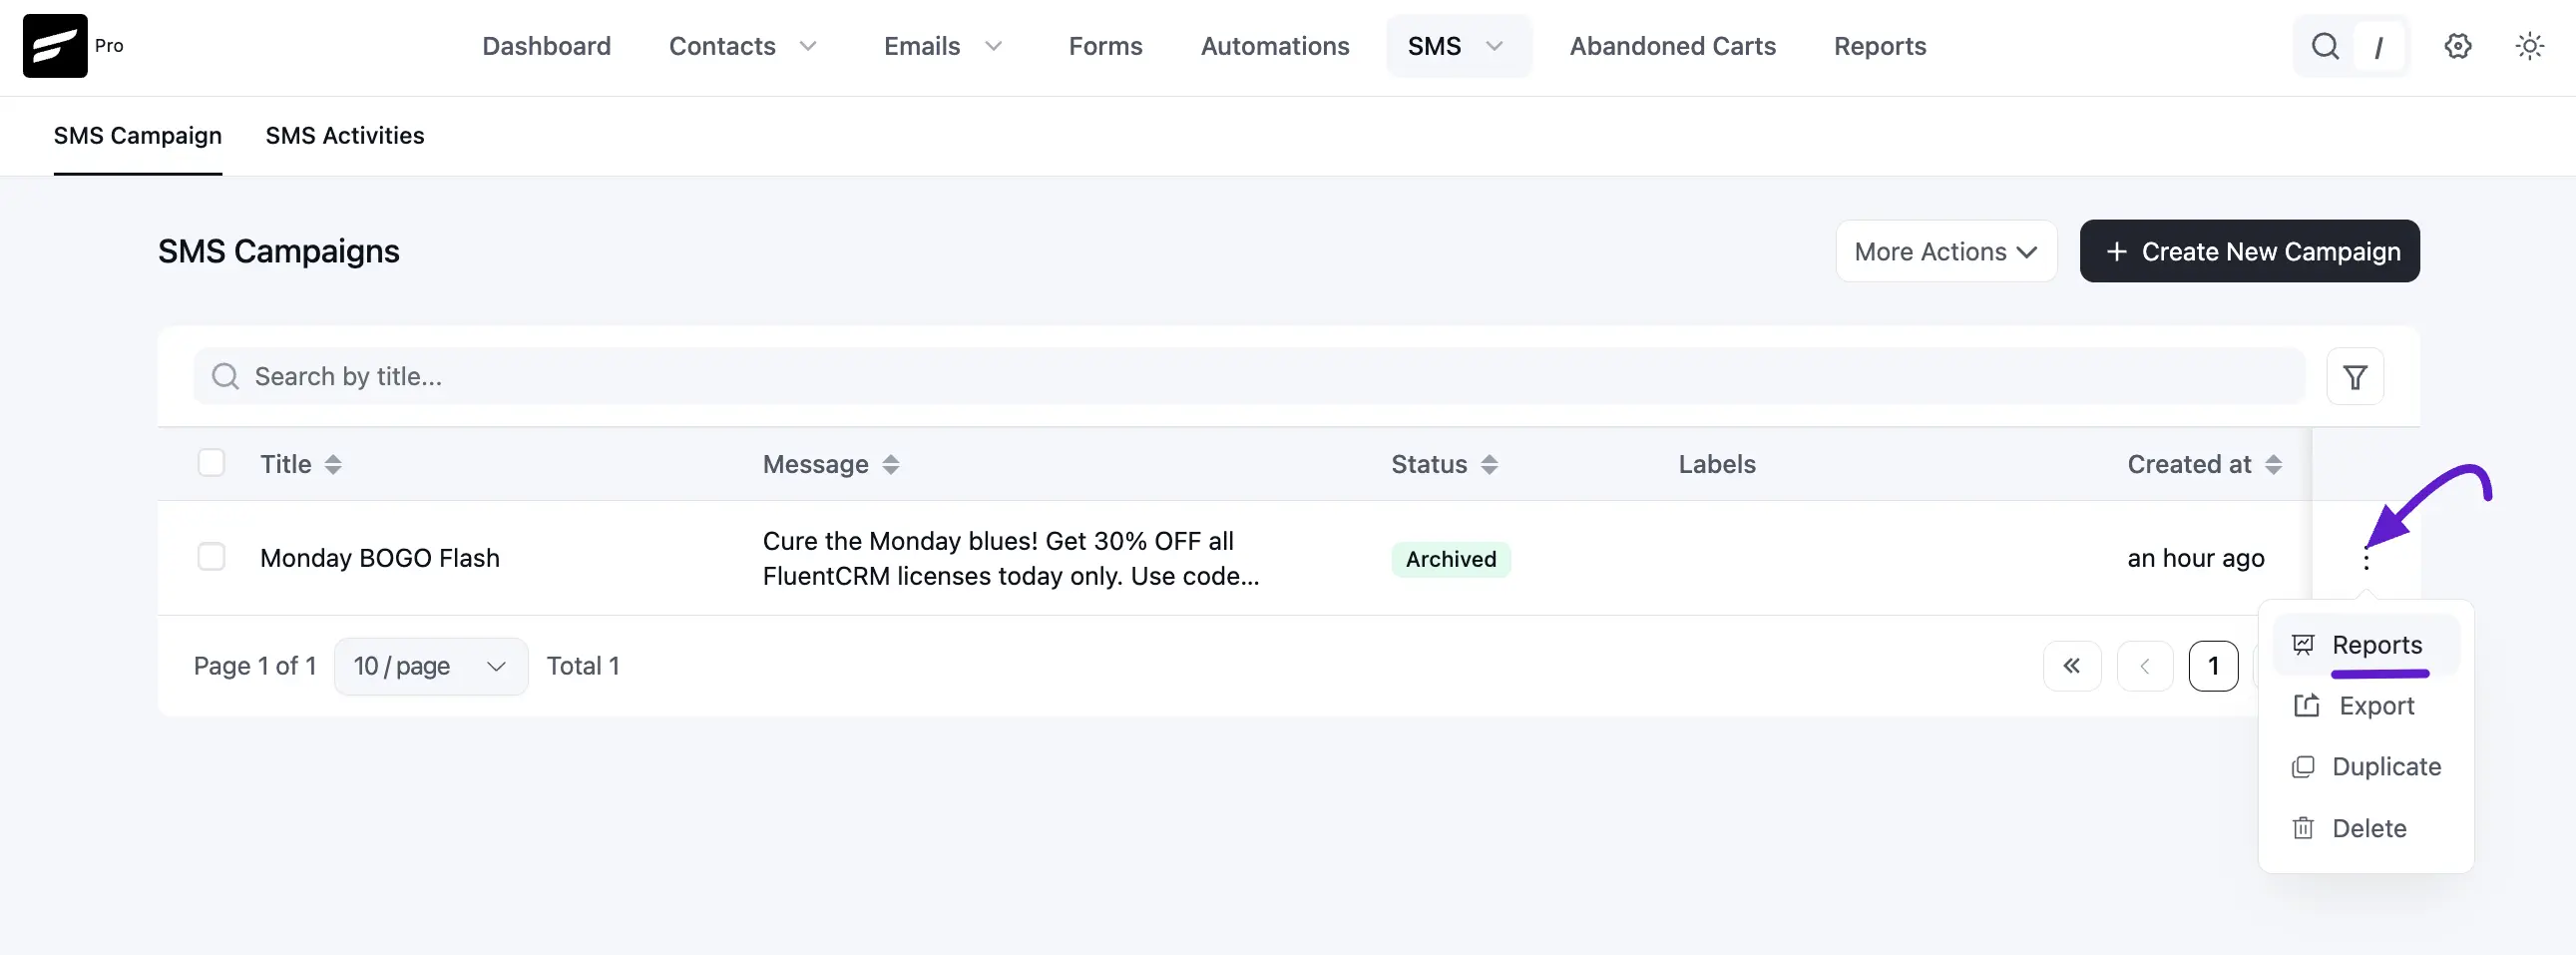
Key Features and Data Columns
The campaigns dashboard shows each broadcast with:
- Title: Internal name of your campaign.
- Message: Short snippet of the message content.
- Status: Current status. You can filter by:
- Draft: Being created or edited.
- Pending / scheduled: Waiting for the send time.
- Processing: Currently sending.
- Archived / purged: Removed from the active list.
- Incomplete: Needs more configuration before sending.
- Labels: Organizational labels applied to the campaign.
- Created At: The time of created.
SMS Activities: Monitoring Delivery and Status
The All SMS Activities section is a centralized log of every SMS sent through your FluentCRM account, including messages from campaigns and automations. Use it to monitor delivery, troubleshoot, and audit your communication history.
Overview
SMS Activities acts as a reporting view into every transaction handled by the SMS Module so you can confirm delivery and spot failures quickly.
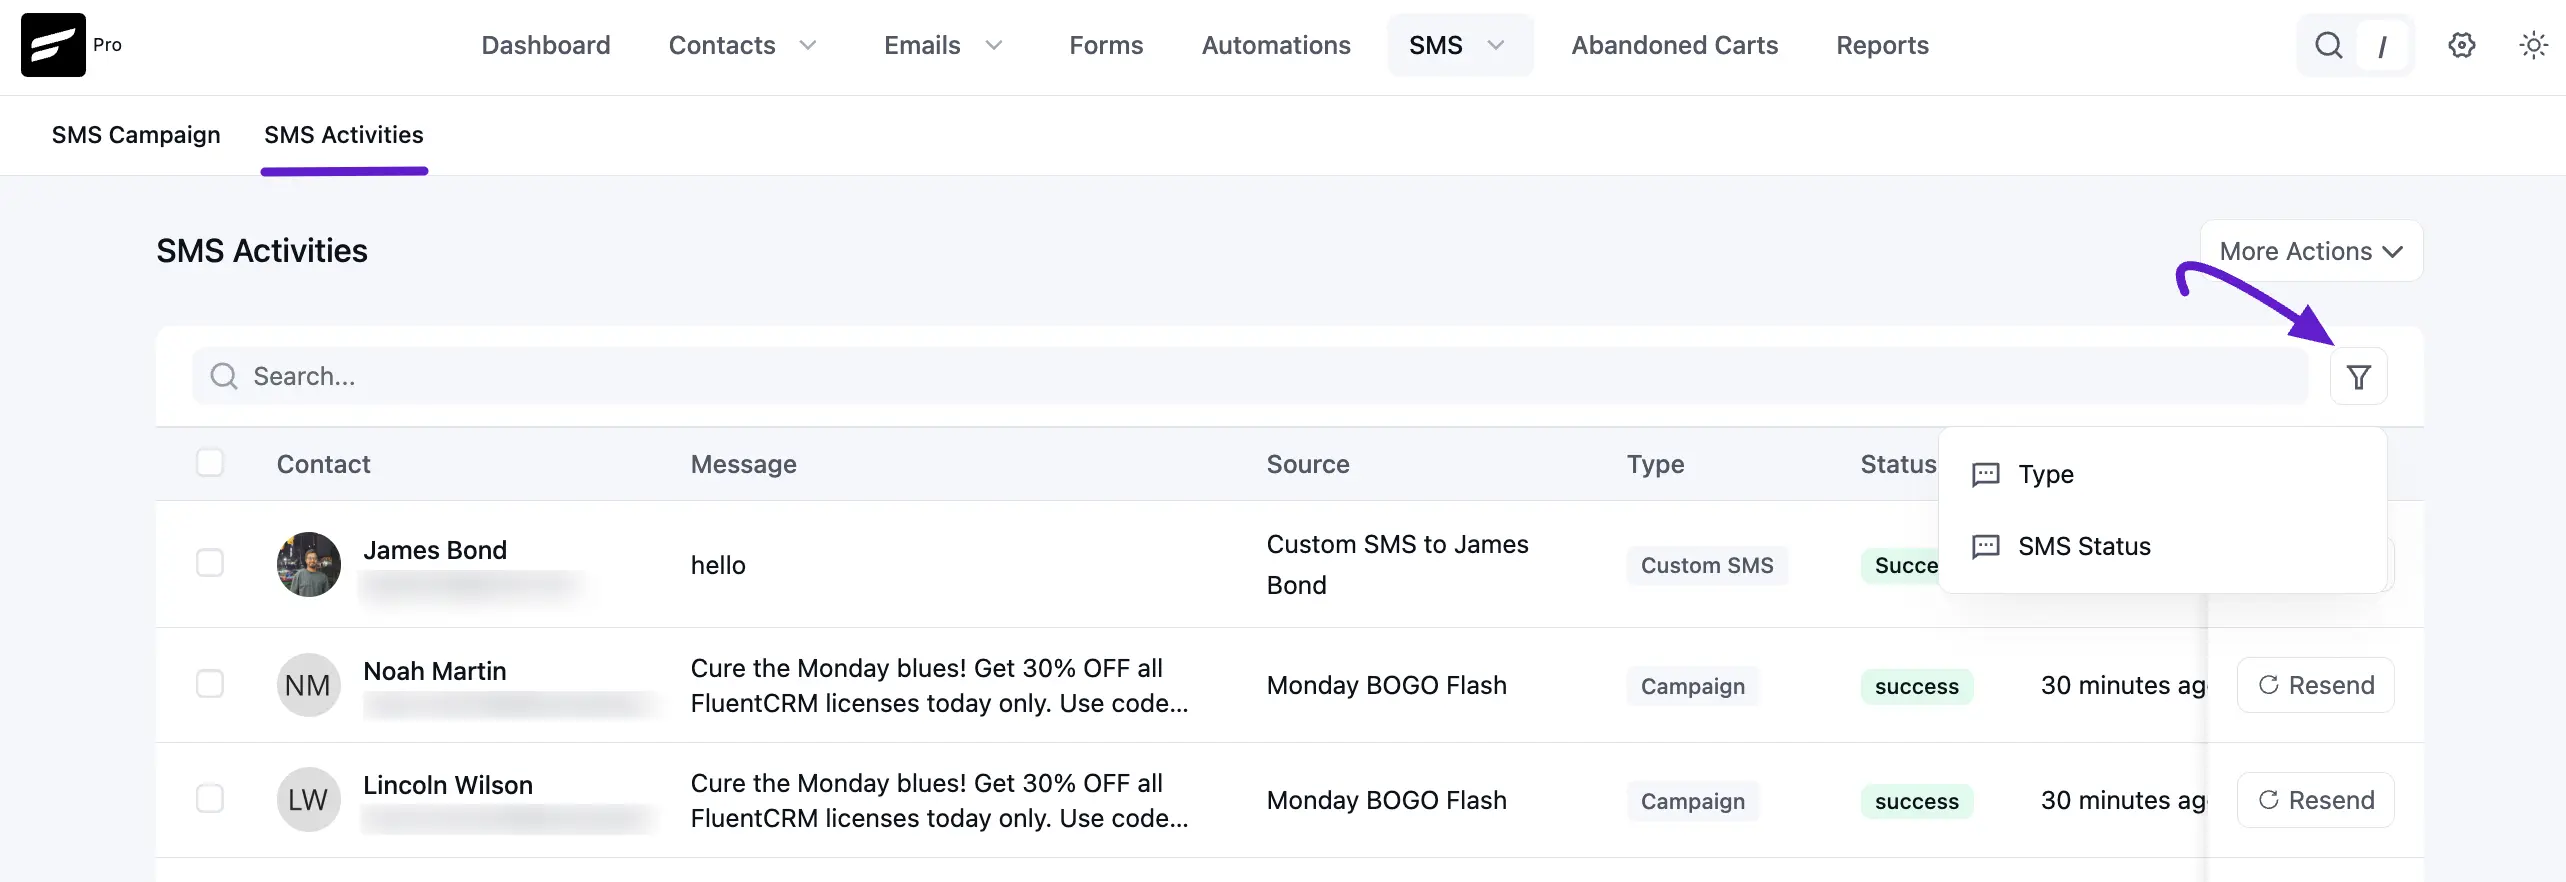
Key Data Points for Tracking
The activity log includes:
- Contact: The subscriber who received the message.
- Message: Full SMS content sent to the contact.
- Source: How the message was triggered (for example, a campaign broadcast or an automation).
- Status: Delivery status (for example, Delivered, Failed, or Pending) as reported by your provider (Twilio, Amazon End User Messaging, etc.).
- Sending time: When the message was sent or attempted.
- Actions: Options such as viewing details or troubleshooting.
Send SMS from individual contacts
In addition to campaigns and automations, you can send direct, one-to-one messages from a contact’s profile.
Accessing the Direct SMS Feature
- Open Contacts from the FluentCRM dashboard and select the contact.
- On the contact’s details page (emails, lists, tags, etc.), open the SMS tab next to Emails and Purchase History (or similar tabs).
Using the Direct Messaging Interface
The SMS tab includes:
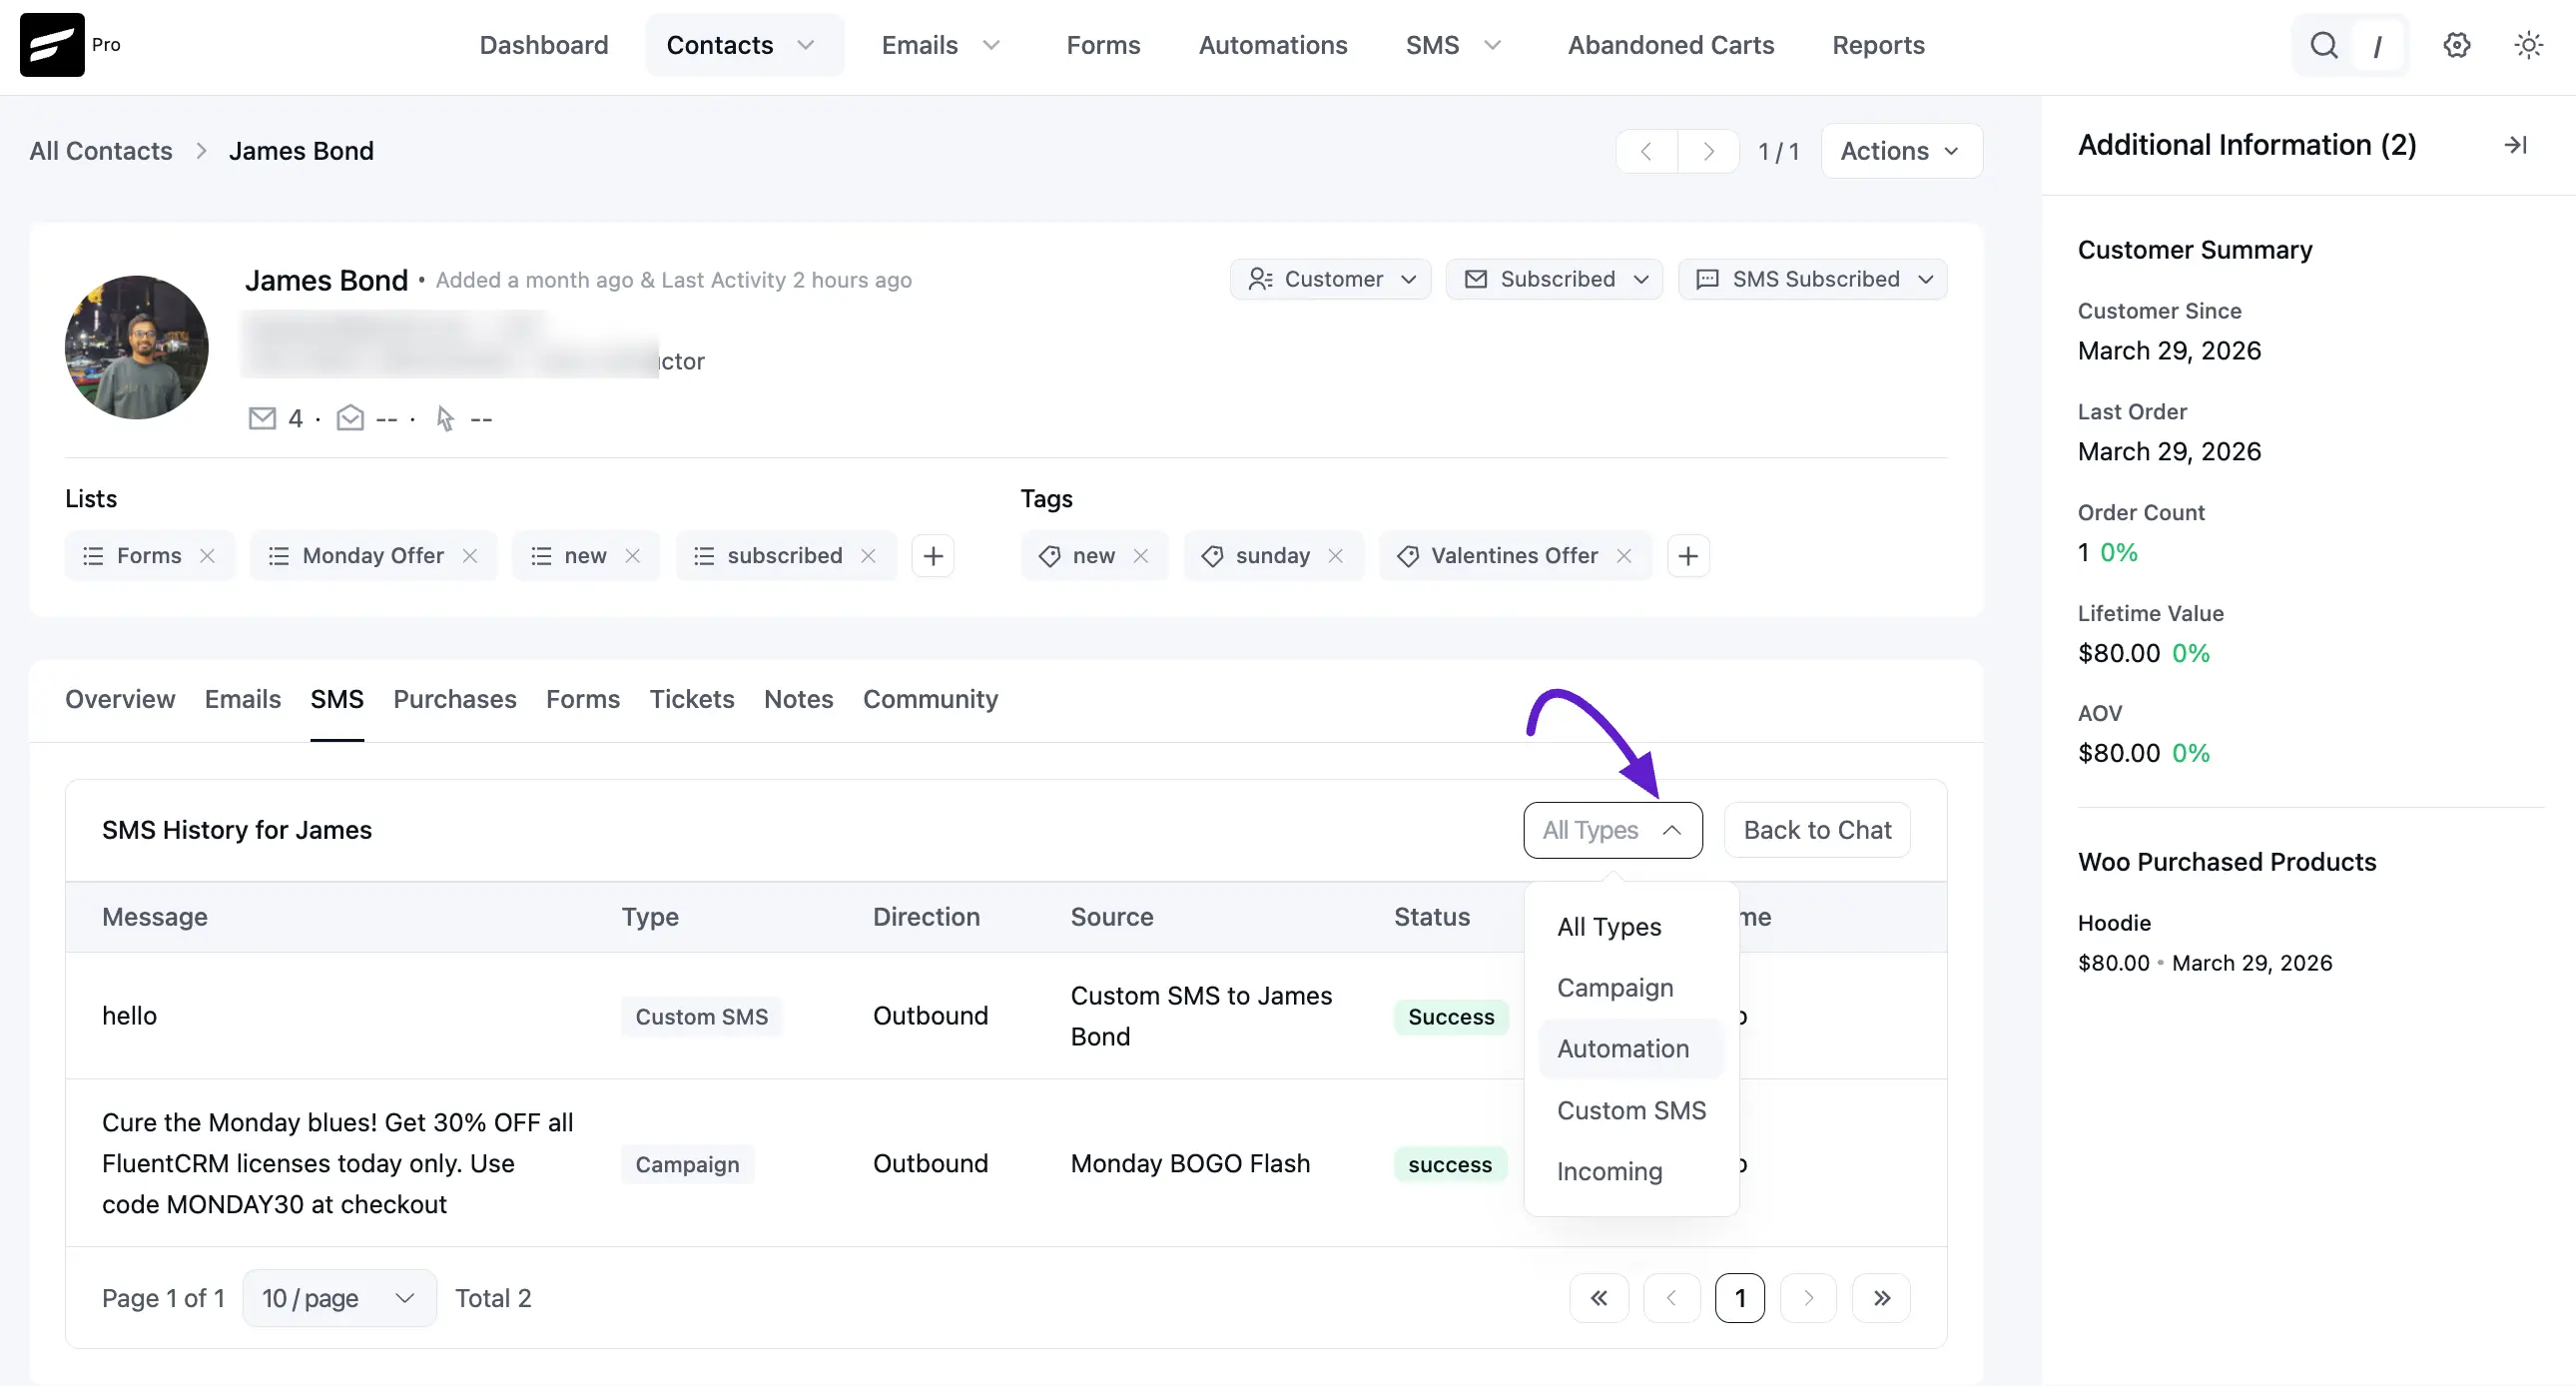
- SMS stats: A breakdown of the contact’s message history (ALL, CAMPAIGN, AUTOMATION, DIRECT).
- Direct send interface: A simple, chat-style area at the bottom.
Type your message in the field labeled Type a message, then press Enter or click Send. A character count (for example, 0/160 msg) helps you stay within SMS length limits.
Messages sent this way appear in the contact’s activity and count toward DIRECT in SMS stats.
To build full workflows that include SMS, start with Introduction to FluentCRM Automation.
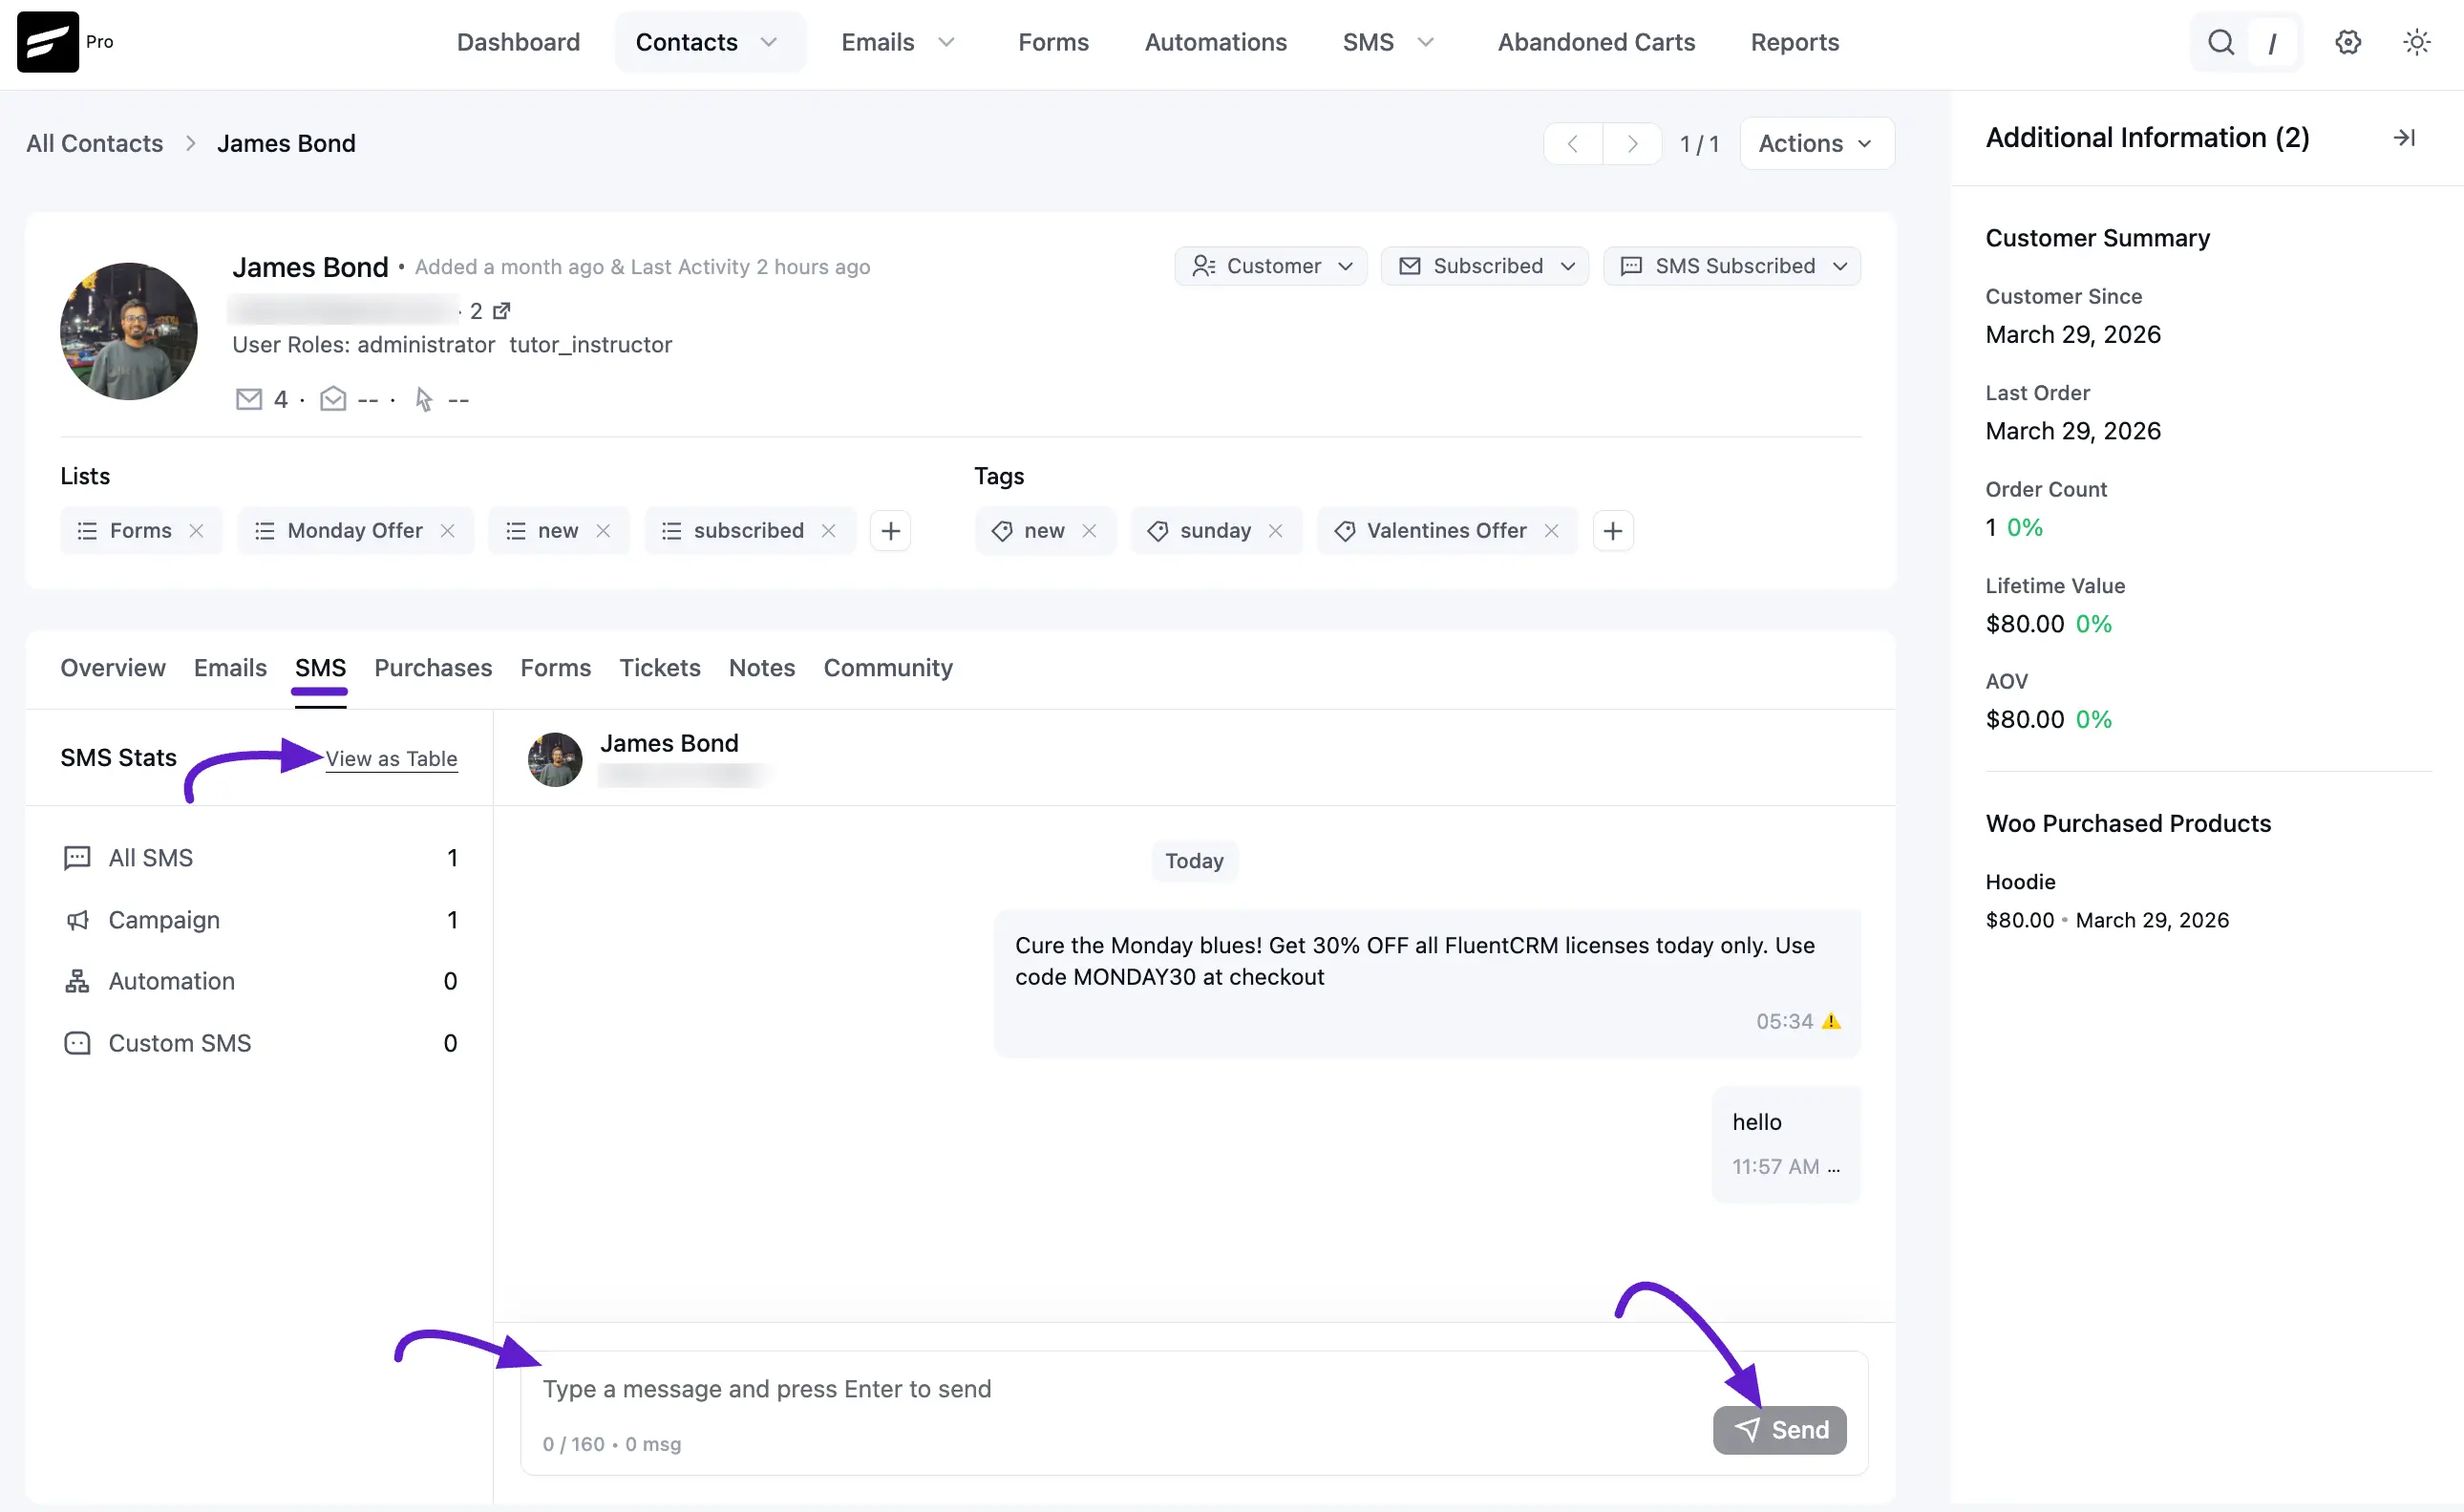
If you want to view this SMS Stats in table, click on the the View as table button. You will also see, all types of SMS campaign from this dropdown option.
That covers the core SMS Module setup and usage.