Appearance
Custom Contact Fields
When you need additional fields to gather specific information for your business, you can create new Custom Fields. This allows you to store specialized data that goes beyond standard name and email fields.
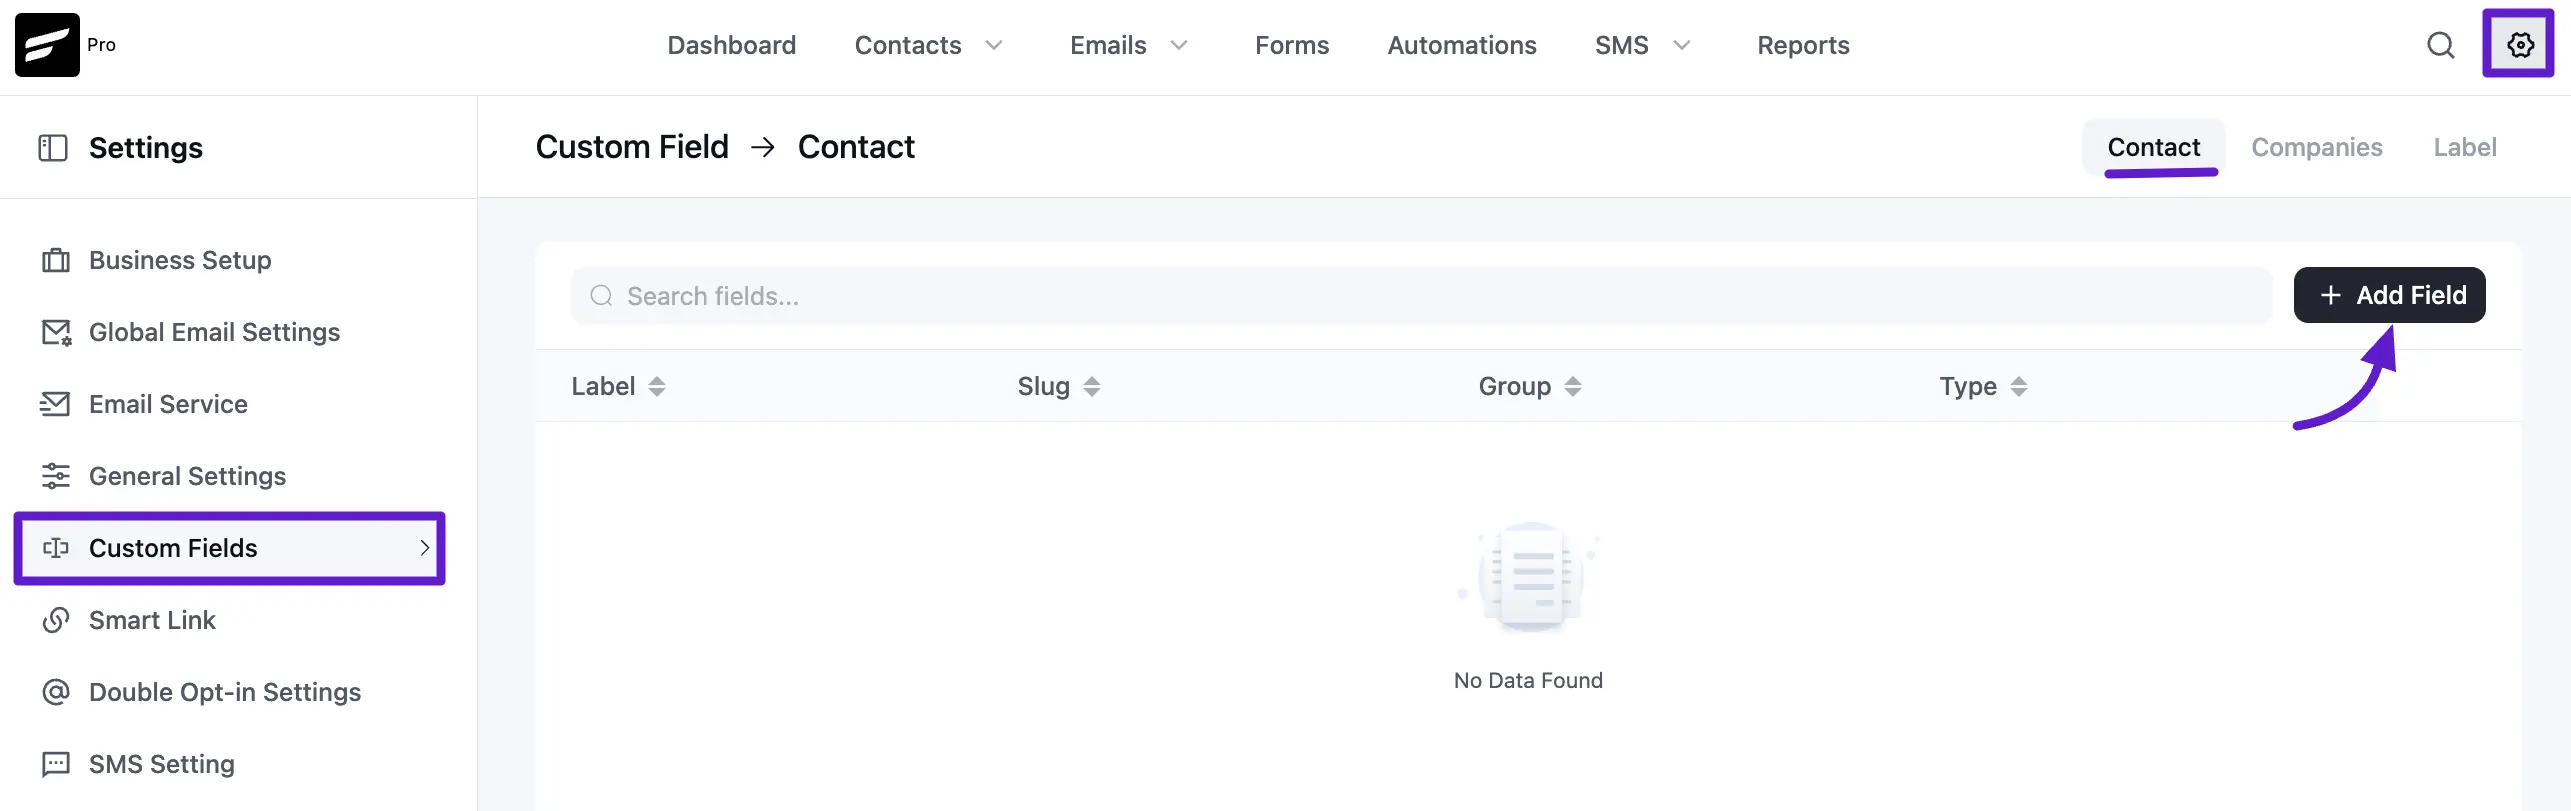
To manage these, go to the Settings in the top right corner of the main navigation bar. From the left sidebar menu, navigate to Custom Contact Fields.
Adding Custom Contact Field
To create a new data point, click the + Add Field button.
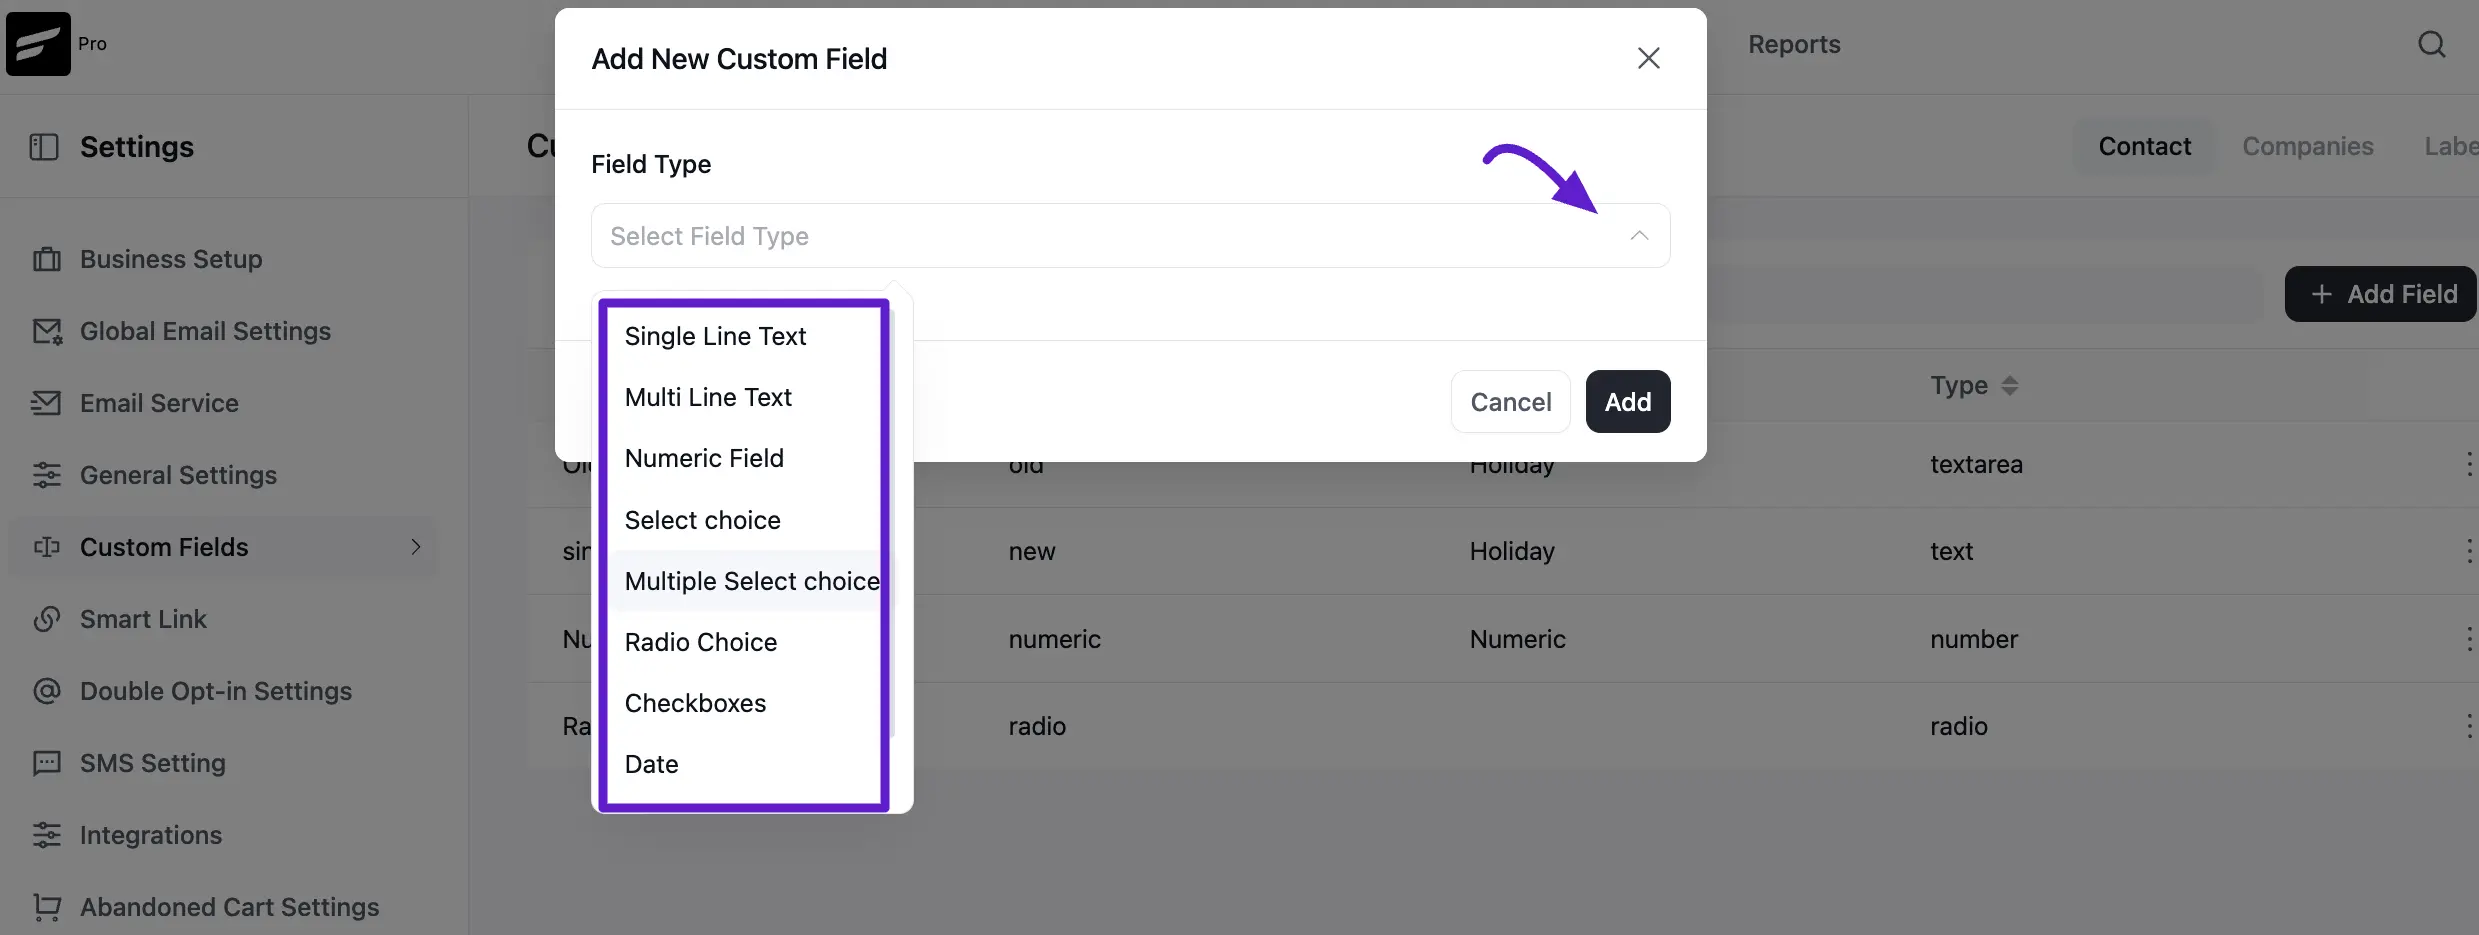
A popup form will appear where you can select your desired Field Type.
Available Field Types:
- Single Line Text: Used for short, one-liner entries.
- Multi-line Text: Used for adding descriptive information or notes.
- Numeric Field: Used for adding numerical inputs.
- Select Choice: A dropdown menu for selecting one value from multiple options.
- Multiple Select Choice: A dropdown for selecting multiple inputs as choices.
- Radio Choice: A list of options where only one can be selected.
- Checkboxes: Used for selecting multiple or single tick-box inputs.
- Date: A simple calendar picker for date information.
- Date and Time: Used for adding the exact time along with the date.
Field Configuration
After choosing the field type, you must provide a Label.
- For Choice-Based Fields: If you select Radio Choice, Select Choice, or Checkboxes, you must enter the options manually. Type the option value and press Enter on your keyboard to add it to the list.
- Groups: You can assign the field to a specific Field Group to keep your contact profiles organized.
Rearranging Custom Contact Fields
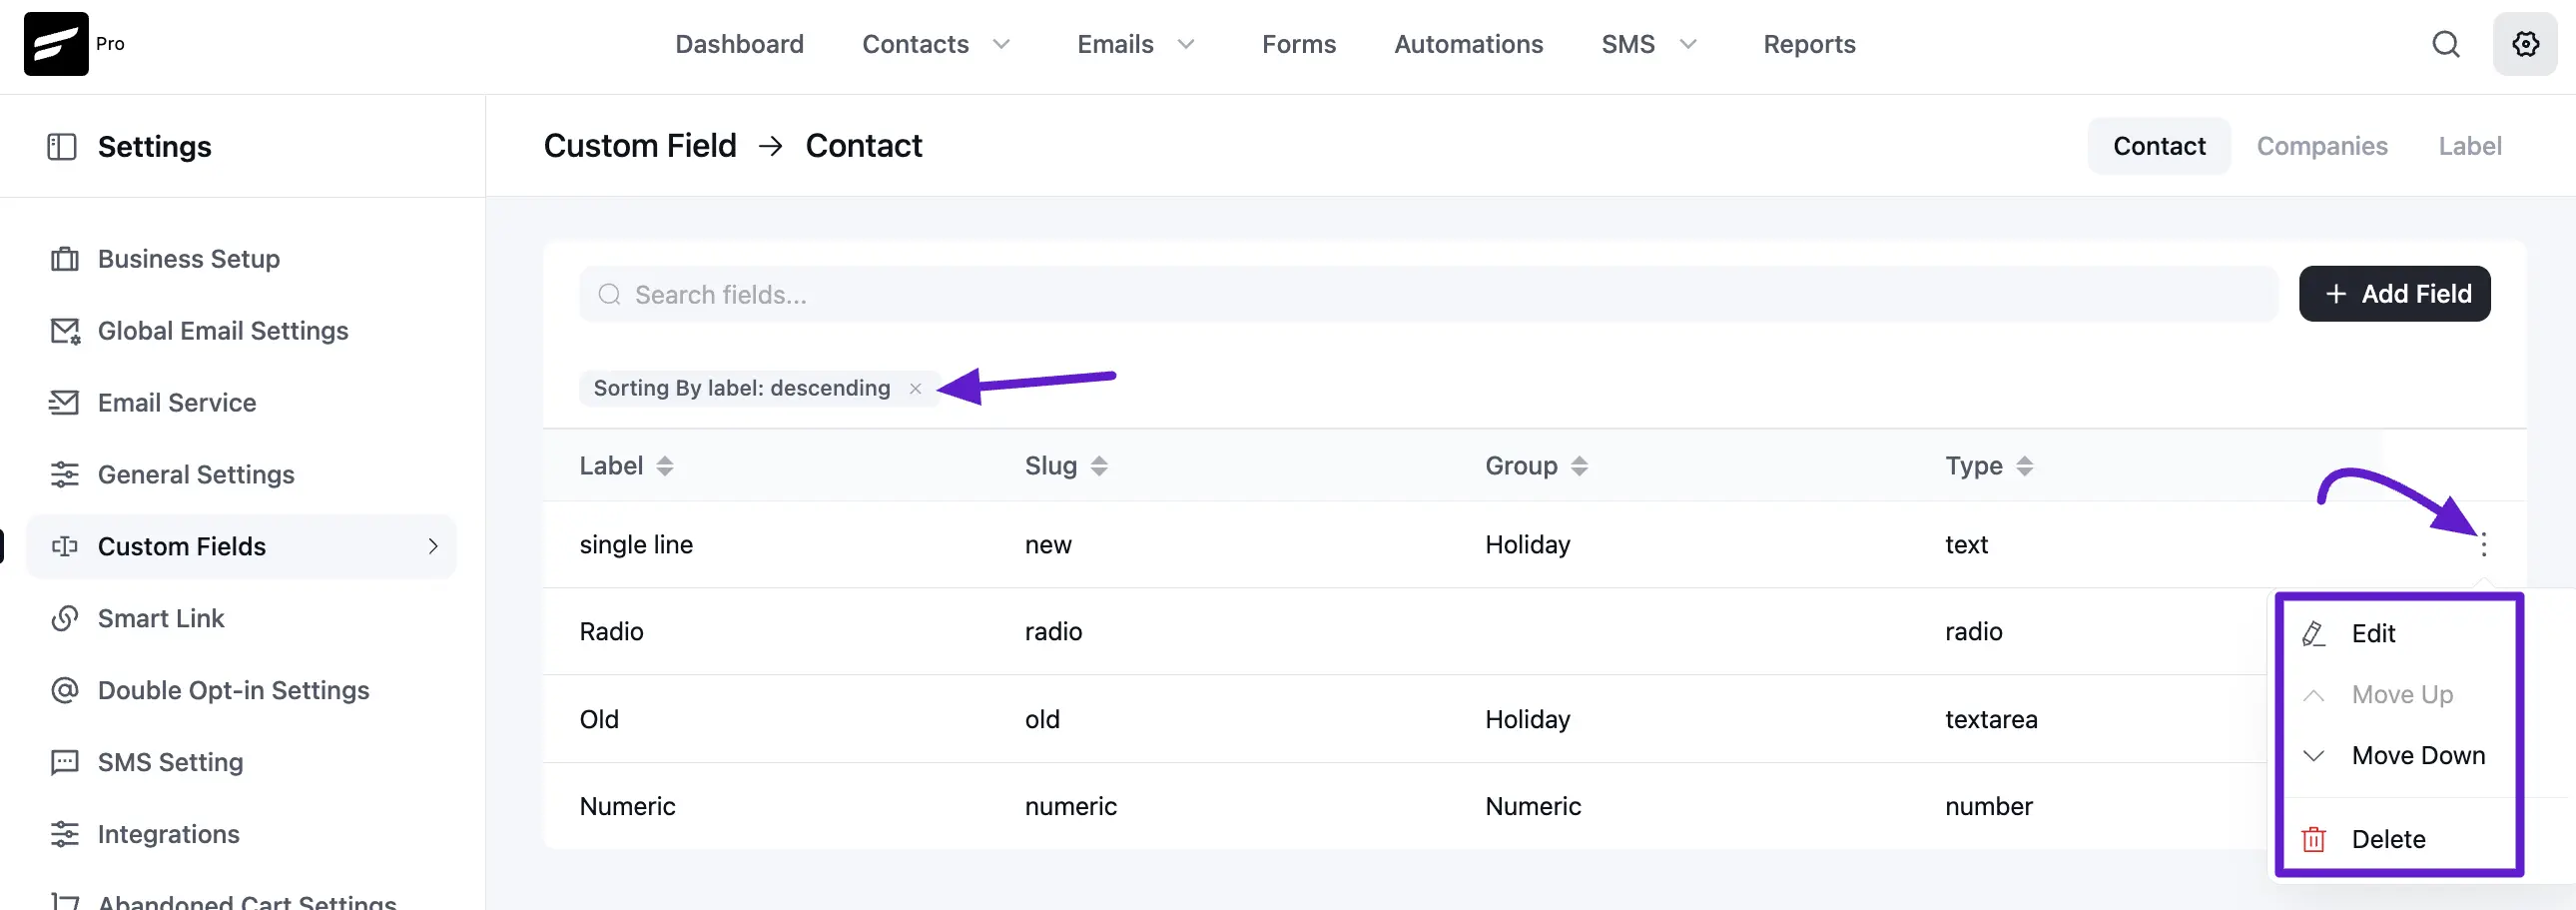
When you add multiple Custom Contact Fields, they will appear in the Custom Profile Data section in the same order they were created. If you want to change the order, click the three-dot menu and use the Up and Down arrows to rearrange them. From the same menu, you can also Edit or Delete the fields.
You can also sort the fields by going to Custom Contact Fields and clicking on the column labels to arrange them in ascending or descending order.
Update Custom Fields Using Bulk Actions
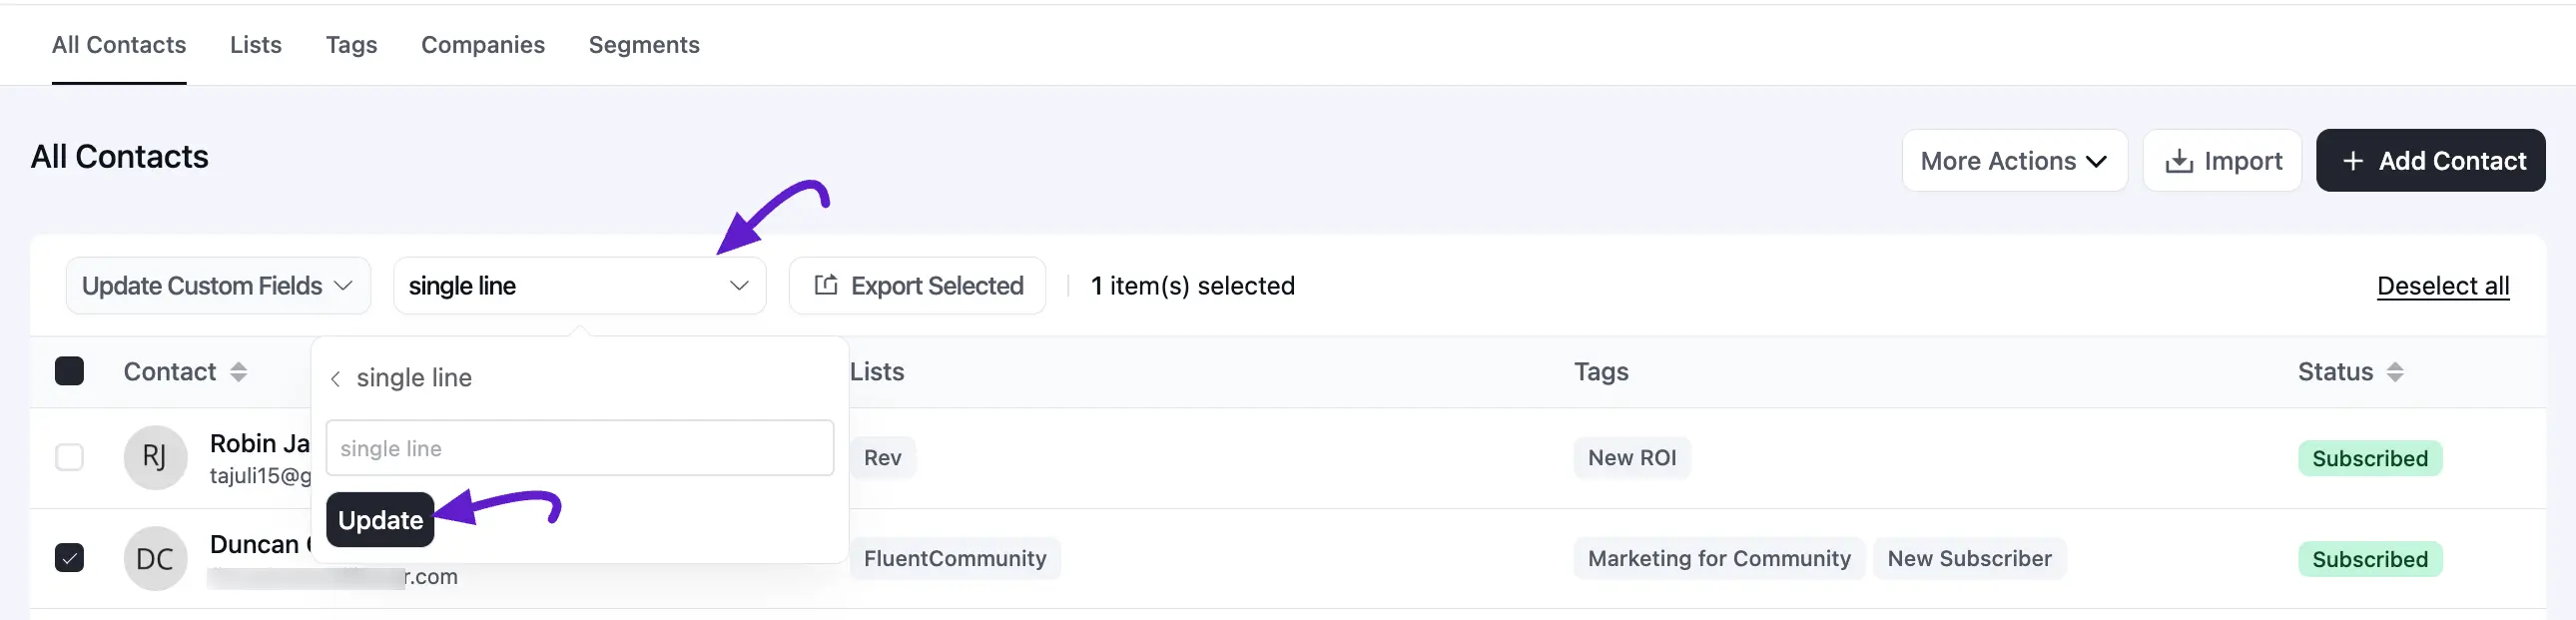
You can add custom fields to your users using the Bulk Action feature in FluentCRM. To do this, go to the Contacts section and select the contacts you want to update. Now, click on the Select Action dropdown, where you’ll see the Update Custom Field option—select it.
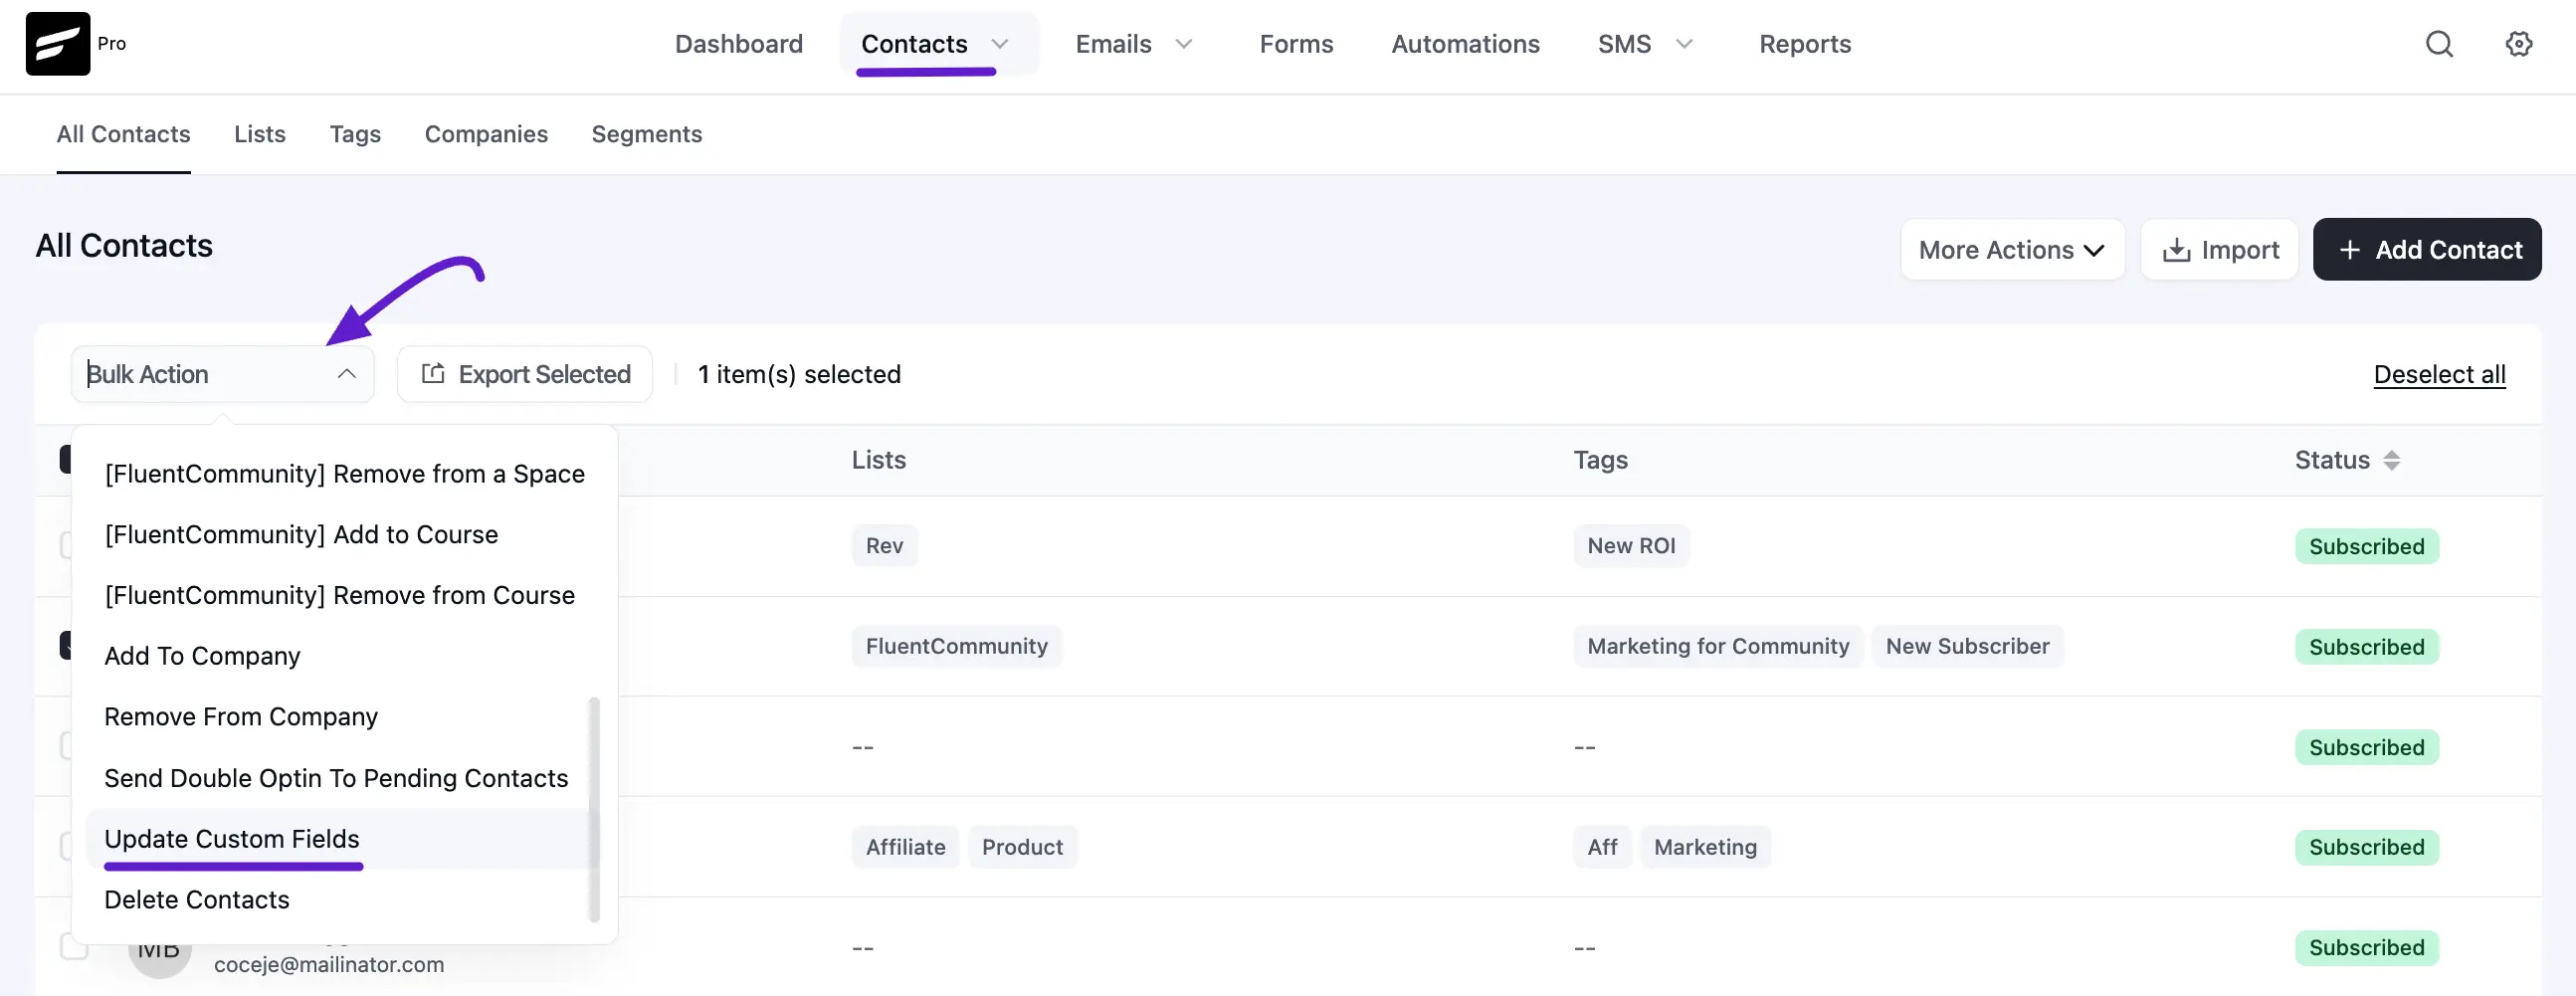
After that, another dropdown will appear, allowing you to choose the custom field you want to add. Once selected, click the Update Field button to save the changes.
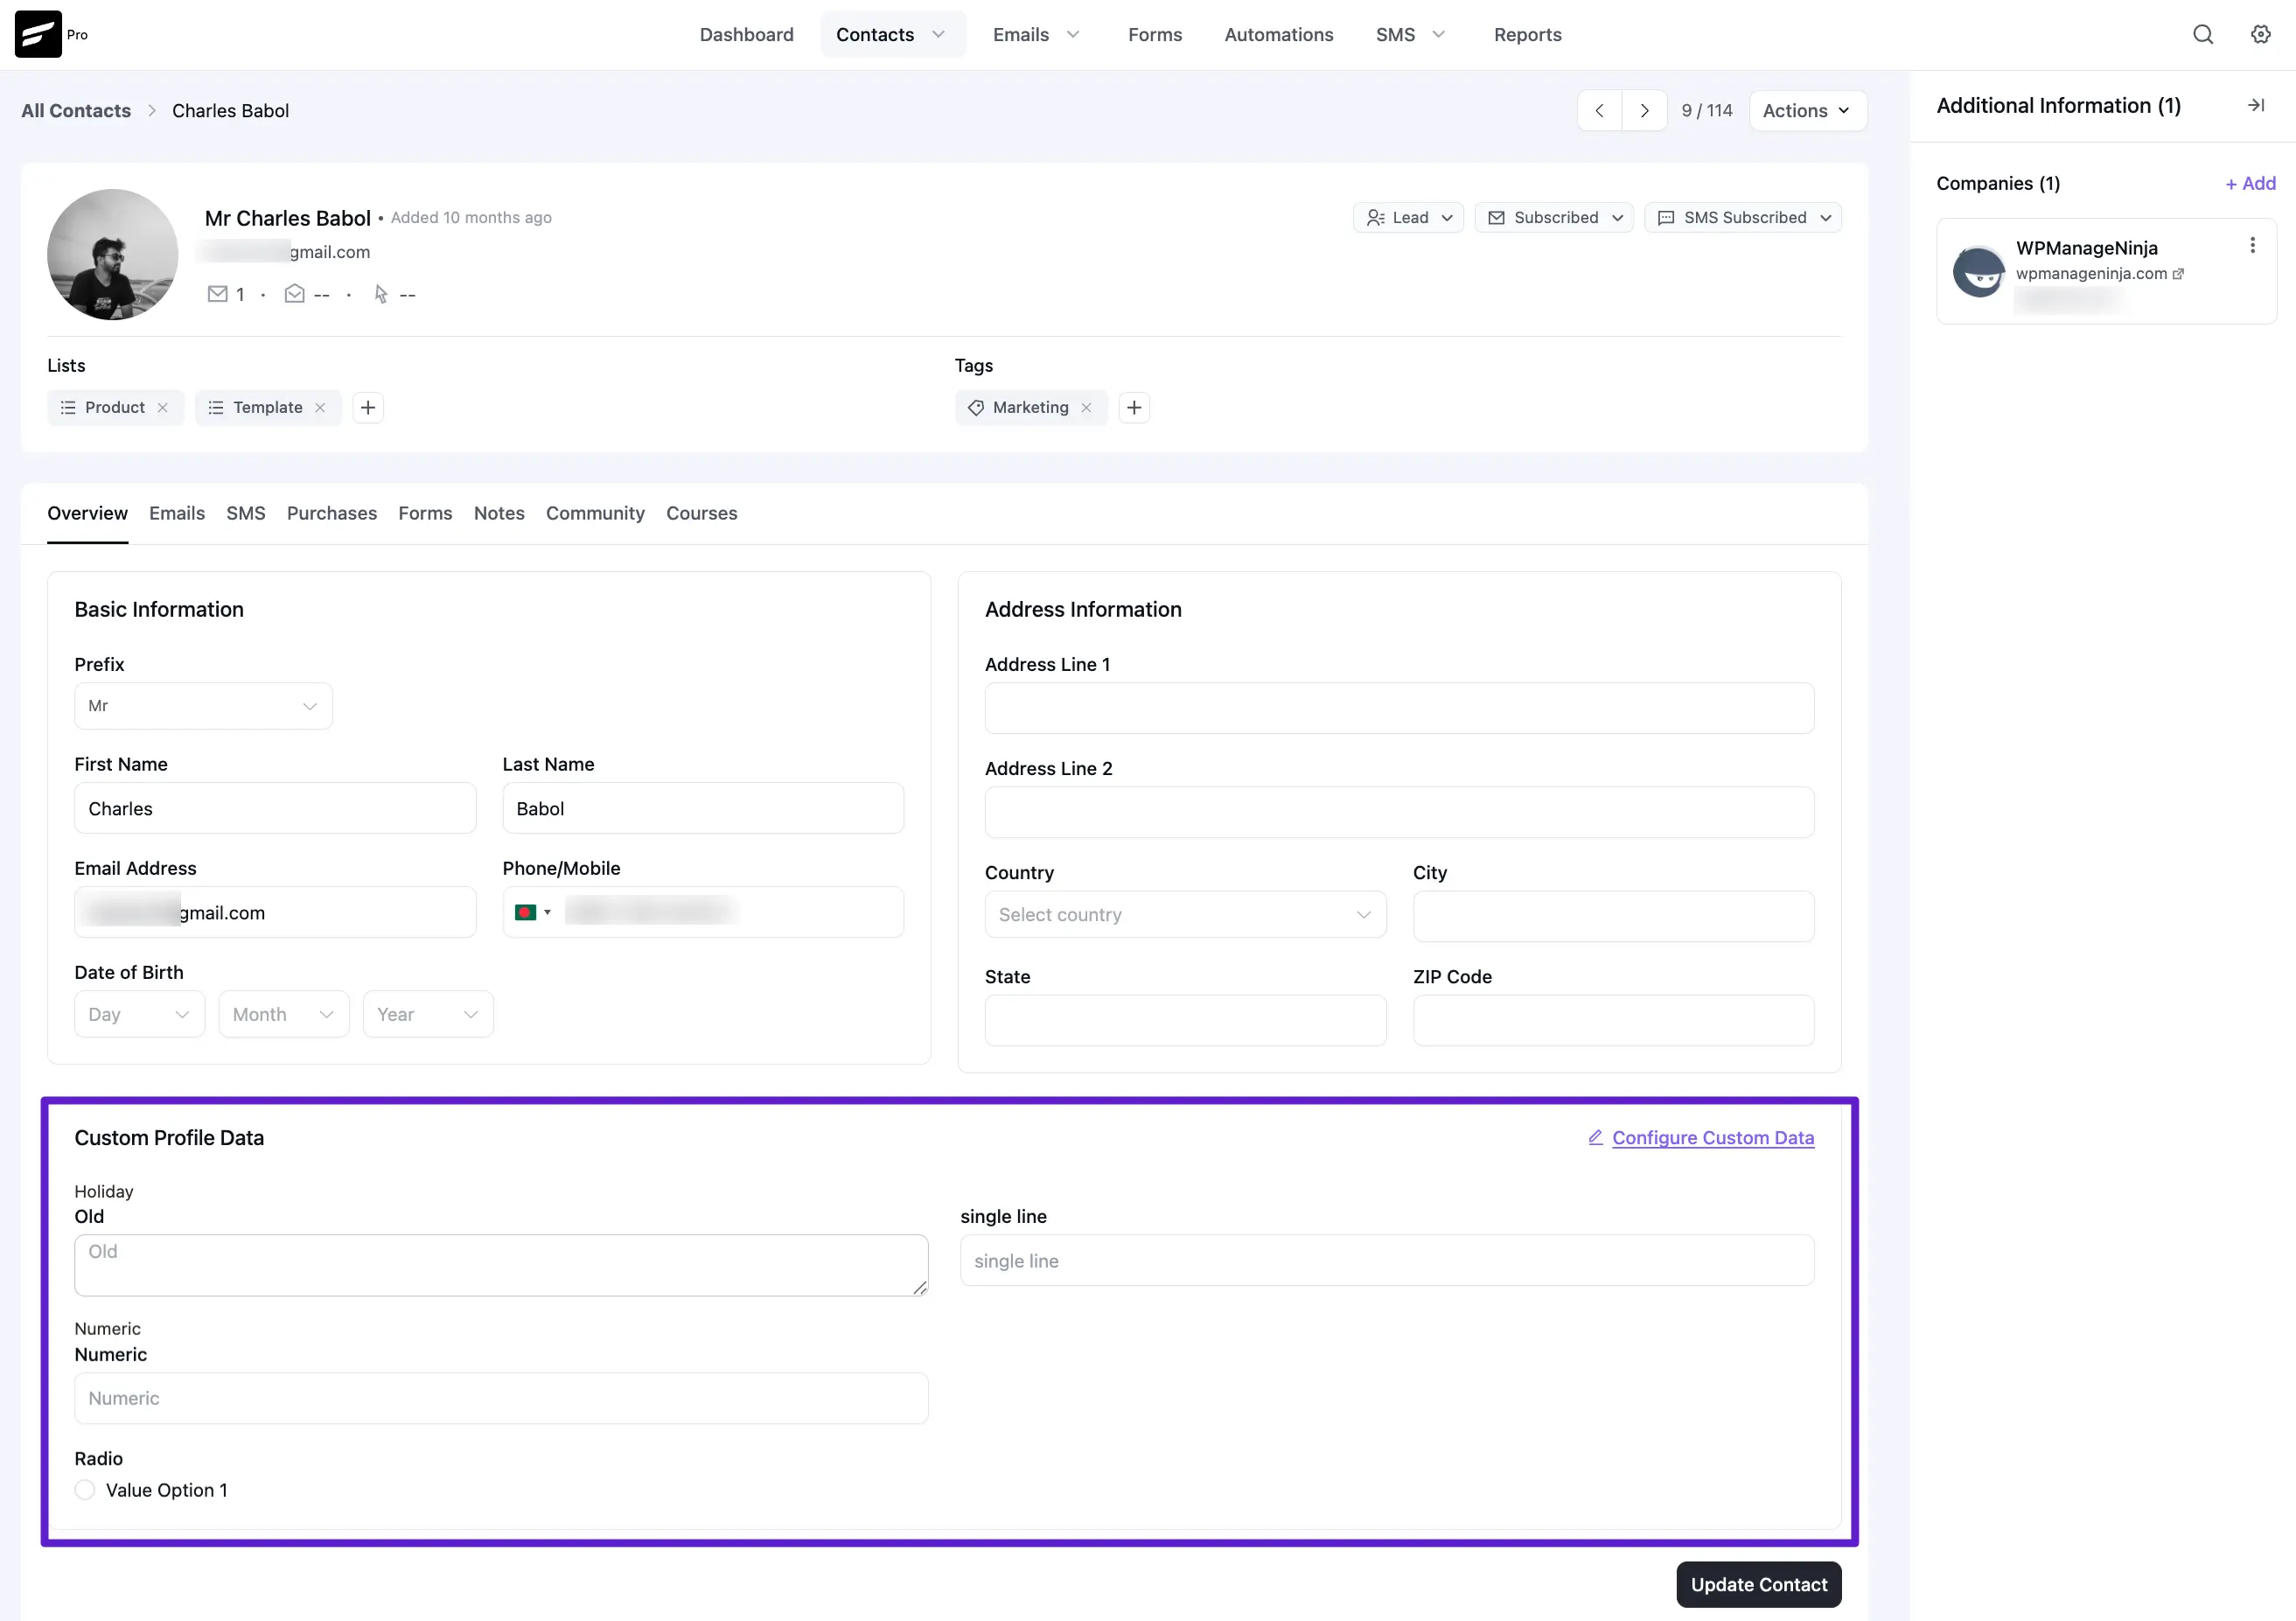
Previewing custom data
After adding and configuring your fields, you can view the data on any individual Contact Profile. Navigate to the Custom Fields tab within the contact's record to see the organized groups and their corresponding values.
.