Appearance
WordPress Actions
FluentCRM provides several Actions, especially for WordPress sites, to trigger tasks automatically. Once automation is triggered, you can add the desired Actions to handle advanced, repetitive, or routine tasks. This article provides detailed information about all WordPress Actions in FluentCRM Automation.
Remember, to use all the WordPress Actions, you need to have FluentCRM Pro Plugin installed and activated in your WordPress Site.
All WordPress Actions
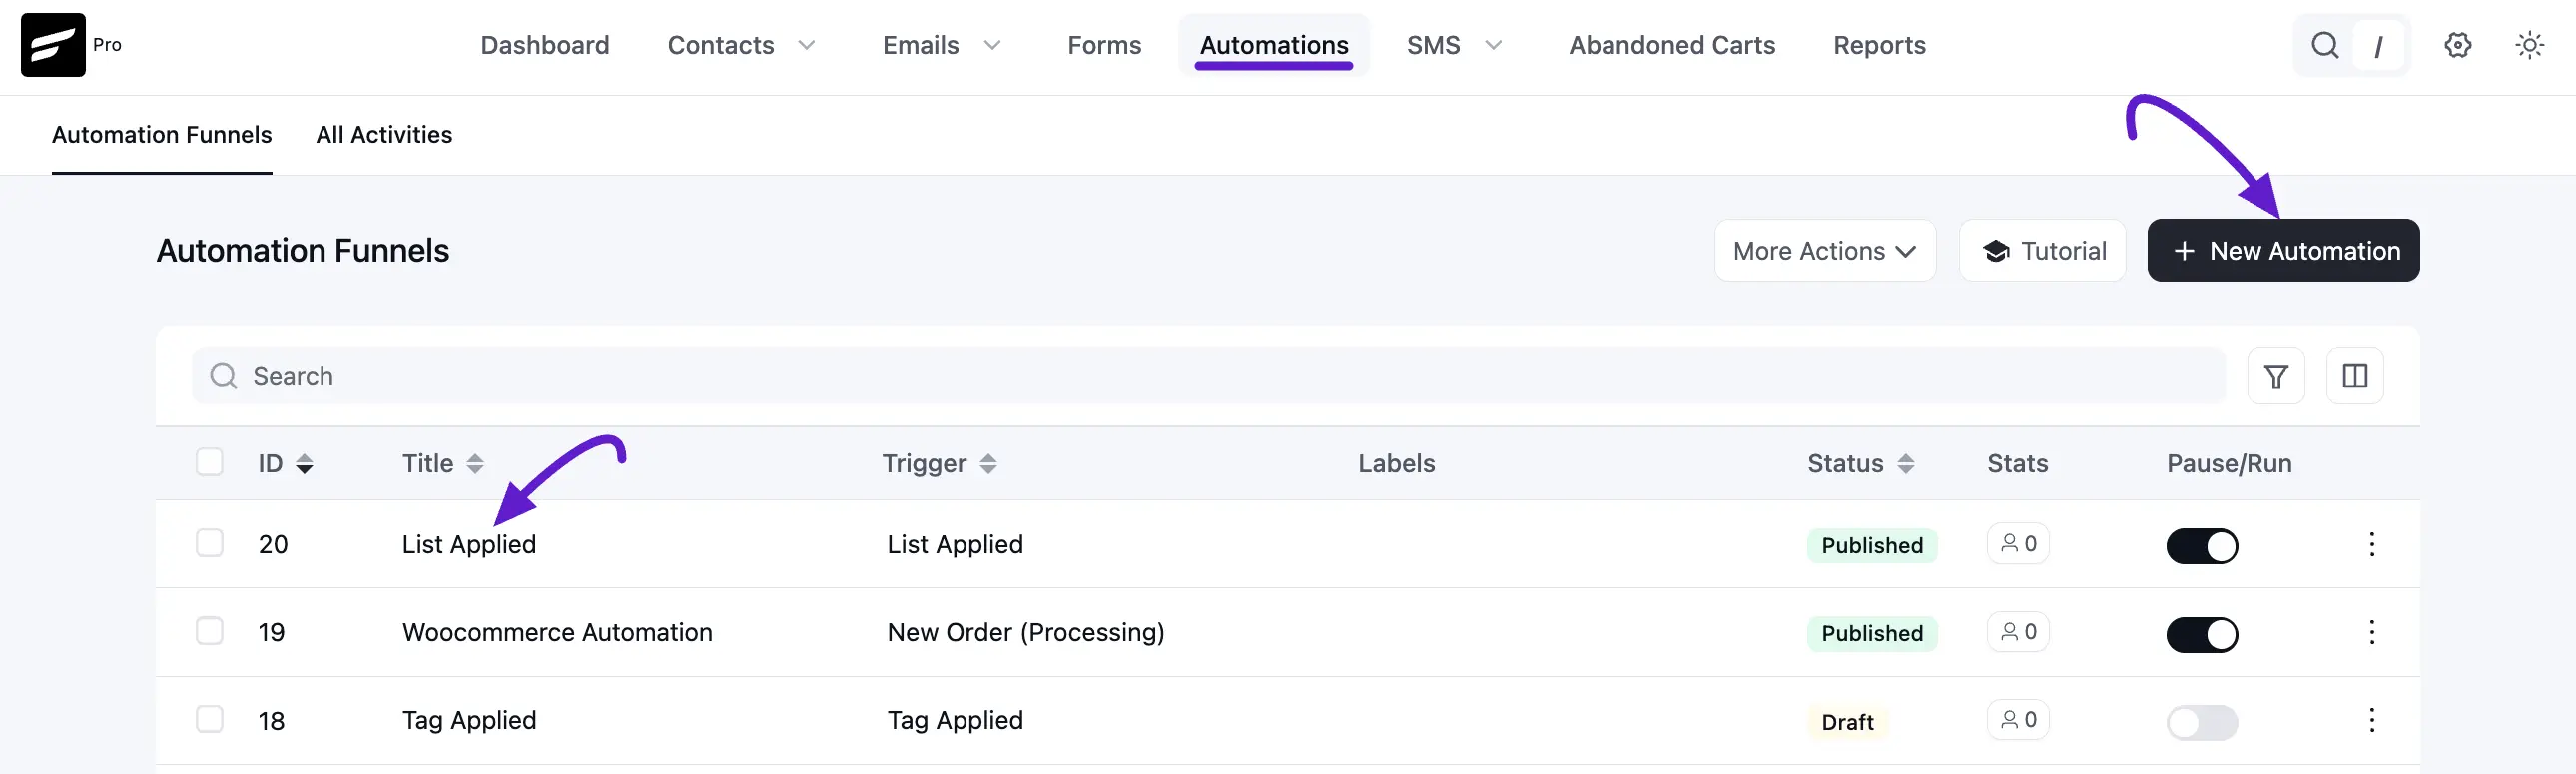
Go to the Automation section from the FluentCRM Navbar, and open your desired Automation by clicking on its title.
Or, create a new one by clicking the + New Automation.
To learn how to create a new automation funnel, read this Documentation.
For example, I opened the List Applied automation funnel to explain all the Actions in CRM.
Now, click the Plus Icon, or just hover over it and click the Add Action / Goal option to get all the WordPress Actions.
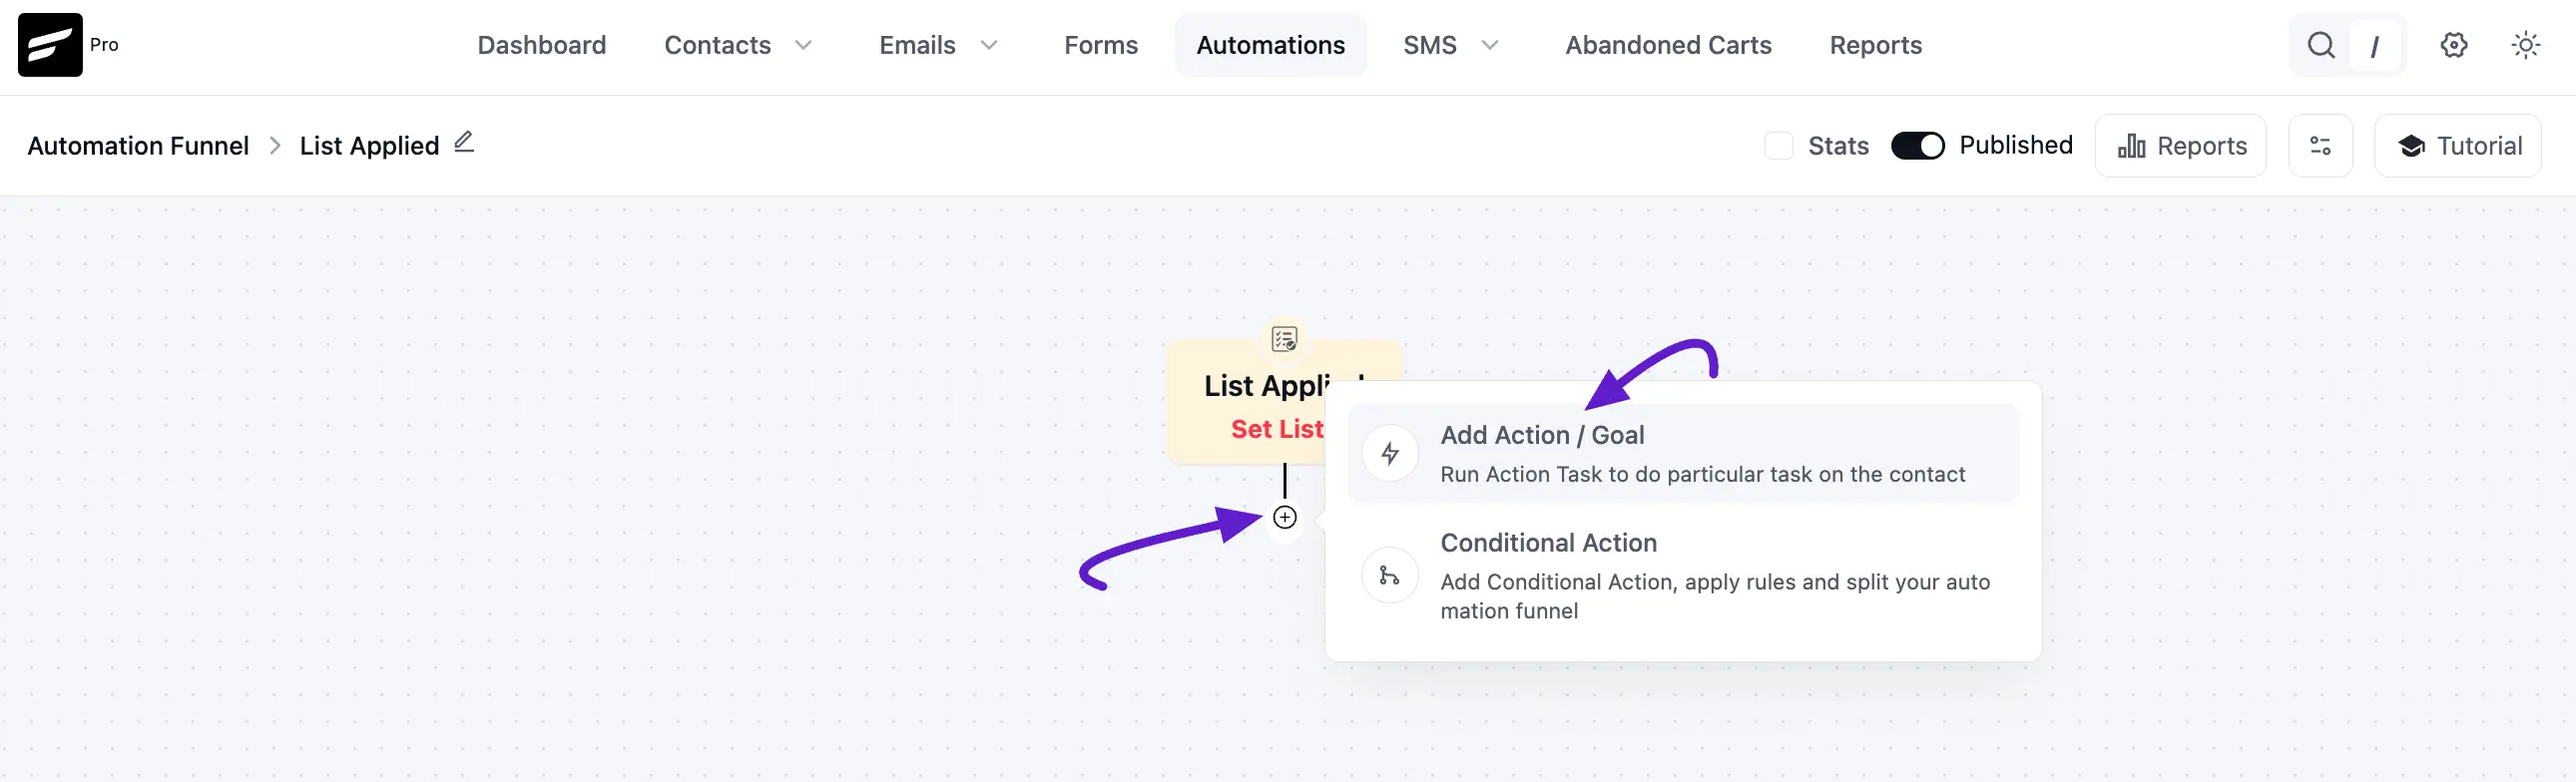
Now, a pop-up page will appear with all the WordPress Action Blocks of FluentCRM to choose from.
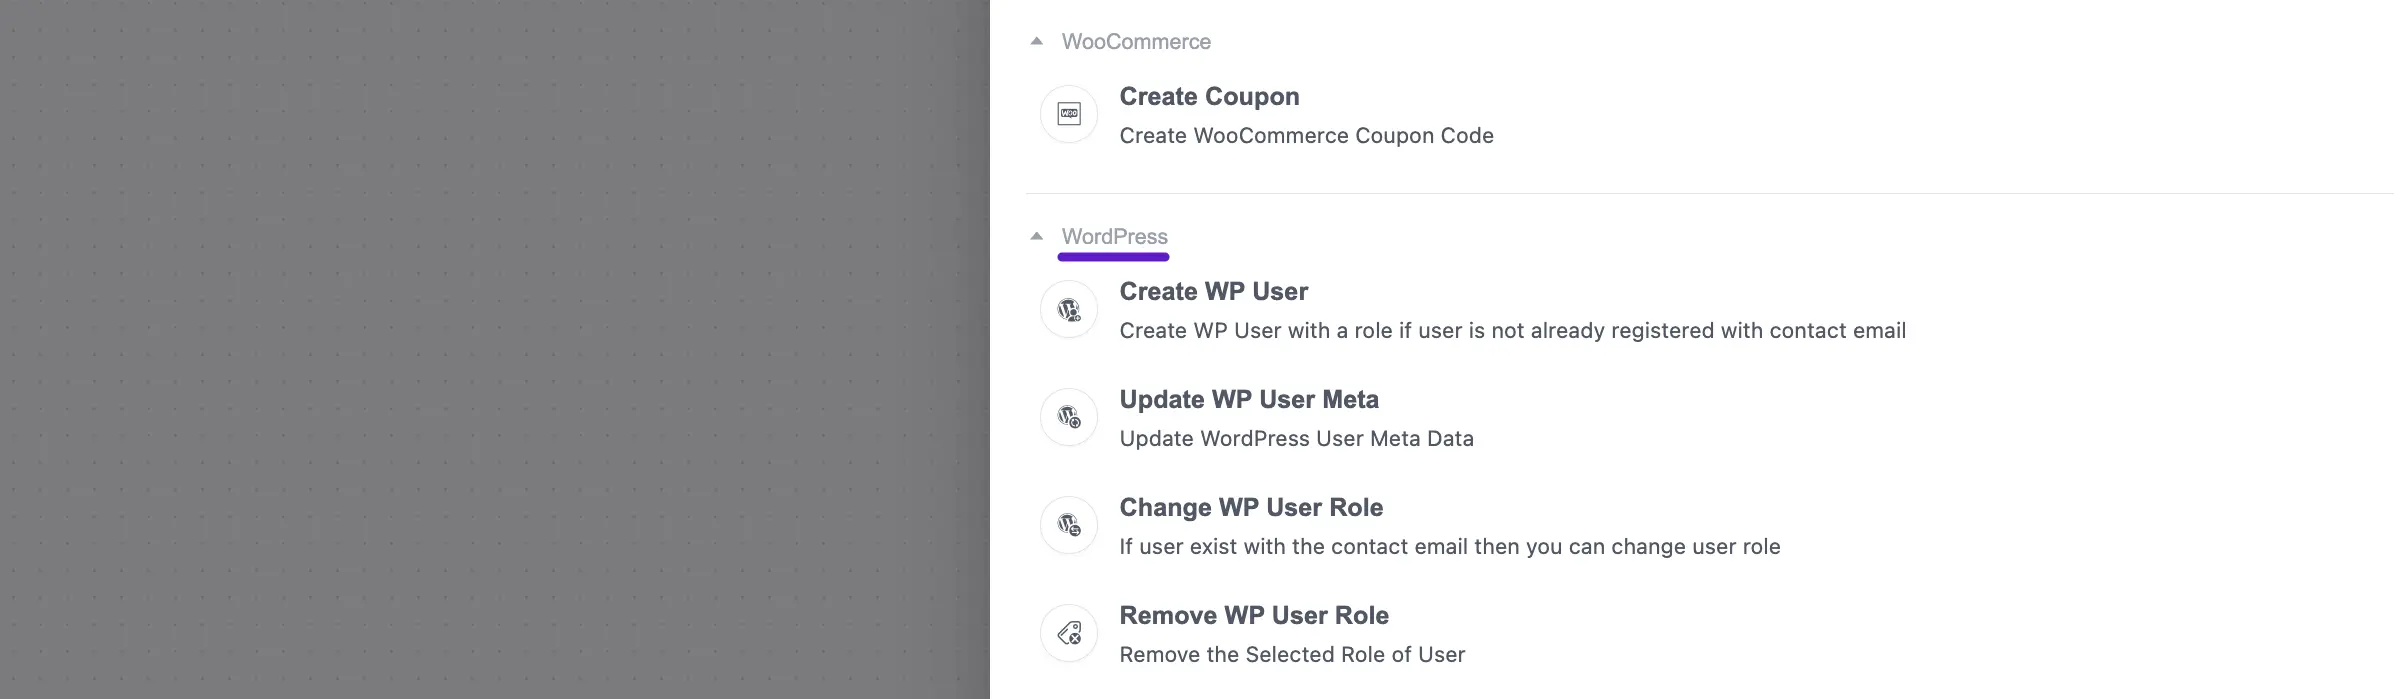
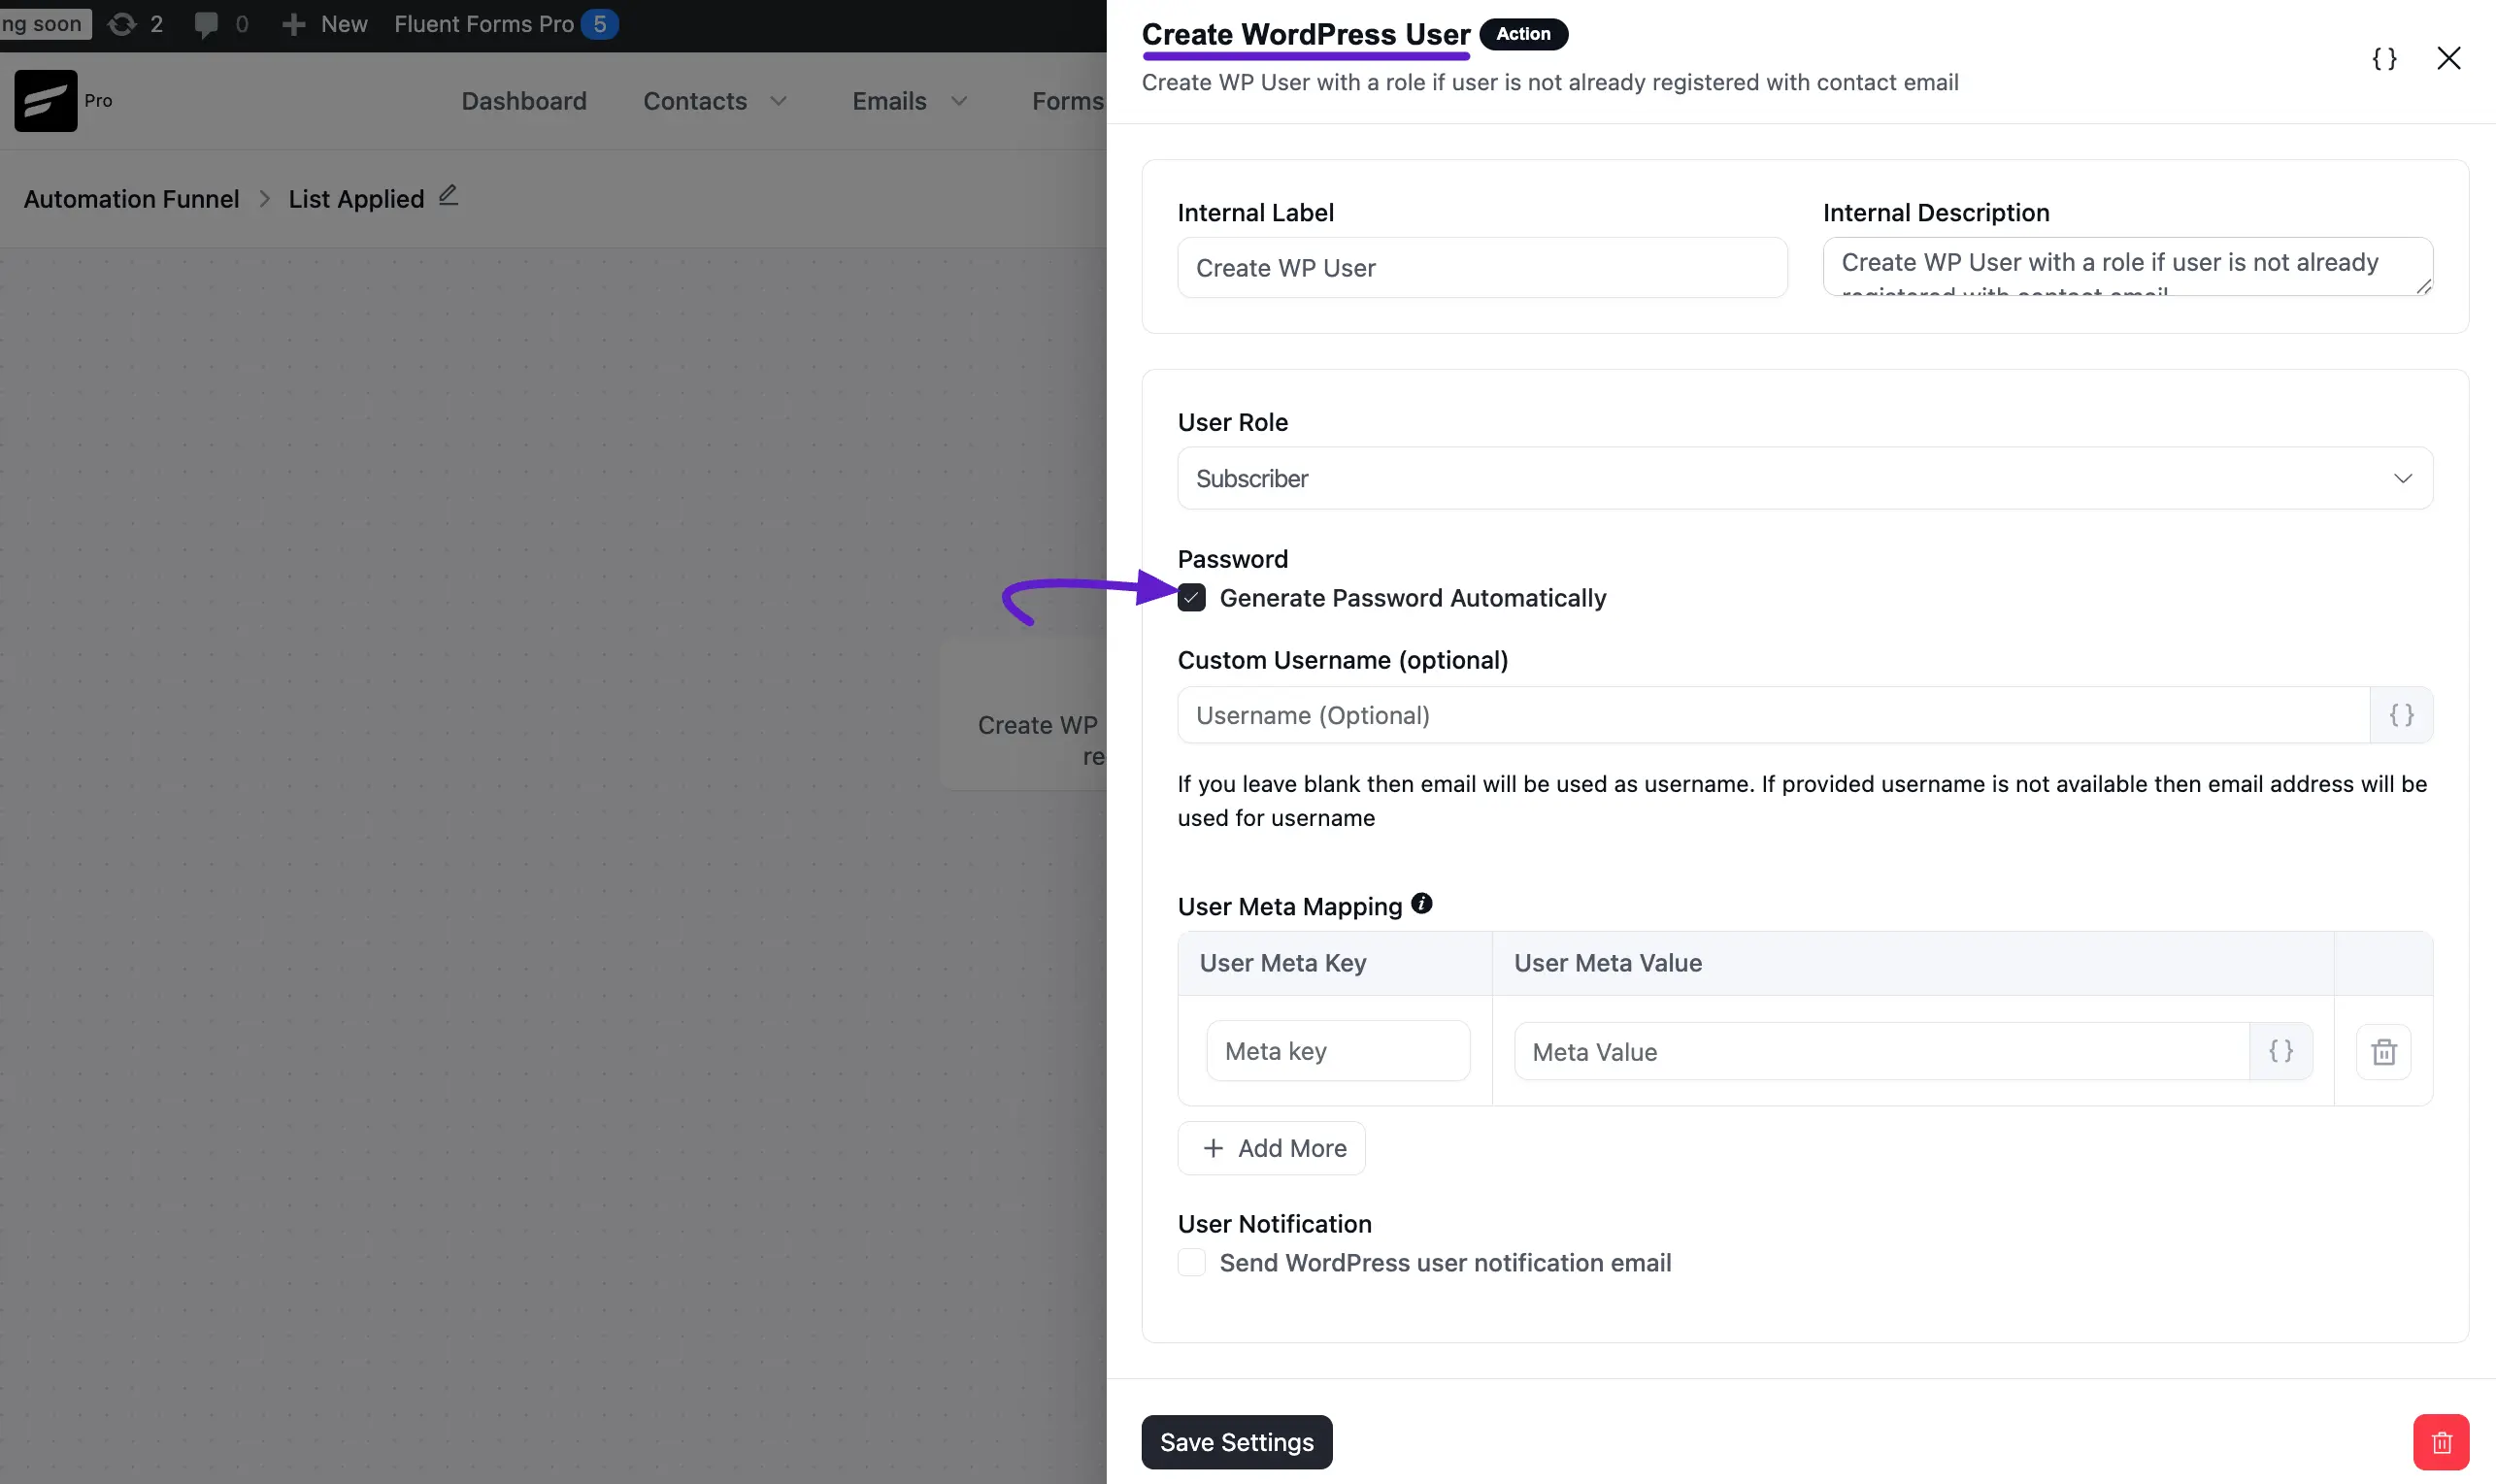
1. Create WordPress User
This action lets you Create WordPress Users with a role (if the user is not already registered with a contact email) for the contacts within the automation funnel. After selecting this Action, a tab will appear on the right-hand side with options to set up your action.
Settings of Create WP User Action
Interval Label: Here, a Name for the Action will be automatically added so you can easily find it later. You can change it according to your needs.
Internal Description: A description of the action will also be automatically added as a Subtitle. You can also change it according to your needs.
User Role: Select available WordPress User Roles for the CRM Contacts using the Dropdown Arrow. To learn more about WordPress User Roles, read this Documentation.
Password: Check the Generate Password Automatically box for automatic password generation for WP Users. Or you can set a custom password manually by entering the custom text or using the SmartCodes Button in the Provide Custom User Password field.
Custom Username (optional): With this option, you can set a Custom Username by using the SmartCodes Button or entering Custom Text. If you leave it blank, the email address will be used as the username. If the provided username is not available then the email address will be used for the username. This is optional.
User Meta Mapping: If you want to map user meta properties you can add that here. This is also totally optional. Also, you can add more mapping fields by clicking the +Add More button and delete any existing fields by clicking the Trash Icon if needed.
- Meta Key: The key is mapped to the Database as the Meta Key.
- Meta Value: The value against the User Meta Key. You can use SmartCodes too as described in this SmartCode Documentation.
User Notification: Check this box if you want to send the WordPress User Notification Email to the CRM Contacts.
Once you are done, click the Save Settings button to save all your changes. You can also Delete the action by clicking the Trash Icon if needed.
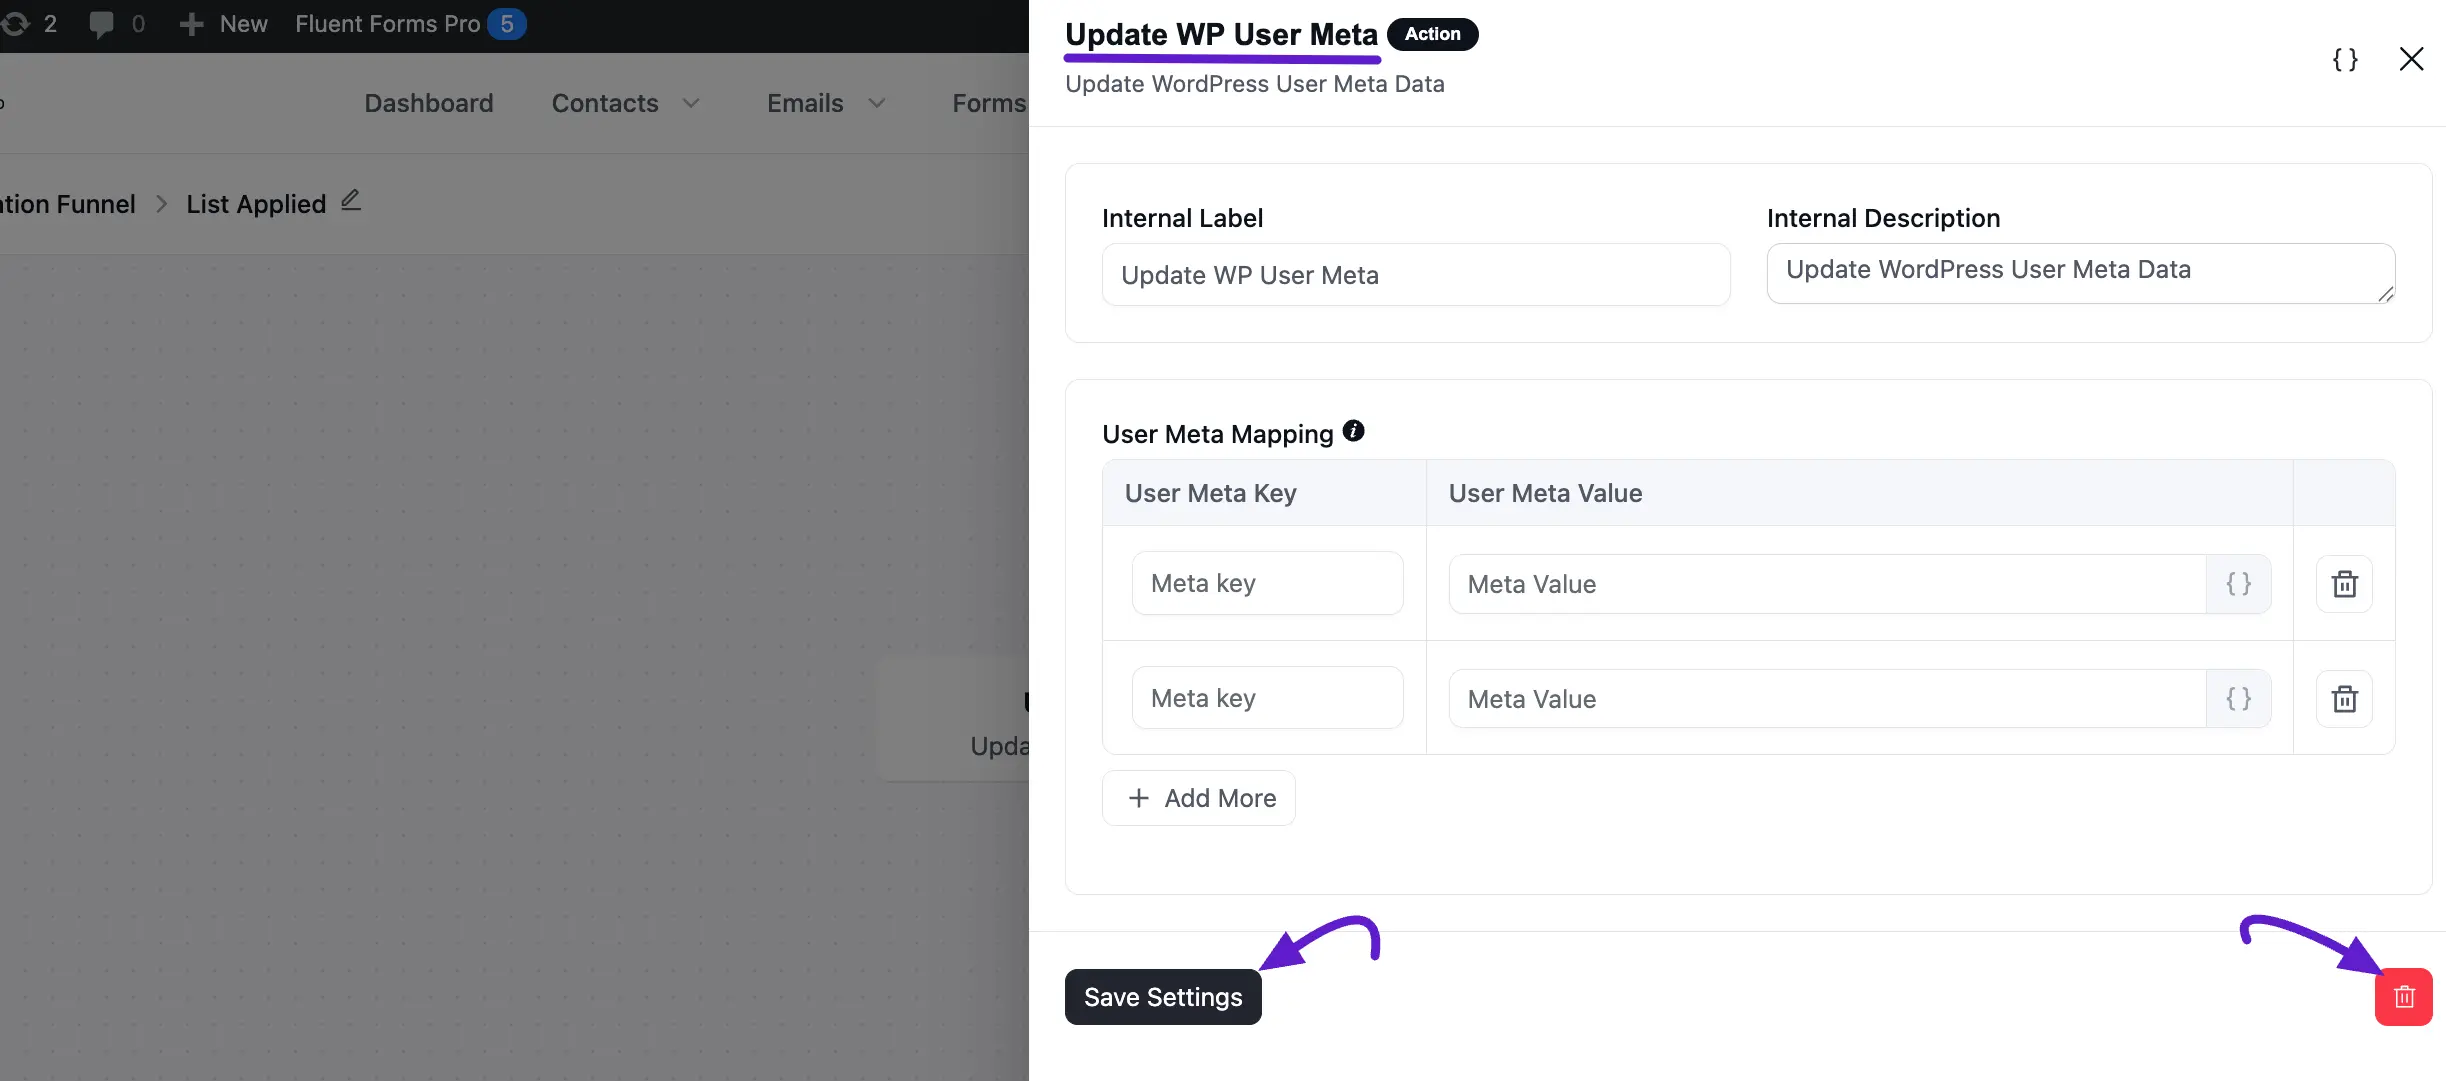
2. Update WP User Meta
This action lets you Update WP User Meta Data for the contacts within the automation funnel.
After selecting this Action, a tab will appear on the right-hand side with options to set up your action.
Here are the Settings of the Update WordPress User Meta action:
- User Meta Mapping: If you want to map user meta properties you can add that here. This is also totally optional. Also, you can add more mapping fields by clicking the +Add More button and delete any existing fields by clicking the Trash Icon if needed.
- Meta Key: The key is mapped to the Database as the Meta Key.
- Meta Value: The value against the User Meta Key. You can use SmartCodes too as described in this SmartCode Documentation.
To learn the use of first Two settings mentioned in the screenshot below, read this Section as it works the same way.
Once you are done, click the Save Settings button to save all your changes.
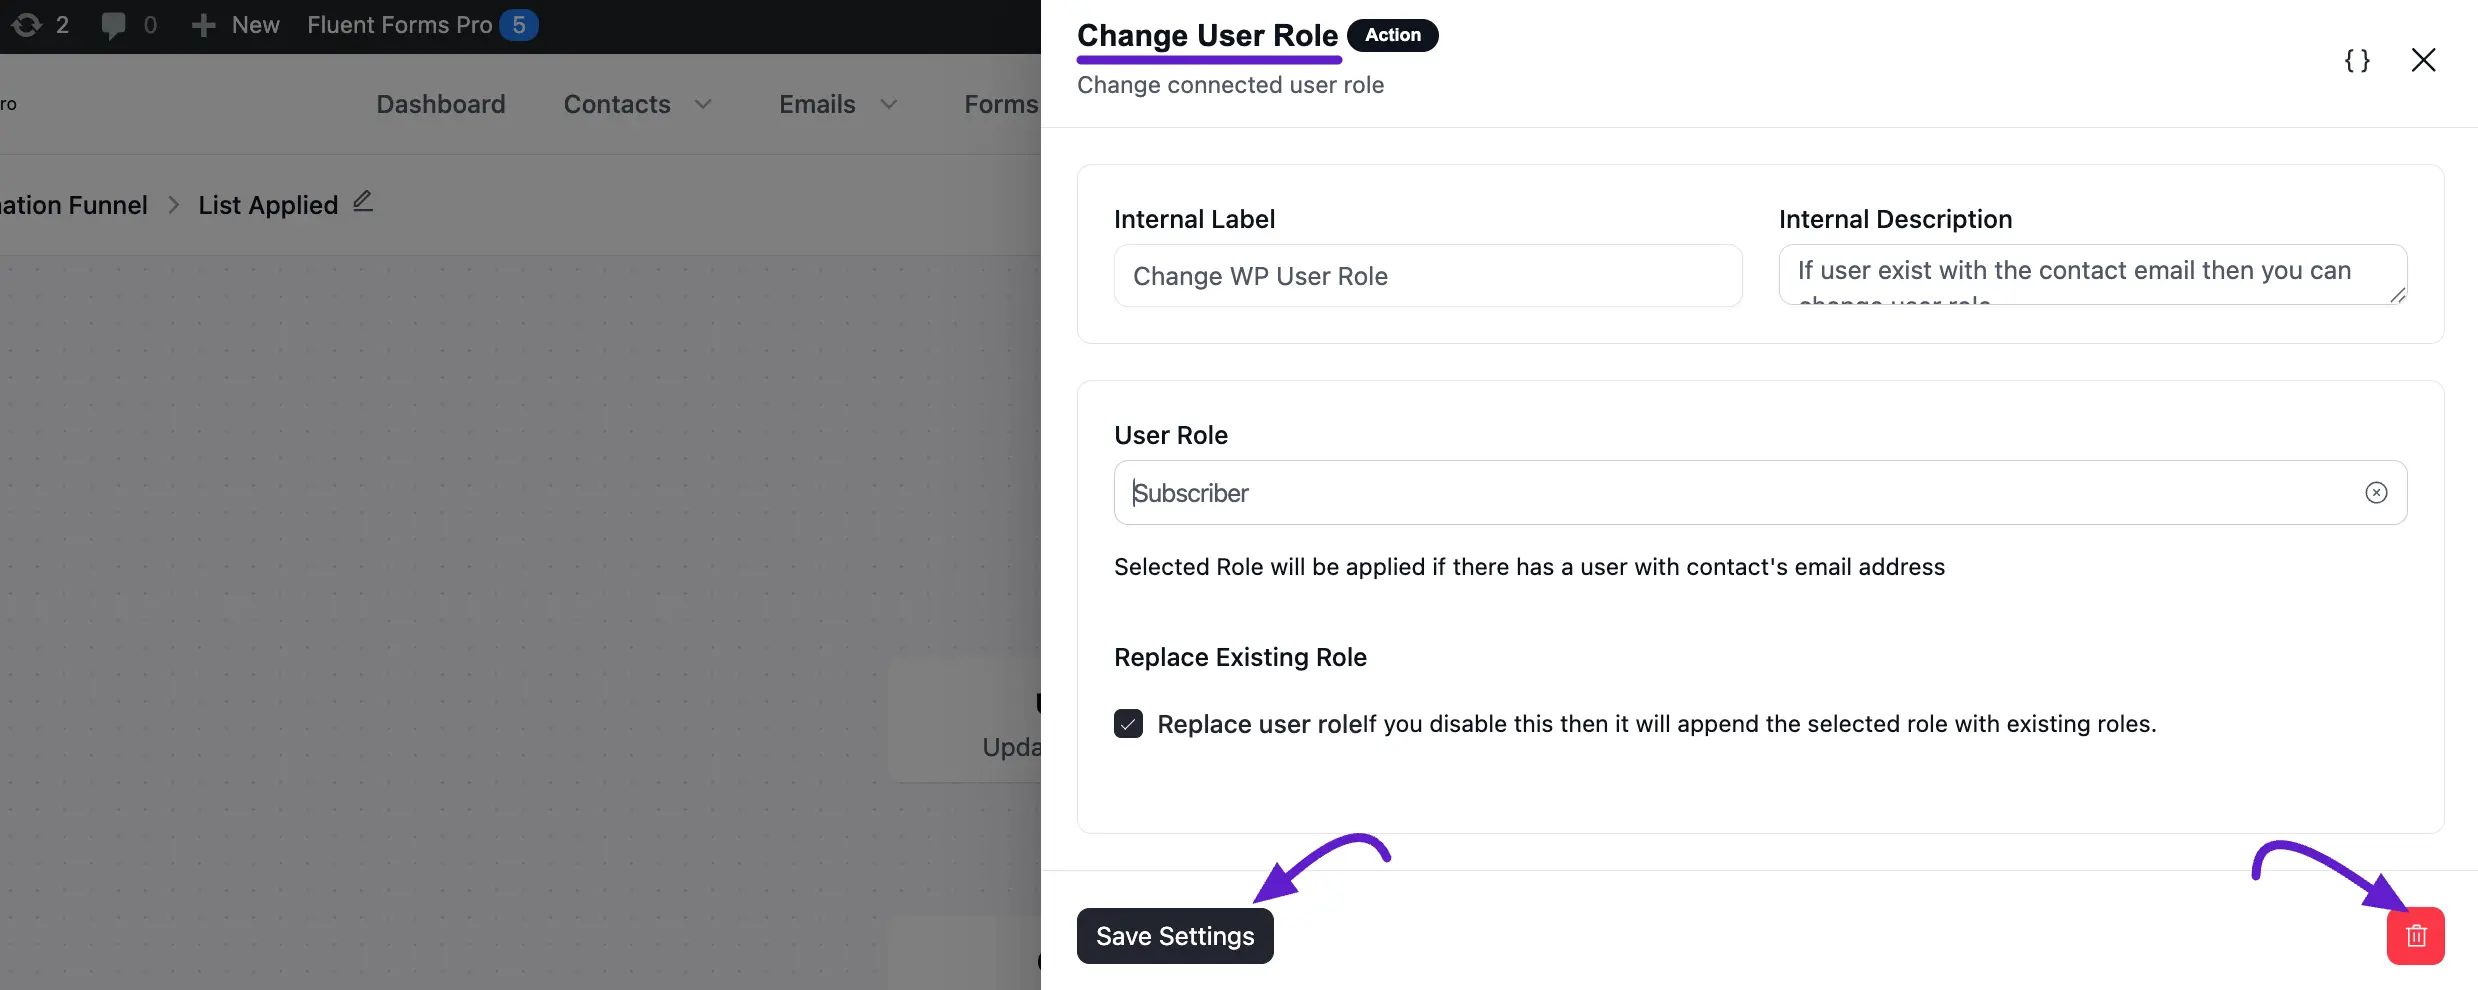
3. Change WP User Role
This action lets you Change connected WordPress User Roles for the contacts within the automation funnel.
After selecting this Action, a tab will appear on the right-hand side with options to set up your action.
Here are the Settings of the Change WP User Role action:
User Role: Select available WordPress User Roles for the CRM Contacts using the Dropdown Arrow. To learn more about WordPress User Roles, read this Documentation.
Replacing Existing Role: Check this boxing you want the User Role selected will be replaced or updated for the user. If you do not check this, then the User Role you Selected will be appended to the User.
To learn the use of first Two settings mentioned in the screenshot below, read this Section as it works the same way.
Once you are done, click the Save Settings button to save all your changes.
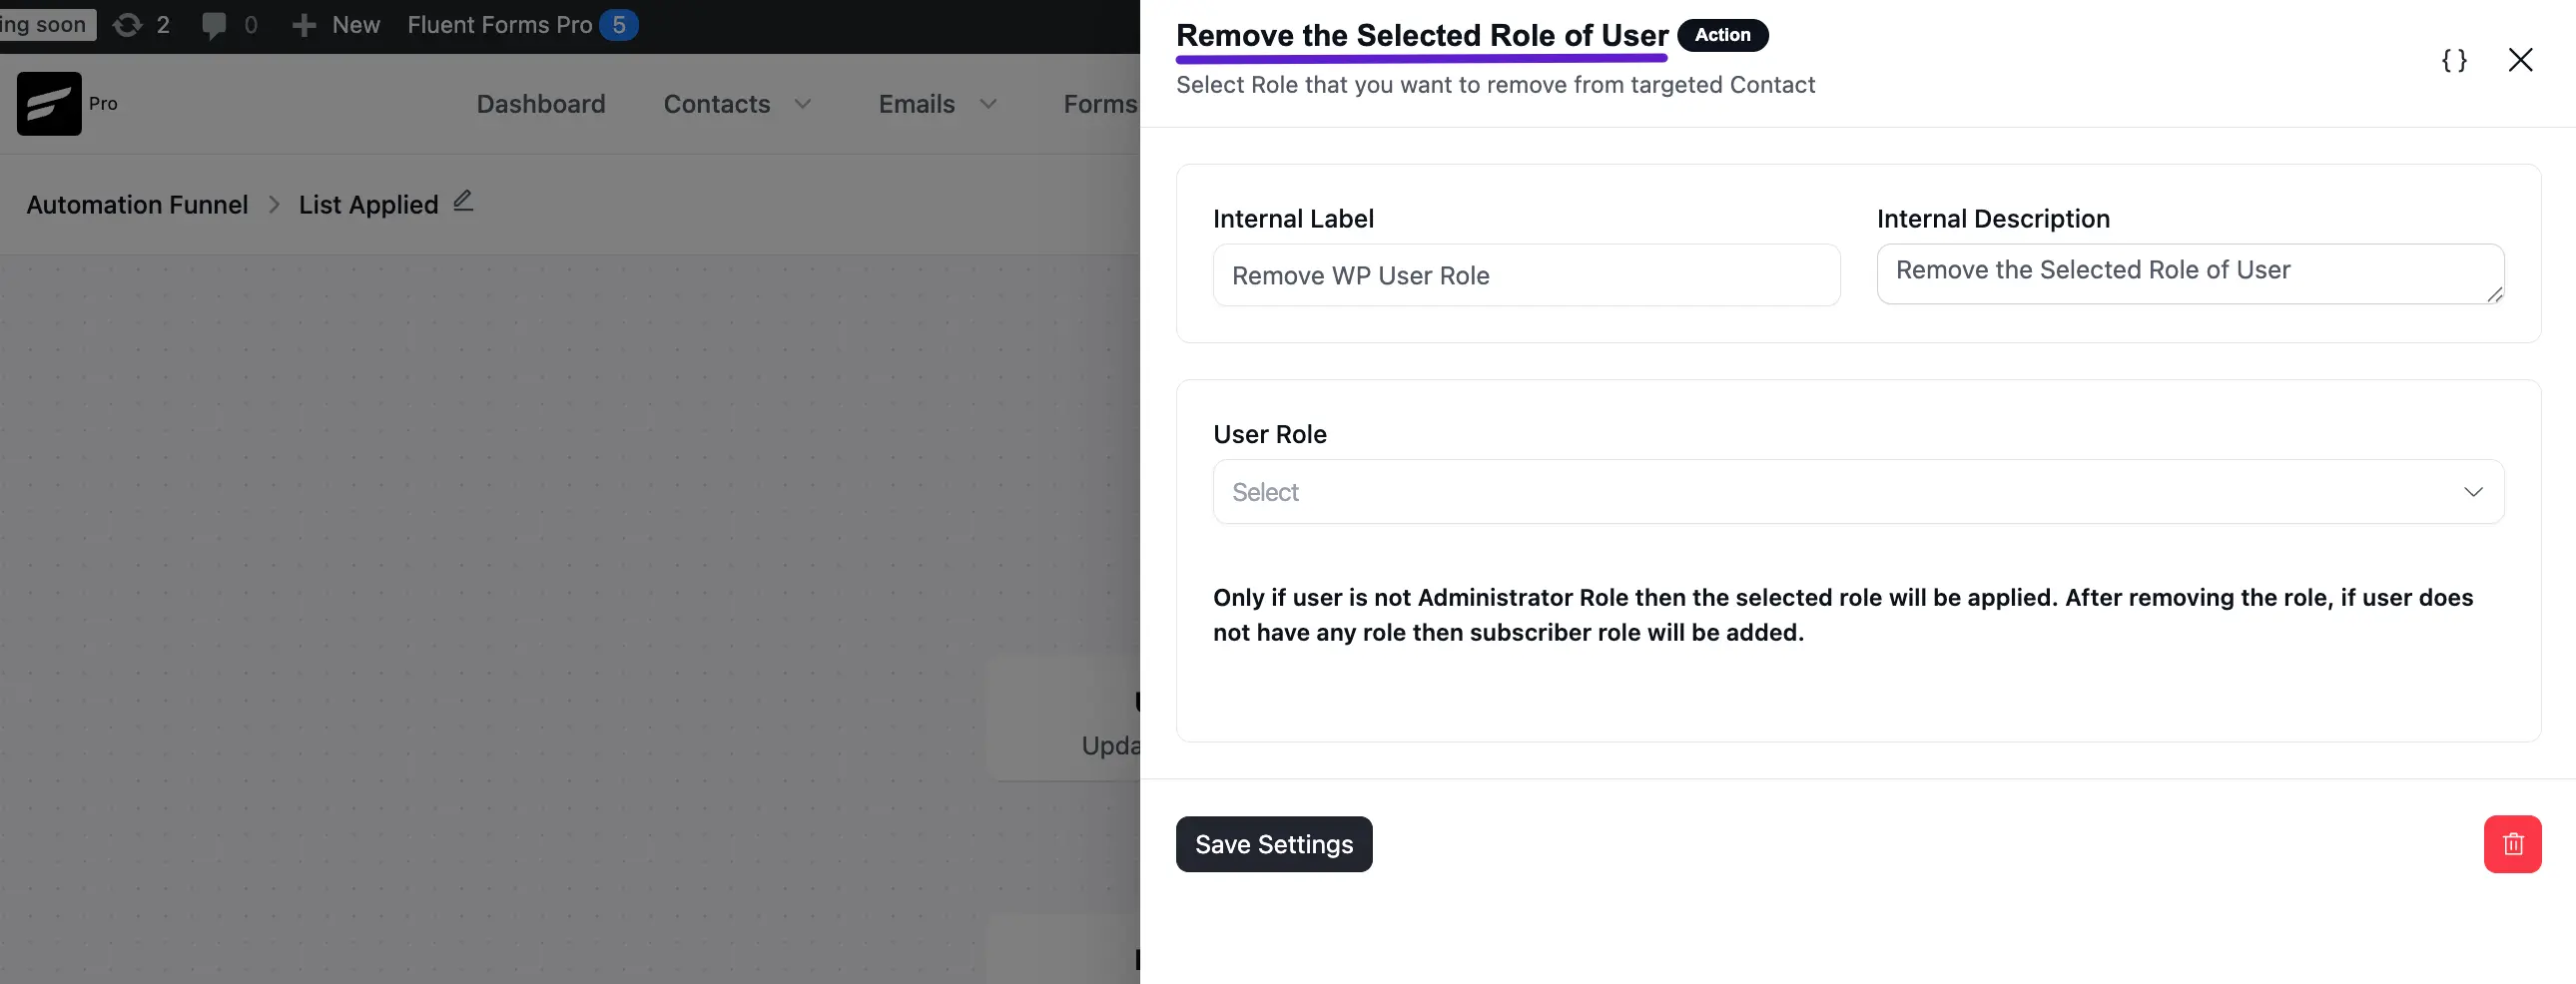
4. Remove the Selected Role of User
This action lets you Select the WordPress Role that you want to remove from the targeted Contact.
After selecting this Action, a tab will appear on the right-hand side with options to set up your action.
Here are the Settings of the Remove WP User Role action:
- User Role: Select available WordPress User Roles for the CRM Contacts using the Dropdown Arrow. To learn more about WordPress User Roles, read this Documentation.
To learn the use of first Two settings mentioned in the screenshot below, read this Section as it works the same way.
Once you are done, click the Save Settings button to save all your changes.