Appearance
WooCommerce Subscription Triggers
FluentCRM now includes Triggers specifically for WooCommerce Subscriptions, allowing users to manage subscription-related tasks through FluentCRM automation. This article will guide you through the detailed information about all WooCommerce Subscription Triggers.
Install & Activate WooCommerce Subscriptions Add-on
Before you proceed, you need to install and activate the FluentCRM WooCommerce Subscription Triggers add-on in your WordPress site to get all the Subscription-related Triggers.
Note: This is a FluentCRM add-on, not the WooCommerce Subscriptions plugin by Automattic. You can obtain it from your FluentCRM account as part of your Pro license.
To learn how to install & activate the WooCommerce Subscription Triggers Add-on, follow the steps with screenshots below –
First, download the WooCommerce Subscription Triggers Add-on .zip file from your FluentCRM account area.
Then, go to Plugins from the WordPress Left Sidebar, and click the Add New Plugin button.
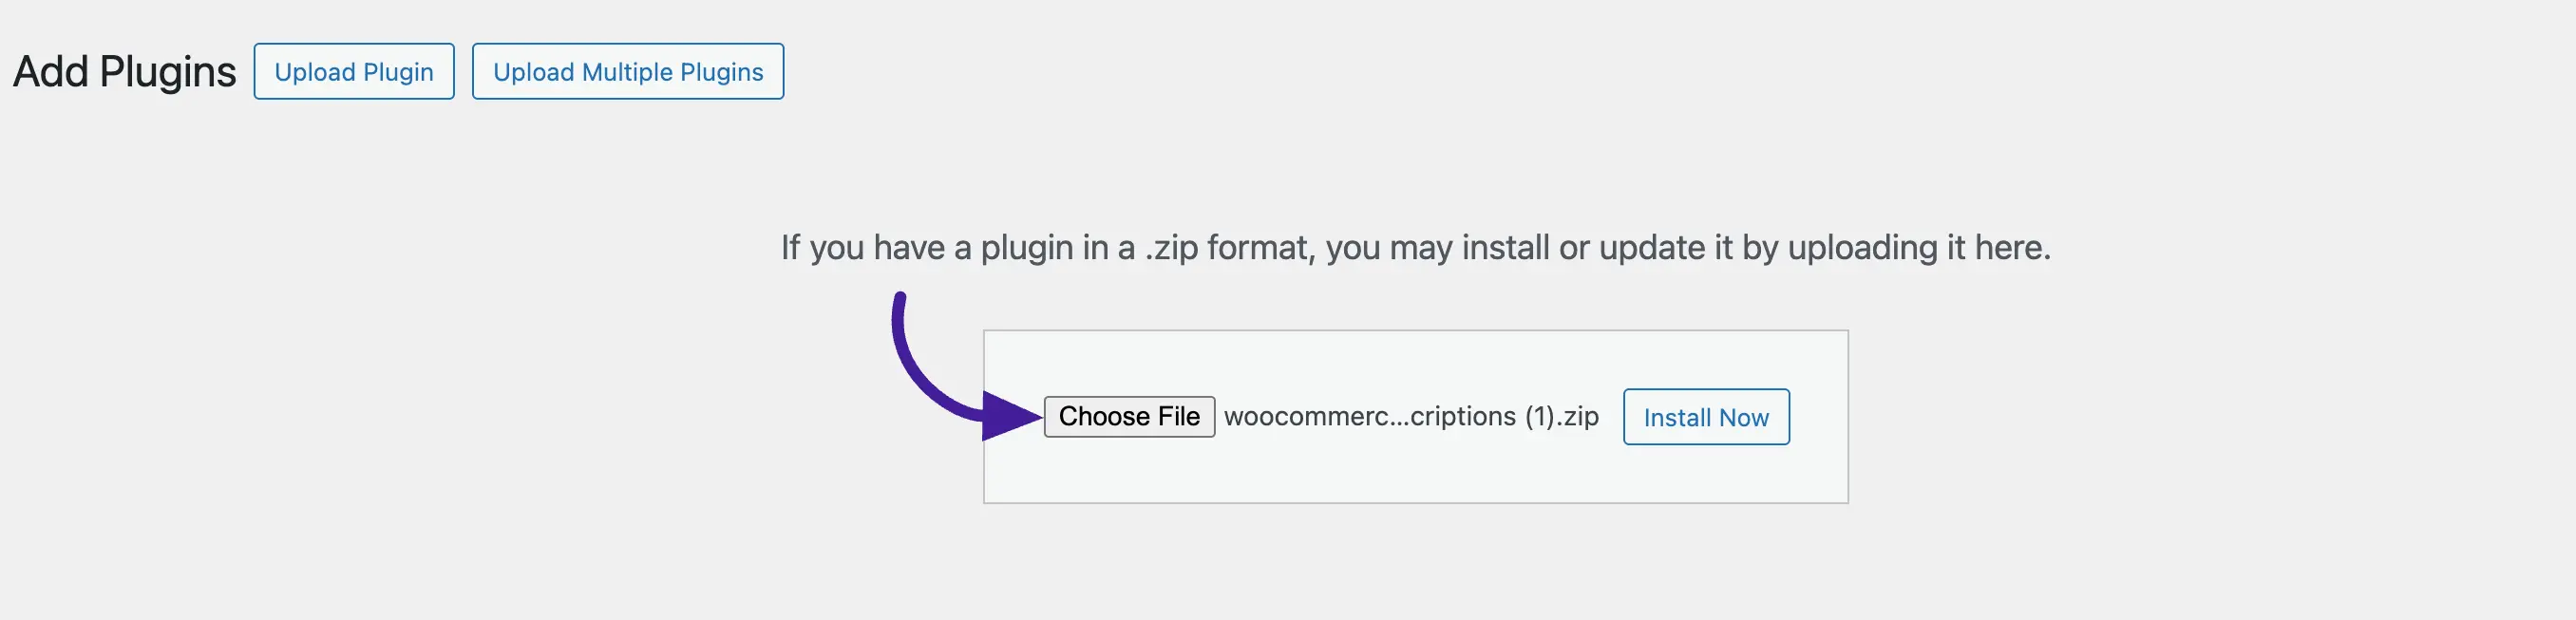
Click on the Upload Plugin button.
Now, click on the Choose file to upload the .zip file of WooCommerce Subscriptions that you’ve purchased, and press the Install Now button.
Once you installed the add-on, click the Activate button.
And, your WooCommerce Subscriptions Add-on will be installed and activated on your WordPress Site.
WooCommerce Subscription Triggers in FluentCRM
To learn how you can use this WooCommerce Subscription Triggers feature in your FluentCRM, follow the steps with screenshots below –
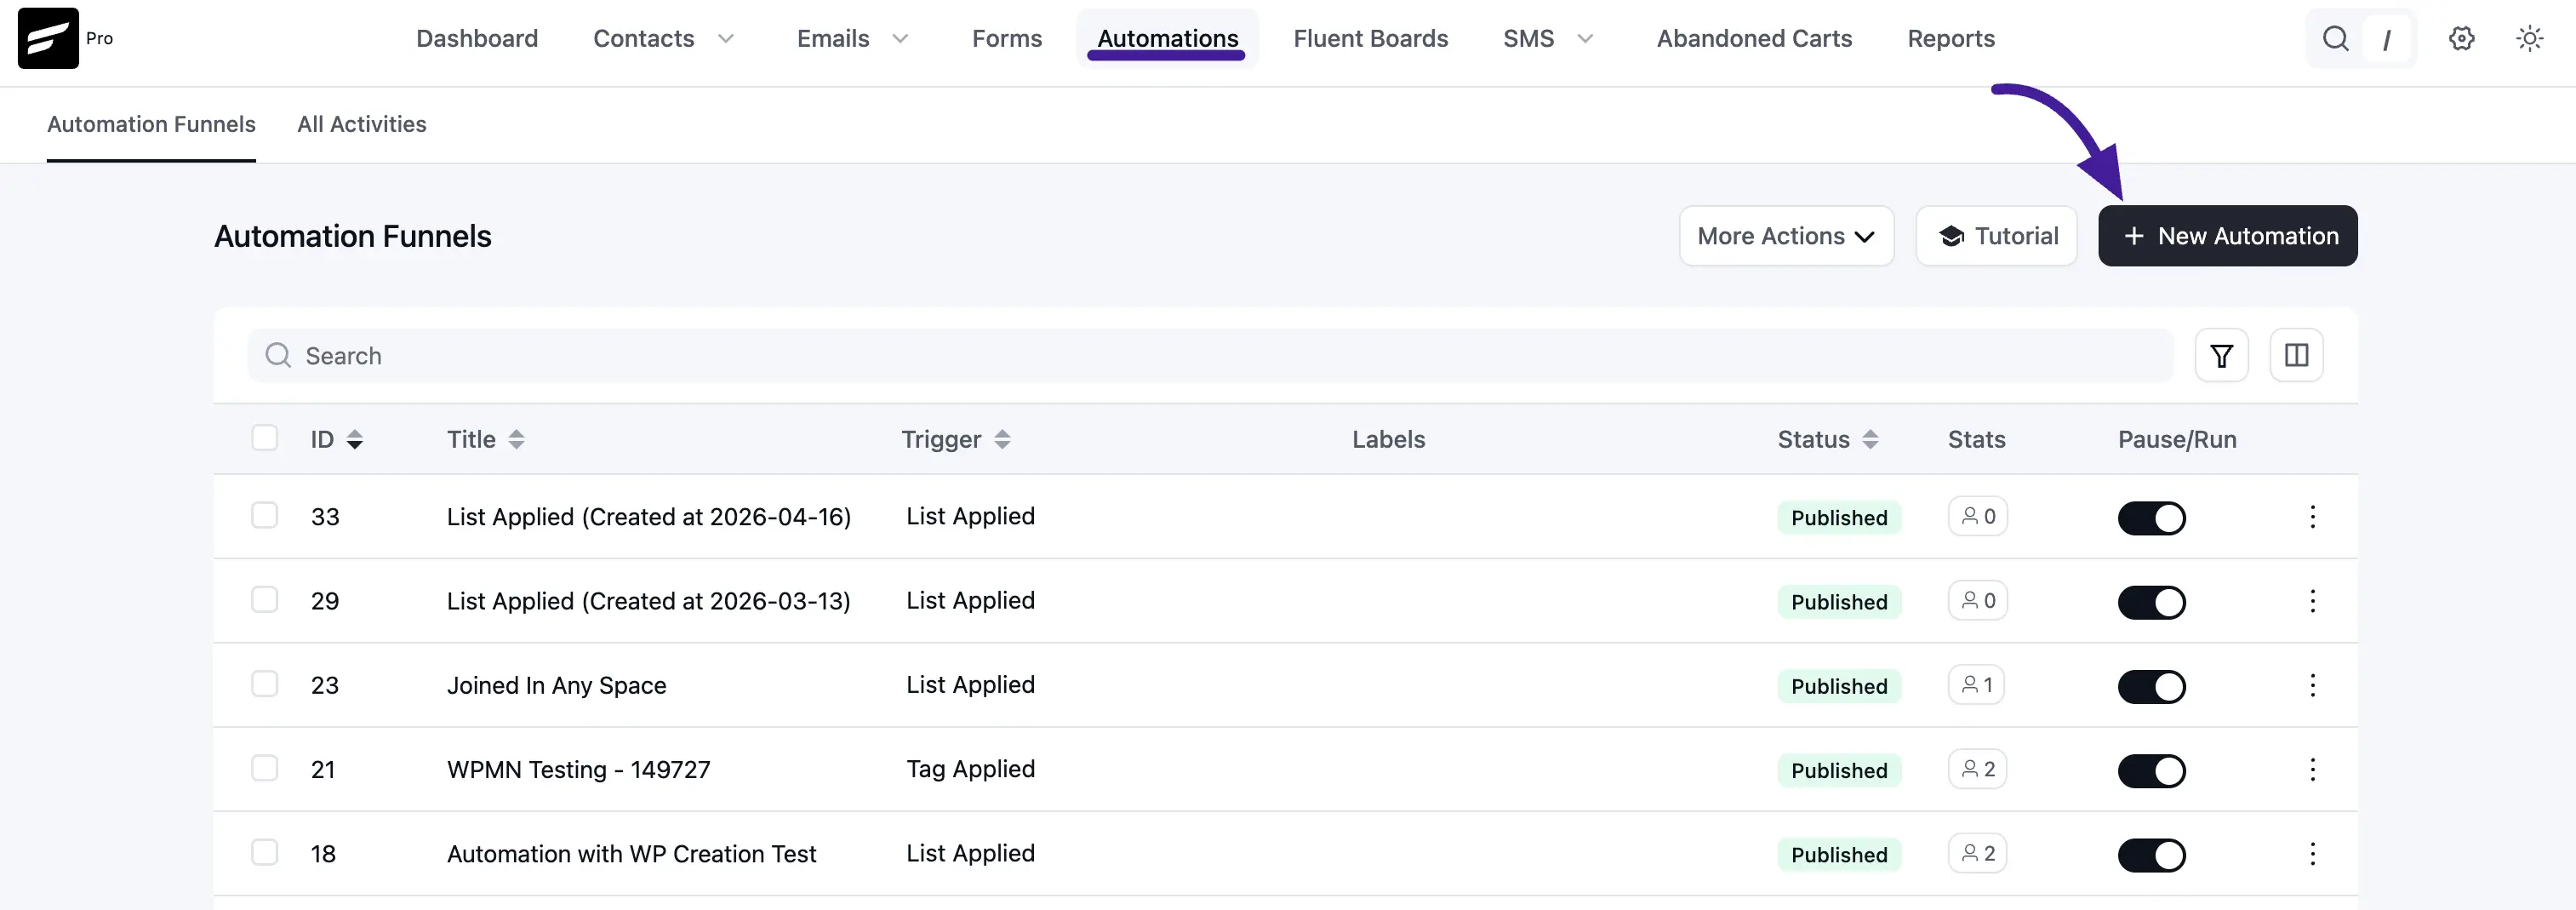
Once you install & activate the add-on, go to the Automation section from the FluentCRM Navbar, and click on the + New Automation button.
Once you click the + New Automation button, a pop-up page will appear with all the Popular Pre-built Funnel Templates for creating automations.
Now, you just need to click on the desired templates and it will redirect you to the Automation Editor where the full funnel diagram will be ready automatically. Alternatively, to get all the WooCommerce-related triggers, simply click on the Create from Scratch box.
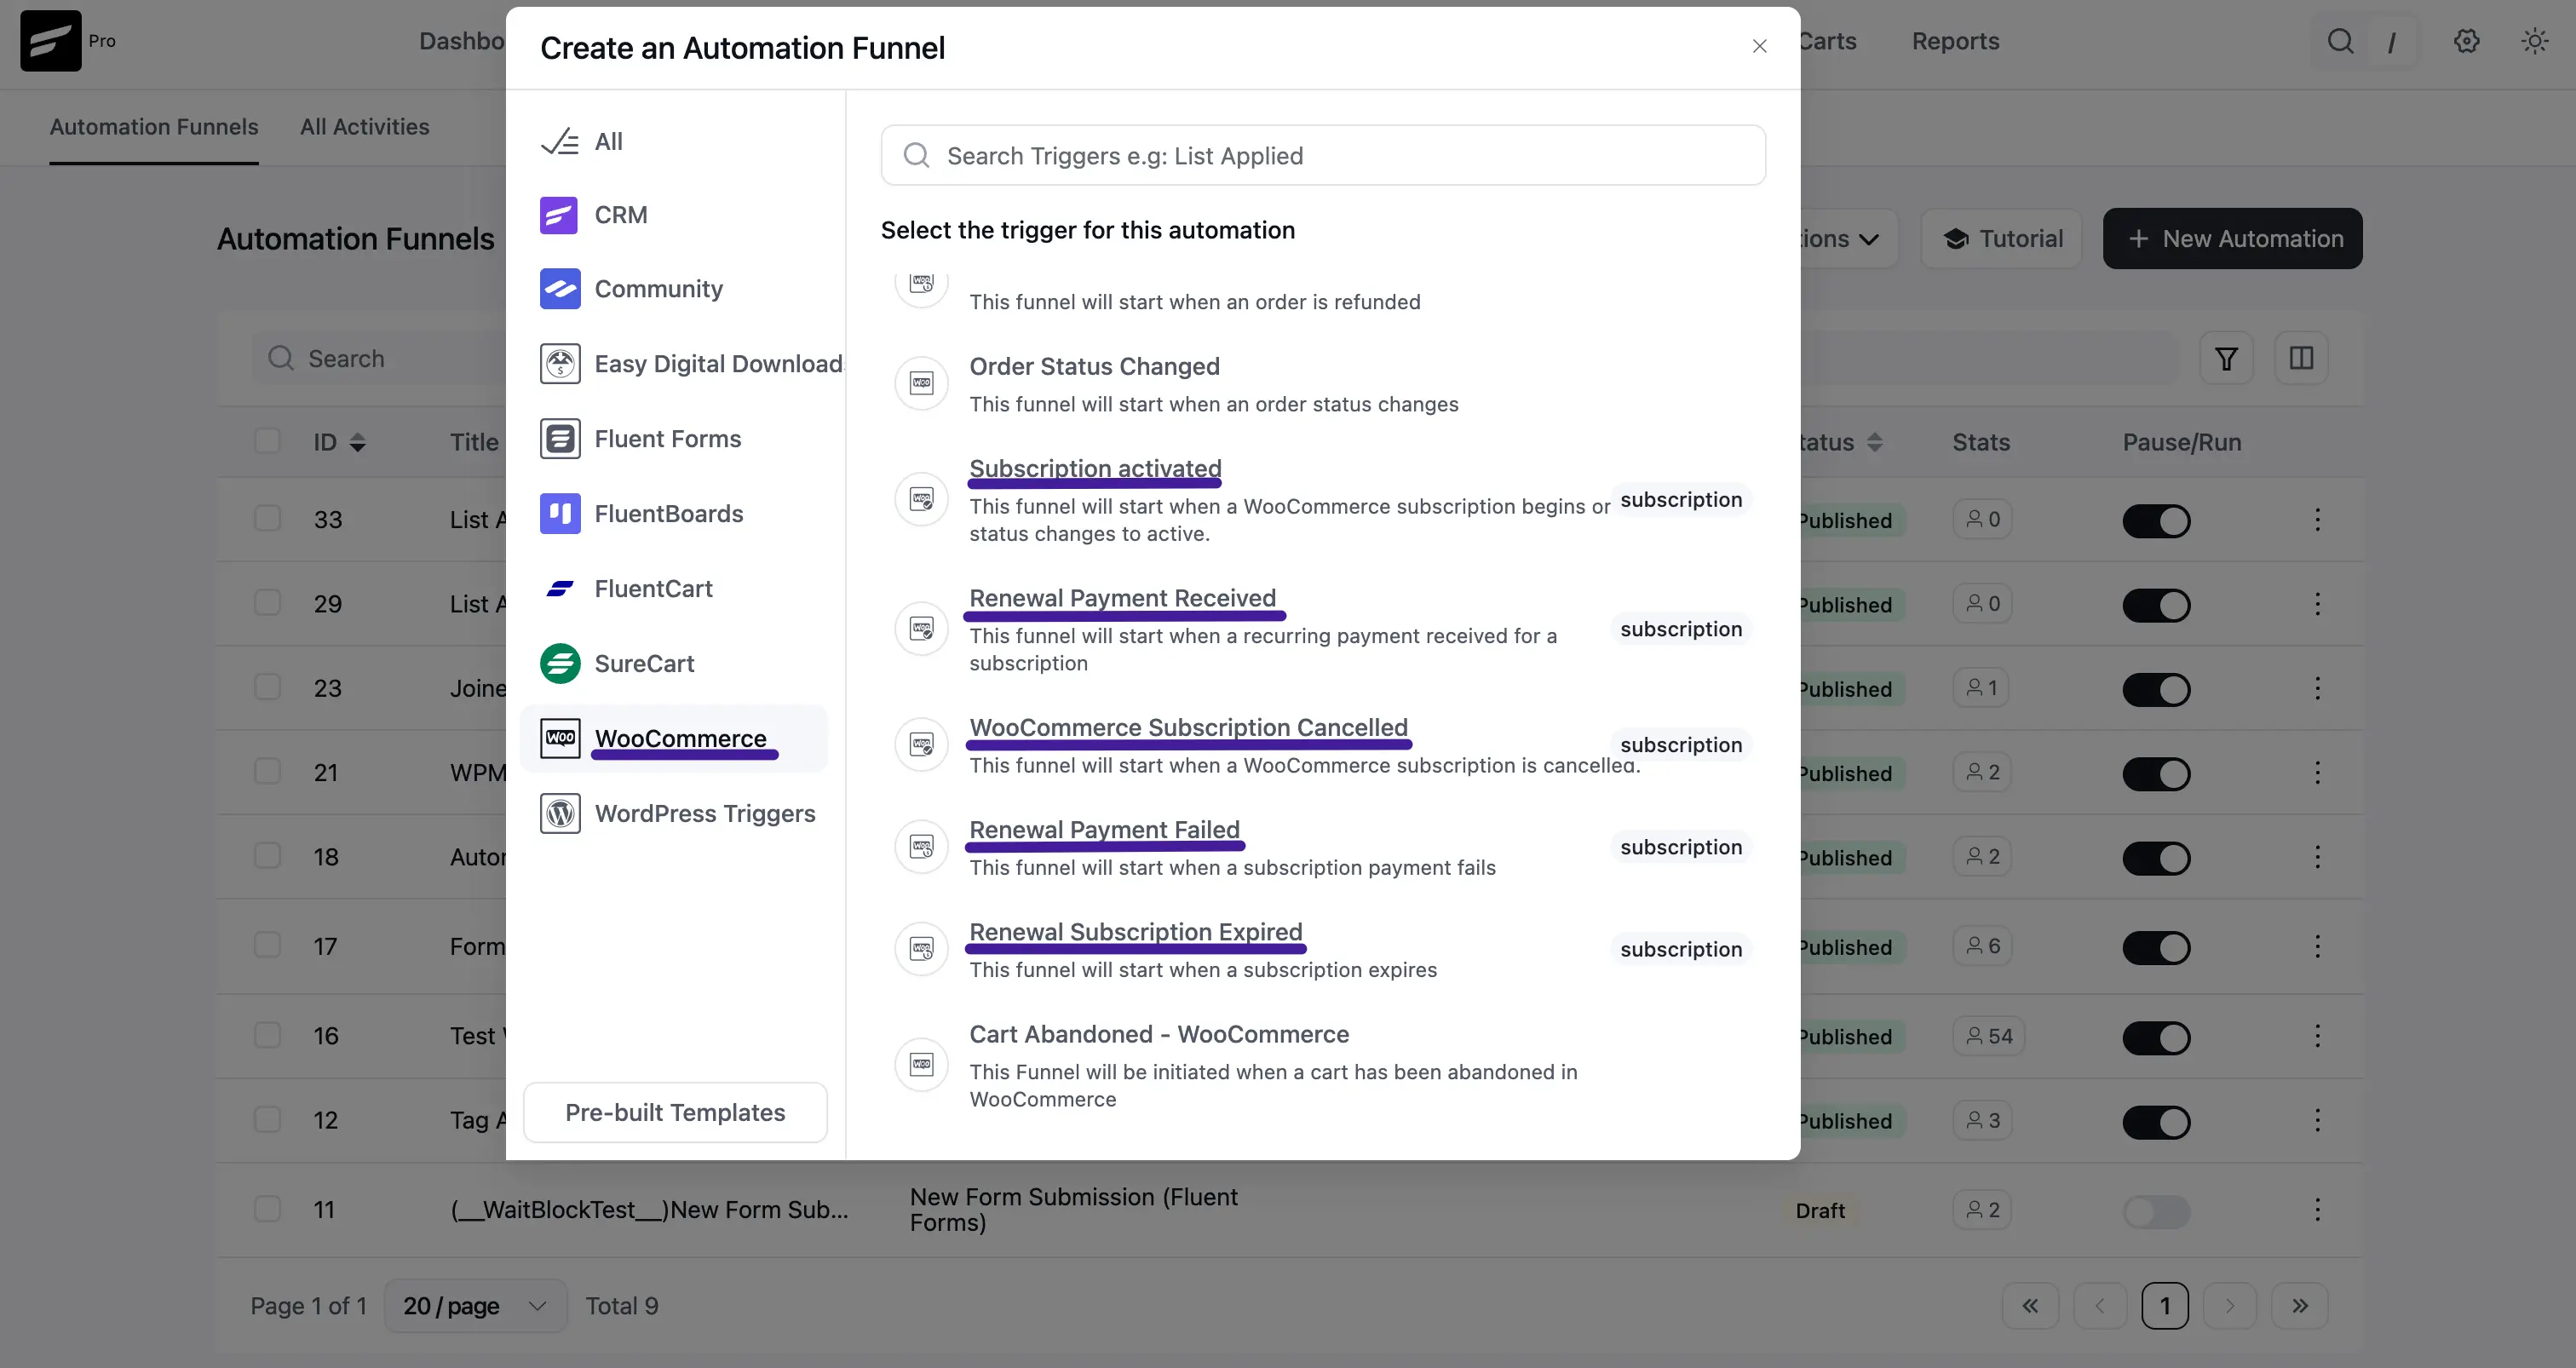
Here, another pop-up will appear for creating an Automation Funnel where you will find the WooCommerce options from the left sidebar.
Now click on WooCommerce and you will get four Woocommerce Subscription Triggers. These are:
- Subscription Activated
- Renewal Payment Received
- Subscription Cancelled
- Renewal Payment Failed
- Renewal Subscription Expired
Once you select your desired Subscription Trigger, put a Label under the Internal Label field for this automation funnel so that you can easily find it later.
A detailed explanation of the Triggers mentioned above is given below –
Subscription Activated
This automation funnel will start once a subscription occurs or is changed to active status. Once you select this trigger, a pop-up will appear with options to manage your funnel.
A brief explanation of the options in the screenshot is given below:
- Automation Name: Provide a Name for the Automation so that you may find it later easily.
- Internal Description: Write a description that will be used as a Subtitle in the Block Diagram in the Automation Editor.
- Contact Status: Change the Subscription Status from the Dropdown list for the Contact that submits the form. To learn more about the Contact Status of FluentCRM, click here.
- Target Products: Select the Products for which this automation will run. Otherwise, leave this field Blank if you want this funnel to run for all products.
- Restart: Check this option if you want the automation to run multiple times for the contact that triggers the automation.
Once you are done, click the Save Settings button to save all your changes.
Renewal Payment Received
This automation funnel will start when a recurring payment is received for a subscription.
After selecting this trigger, a pop-up will appear with the same options as the Subscription Activated Trigger Options for managing your funnel.
Once you are done, click the Save Settings button to save all your changes.
Subscription Cancelled
This funnel will start when a WooCommerce Subscription is canceled. After selecting this trigger, a pop-up will appear with the same options as above.
Once you are done, click the Save Settings button to save all your changes.
Renewal Payment Failed
This automation funnel will start when a payment is failed for a subscription.
After selecting this trigger, a pop-up will appear with the same options as the Subscription Activated Trigger Options for managing your funnel.
Once you are done, click the Save Settings button to save all your changes.
Renewal Subscription Expired
This automation funnel will start when a subscription expires.
After selecting this trigger, a pop-up will appear with the same options as the Subscription Activated Trigger Options for managing your funnel.
Once you are done, click the Save Settings button to save all your changes.