Appearance
Email Settings
The Global Email Settings define the default sender identity for FluentCRM emails, the footer that appears on outgoing messages, how subscribers manage preferences, and related compliance options. Values here apply when a specific campaign or email does not override them.
To open this screen, go to FluentCRM ➜ Settings ➜ Global Email Settings, then use Save in the top-right when you finish editing.
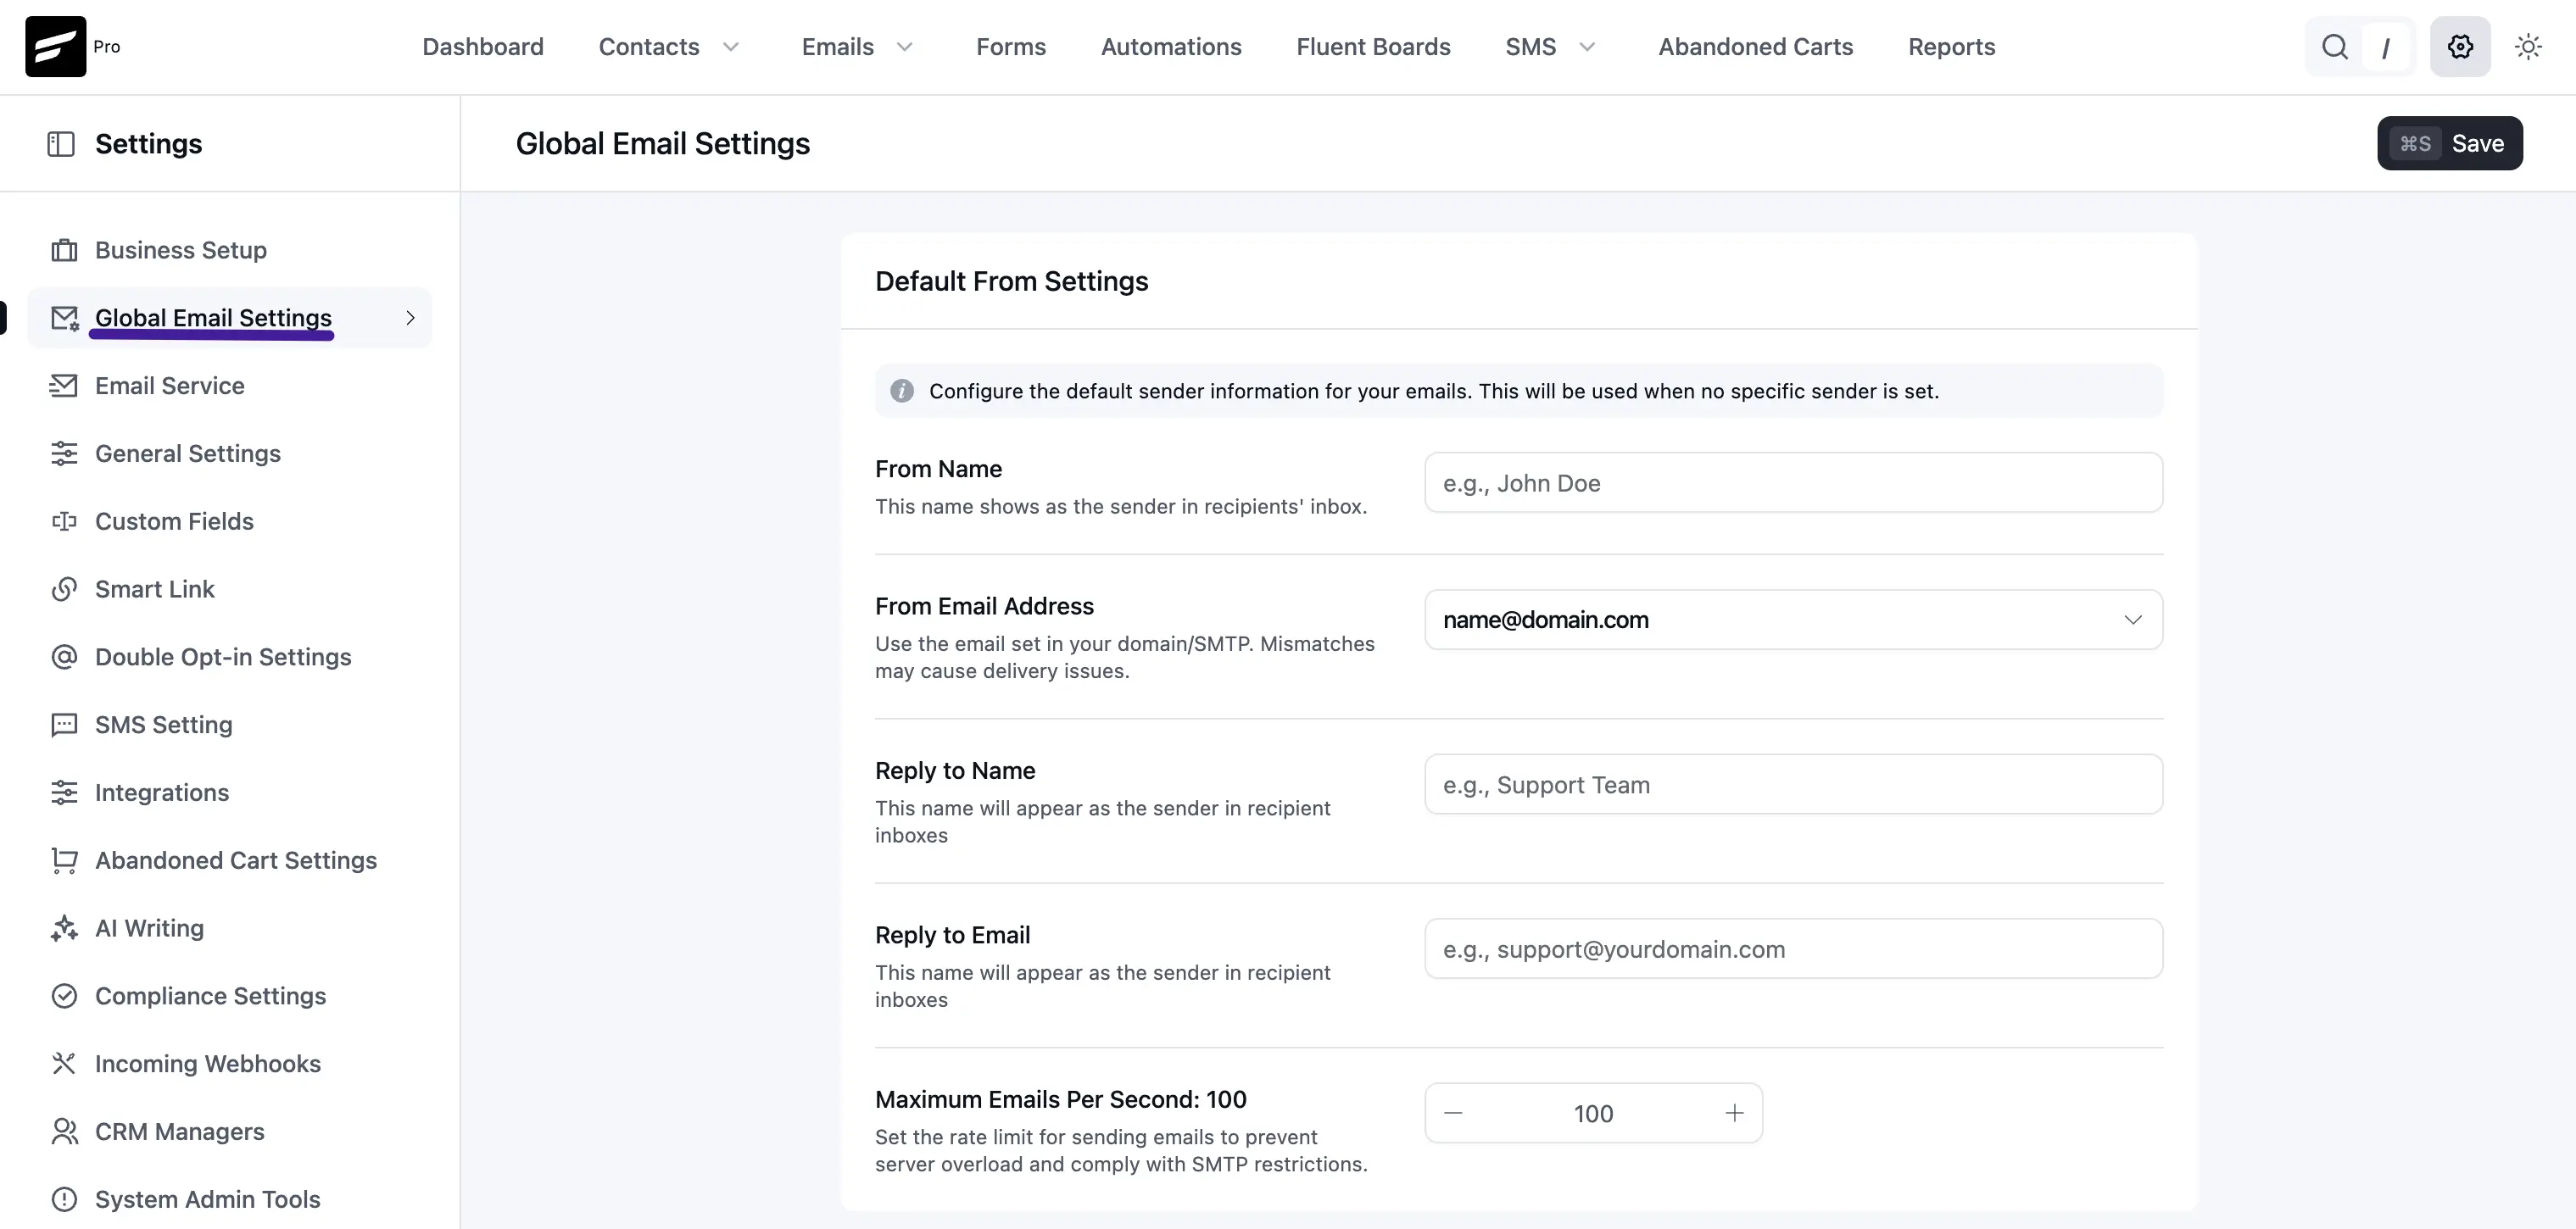
Default From Settings
At the top of the page, a notice explains that this block sets the default sender information for your emails when no other sender is chosen for a particular message.
From Name: The name recipients see as the sender in their inbox. It strongly influences whether people open the message—often your company, product, or service name.
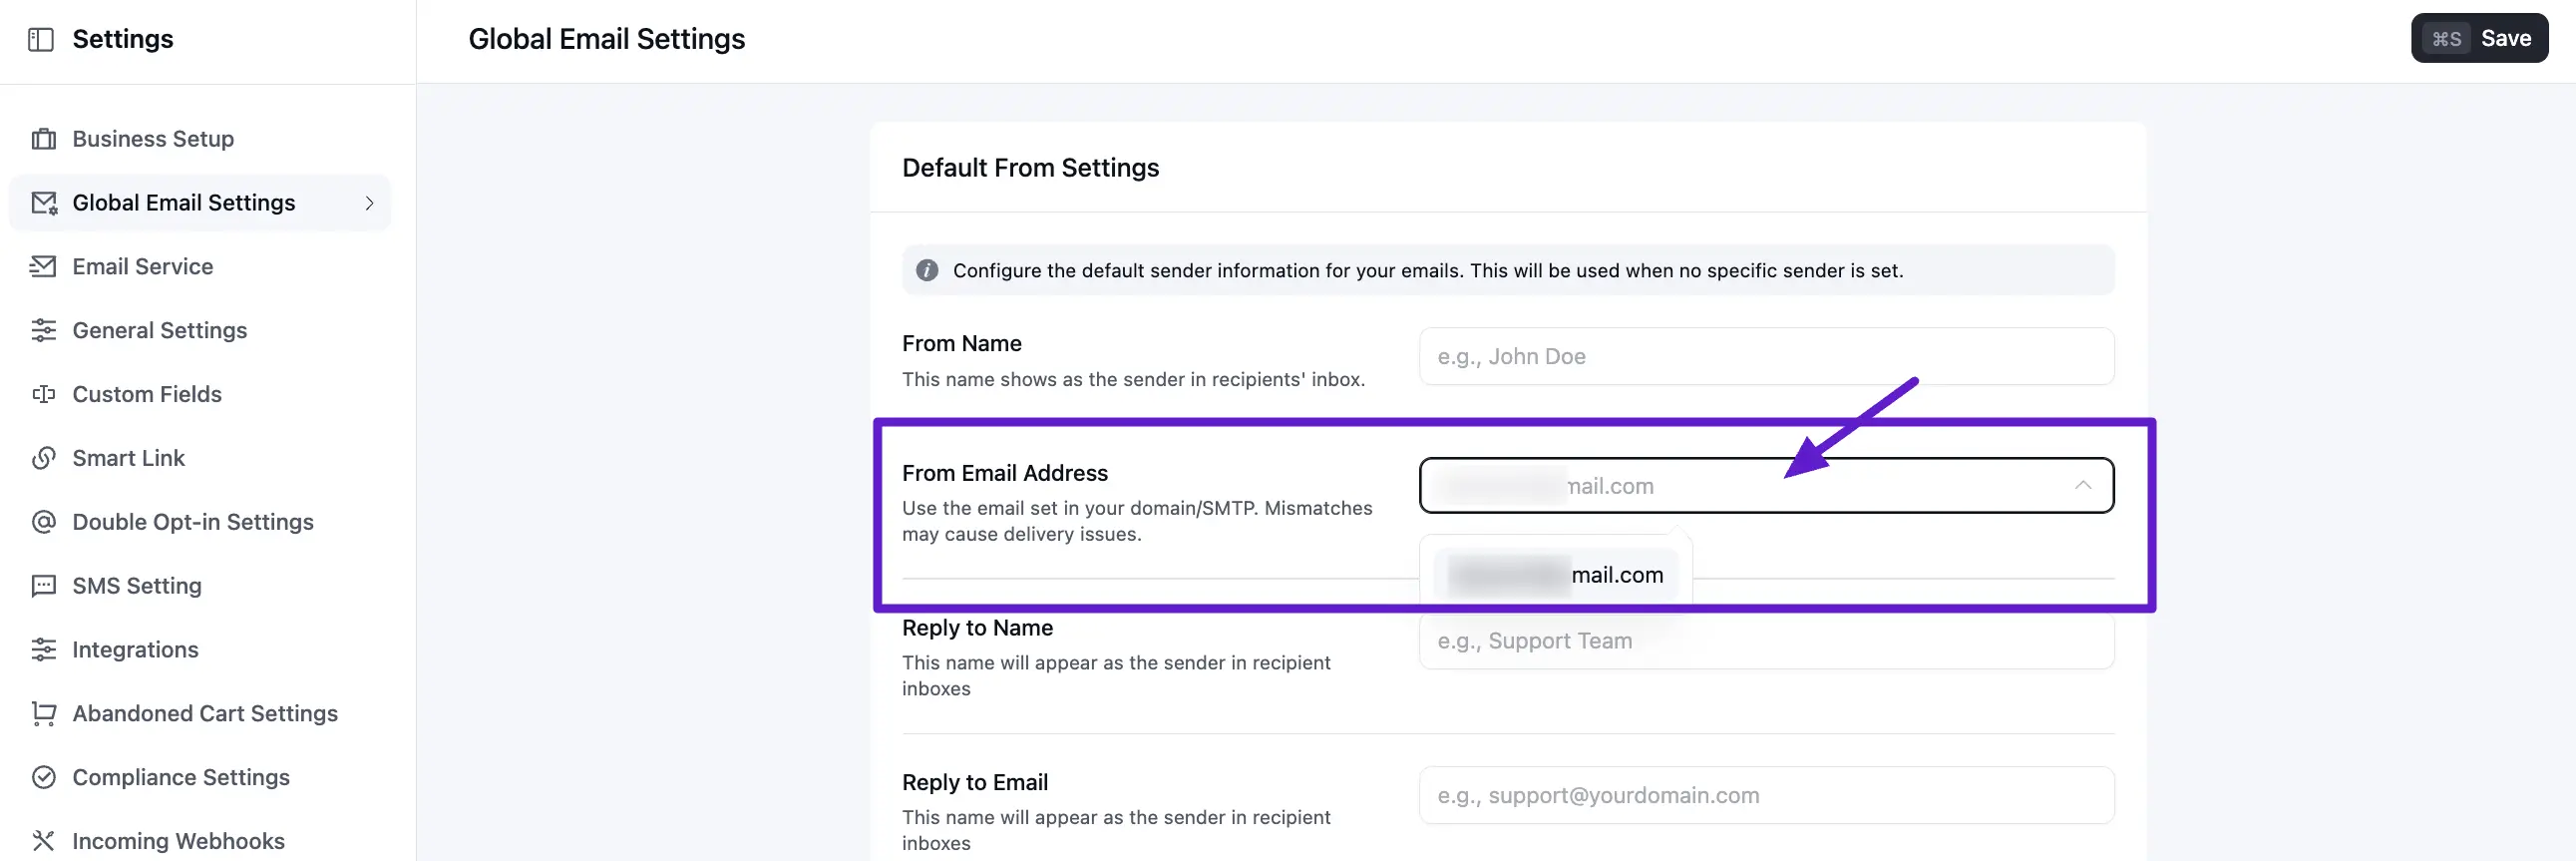
From Email Address: The sender address shown in the inbox. It should match an address your domain and SMTP setup actually send from; mismatches can hurt deliverability. If you use a plugin such as FluentSMTP, this field may appear as a dropdown so you can pick a configured connection. The number of choices depends on how many sending identities you have set up there.
Reply to Name: The display name used for replies (for example, a support or team name).
Reply to Email: The address that receives replies when a recipient hits “Reply.”
Maximum Emails Per Second: A rate limit for how many messages FluentCRM attempts to send per second. Lower it if your host, firewall, or mail provider enforces stricter limits; raising it without headroom can overload the server or trigger SMTP throttling.
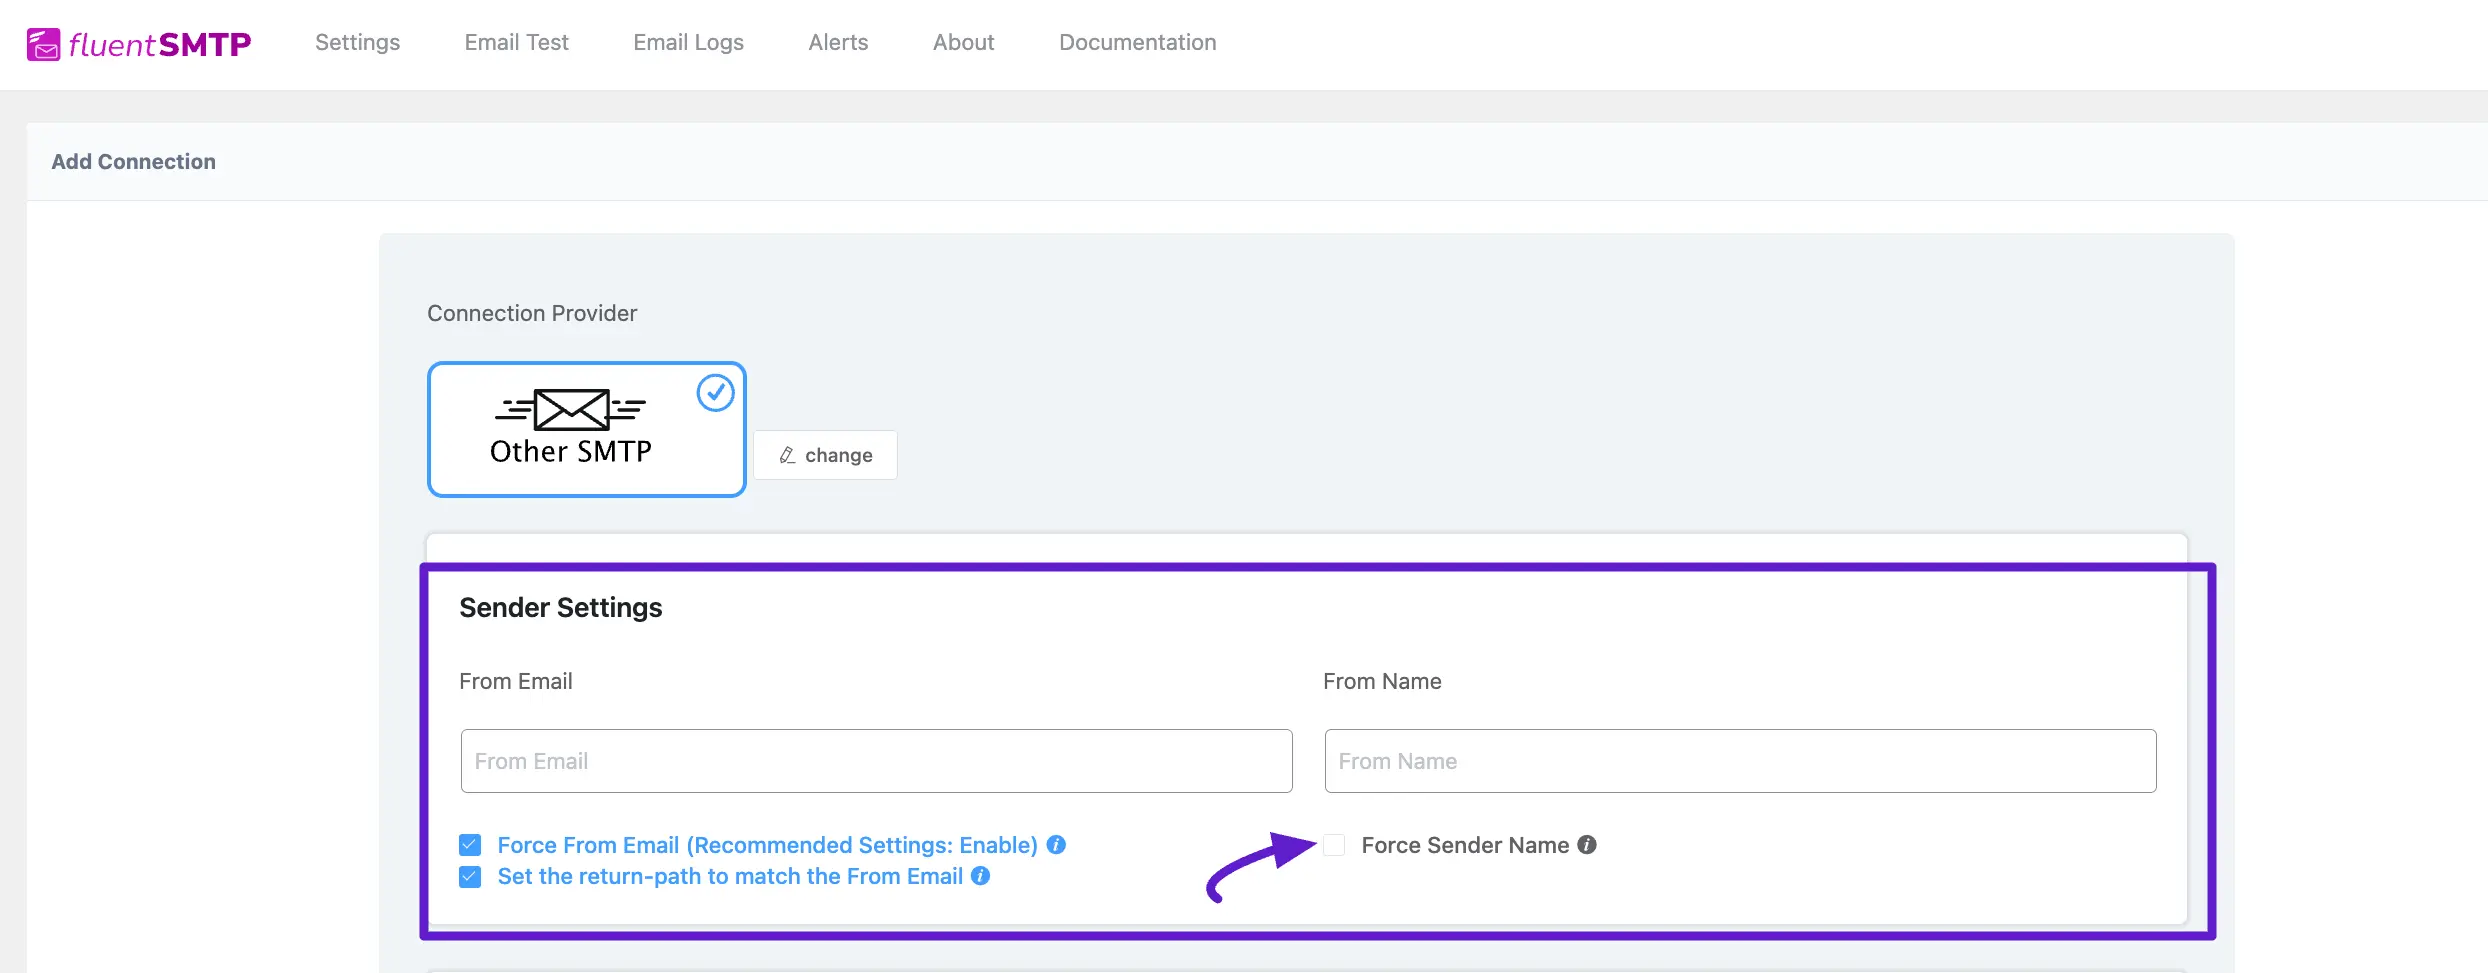
The above defaults apply when no SMTP plugin overrides them. If FluentSMTP (or similar) is installed and does not force its own “from” values, these settings remain in effect.
With an SMTP plugin that manages delivery, you can often choose the active From Email Address from a list of configured connections:
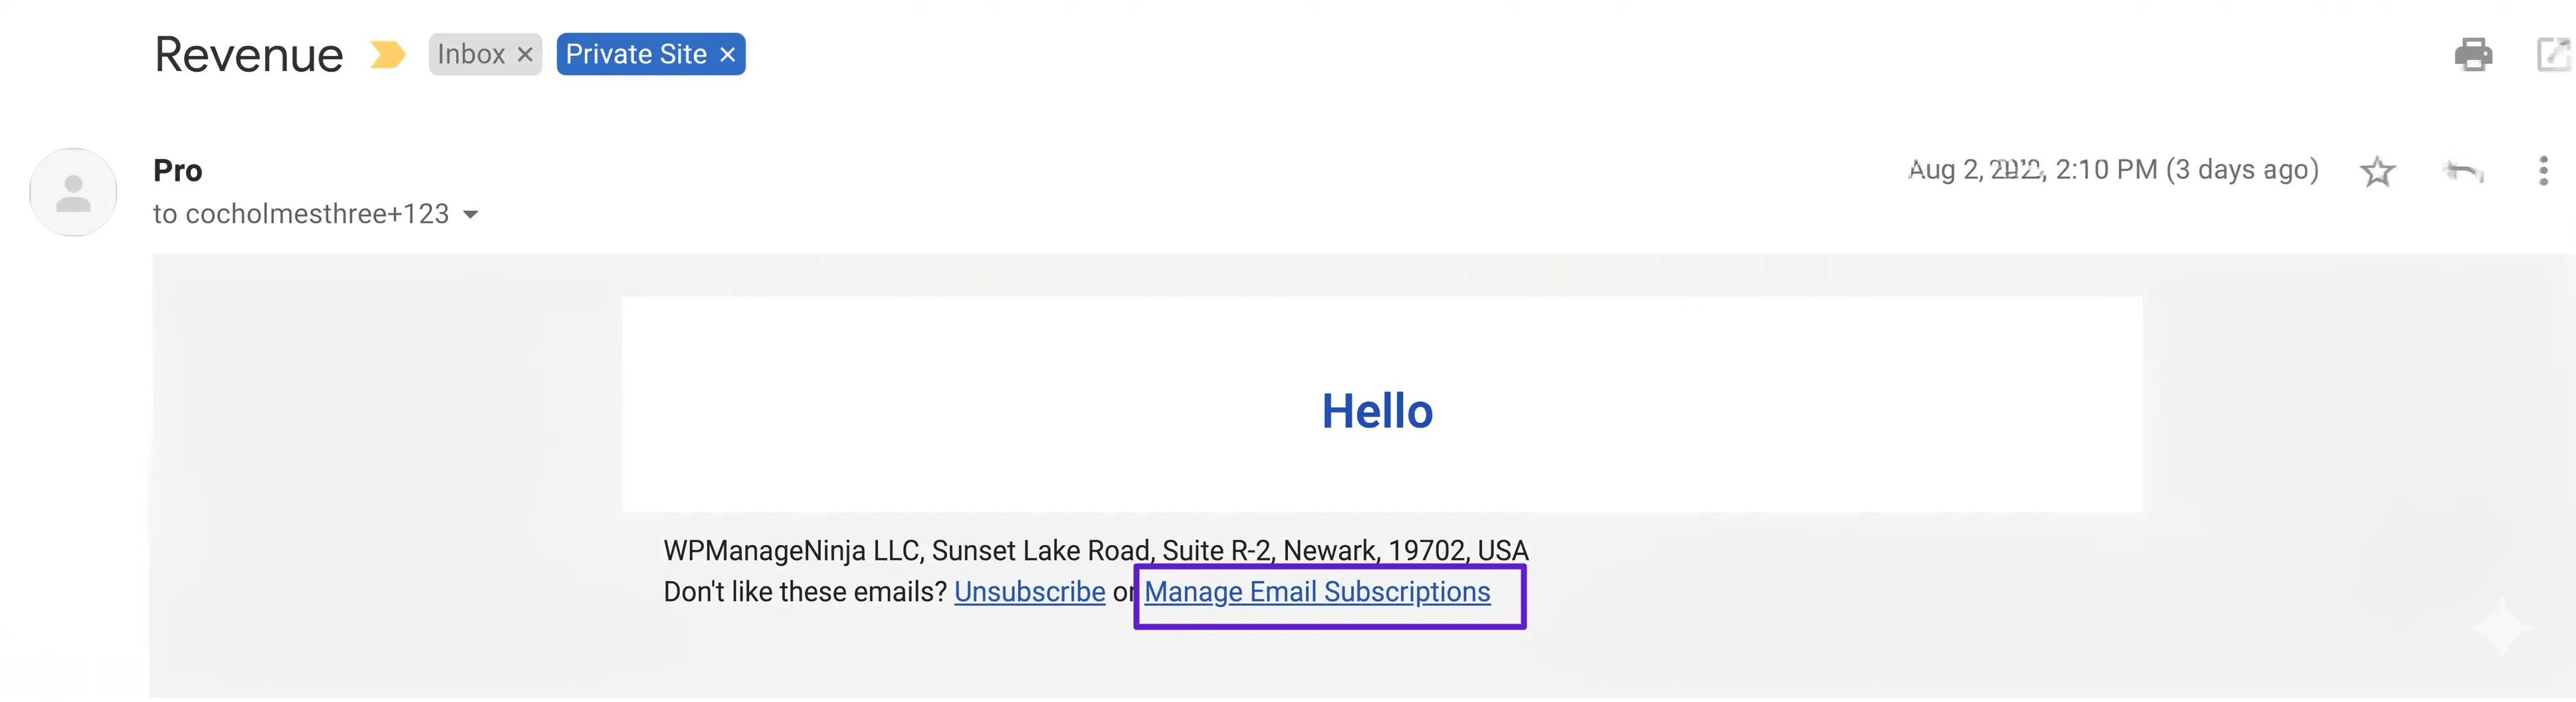
Below is an example of the From Name and From Email Address as they appear in the Gmail web client.
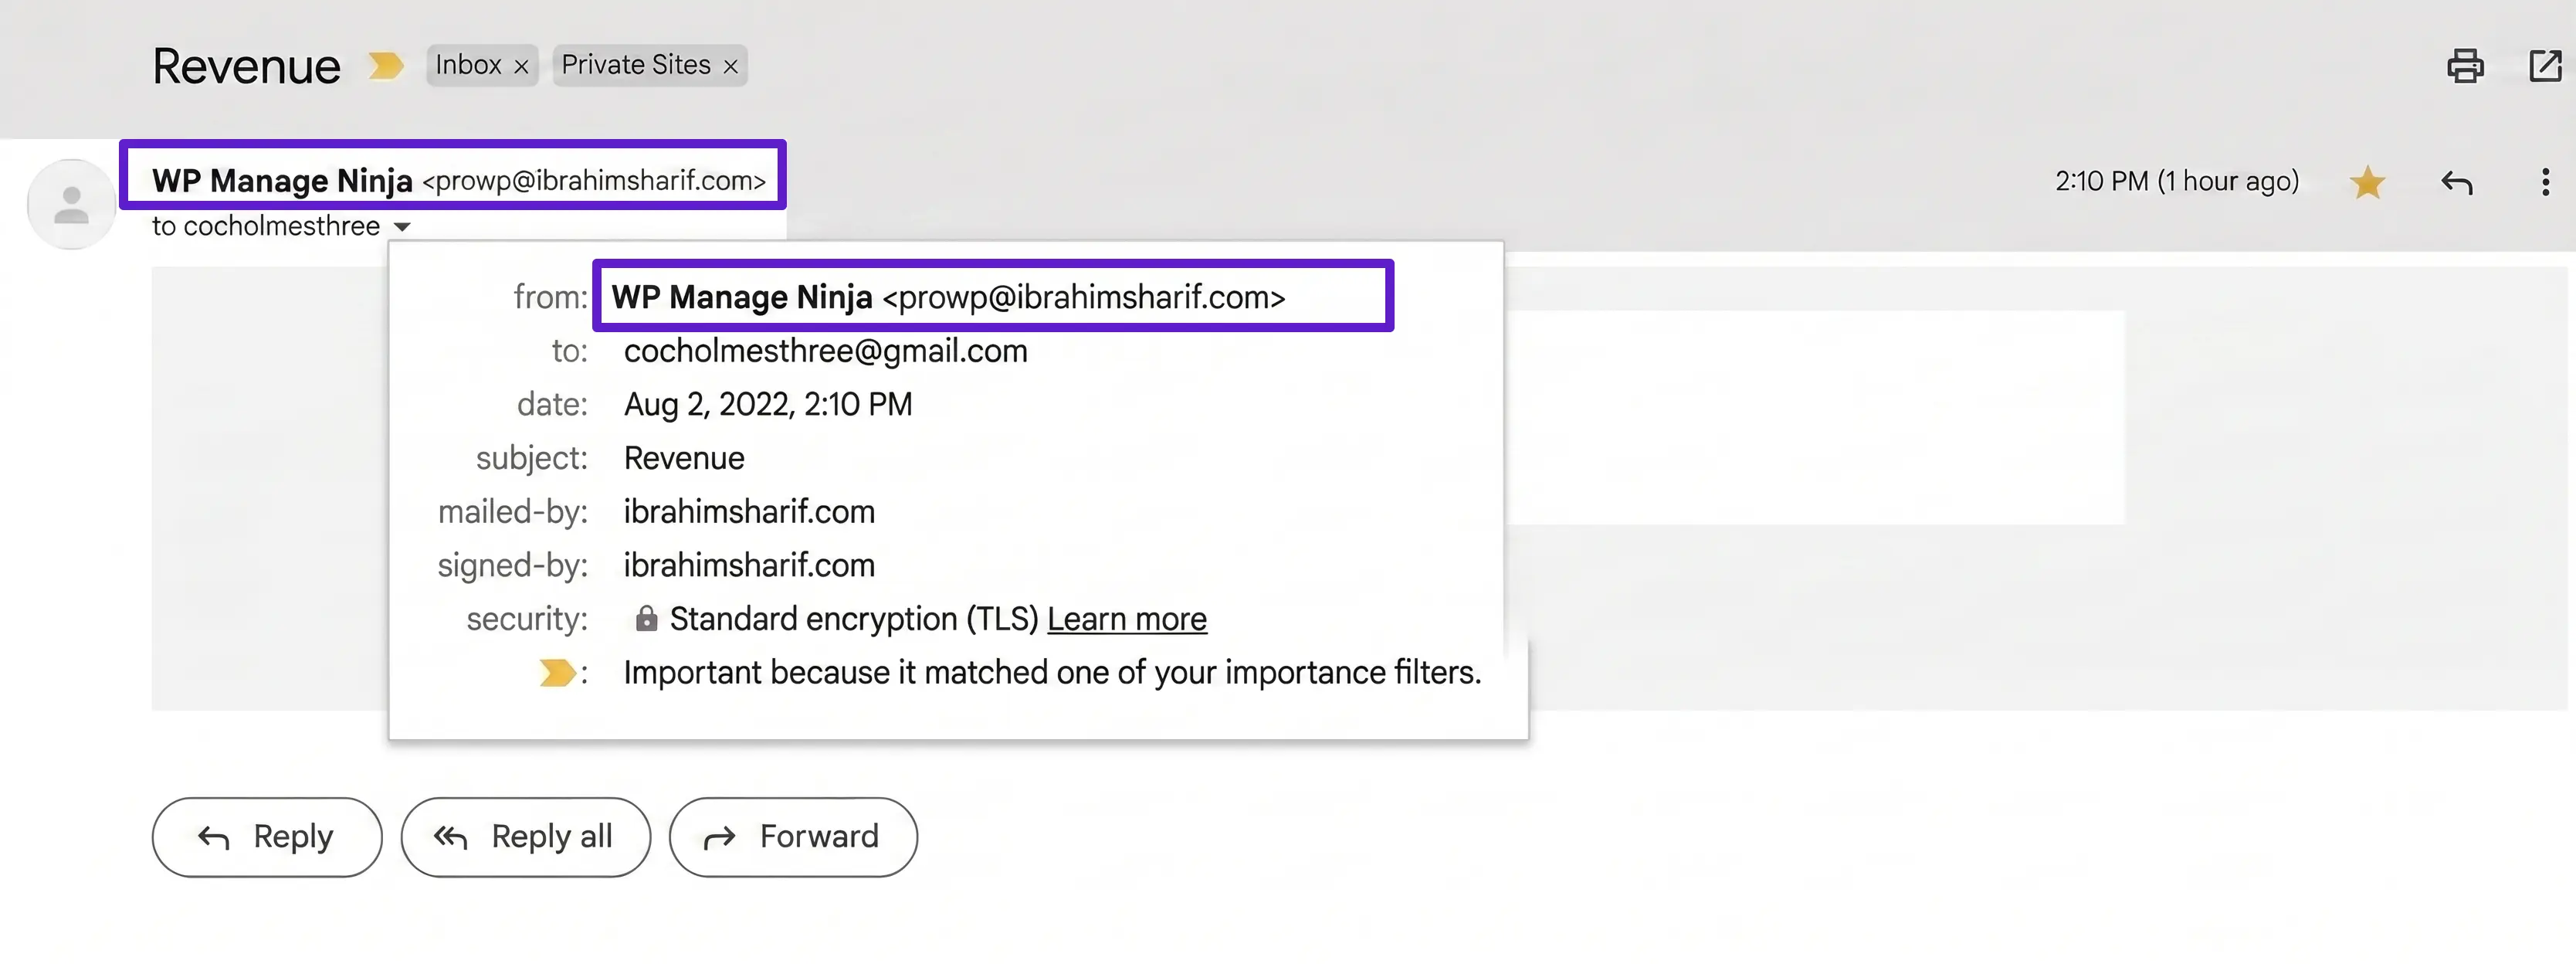
An example email sent from FluentCRM showing how From Name and From Email appear in the inbox.
Email Footer Settings
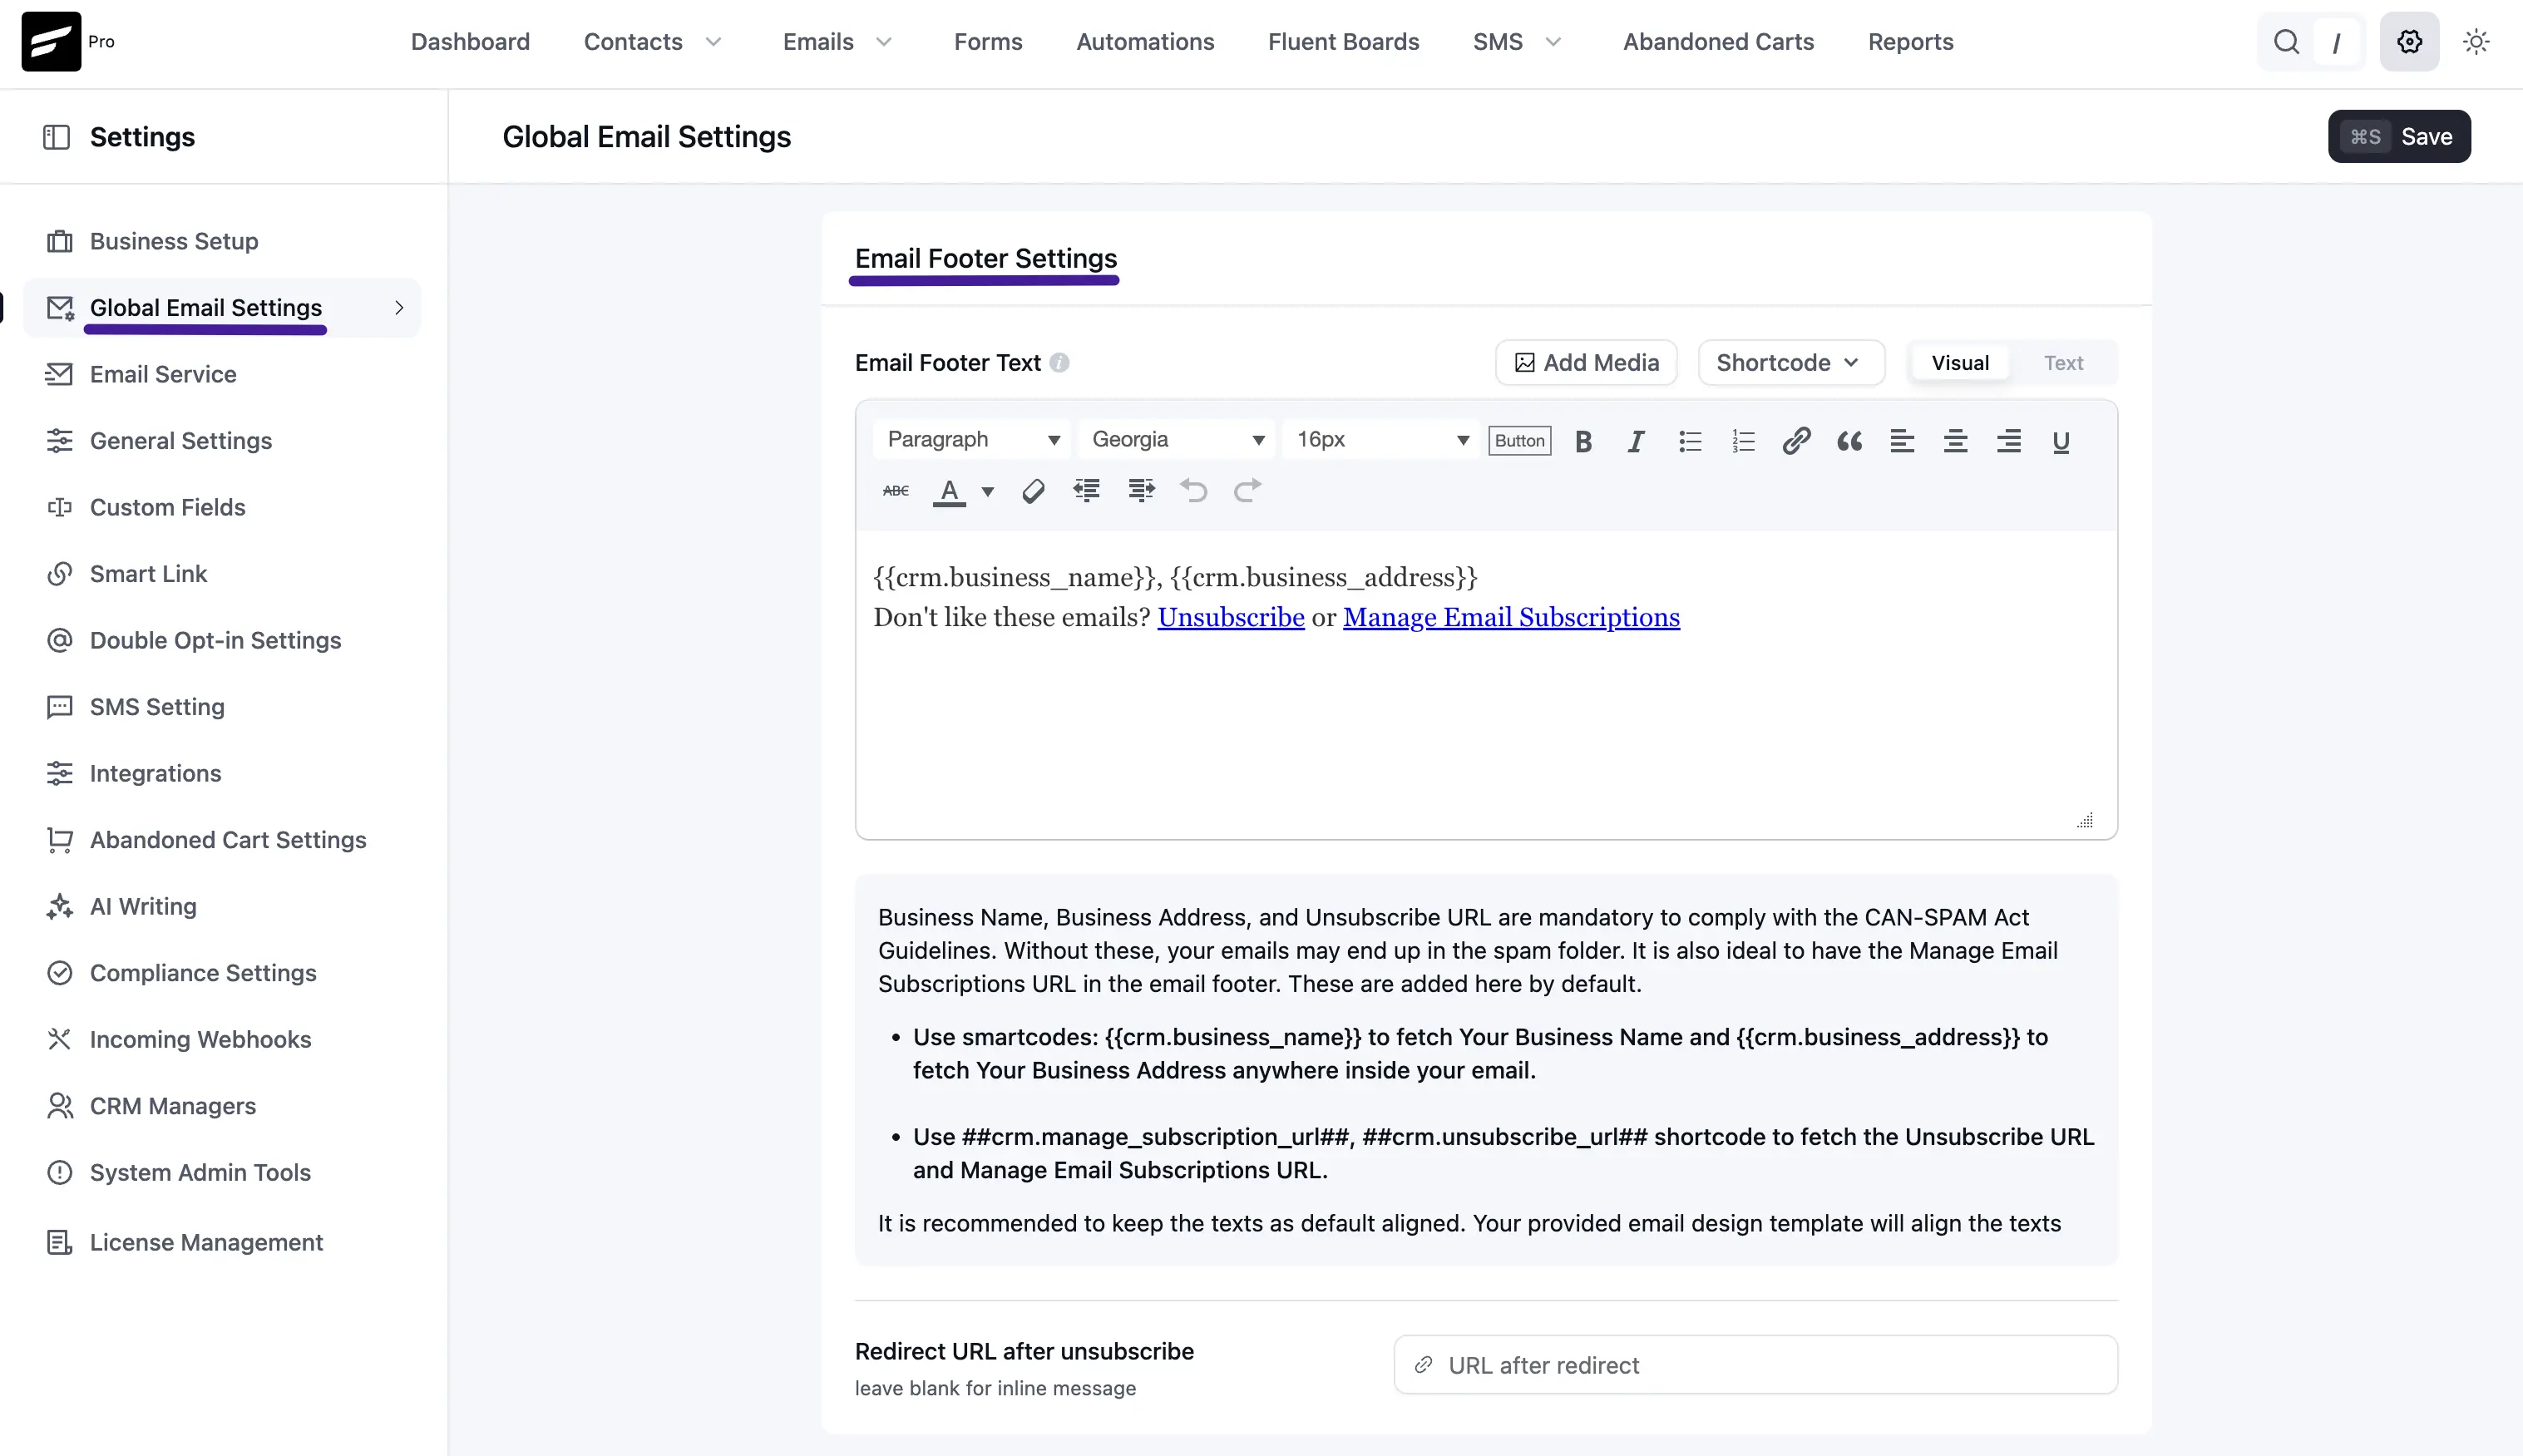
Email Footer Text sets the content that appears at the bottom of every outgoing email. The editor supports two modes:
- Visual mode — a rich-text toolbar with paragraph style, font family, font size, bold, italic, underline, lists, links, blockquote, alignment, and Add Media.
- Text mode — direct HTML editing for precise control over markup.
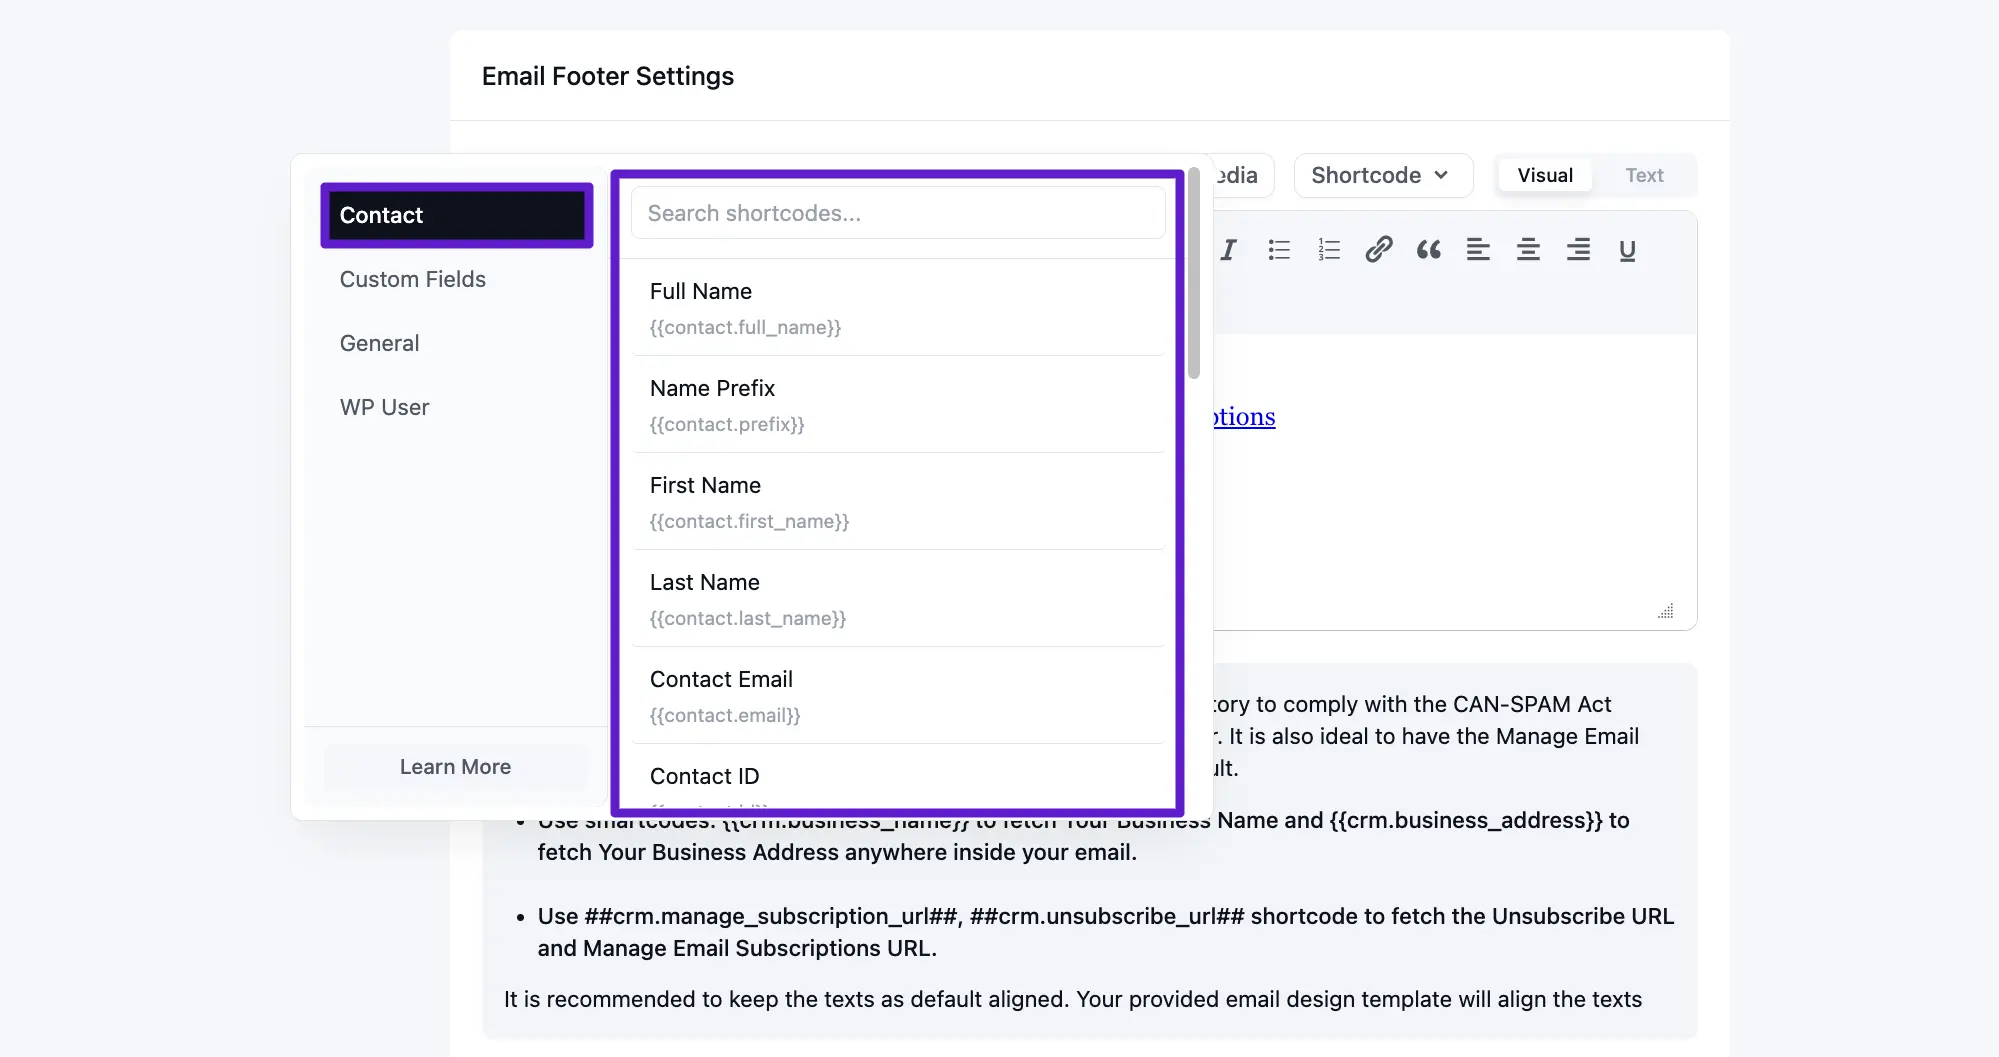
SmartCode Insert Menu
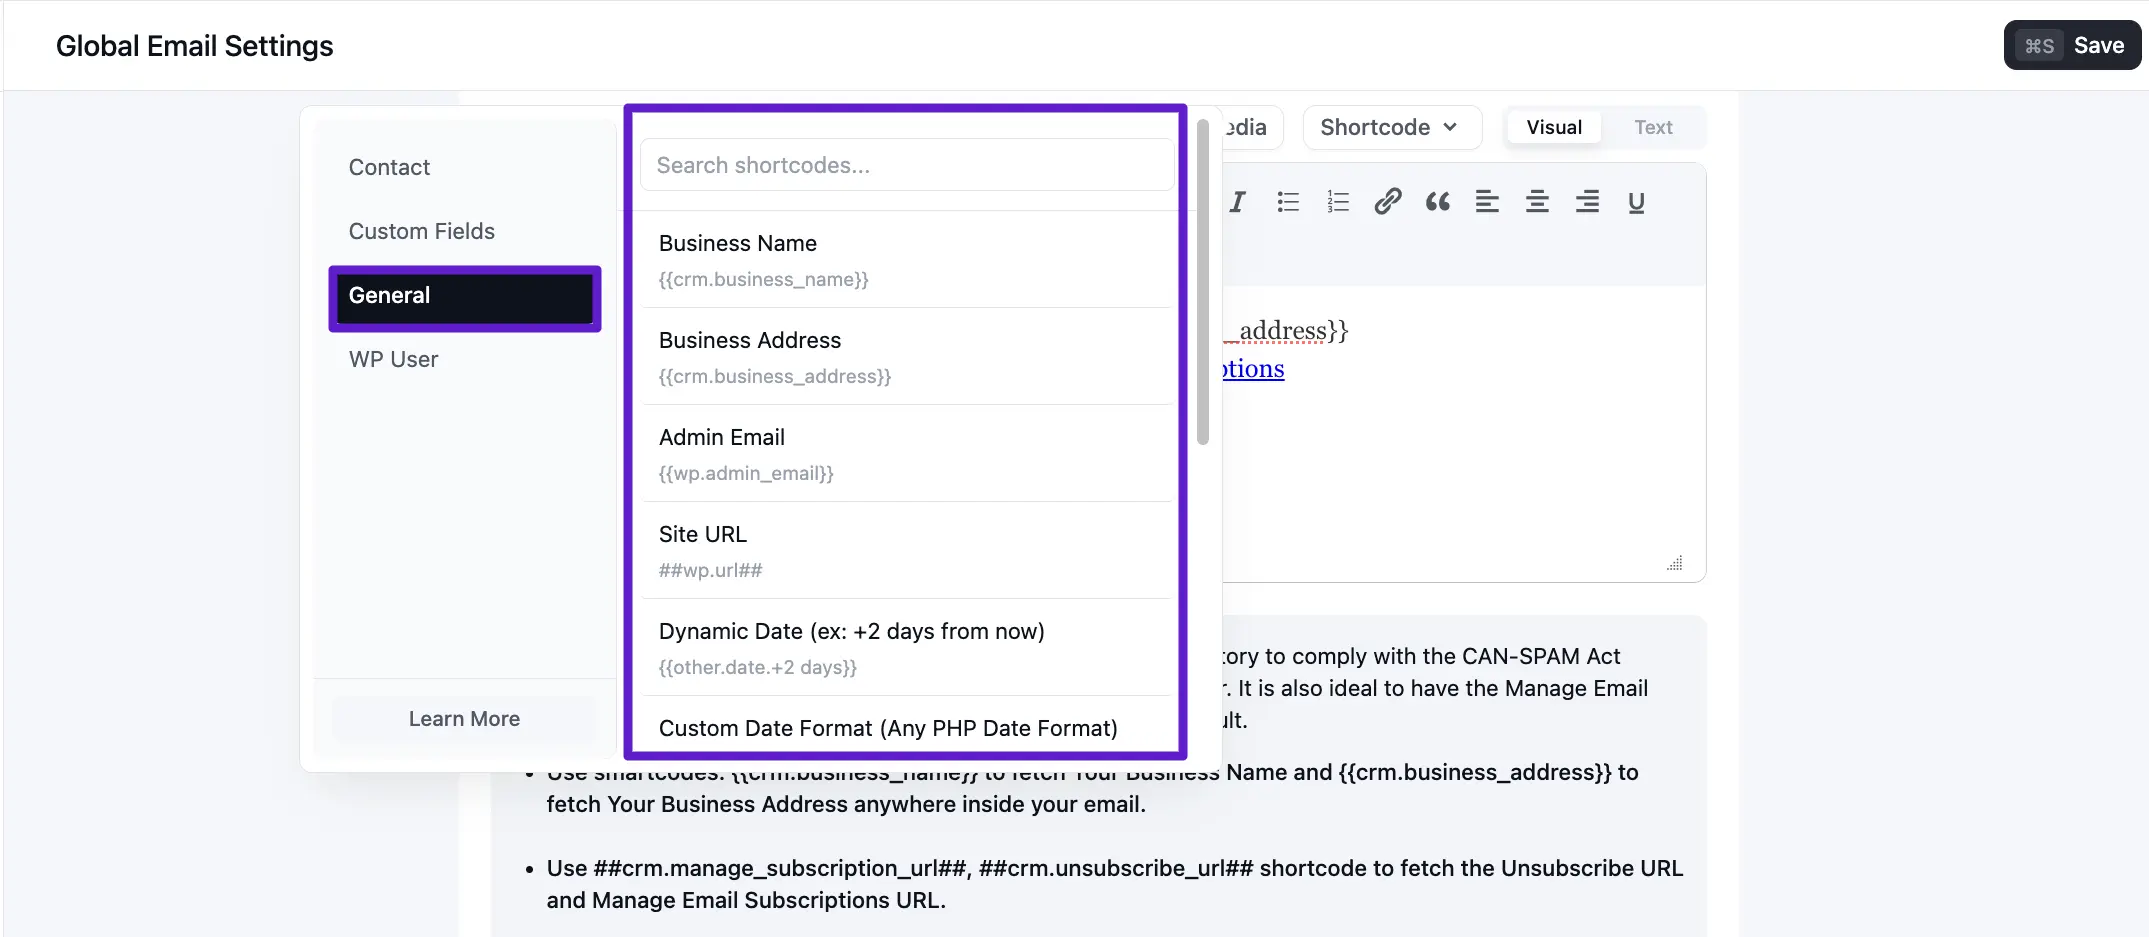
The footer editor includes a SmartCode button that opens a dedicated insert menu. Use it to browse and insert contact fields, general CRM tokens, and subscription management URLs directly into your footer — no need to type SmartCodes manually.
The most commonly used footer SmartCodes are:
- Business Name:
{{crm.business_name}} - Business Address:
{{crm.business_address}} - Manage Subscription URL:
##crm.manage_subscription_url## - Unsubscribe URL:
##crm.unsubscribe_url##
A typical compliant footer looks like:
{{crm.business_name}}, {{crm.business_address}}
[Unsubscribe](##crm.unsubscribe_url##) | [Manage Preferences](##crm.manage_subscription_url##)
NOTE
Business name, business address, and a working unsubscribe path are required by CAN-SPAM and similar regulations. FluentCRM shows a reminder beneath the editor.
Keep footer text in the default alignment when possible — your email template controls the final visual layout.
Disabling the Footer Per Template
Individual email templates can disable the global footer. Open the template editor and toggle the Disable Footer option in the template settings. This setting now persists correctly across saves.
TIP
Disabling the footer removes your unsubscribe link from that template. Only use this for transactional emails where you have a legal basis to omit it.
Redirect URL After Unsubscribe
Redirect URL after unsubscribe lets you send contacts to a specific page on your site after they unsubscribe (for example, a confirmation or feedback page). Leave the field blank if you prefer FluentCRM to show the standard inline unsubscribe message instead.
Available SmartCodes
You can use SmartCodes in your subject, pre-header, and email body to dynamically personalize content for each recipient.
Contact SmartCodes
| Data Field Name | SmartCode |
|---|---|
| Full Name | {{contact.full_name}} |
| Name Prefix | {{contact.prefix}} |
| First Name | {{contact.first_name}} |
| Last Name | {{contact.last_name}} |
| Contact Email | {{contact.email}} |
| Contact ID | {{contact.id}} |
| User ID | {{contact.user_id}} |
| Address Line 1 | {{contact.address_line_1}} |
| Address Line 2 | {{contact.address_line_2}} |
| City | {{contact.city}} |
| State | {{contact.state}} |
| Postal Code | {{contact.postal_code}} |
| Country | {{contact.country}} |
| Phone | {{contact.phone}} |
| Status | {{contact.status}} |
| Date of Birth | {{contact.date_of_birth}} |
Custom Field SmartCodes
Custom fields depend on your FluentCRM settings. You can create as many custom fields as needed, and they will appear in the SmartCode selector.

The Data Field Name matches the custom field Label, and the SmartCode uses the field slug.
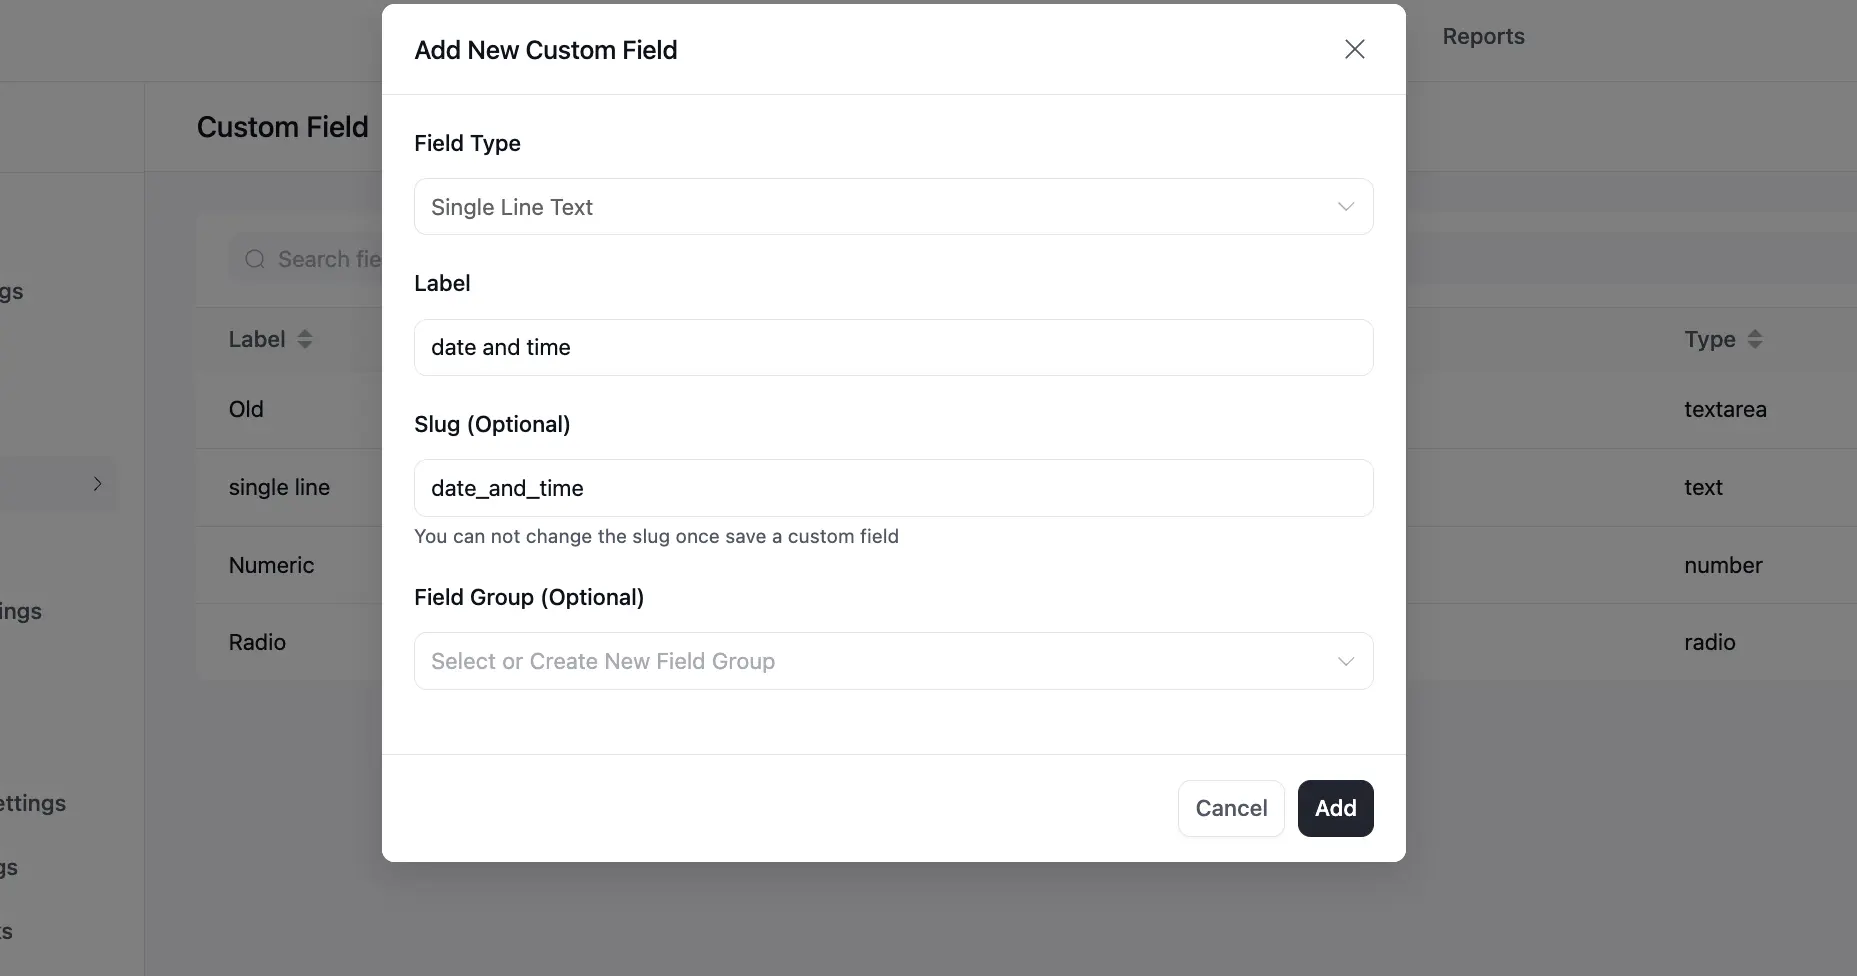
Example:
- Data Field Name: Date and Time
- SmartCode:
{{contact.custom.date_time}}
General SmartCodes
| Data Field Name | SmartCode |
|---|---|
| Business Name | {{crm.business_name}} |
| Business Address | {{crm.business_address}} |
| Admin Email | {{wp.admin_email}} |
| Site URL | {{wp.url}} |
| Dynamic Date (example: +2 days from now) | {{other.date.+2 days}} |
| Unsubscribe URL | ##crm.unsubscribe_url## |
| Manage Subscription URL | ##crm.manage_subscription_url## |
| View on Browser URL | ##web_preview_url## |
| Unsubscribe Hyperlink HTML | {{crm.unsubscribe_html|Unsubscribe}} |
| Manage Subscription Hyperlink HTML | {{crm.manage_subscription_html|Manage Preference}} |
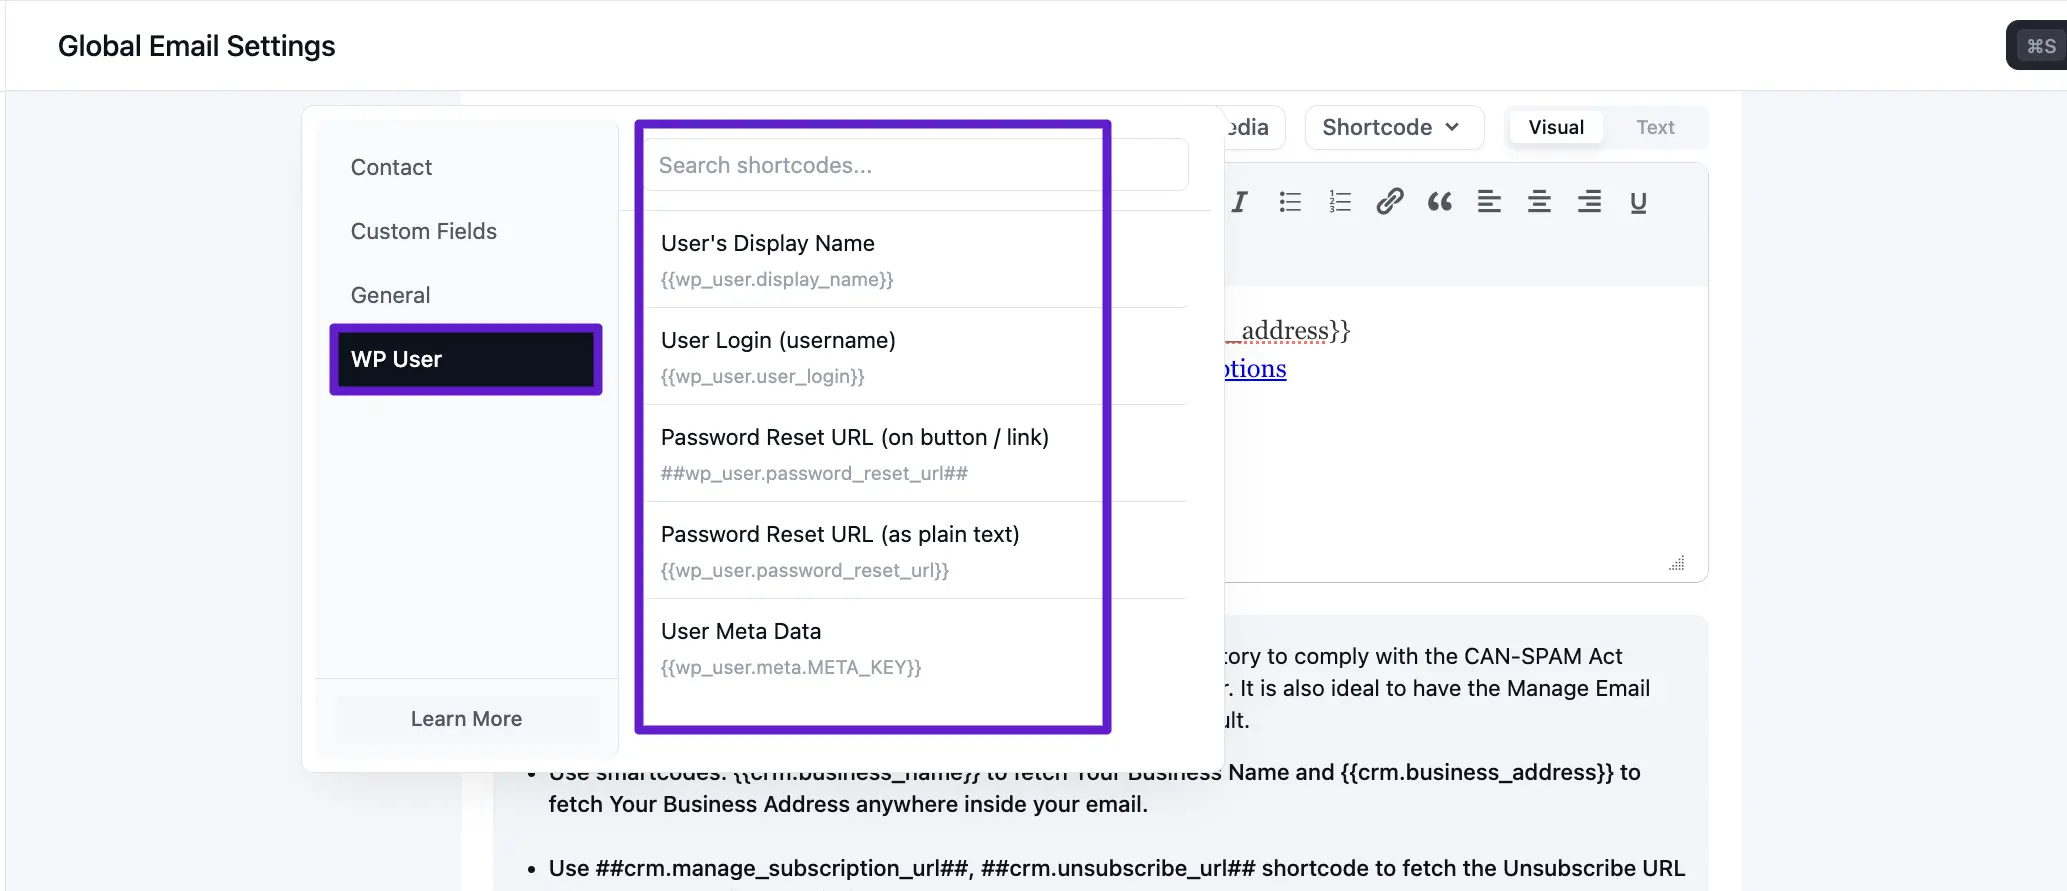
WP User SmartCodes
The following SmartCodes are available for WordPress user-related data:
| Data Field Name | SmartCode |
|---|---|
| User Display Name | {{wp_user.display_name}} |
| User Login (username) | {{wp_user.user_login}} |
| Password Reset URL (button / link usage) | ##wp_user.password_reset_url## |
| Password Reset URL (plain text) | {{wp_user.password_reset_url}} |
| User Meta Data | {{wp_user.meta.META_KEY}} |
Email Preference Settings
The ##crm.manage_subscription_url## token (or the HTML hyperlink variants in the table above) sends subscribers to the preference experience where they can update profile fields and, depending on your rules, manage list subscriptions. The options below control what they are allowed to see and change.
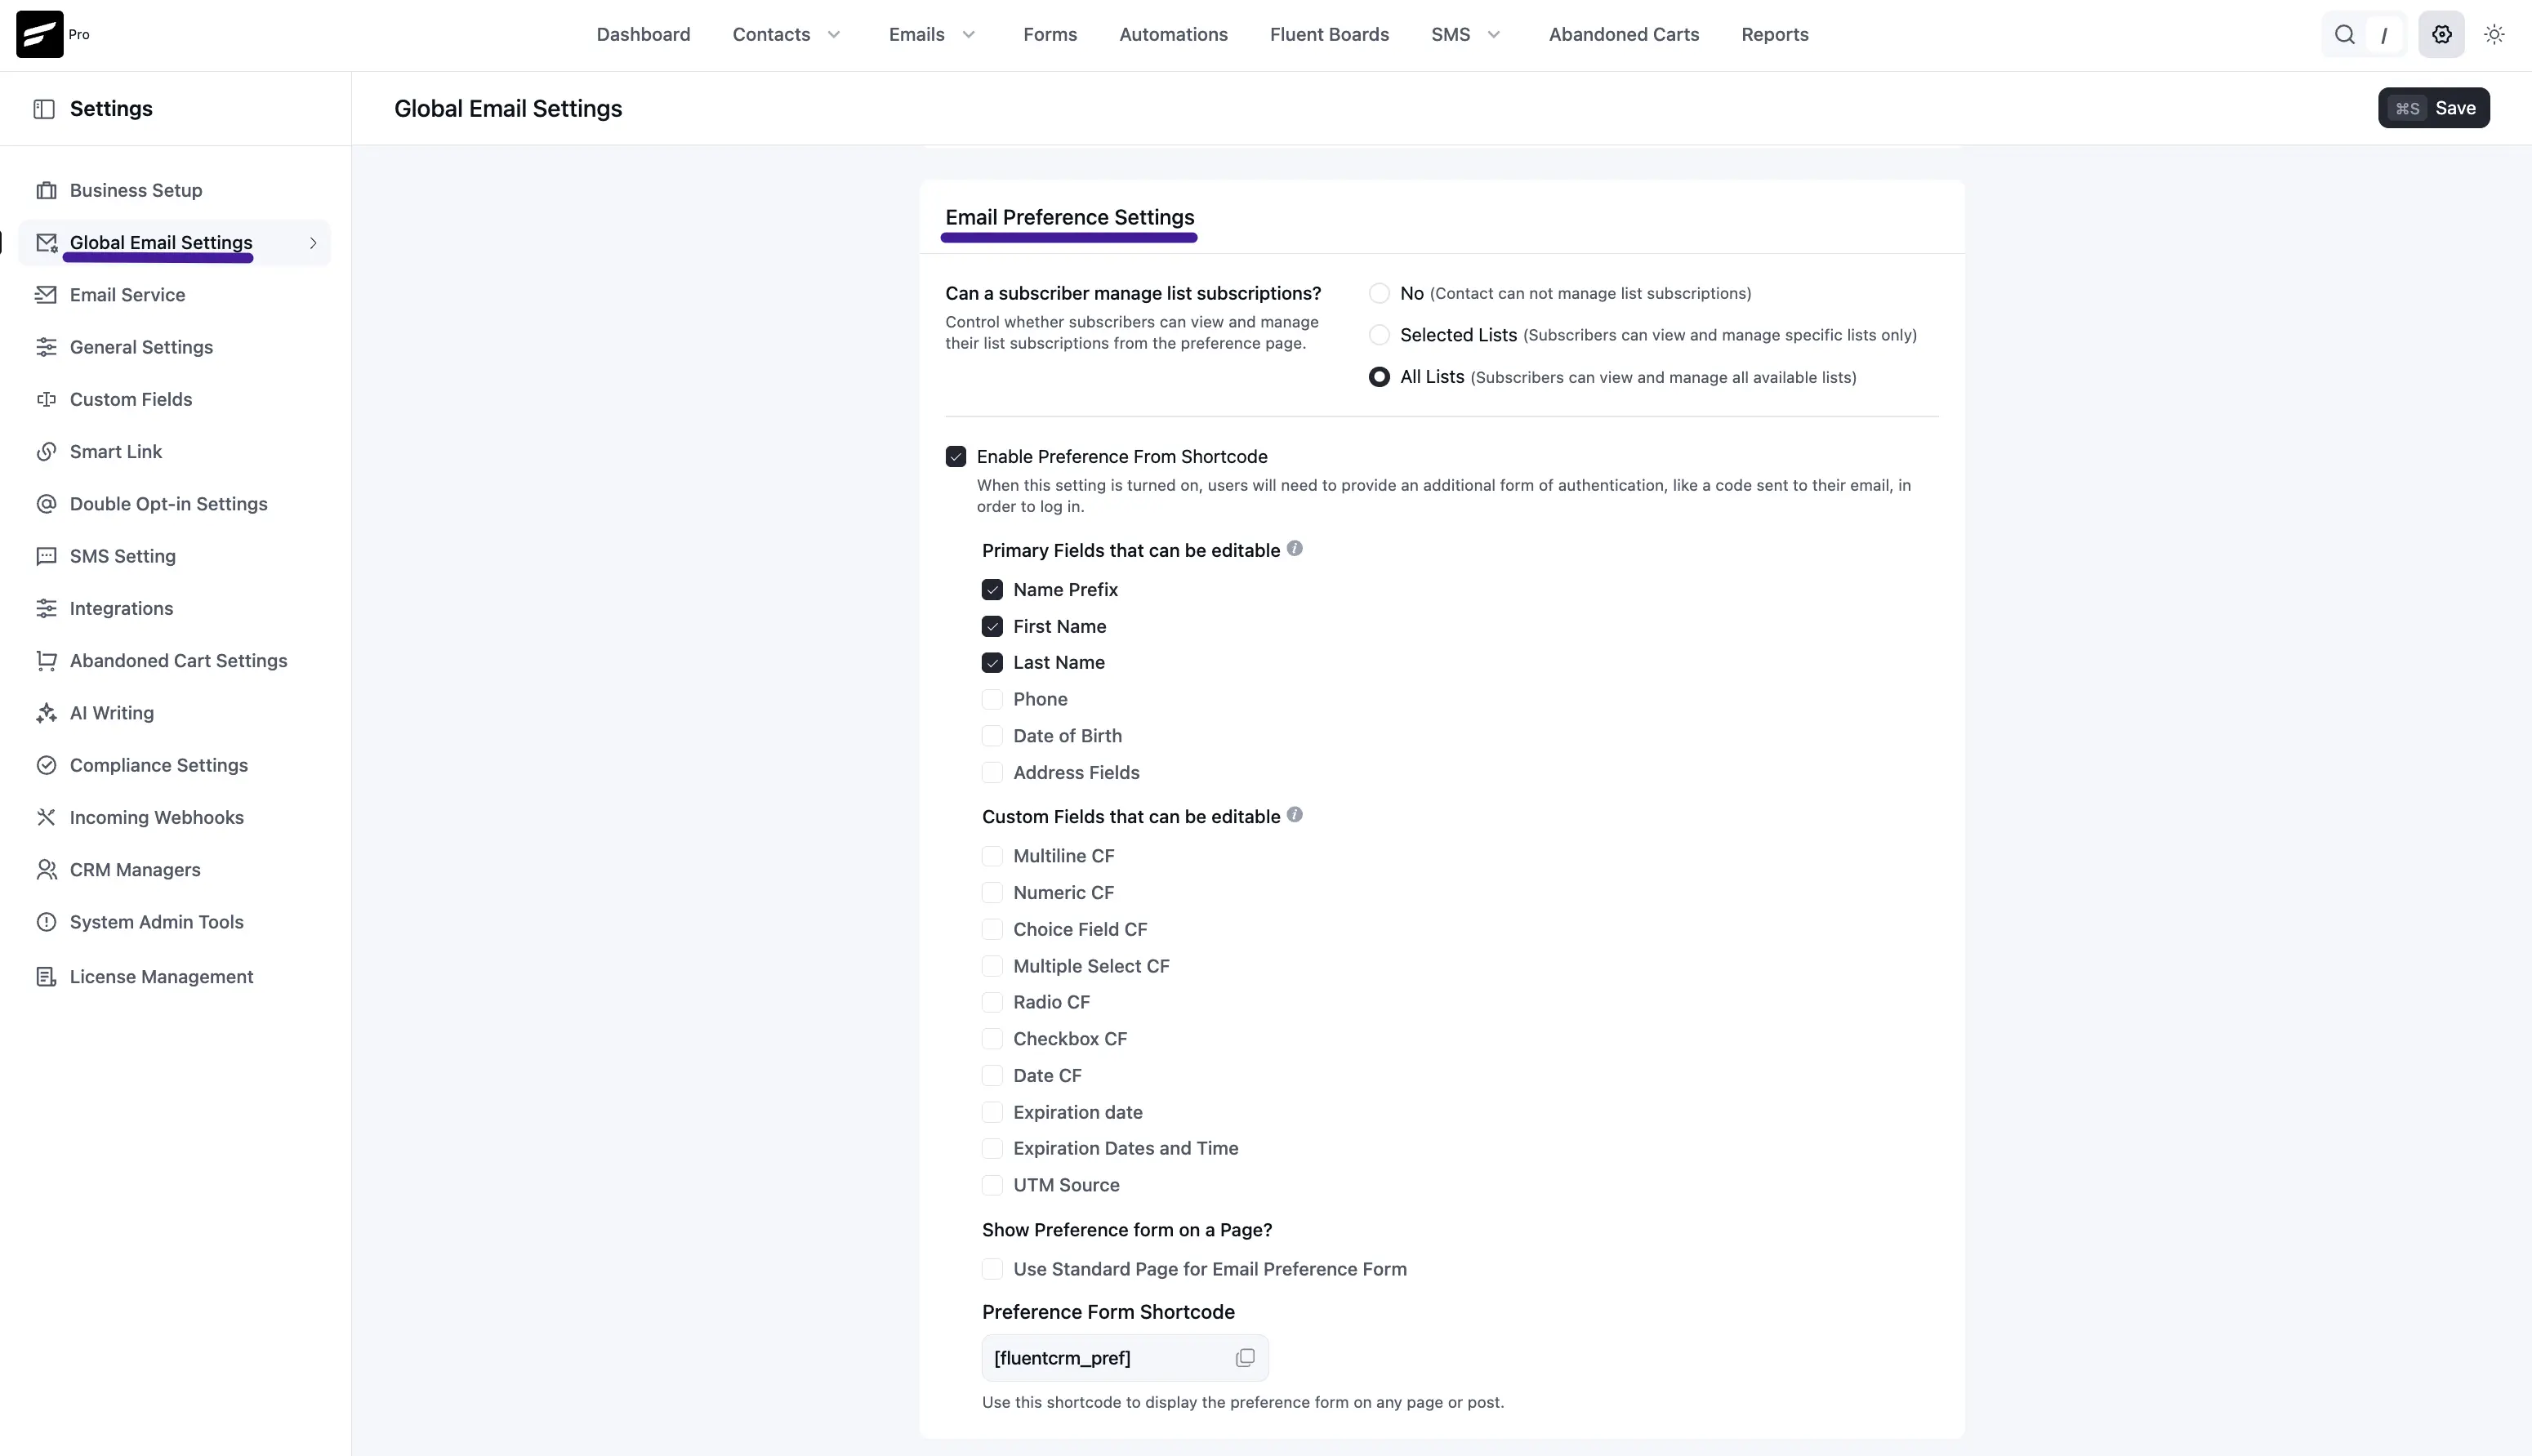
List Subscription Management
This controls whether subscribers can view and manage lists from the preference page:
Selected Lists: They only see and manage the lists you allow (useful when you want to expose a subset of lists).
All Lists: They can view and manage every list available in FluentCRM.
Enable Preference From Shortcode
When Enable Preference From Shortcode is turned on, opening the preference flow from the shortcode-based form requires an extra verification step (for example, a code sent to the contact’s email) before they can access or change preferences.
Primary Fields That Can Be Editable
Standard contact fields appear with checkboxes. Check each field you want subscribers to be able to update on the preference form—for example Name Prefix, First Name, and Last Name. Leave Phone, Date of Birth, or Address unchecked if those should remain admin-only.
Custom Fields That Can Be Editable
Any custom field types you have created (multiline, numeric, choice, multi-select, radio, checkbox, date, expiration, UTM, and similar) can be enabled here so subscribers may edit them on the preference page. Only enable fields you are comfortable having contacts maintain themselves.
Show Preference Form on a Page
Toggle Use Standard Page for Email Preference Form when you want FluentCRM to use its built-in preference page behavior versus embedding the form yourself with the shortcode on a normal WordPress page.
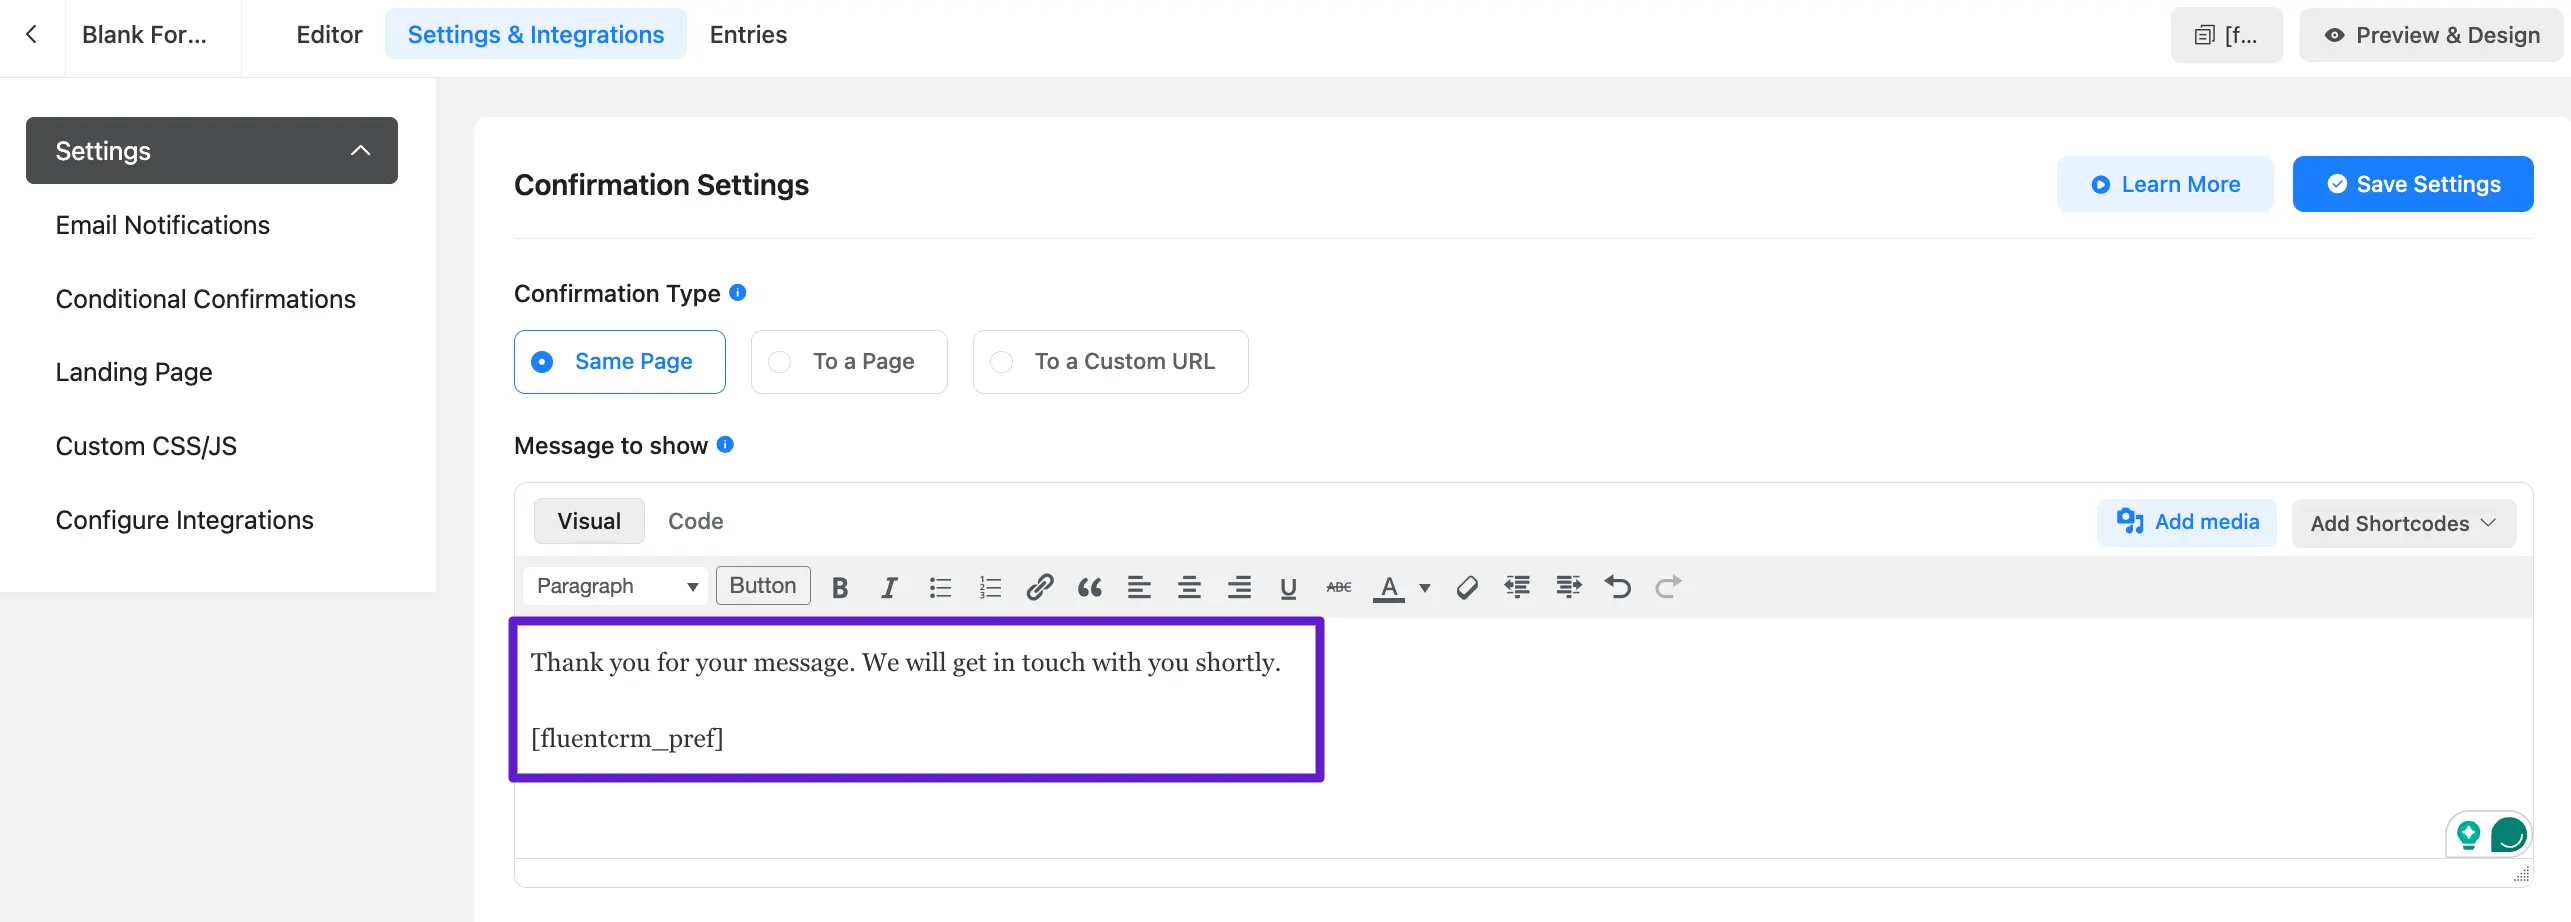
Preference Form Shortcode
Use the shortcode [fluentcrm_pref] on any page or post to display the preference form. In Global Email Settings, the shortcode is shown next to a copy control; the help text reminds you that subscribers can use this form to manage their options from your site.
Including ##crm.manage_subscription_url## (or the HTML hyperlink SmartCodes from the General SmartCodes table) in an email adds a link such as Manage Email Subscriptions and opens the preference flow in the browser.
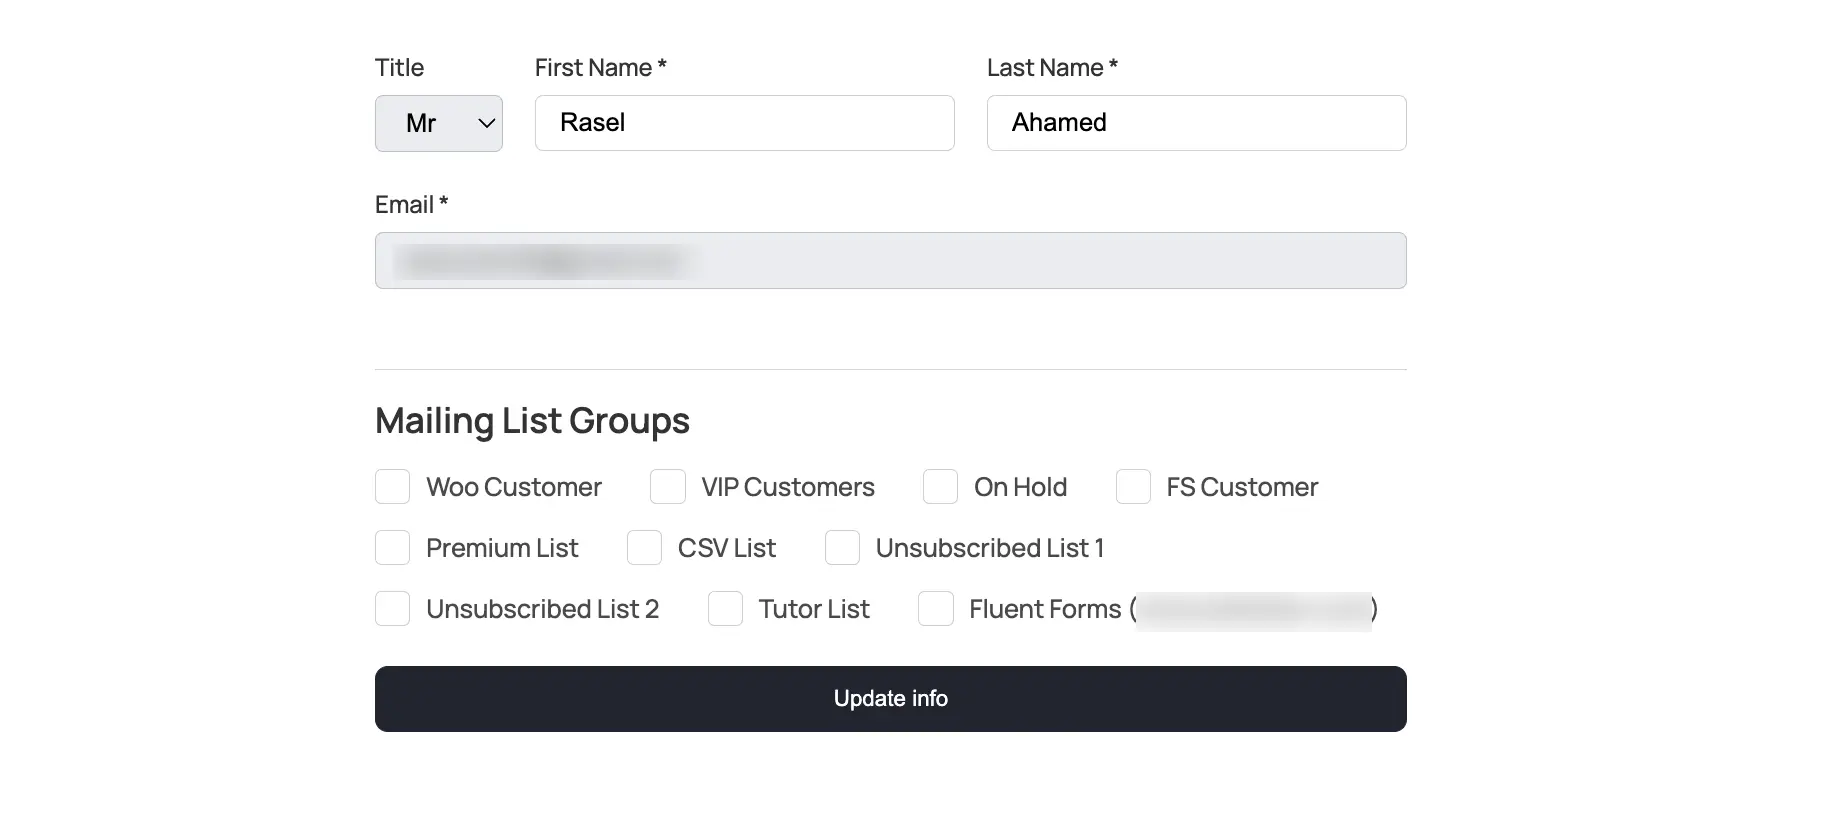
With [fluentcrm_pref] on a page, visitors see a management form similar to these examples:
Adding on a Fluent Forms Notification
This can also be used in a Fluent Forms form submission notification: