Appearance
Fluent Forms Advanced Configuration
This guide covers advanced techniques for extending your subscription forms beyond basic setups. You will learn how to add complex fields, manage double opt-in nuances, and utilize advanced mapping and logic within the FluentCRM feed.
Extending Fluent Forms Fields
While pre-made templates offer a quick start, you can manually add a wide variety of input fields to capture more detailed subscriber data.
- Adding New Fields: From the basic configuration guide, we saw the Edit Form buttons from both of FluentCRM and Fluent Forms.
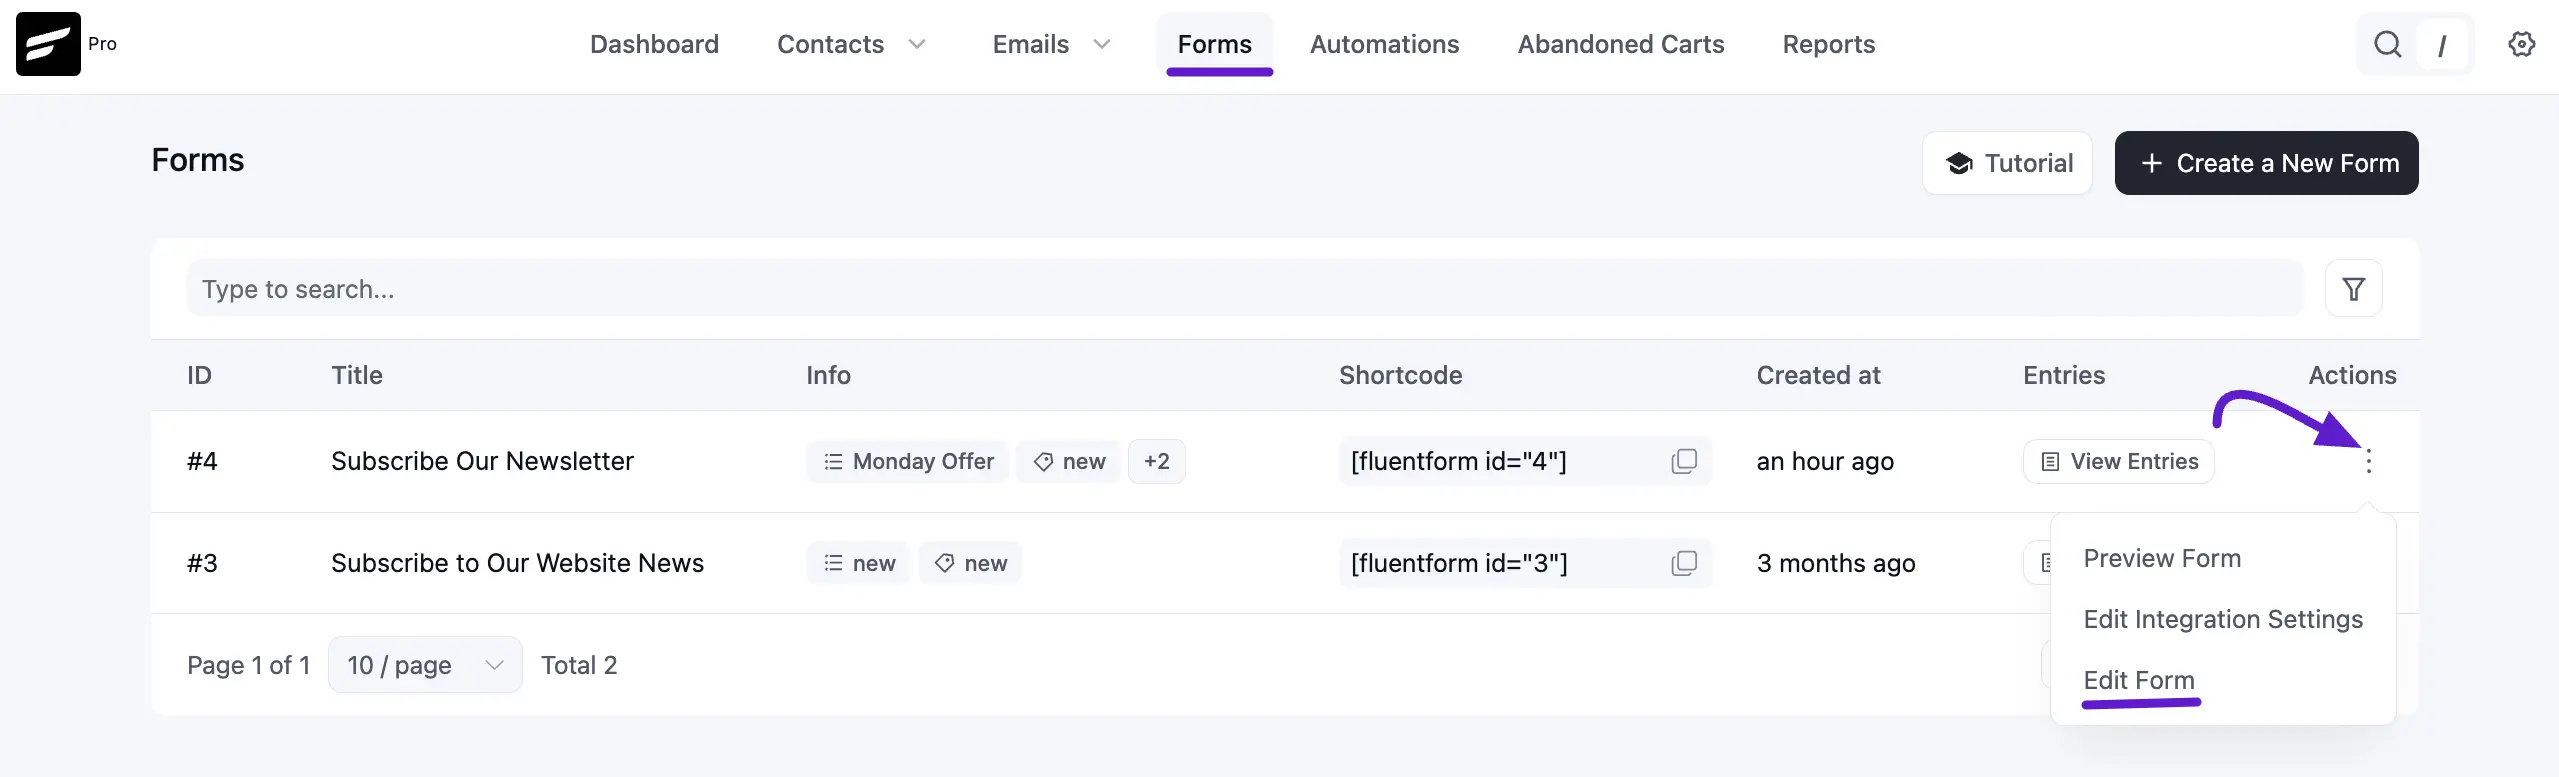
Access the Edit Form interface to drag and drop new components, such as Address Fields or Custom HTML sections for internal messaging.

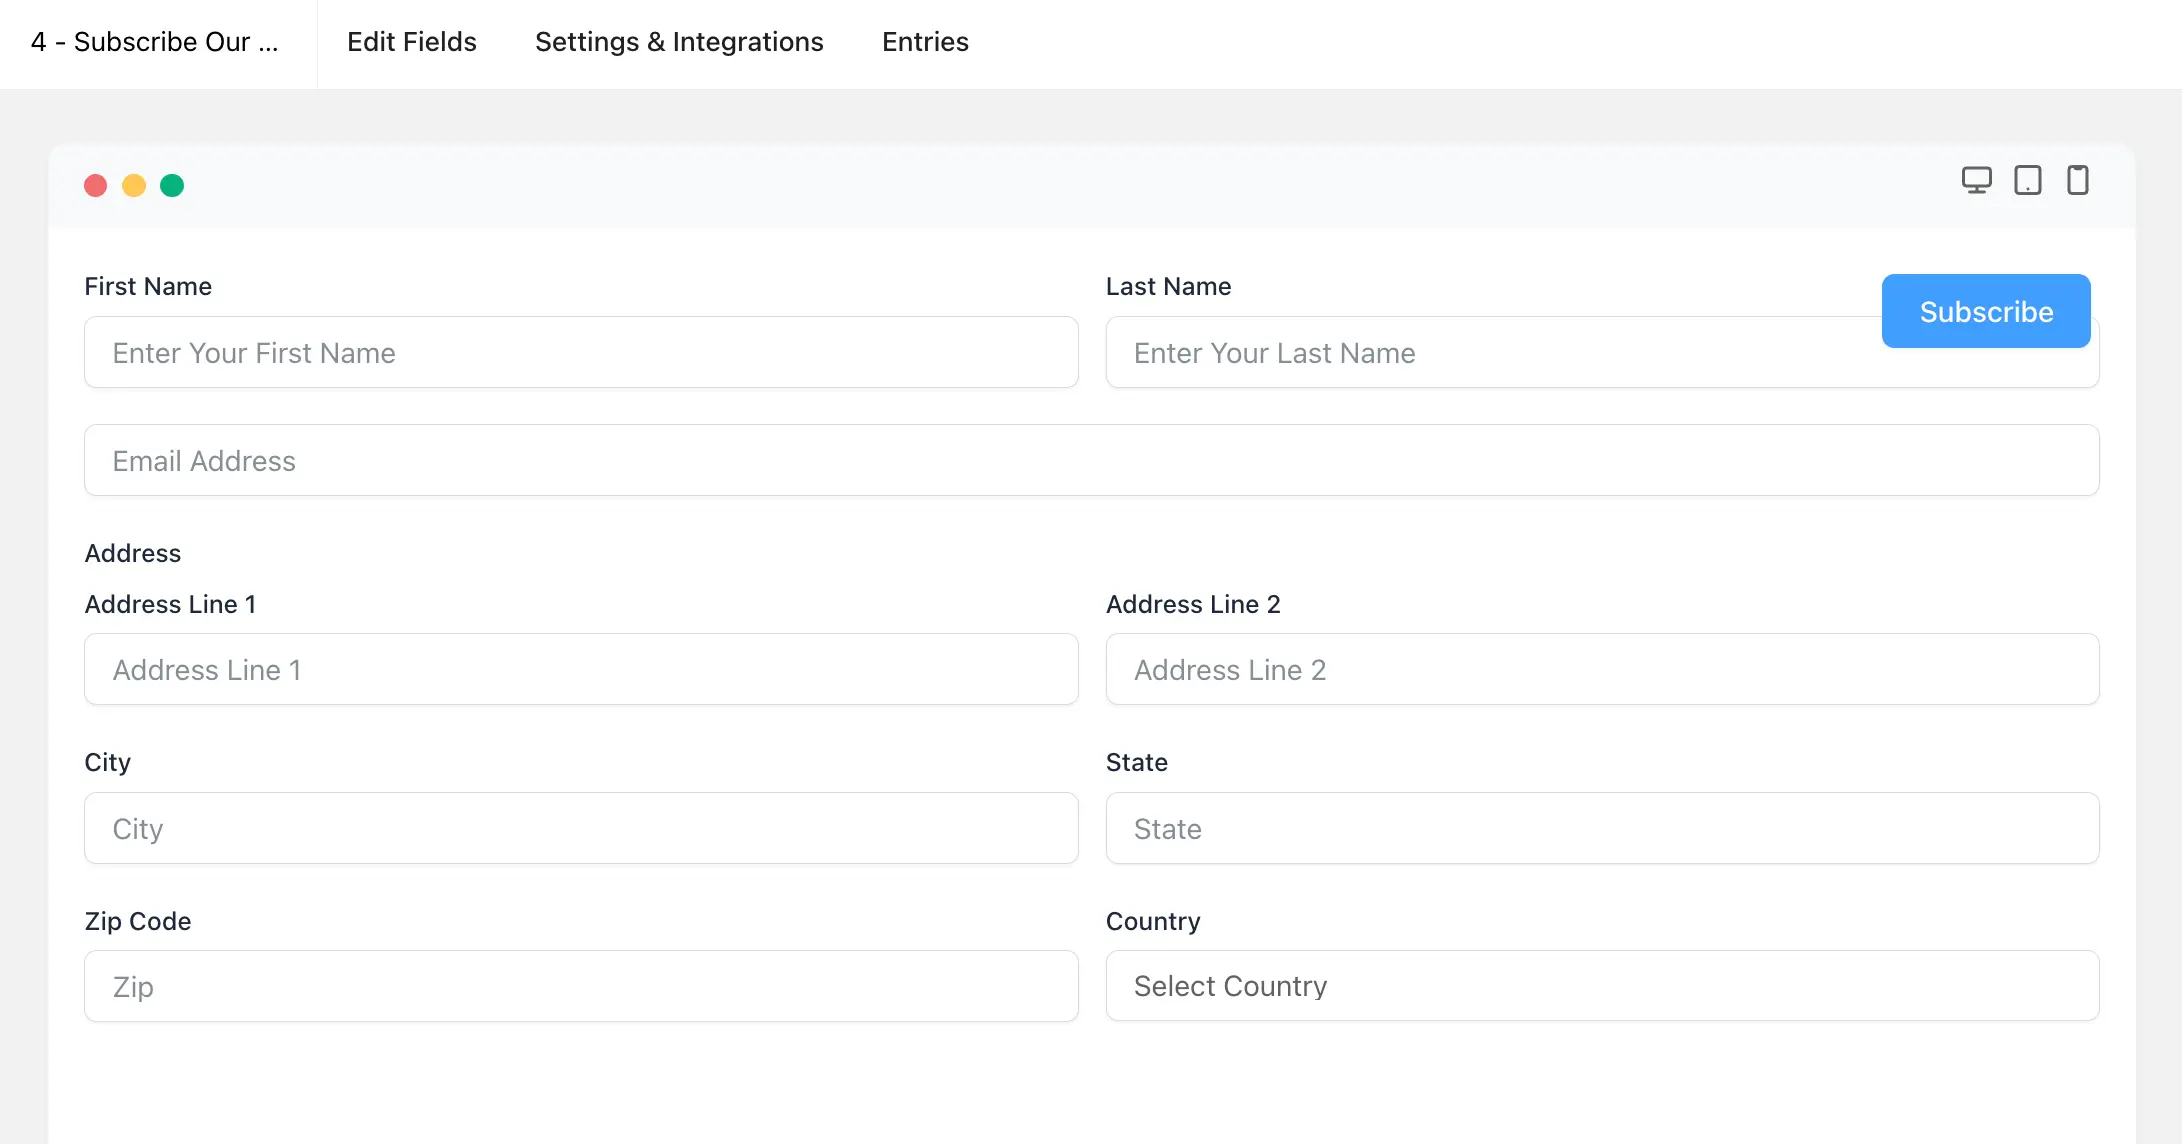
- Preview & Design: After adding fields, click Save and then use the Preview & Design button to see how the customized form appears to users.
Advanced Form Settings
Navigate to the Settings & Integrations tab to configure deep-level form behavior.
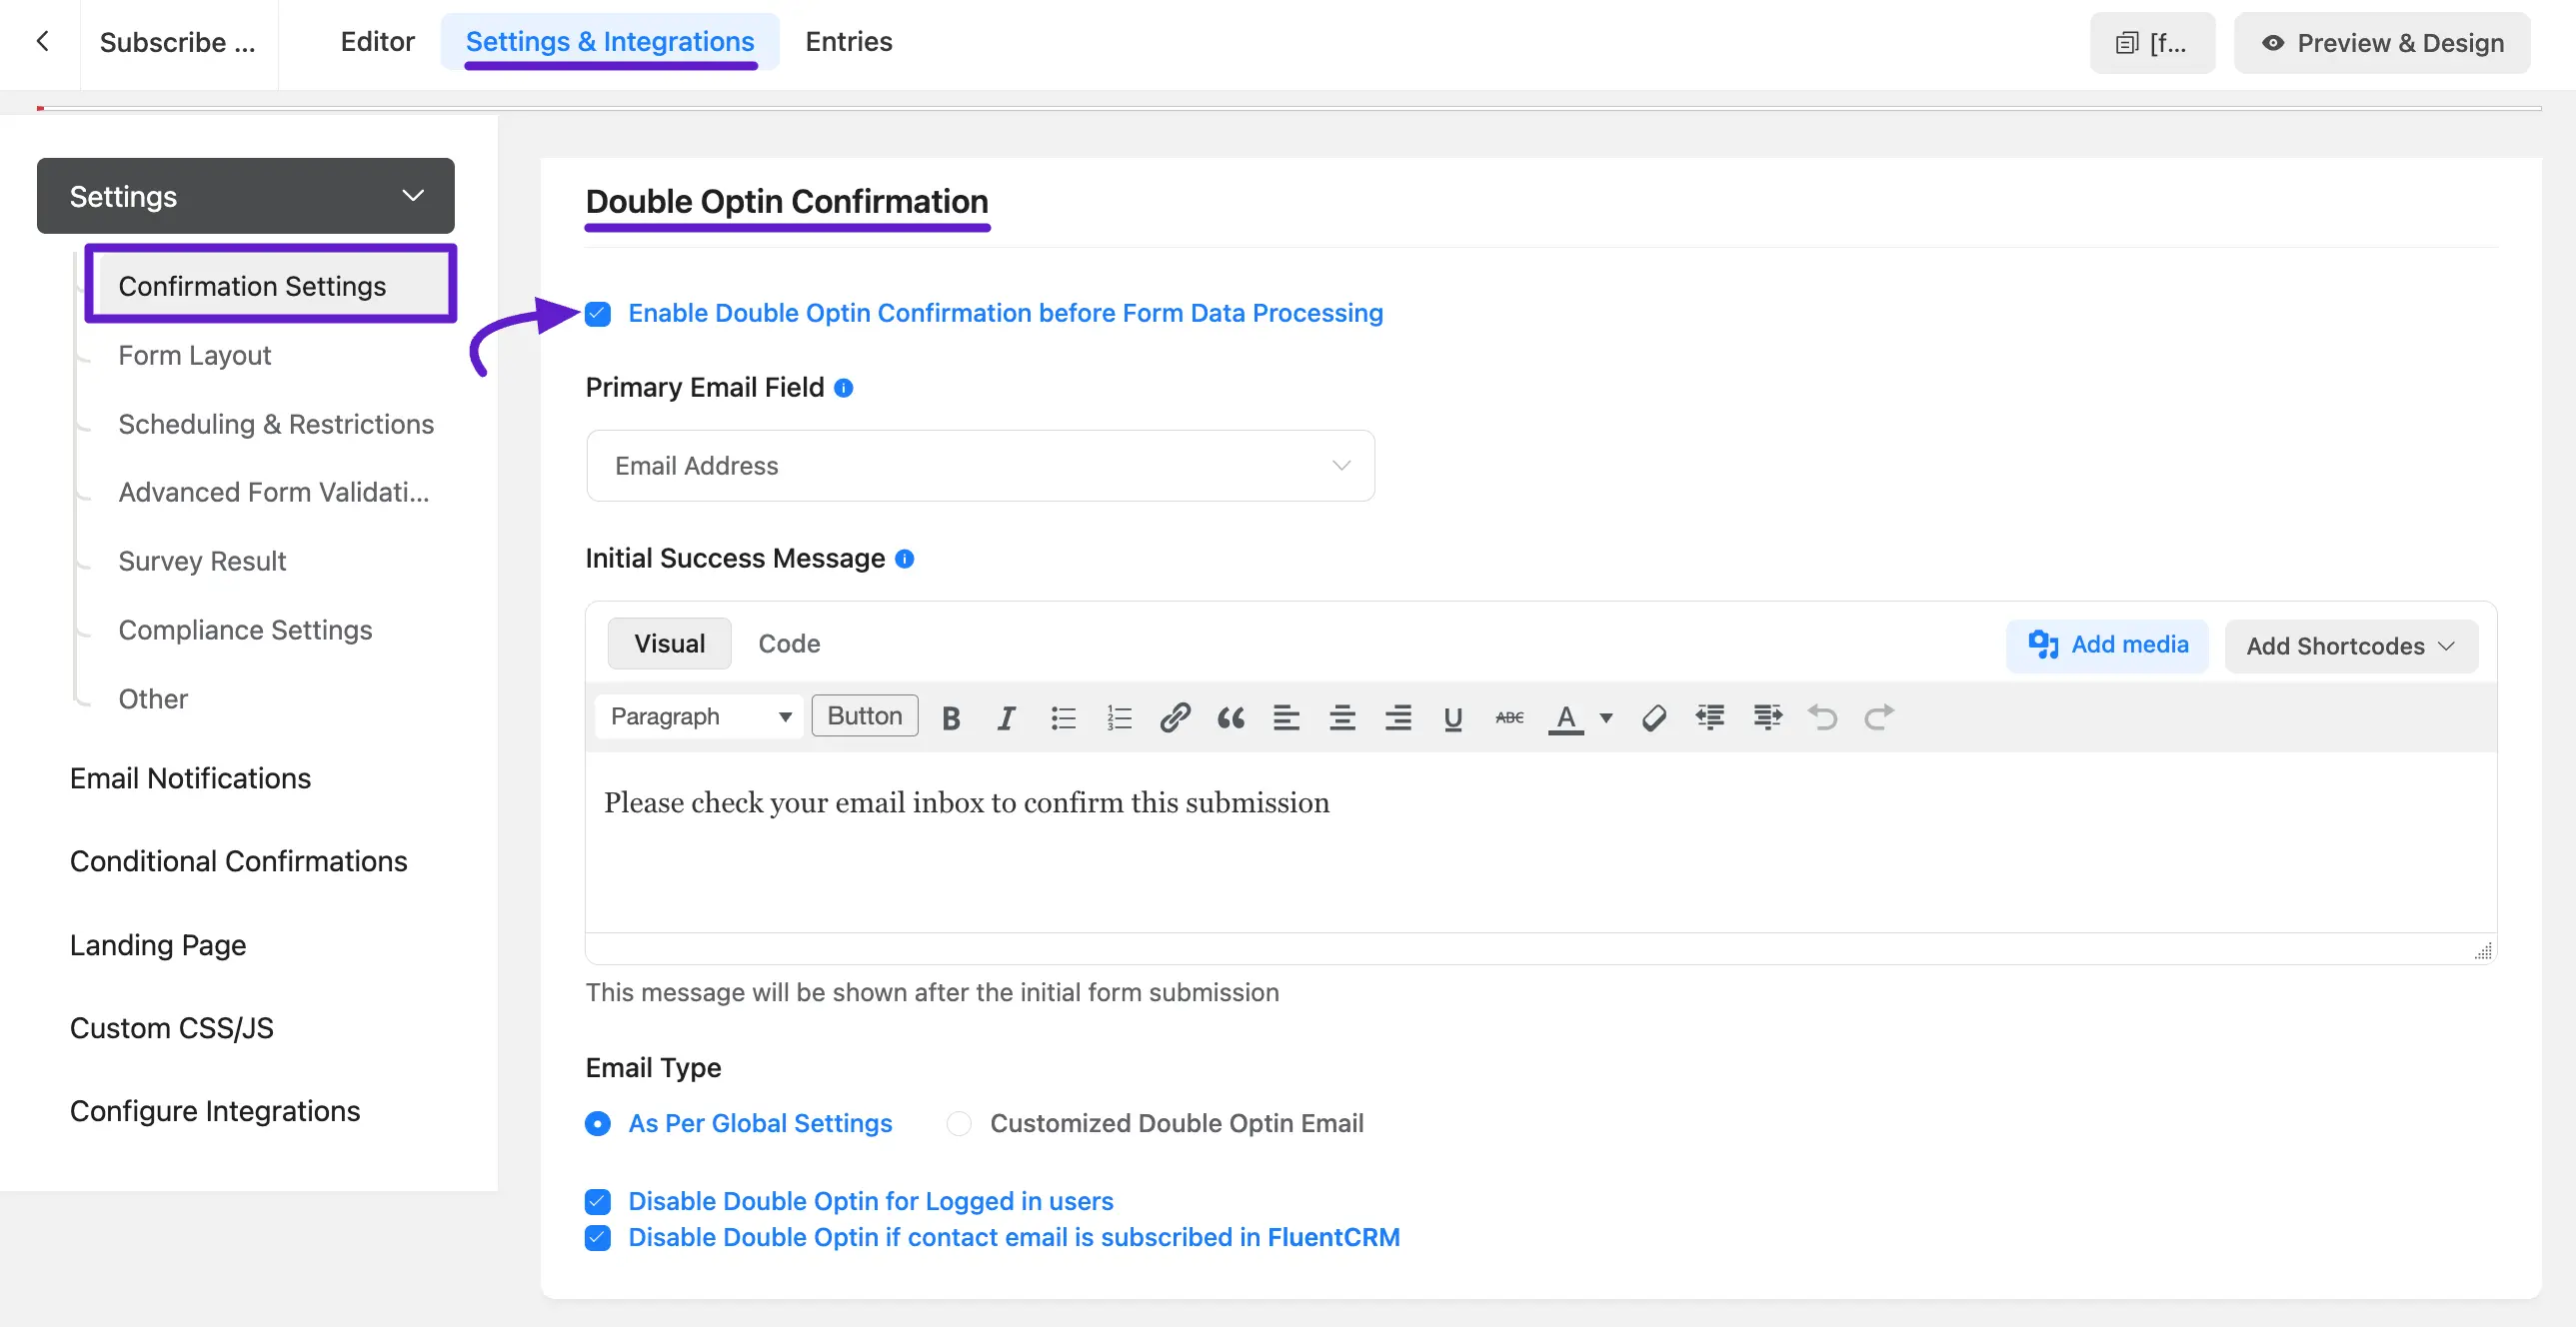
- Double Opt-in Confirmation: This ensures submissions are from legitimate users rather than bots. Fluent Forms can send a confirmation email; once the user confirms, the FluentCRM feed is processed.
You can choose to Disable Double Optin for Logged in users or if the contact is already subscribed in FluentCRM.
You can additionally Disable Double Optin for Logged in users, Disable Double Optin if the contact email is subscribed in FluentCRM by checking the options, and also customize the Form Subscription Double Opt-in confirmation email.
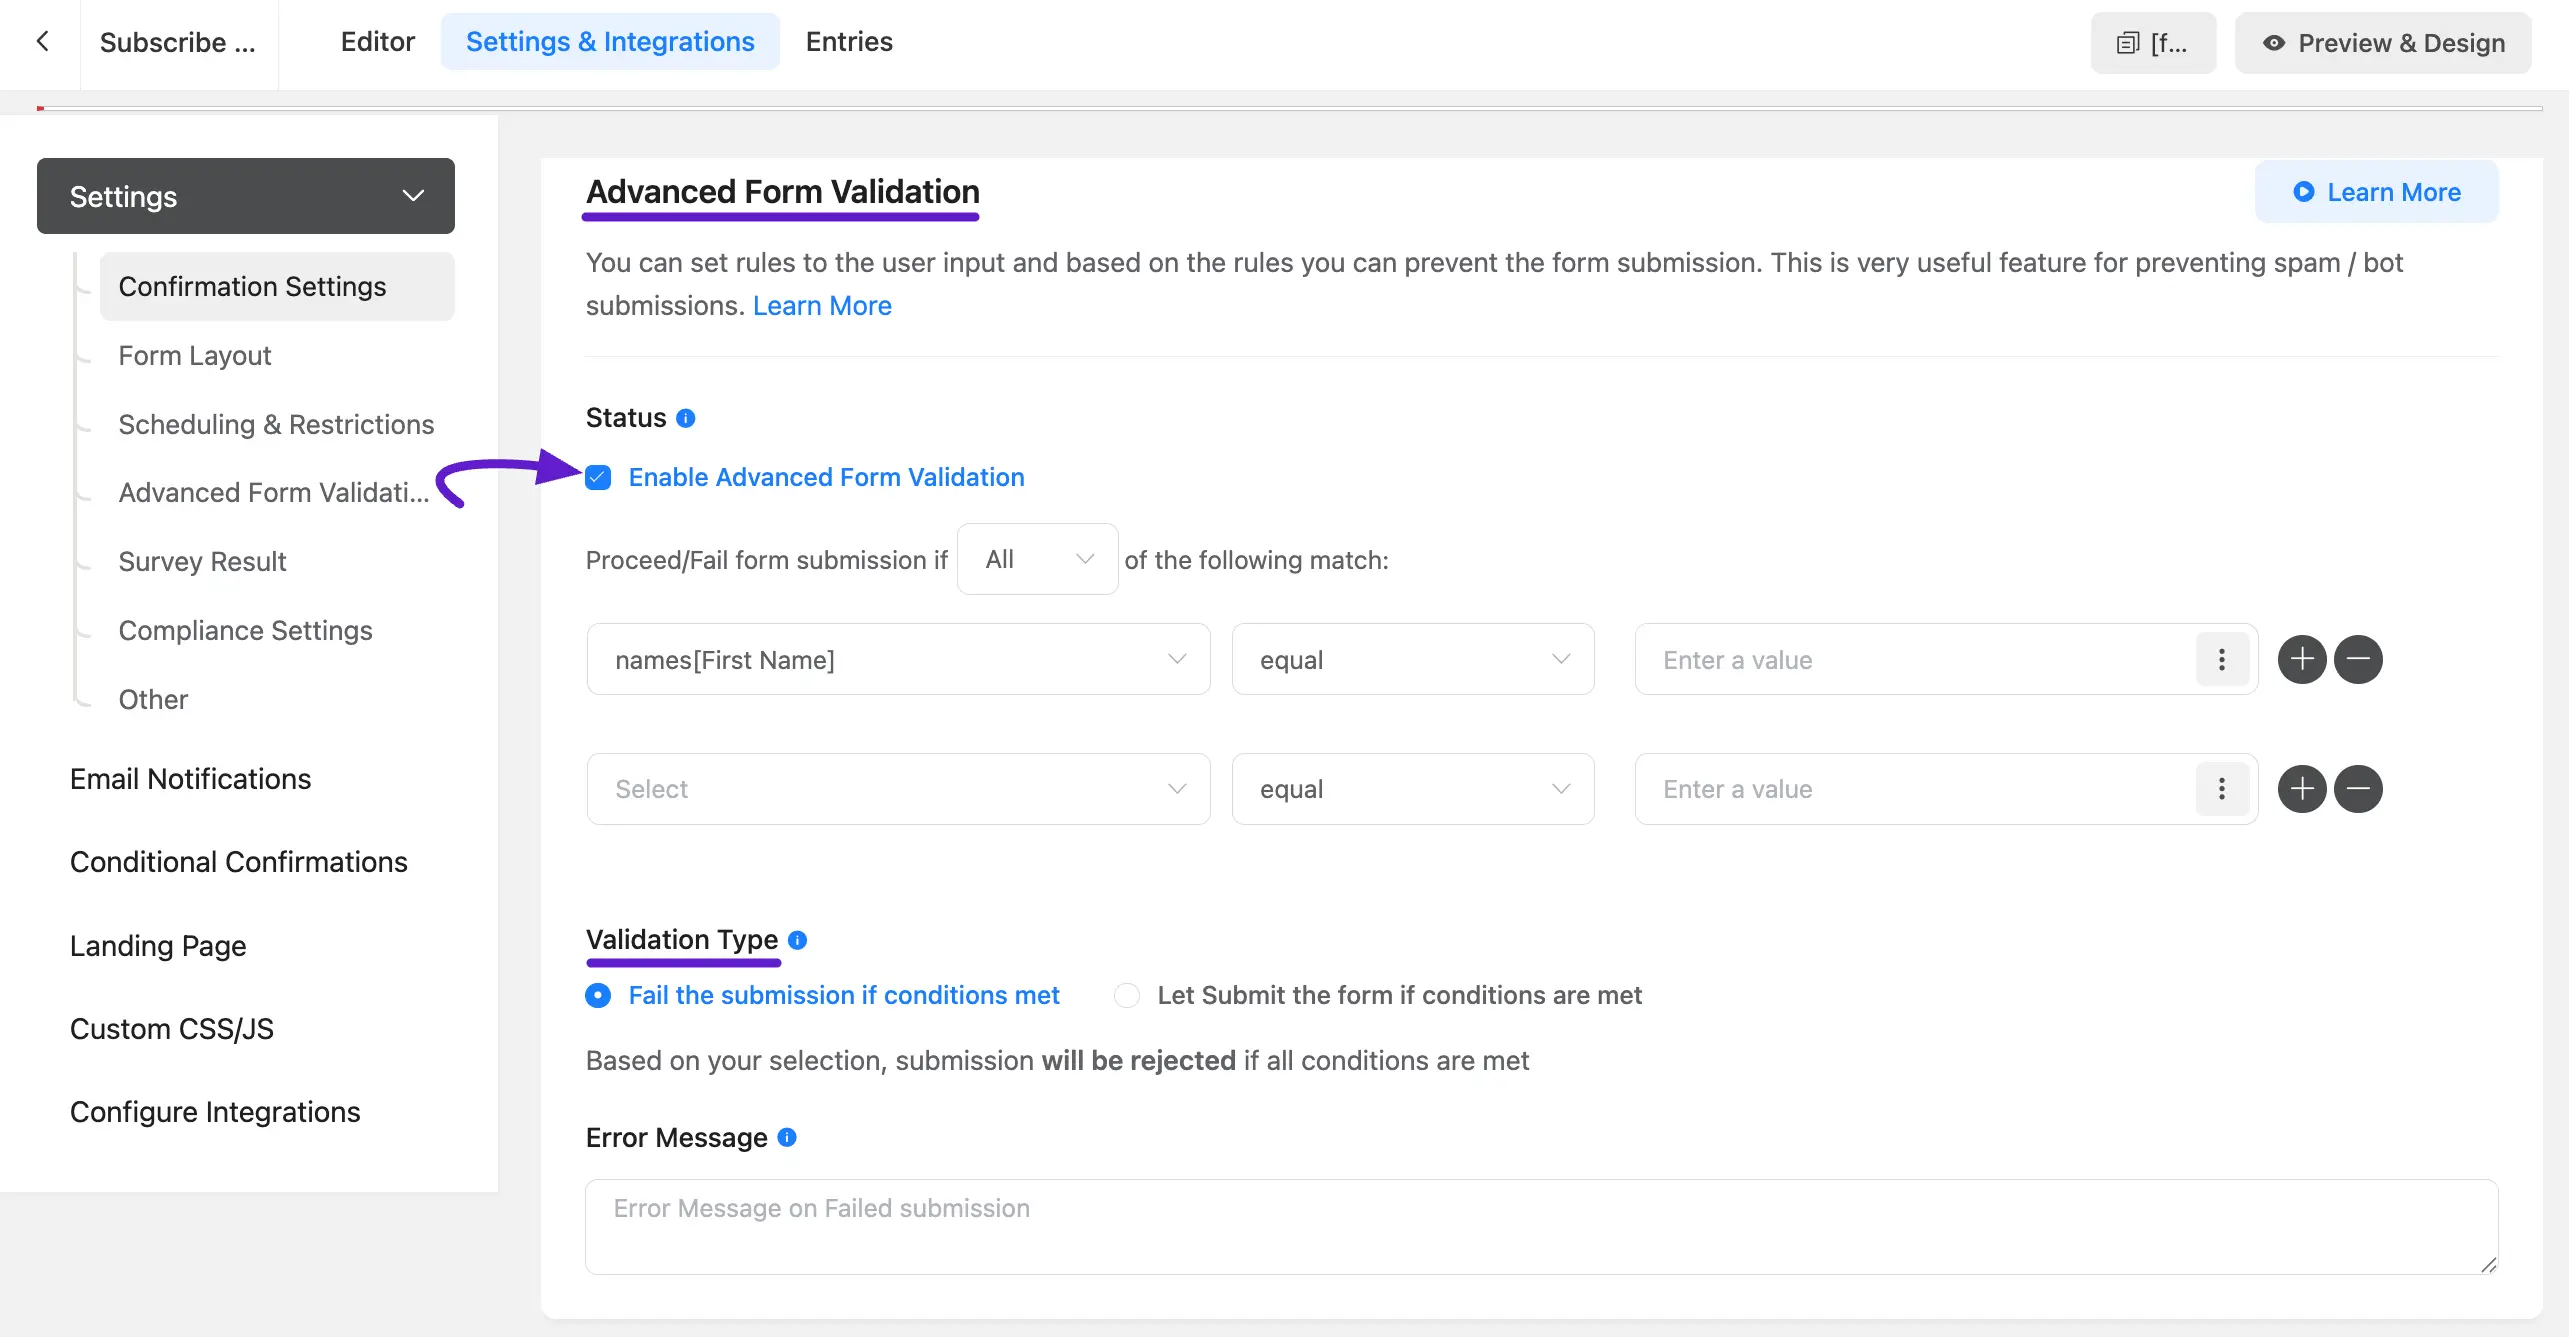
- Advanced Validation: Use this to prevent the use of temporary email addresses or to require a specific passcode for form submission. You can set custom failure messages to guide the user.
Configuring the FluentCRM Integration Feed
The "Feed" is the bridge between your form and the CRM. To add a New Feed hover over Add New Integration and click on the FluentCRM Integration from the options.
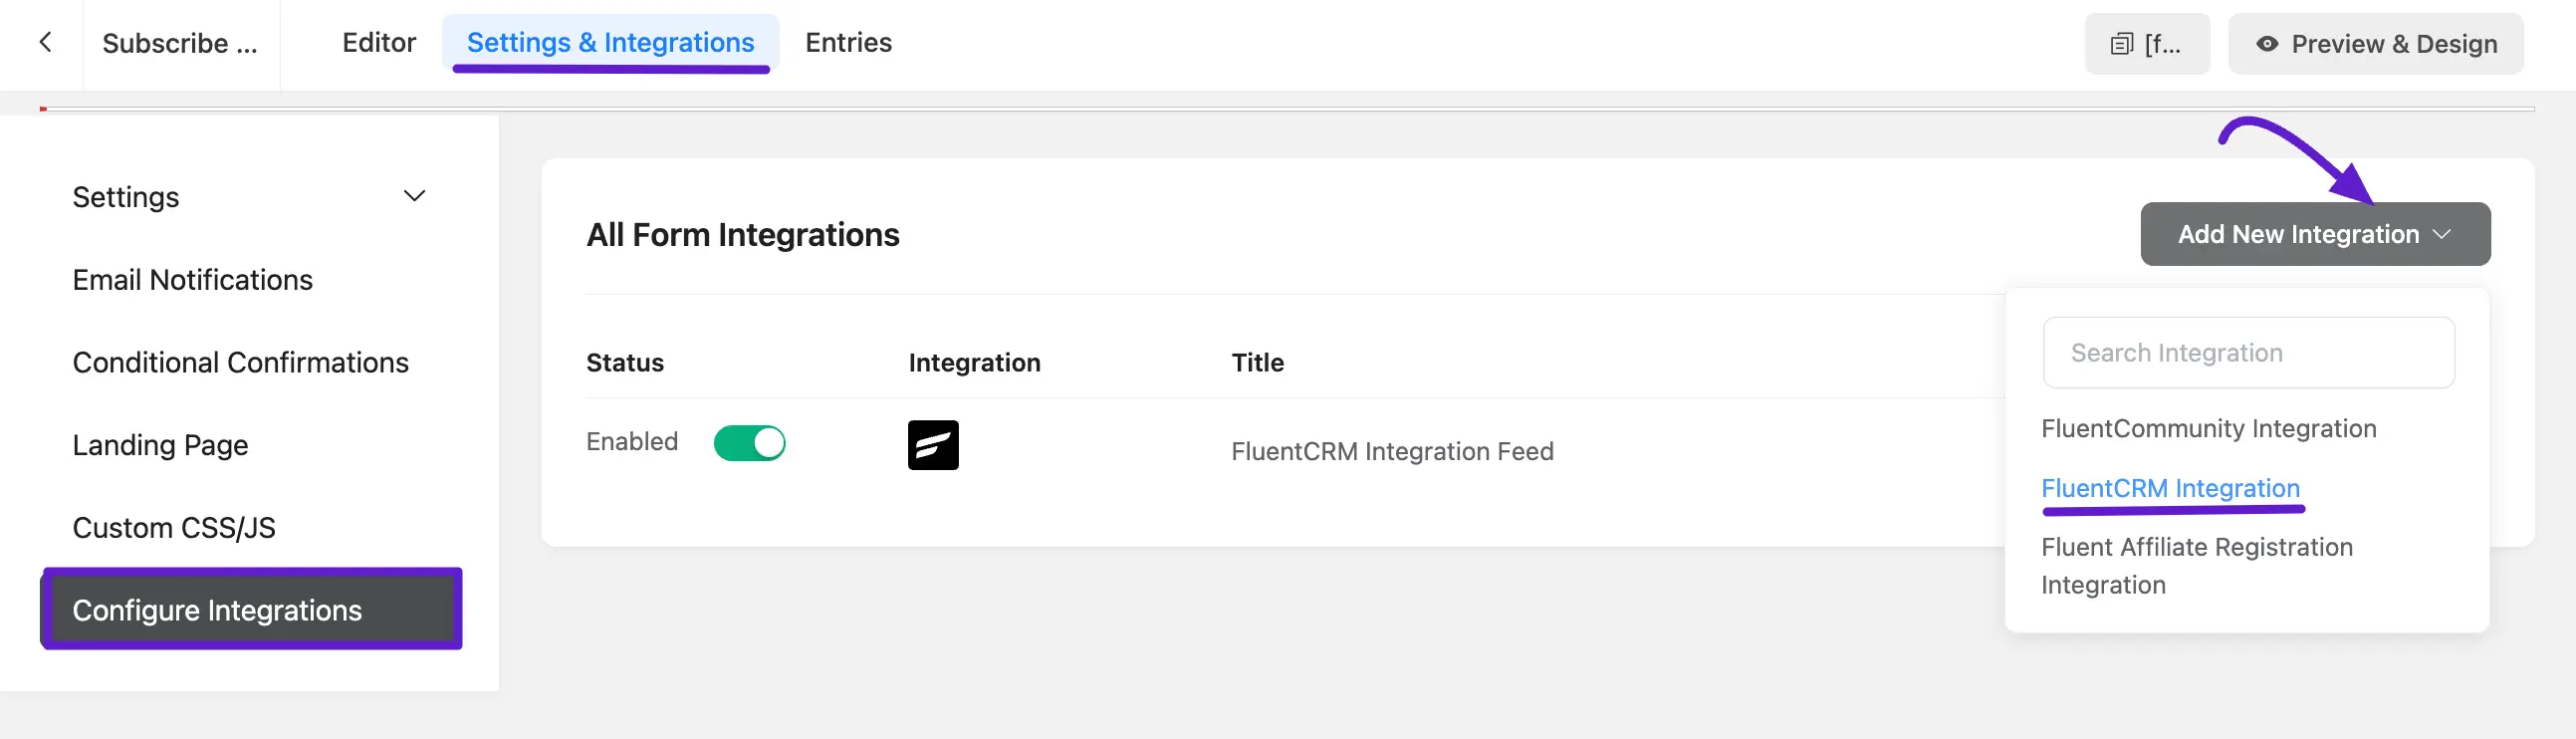
After selecting the FluentCRM integration, you need to configure the feed settings to connect your form with FluentCRM properly.
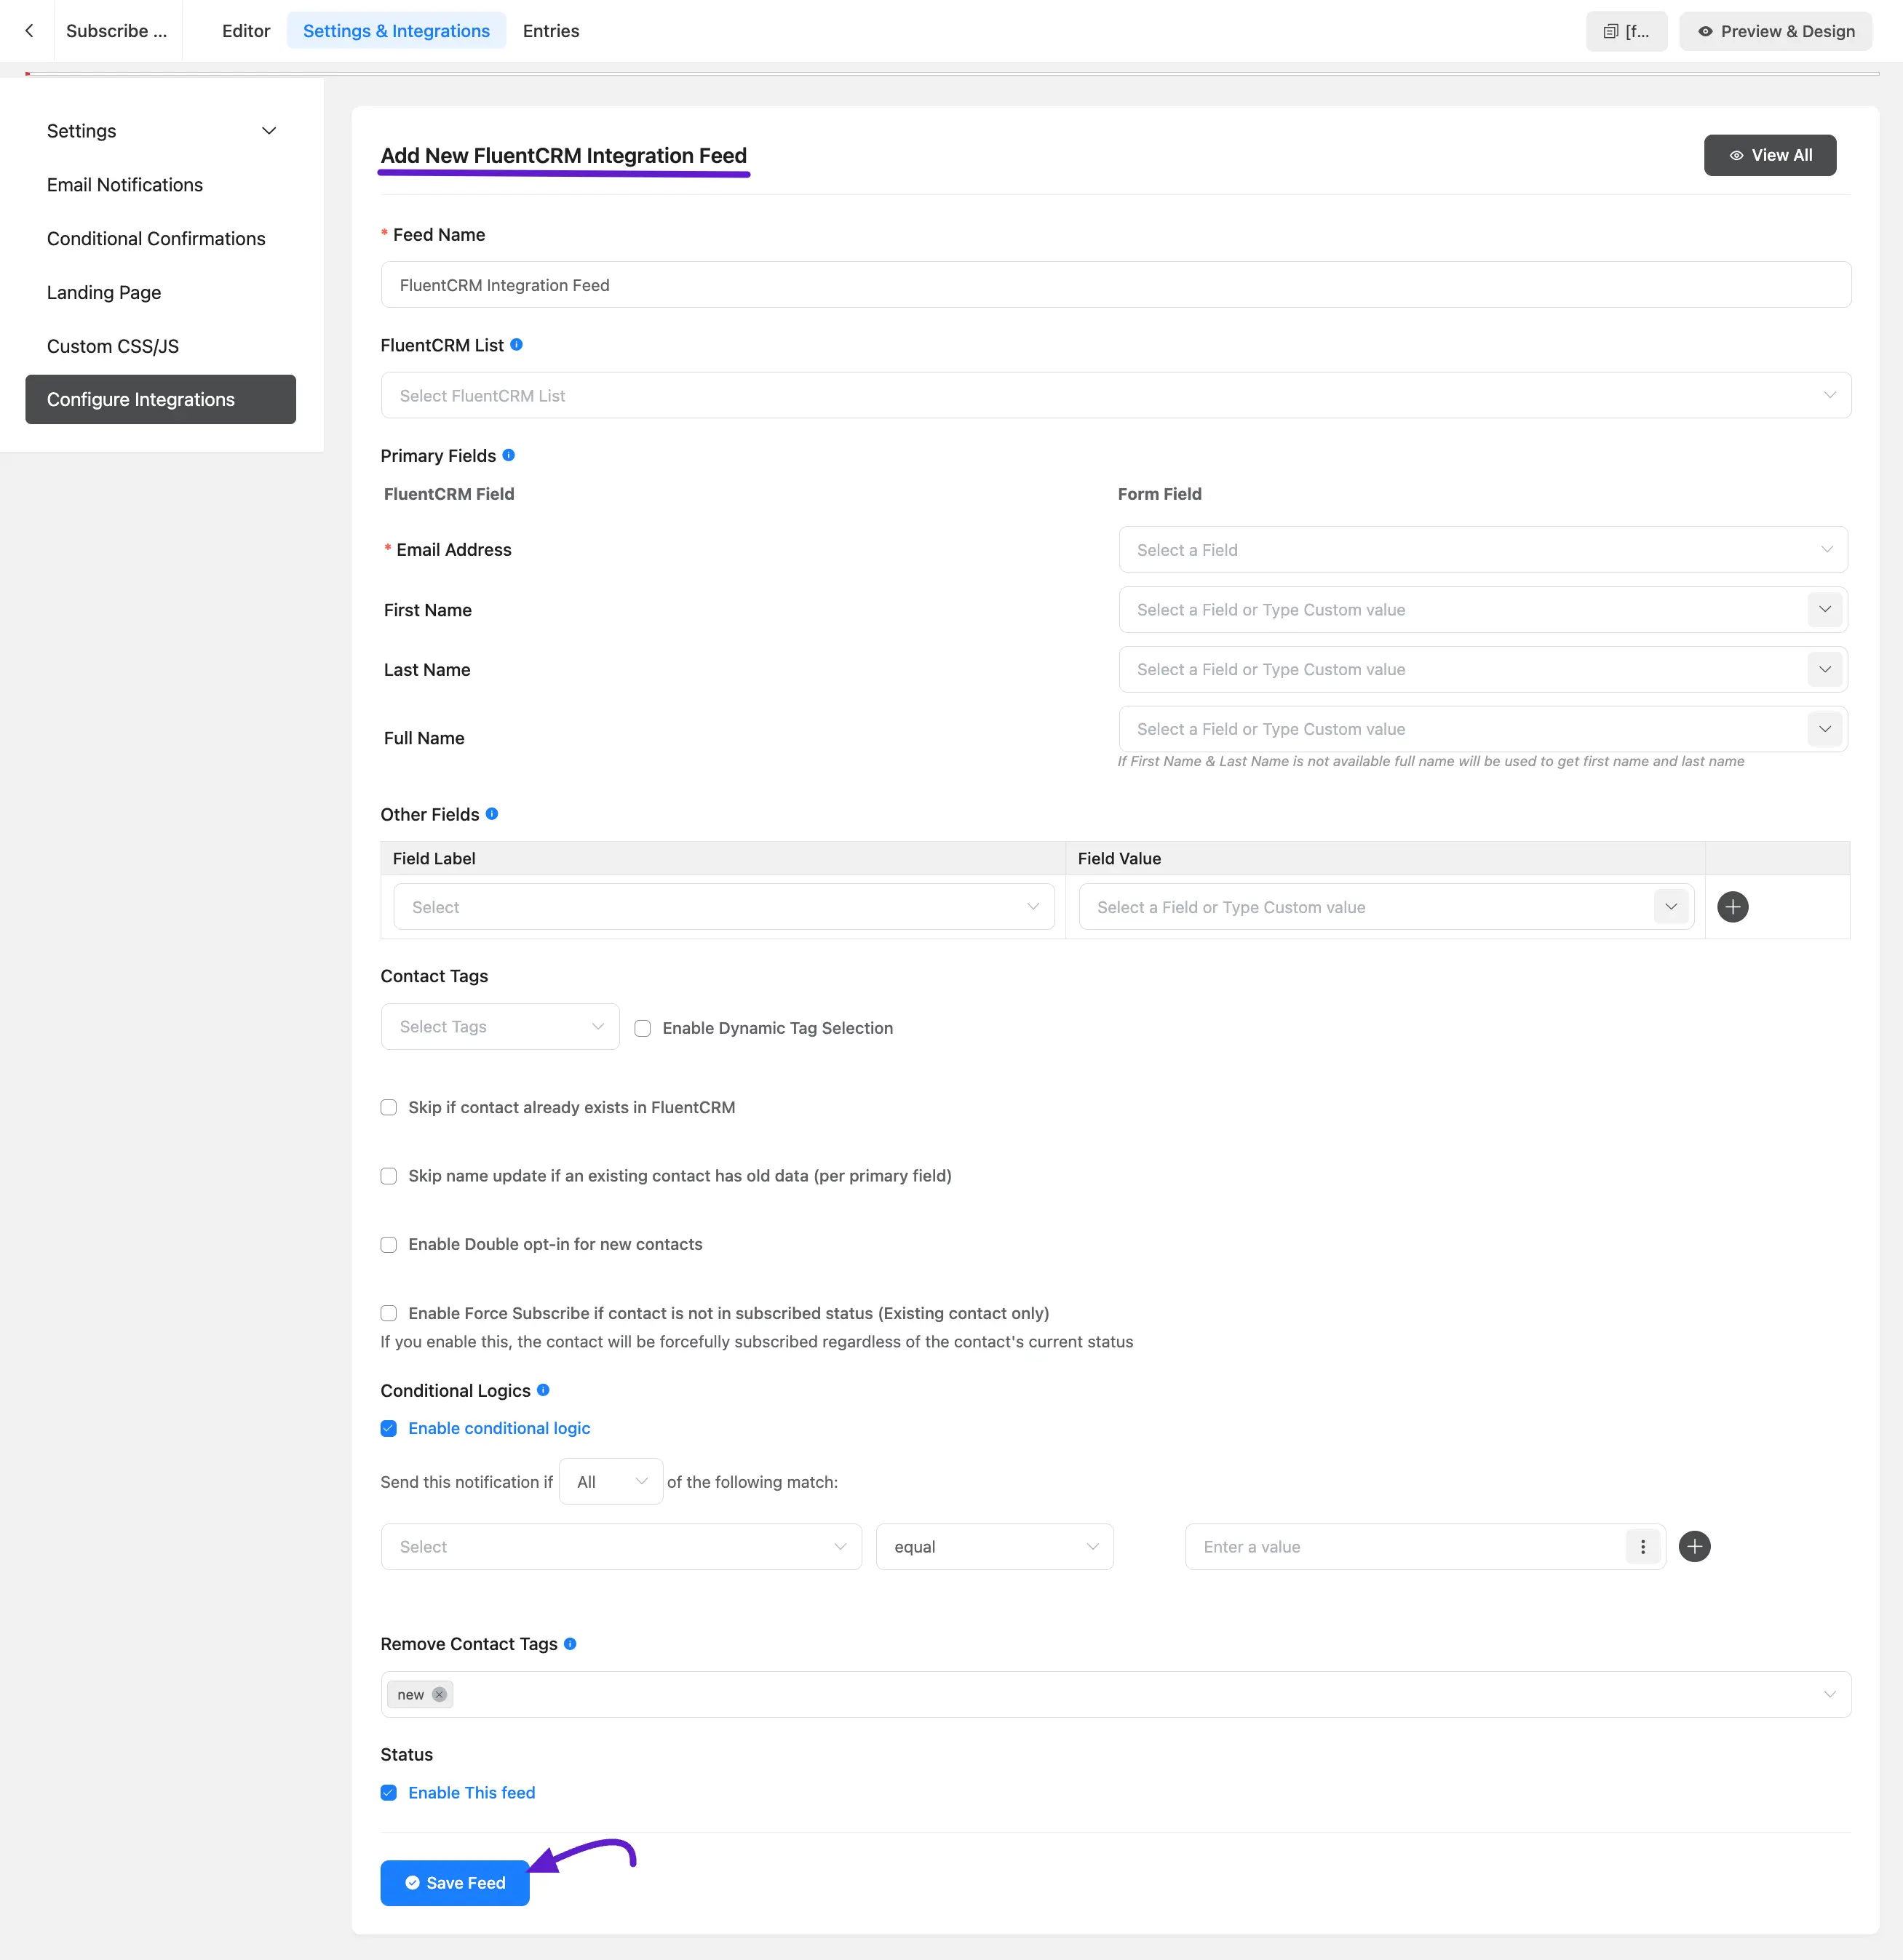
A. Feed Name: Enter a name for your integration feed. This is for internal use and helps you identify the feed later.
B. FluentCRM List: Select the FluentCRM contact list where the submitted contacts will be added. You can change this list anytime if needed.
C. Primary Fields: Map the required FluentCRM fields with your form fields.
- Email Address is required.
- You can also map First Name, Last Name, or Full Name. Use the dropdown to select form fields or add custom values.
D. Other Fields: Here, you can map additional form fields to FluentCRM fields. Click the Plus (+) icon to add more field mappings as needed.
E. Contact Tags: Select one or multiple tags to assign to the contact in FluentCRM.
- Enable Dynamic Tag Selection: Turn this on if you want to assign tags dynamically based on conditions.
- Skip if contact already exists: Prevents duplicate contacts in FluentCRM.
- Skip name update if contact has old data: Keeps existing contact names unchanged even if new data is submitted.
- Enable Double Opt-in: Sends a confirmation email to new contacts before marking them as subscribed.
- Enable Force Subscribe: Automatically subscribes existing contacts who are not currently subscribed.
F. Conditional Logic: Enable this option if you want the integration to run only when certain conditions are met based on form submission data.
- Filtering: You can set conditions to only allow submissions from specific countries or based on other field values.
- Multiple Feeds: Create separate feeds for different scenarios. For example, if a user selects "List A" from a dropdown, one feed triggers; if they select "List B," a completely different feed processes the data.
G. Remove Contact Tags: Select tags that should be removed from the contact when this feed runs.
H. Status: Enable this Feed to activate the integration.
Once you have configured all the settings, click the Save Feed button to complete your FluentCRM integration setup.
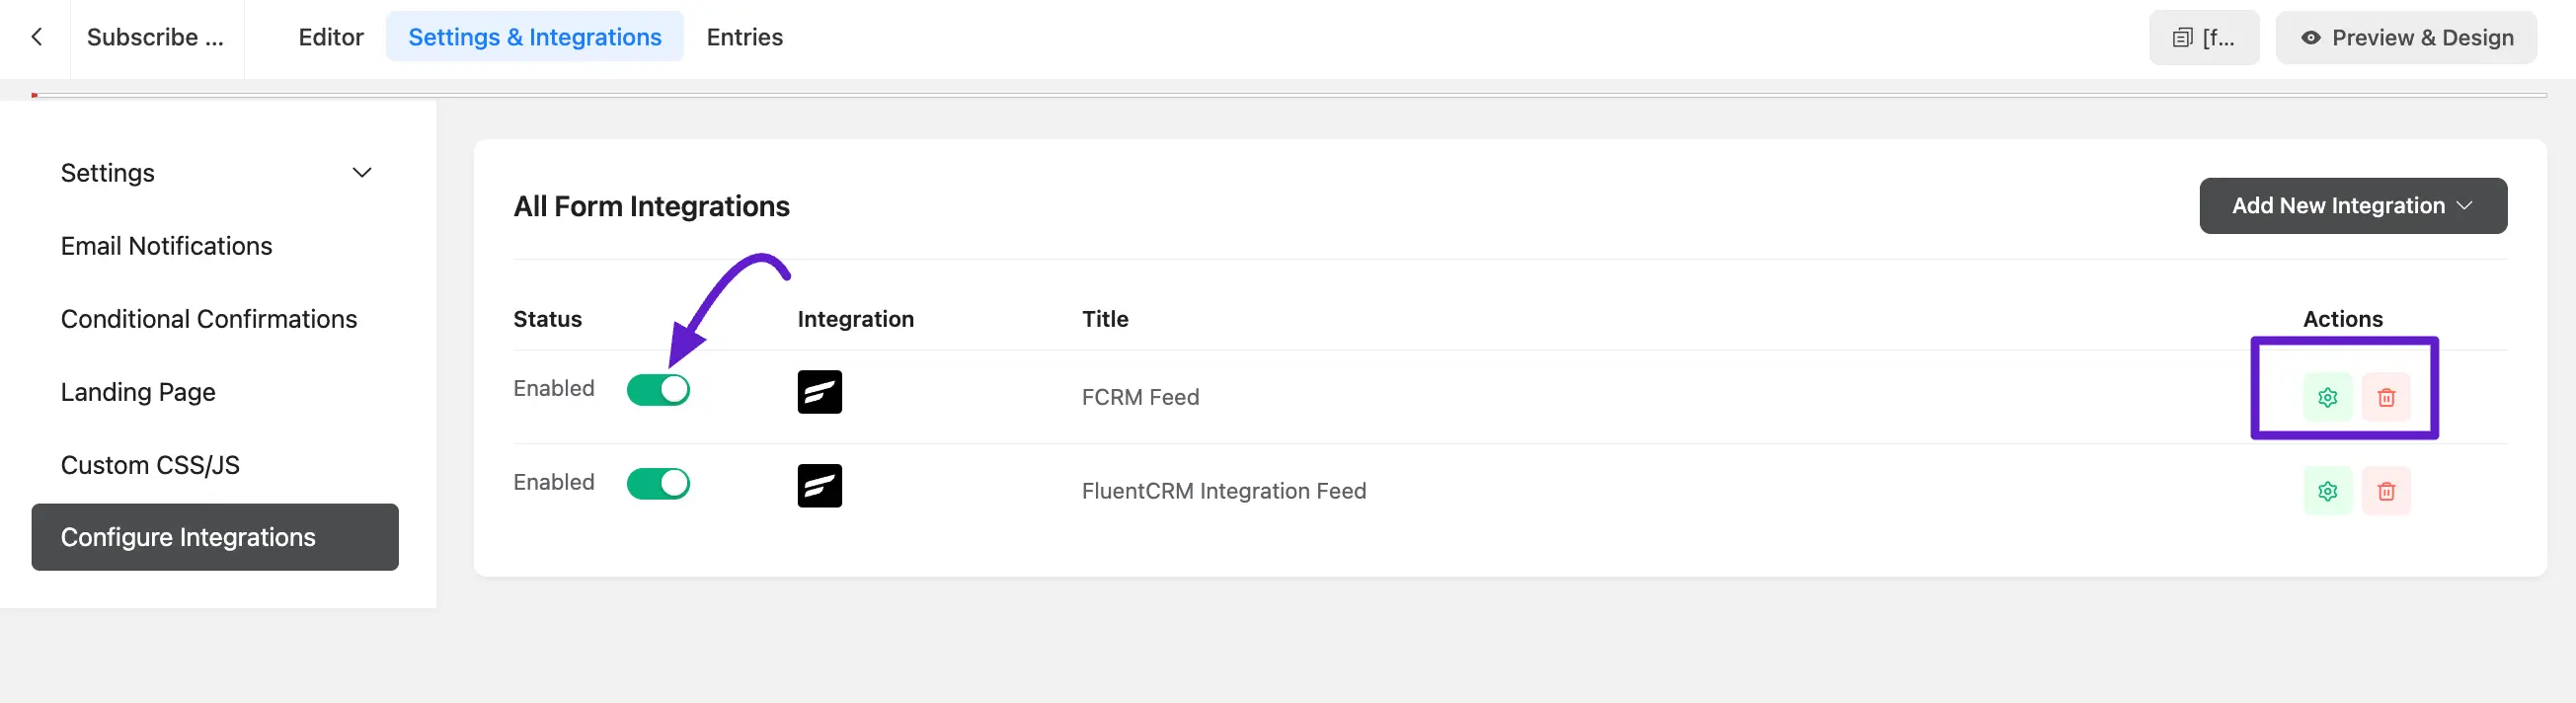
Afetr setup you FluentCRM feed, you can Disable or Enable your feed here. Also, you can Edit or Delete this feed by clicking this Setting and Delete icon.
Verifying the Advanced Setup
Once configured, embed your form and perform a test submission.
- Check Entries: Confirm the data appears in Fluent Forms ➜ Entries.
- Verify Feed Status: Ensure the log shows a "success" message for the CRM integration.
- Confirm in CRM: Search for the contact in FluentCRM ➜ Contacts to verify that address data, dynamic tags, and lists have been applied correctly.
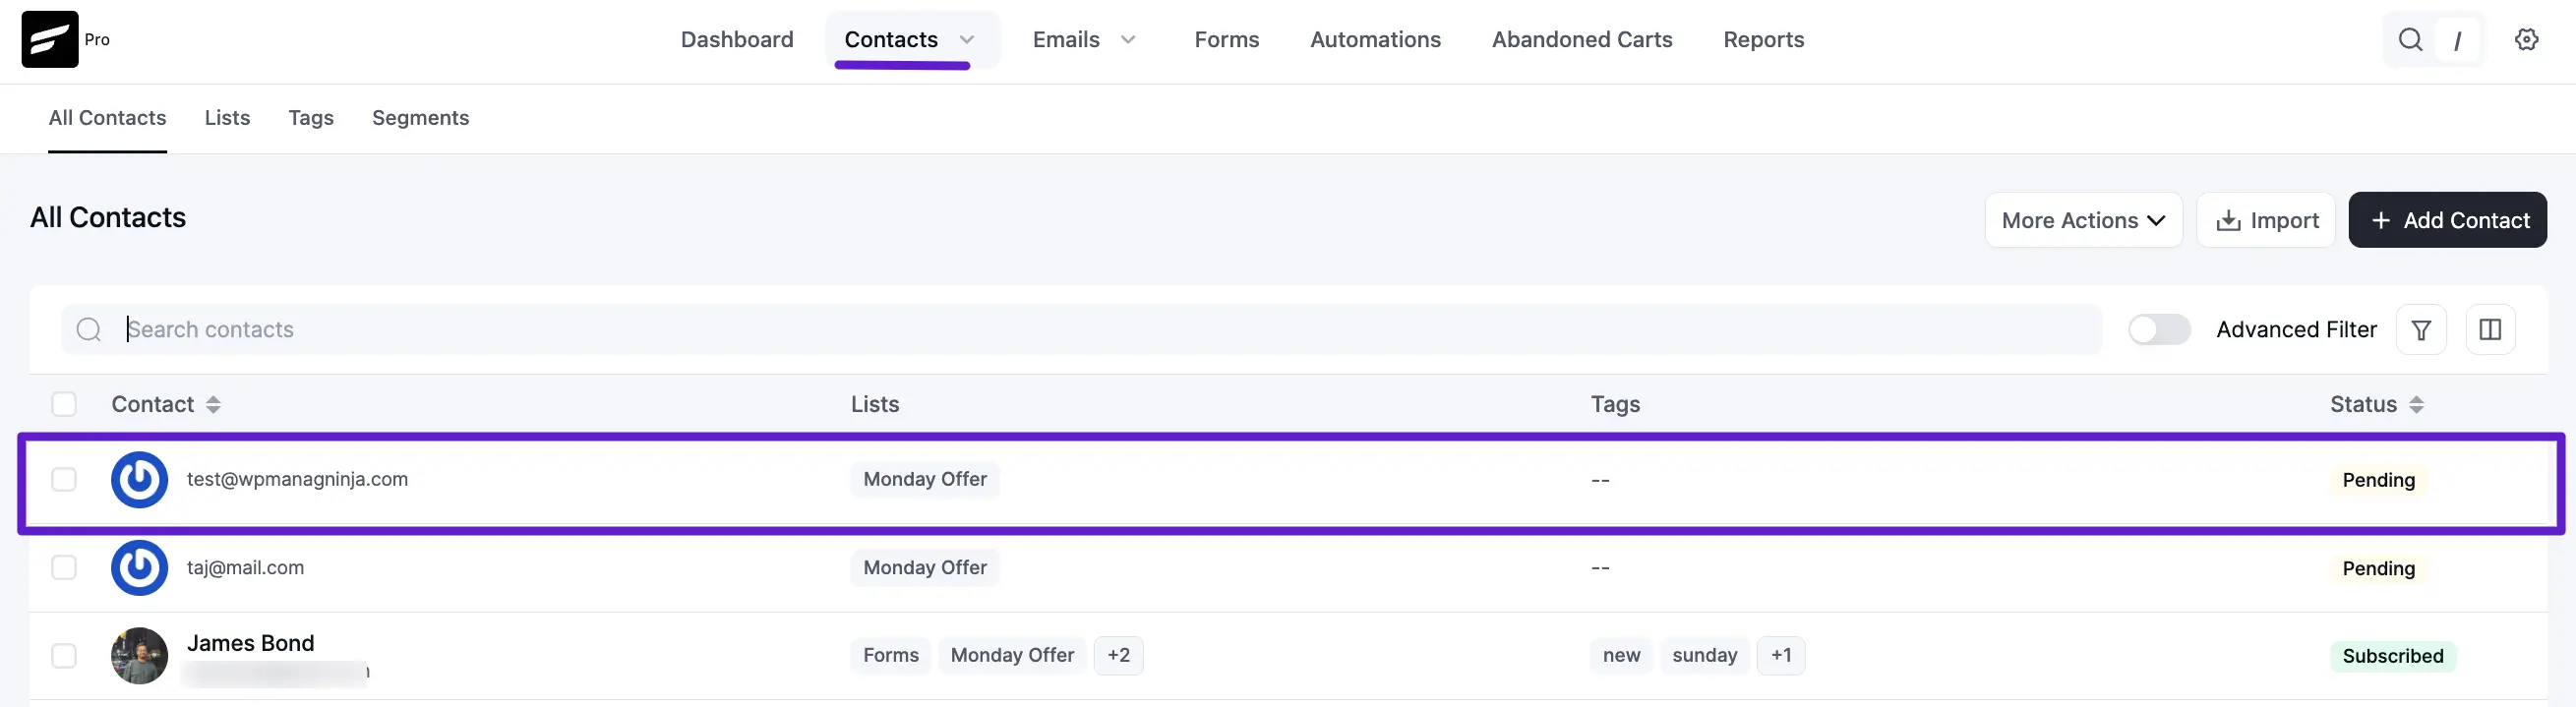
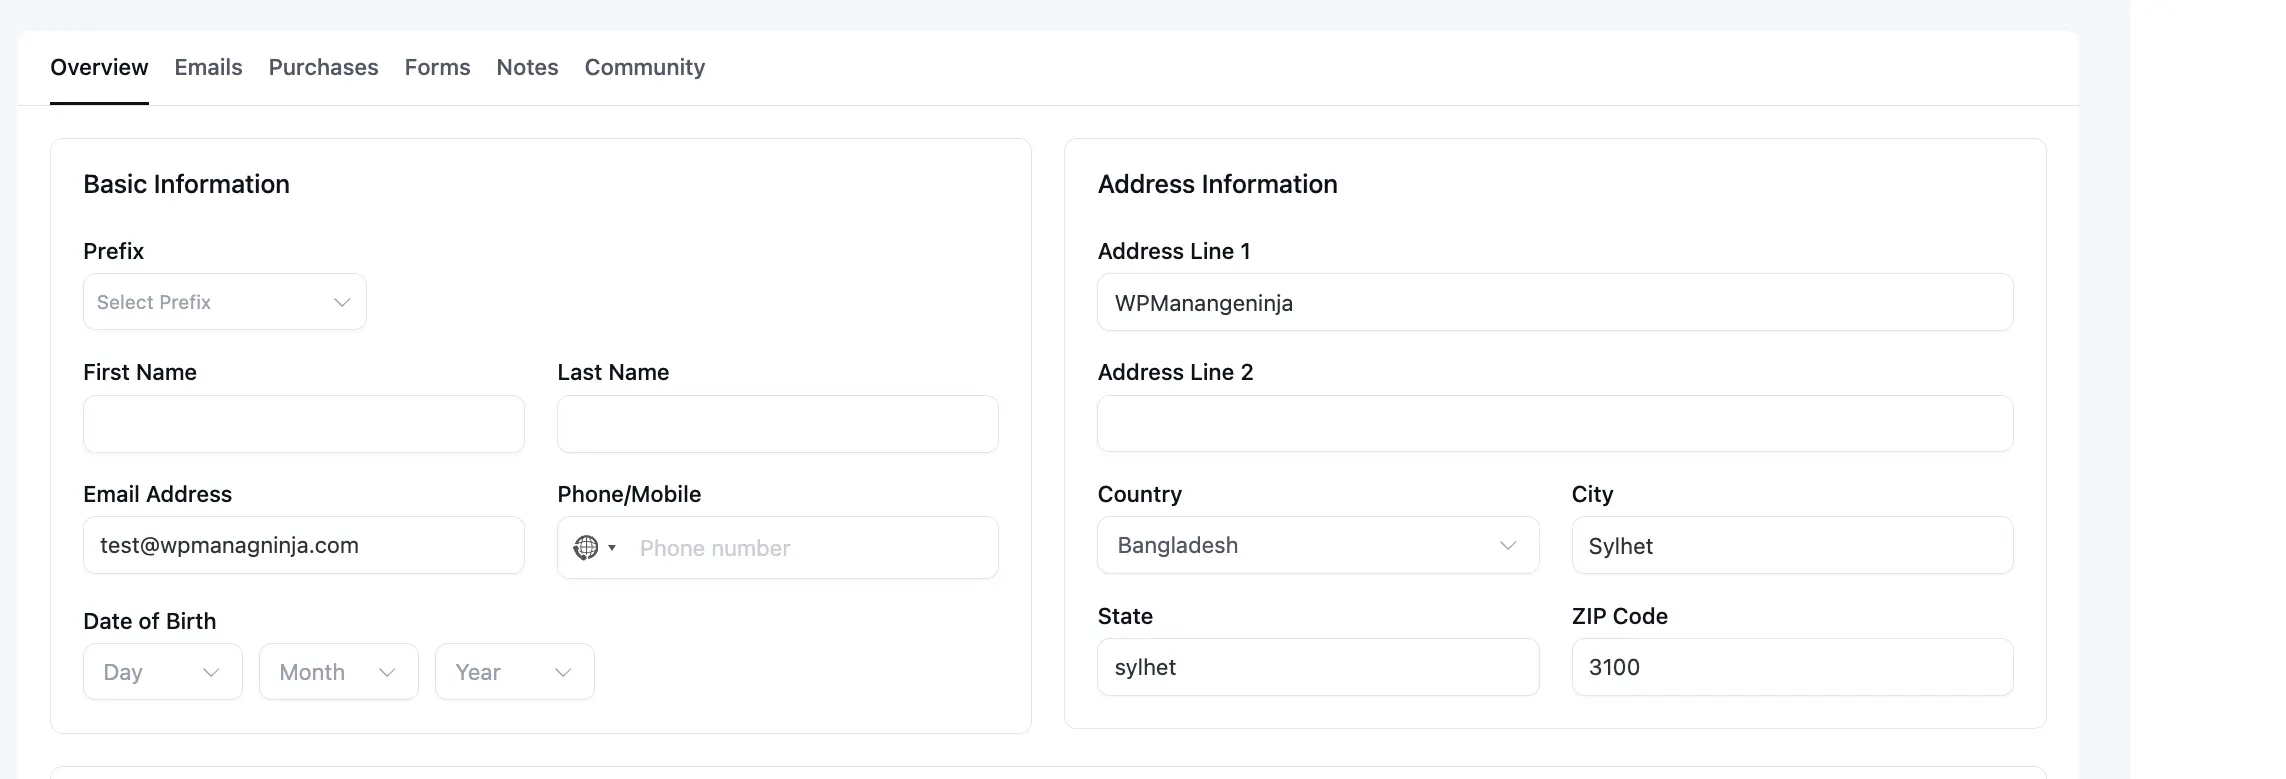
To test out the conditions we just set in an advanced way, The form is submitted with the Country set to Bangladesh with a logged-in user. So
- The Form is submitted for the contact in Bangladesh,
- Double Opt-in for Form Submission processing was not done as the submitter is already logged in to the website,
- Data fed to FluentCRM matching conditional logic,
- Tag Assigned with Bangladesh,
- Address Information that was mapped stored the submitted address information.
That's all for advanced and extended configuration of Fluent Forms Subscriptions with FluentCRM.