Appearance
SMS Automation
FluentCRM’s most powerful feature is its ability to run Automated Actions based on events that occur on your WordPress site. With these automations, FluentCRM can instantly respond to user activity, apply conditions, and take the right actions completely hands-off.
In this guide, you’ll learn how to create new automations and how to integrate the Send a SMS action into your funnels. Using the Automation Editor, you can pick a trigger, add actions and conditions, and define exactly how your automation should flow from start to finish.
NOTE
Before adding the "Send a SMS" action, users must have an active SMS provider (like Twilio or Amazon End User Messaging) configured in FluentCRM Settings > SMS Settings, or the action will not function.
Creating A New Automation Funnel
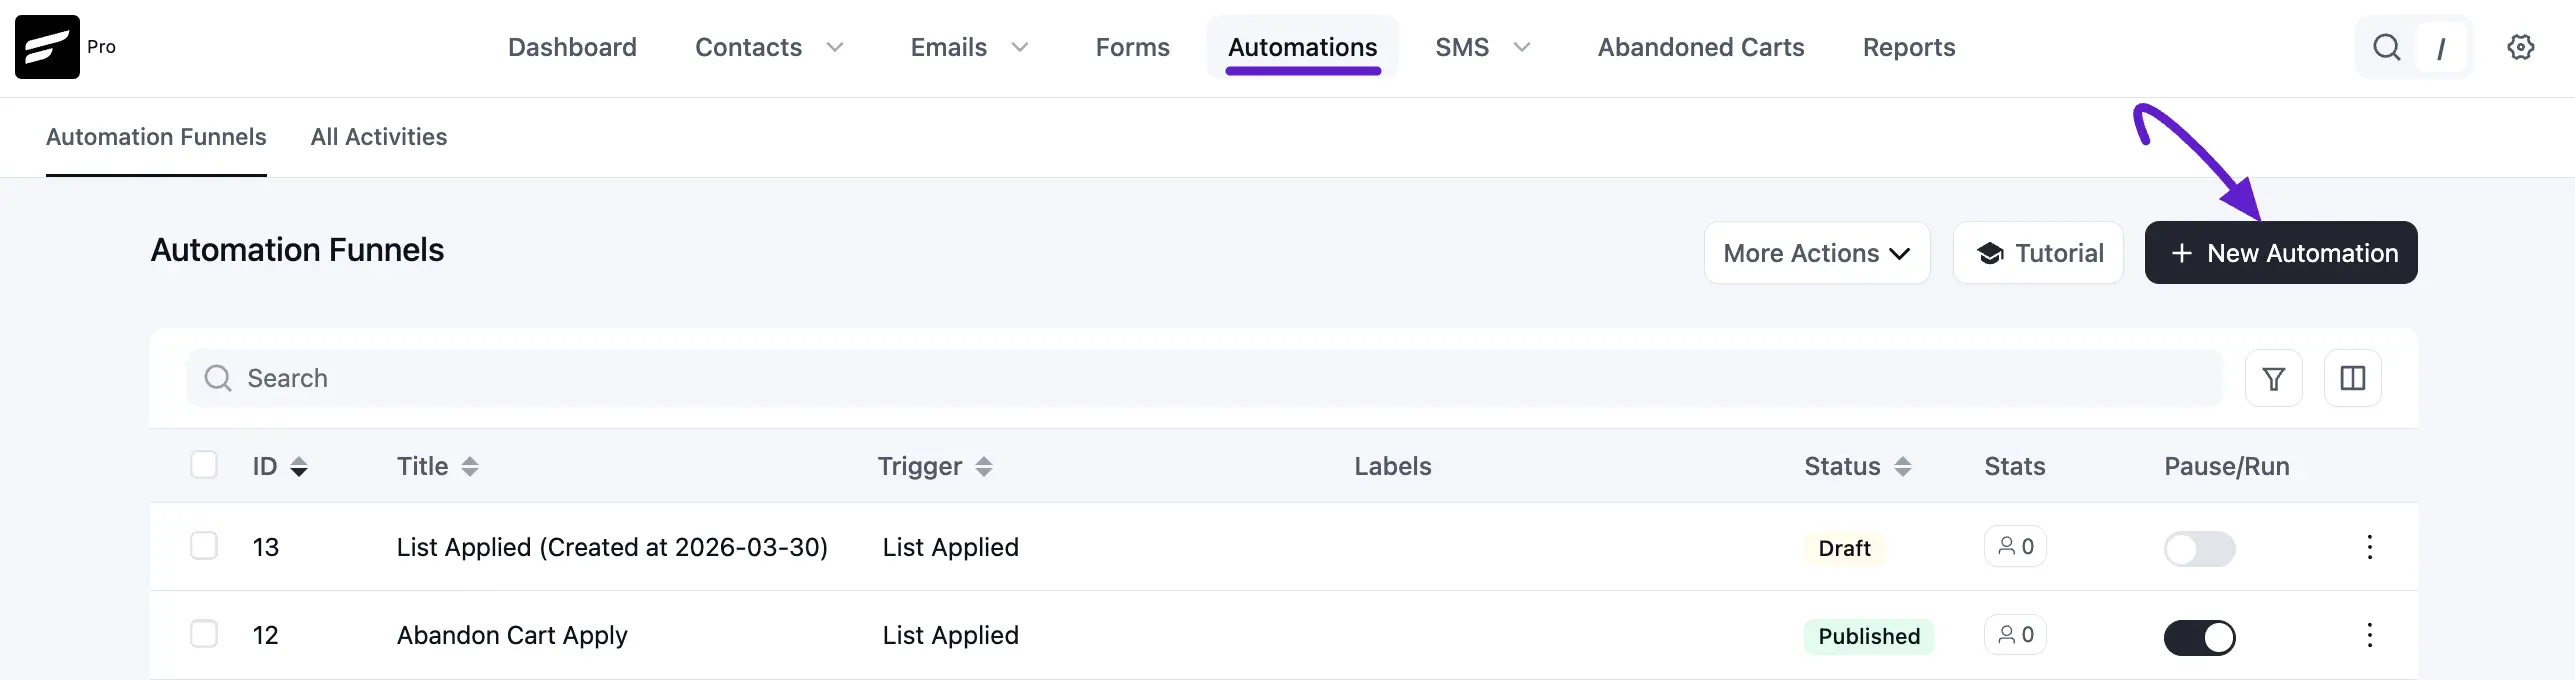
First, navigate to the Automations section from the FluentCRM sidebar and click on + New Automation.
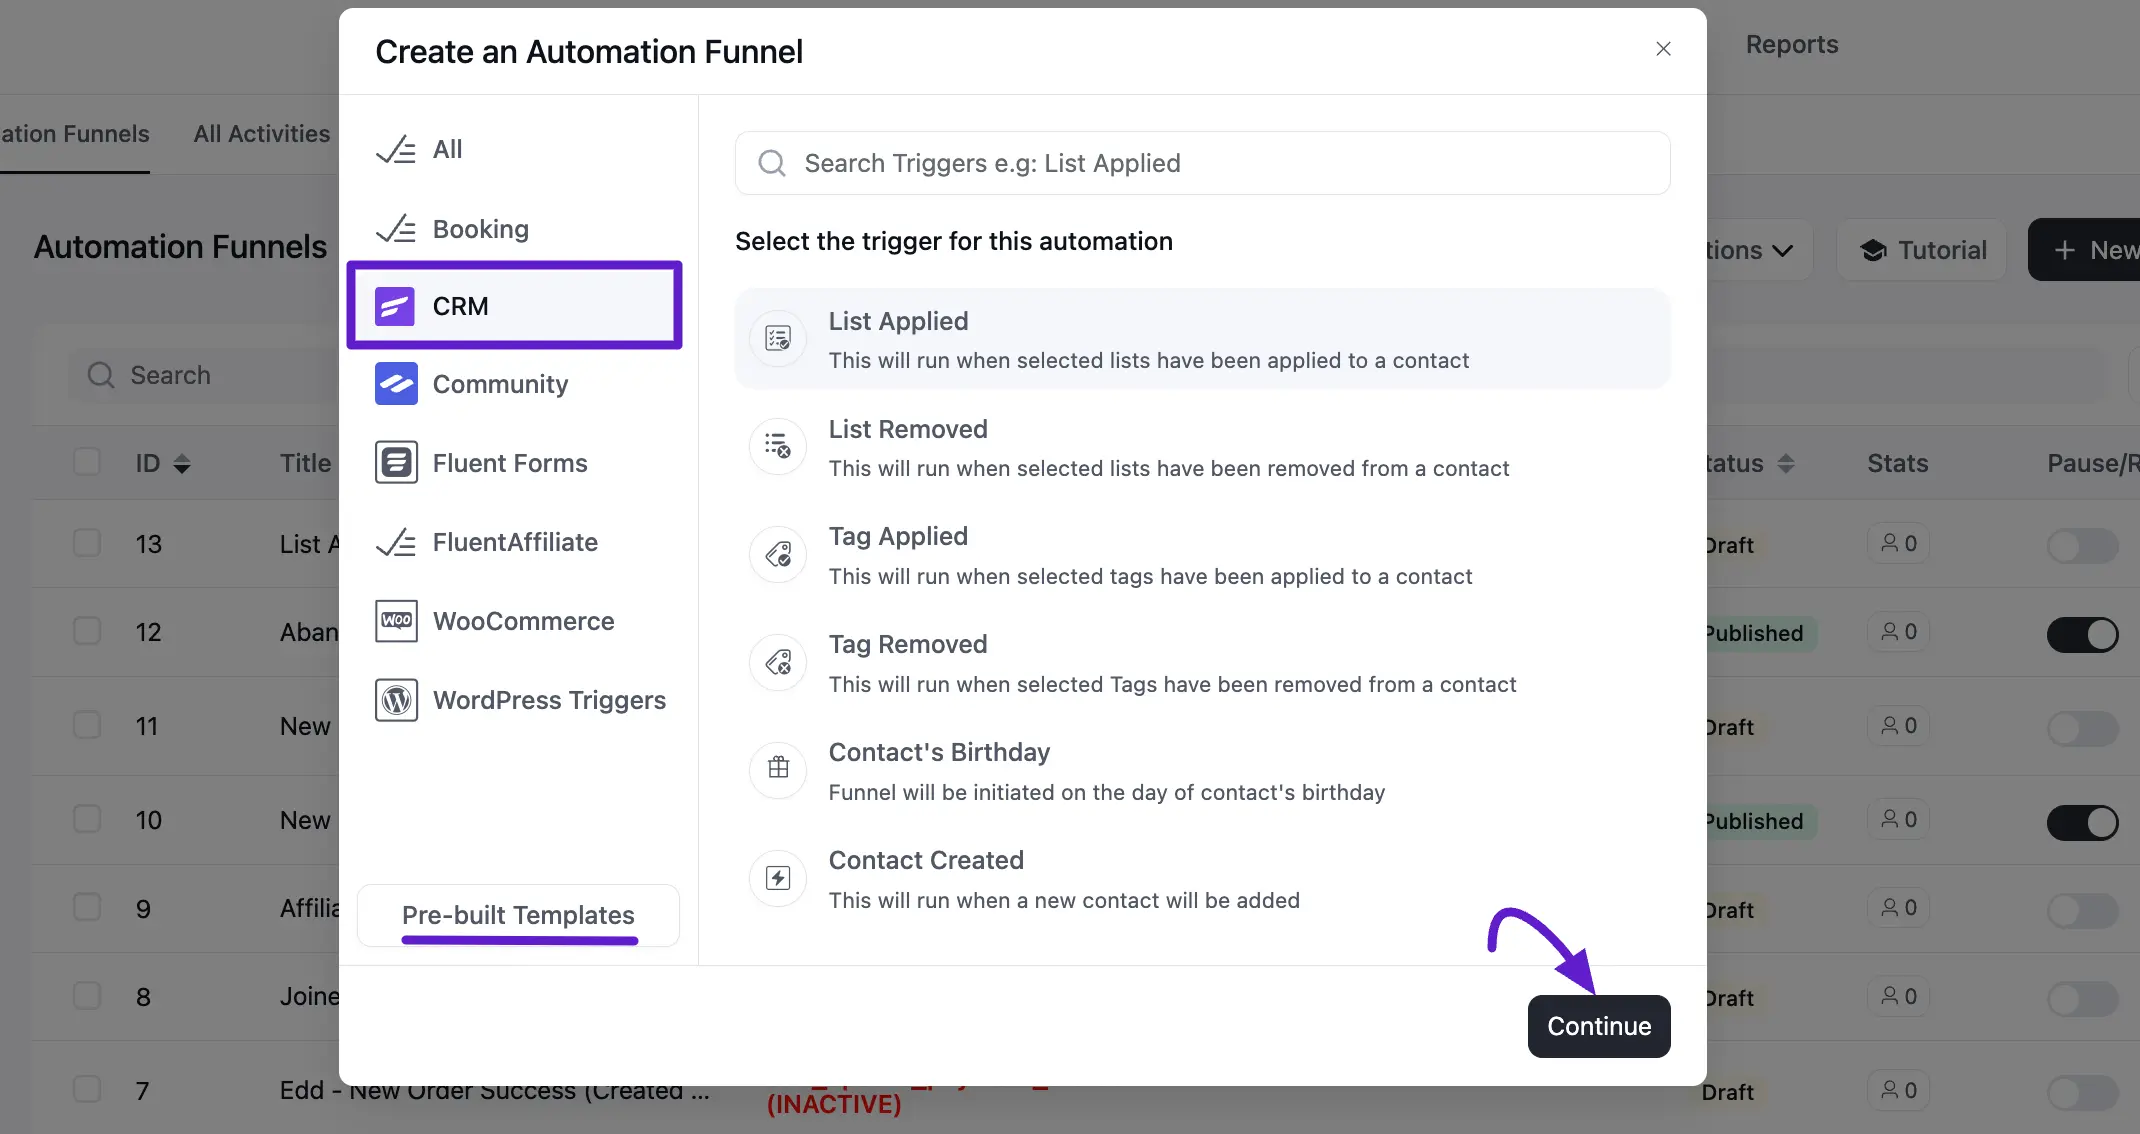
A pop-up will appear with various categories for triggers, such as CRM, Community, Fluent Forms, and WordPress Triggers.
Choose a category and select the Trigger that suits your needs. For example, selecting CRM allows you to choose triggers like List Applied, Tag Applied, or Contact Created. You can also choose Pre-Built Templates here.
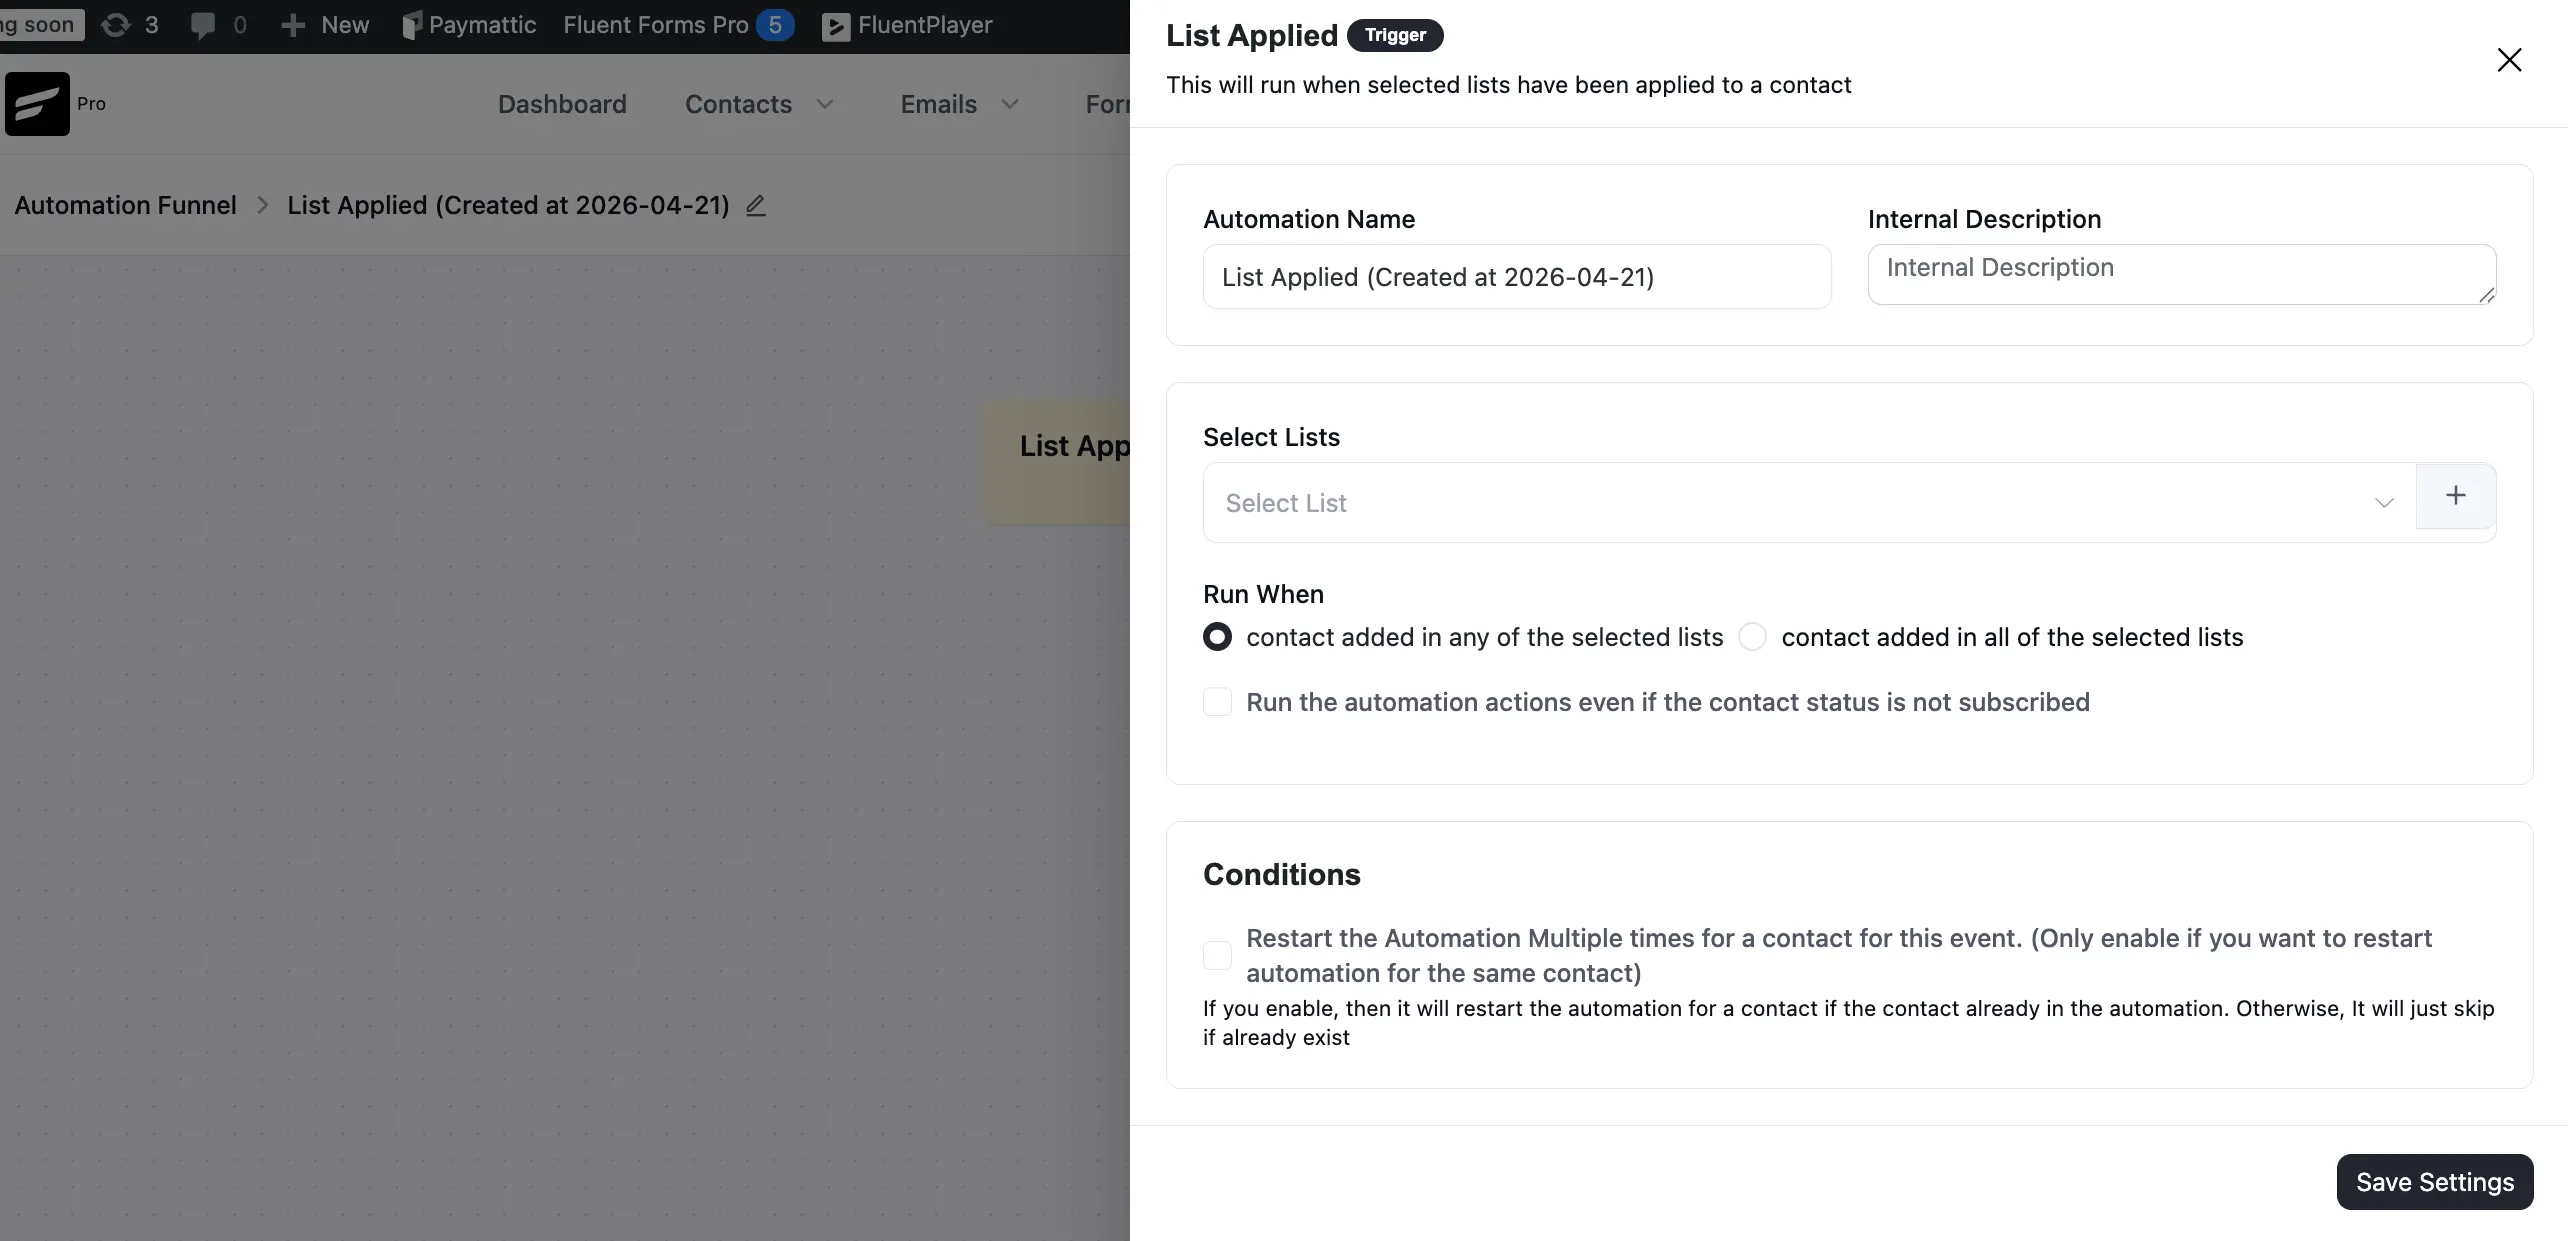
Now, give and Automation Name for easy referencing and click the Save Settings button. Once the trigger is saved, you will be redirected to the Automation Editor screen.
Adding the 'Send a SMS' Action to the Workflow
Once your trigger is set, you can add the SMS action to your funnel:
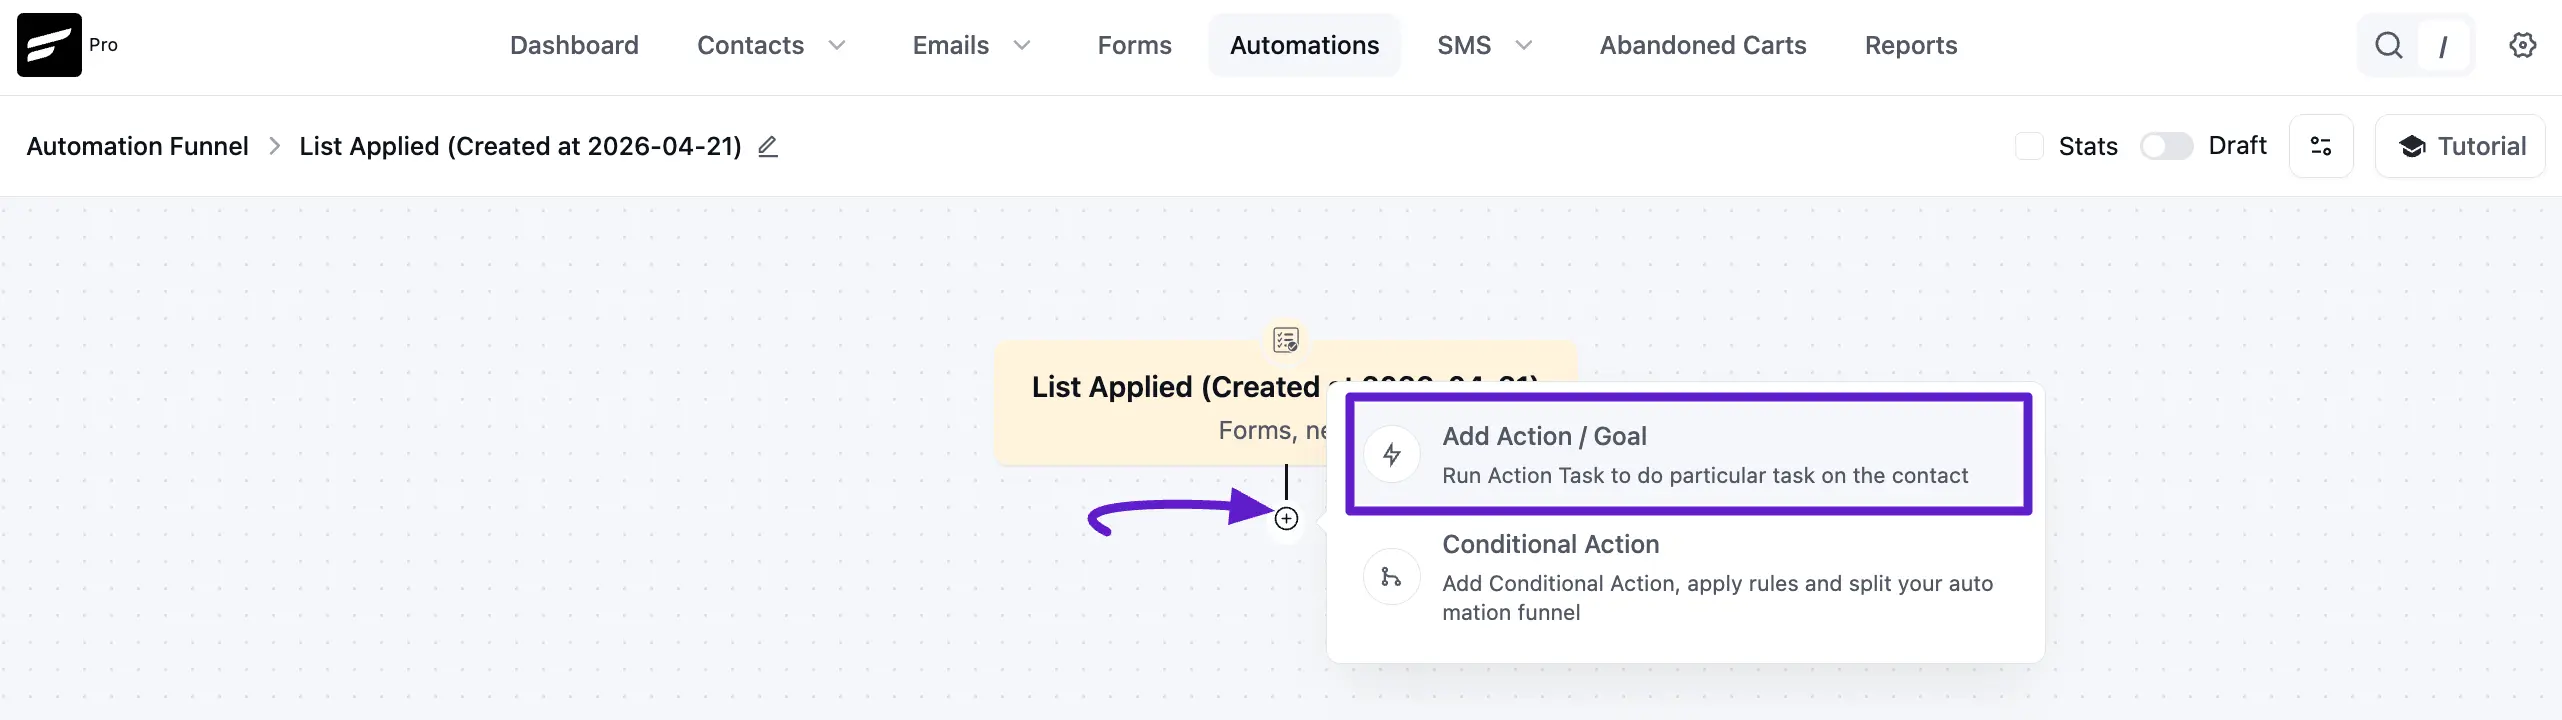
In the Automation Editor, click the Plus (+) Icon situated on the path where you want the message to be sent. Choose Add Action / Goal from the menu to open the selection of Action Blocks.
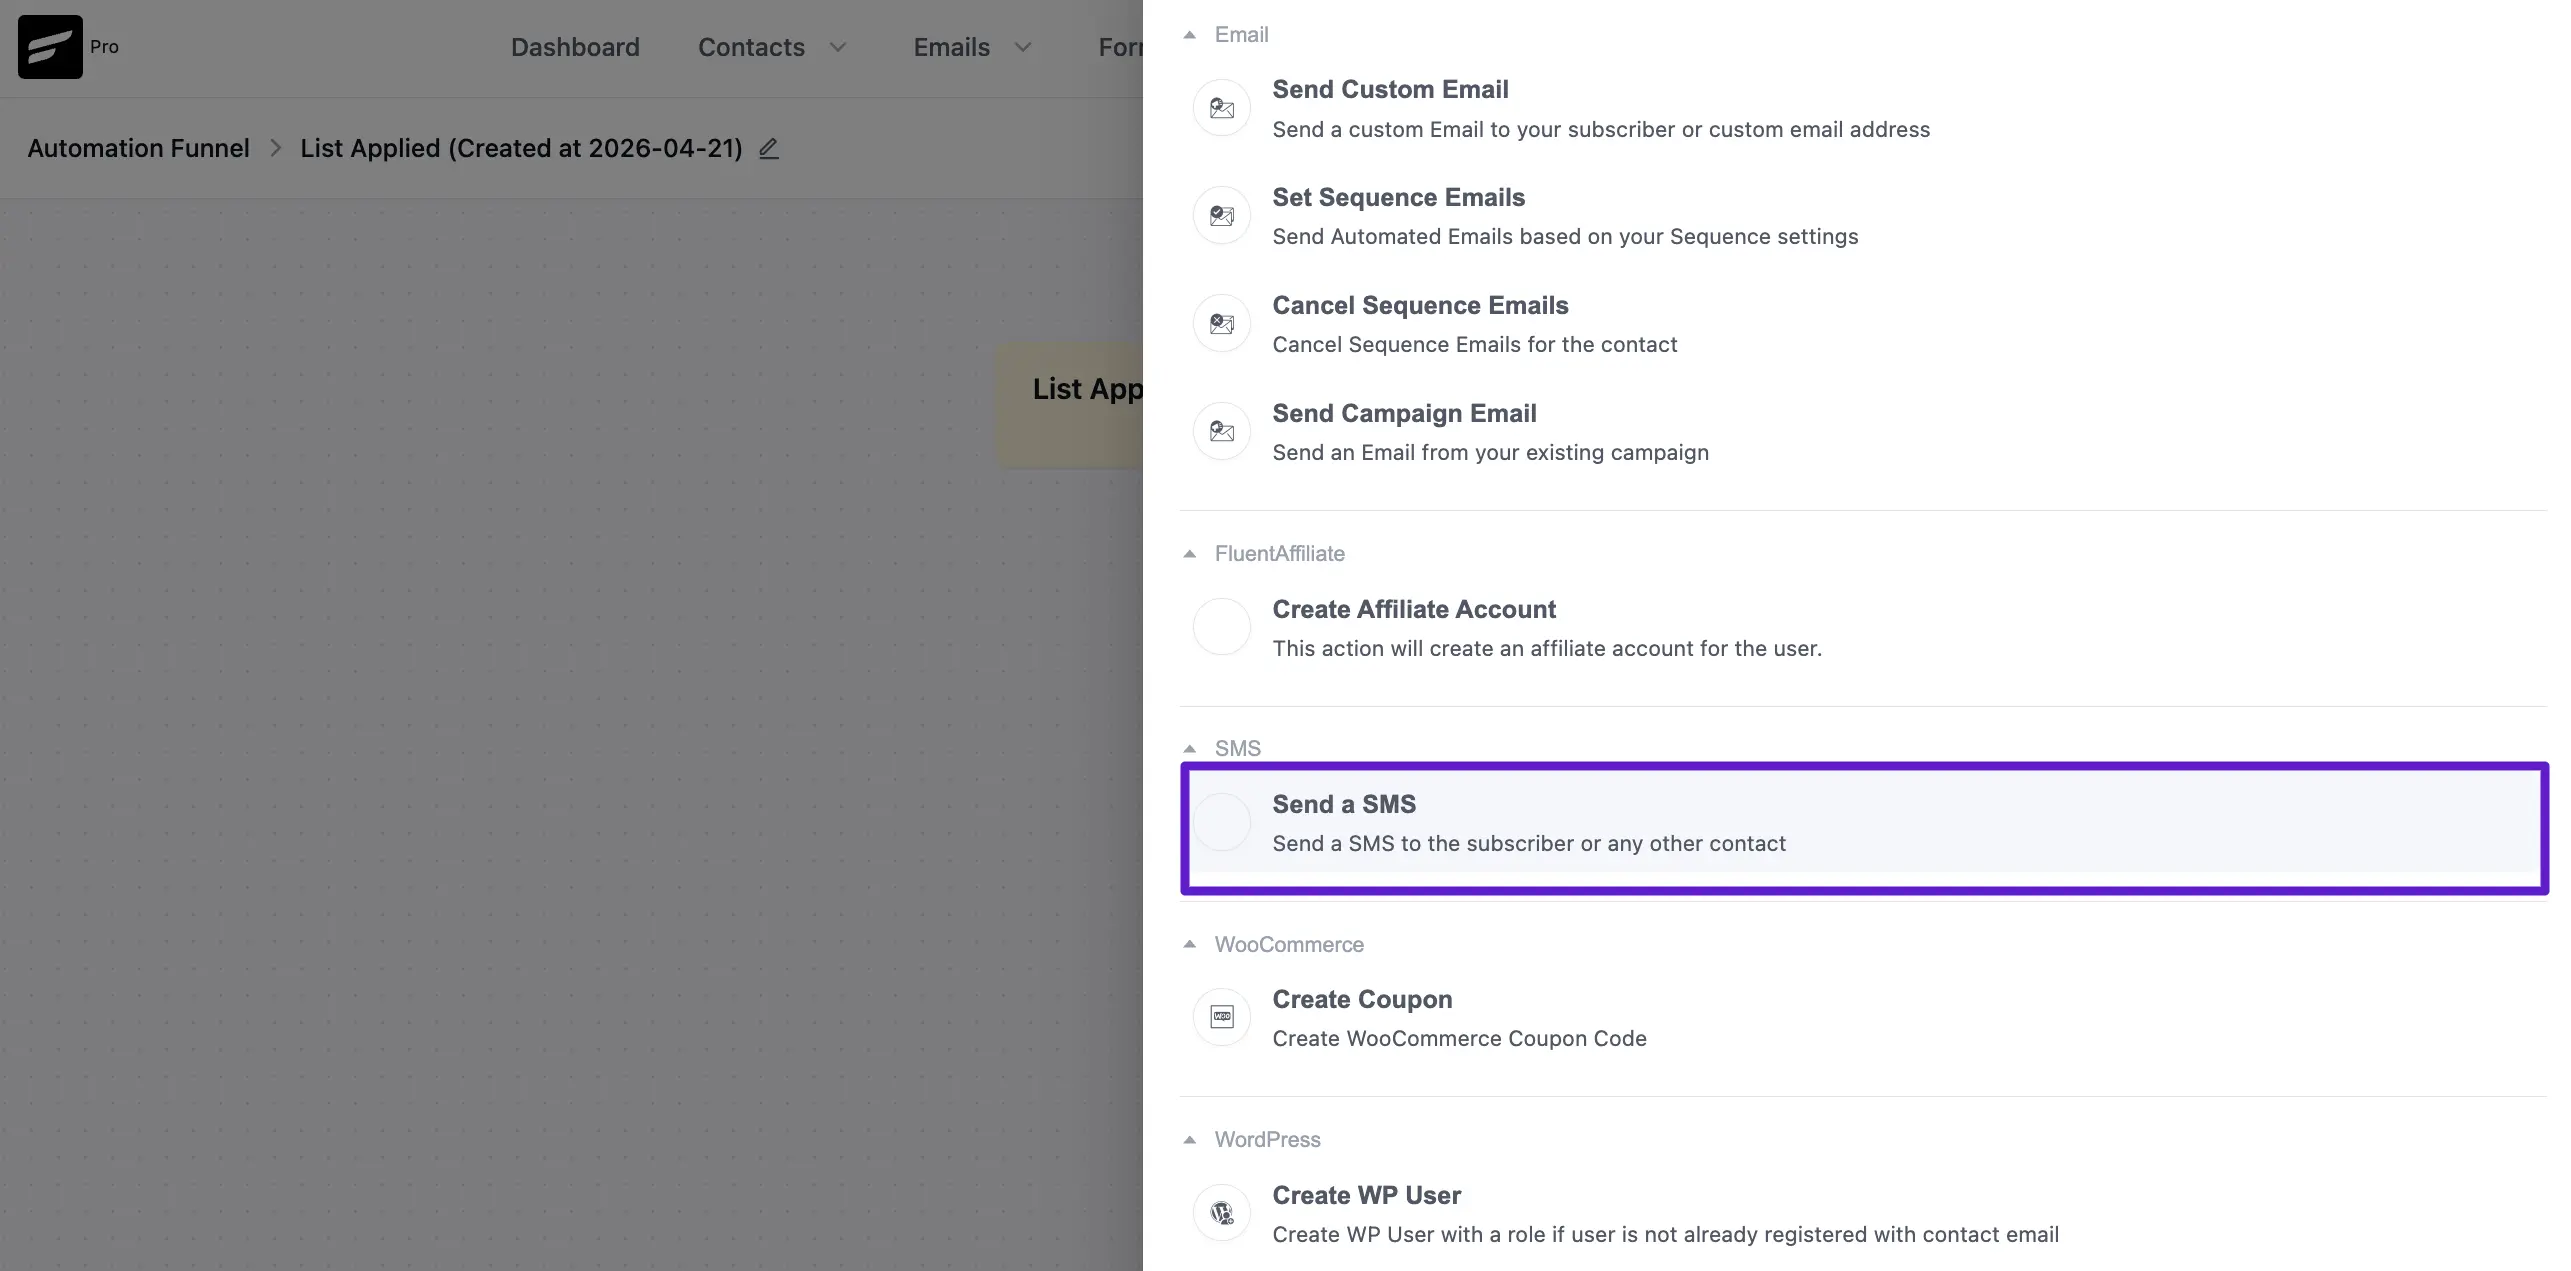
Now, scroll down to the SMS section and select the Send a SMS action block.
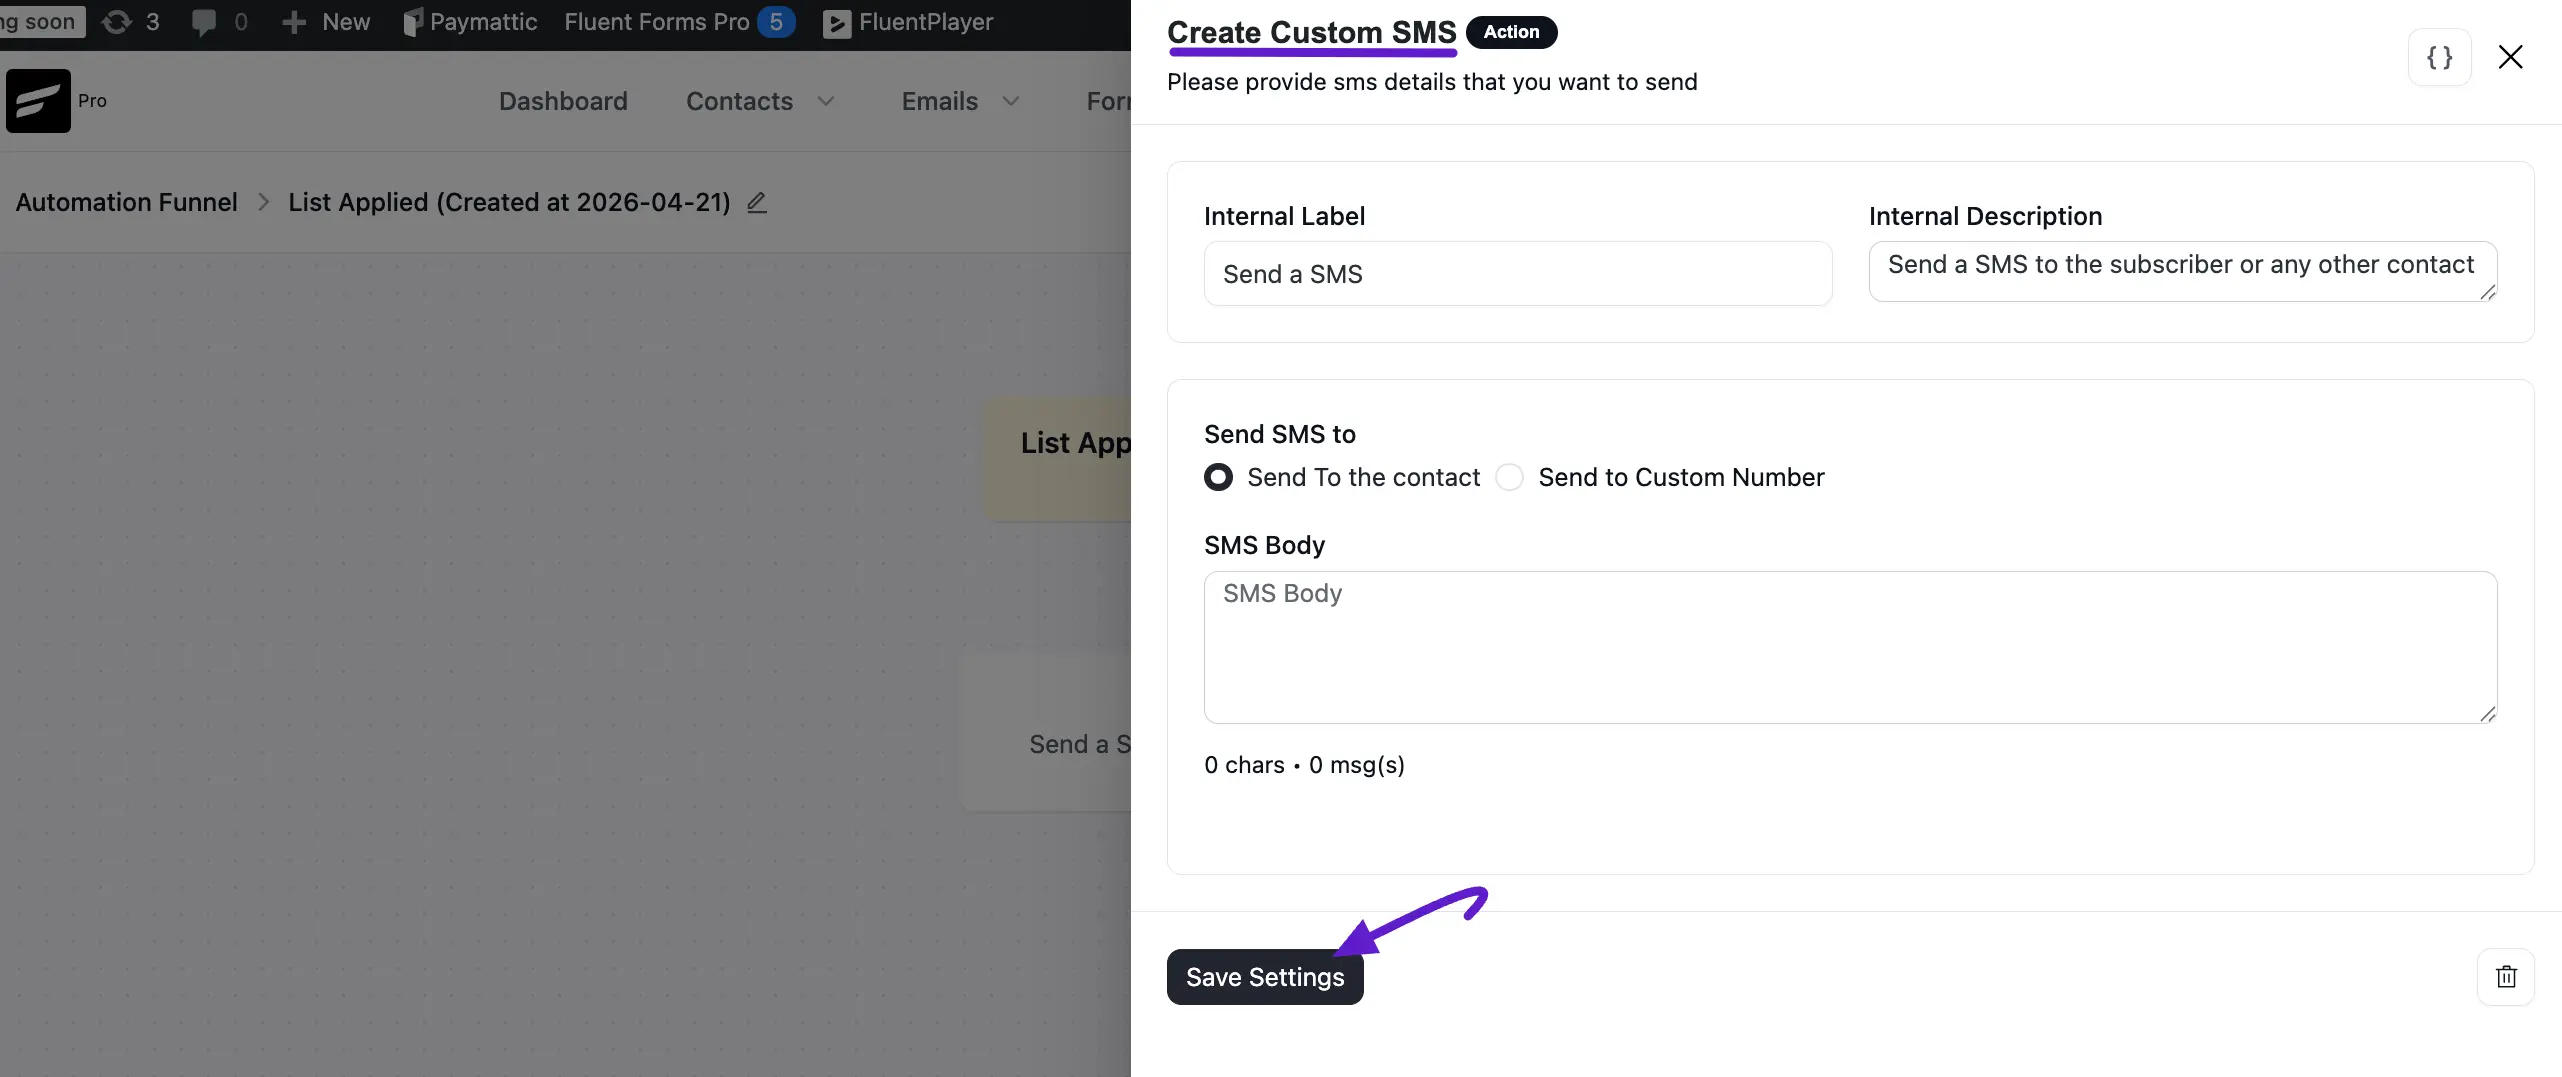
A configuration panel titled "Create Custom SMS" will appear on the right side. Fill in the following fields:
- Internal Label & Description: Provide a name and short description for this specific step in your automation.
- Send SMS to: Choose between two options:
- Send To the contact: Sends the message to the phone number stored in the contact's CRM profile.
- Send to Custom Number: Allows you to enter a specific manual number or use a shortcode.
- SMS Body: Enter the text of your message. You can use the SmartCode icon (brackets) to personalize the content with contact-specific data. The editor will display a character and message count below the text area.
NOTE
When using the SmartCode selector (the {} icon), always verify that the selected field (such as {{contact.first_name}}) contains data in your CRM to avoid sending messages with blank spaces.
- Save Settings: Click the Save Settings button to finalize the action.
Activating Your Automation
After building your funnel, ensure it is ready for live use:
- Review the Workflow: Your funnel will now show the Send a SMS block connected to your initial trigger.
- Publish: Toggle the Published switch at the top right of the editor to activate the automation.
- Monitor: Once published, you can view Reports and Stats for the automation directly from this screen.
