Appearance
Migrating from ActiveCampaign to FluentCRM
Moving your marketing operations from ActiveCampaign to FluentCRM is made simple with our direct API integration. This allows you to securely transfer your contacts, lists, and tags without the need for manual CSV exports.
Follow this guide to complete your migration in just a few minutes.
Step 1: Retrieve Your ActiveCampaign API Keys
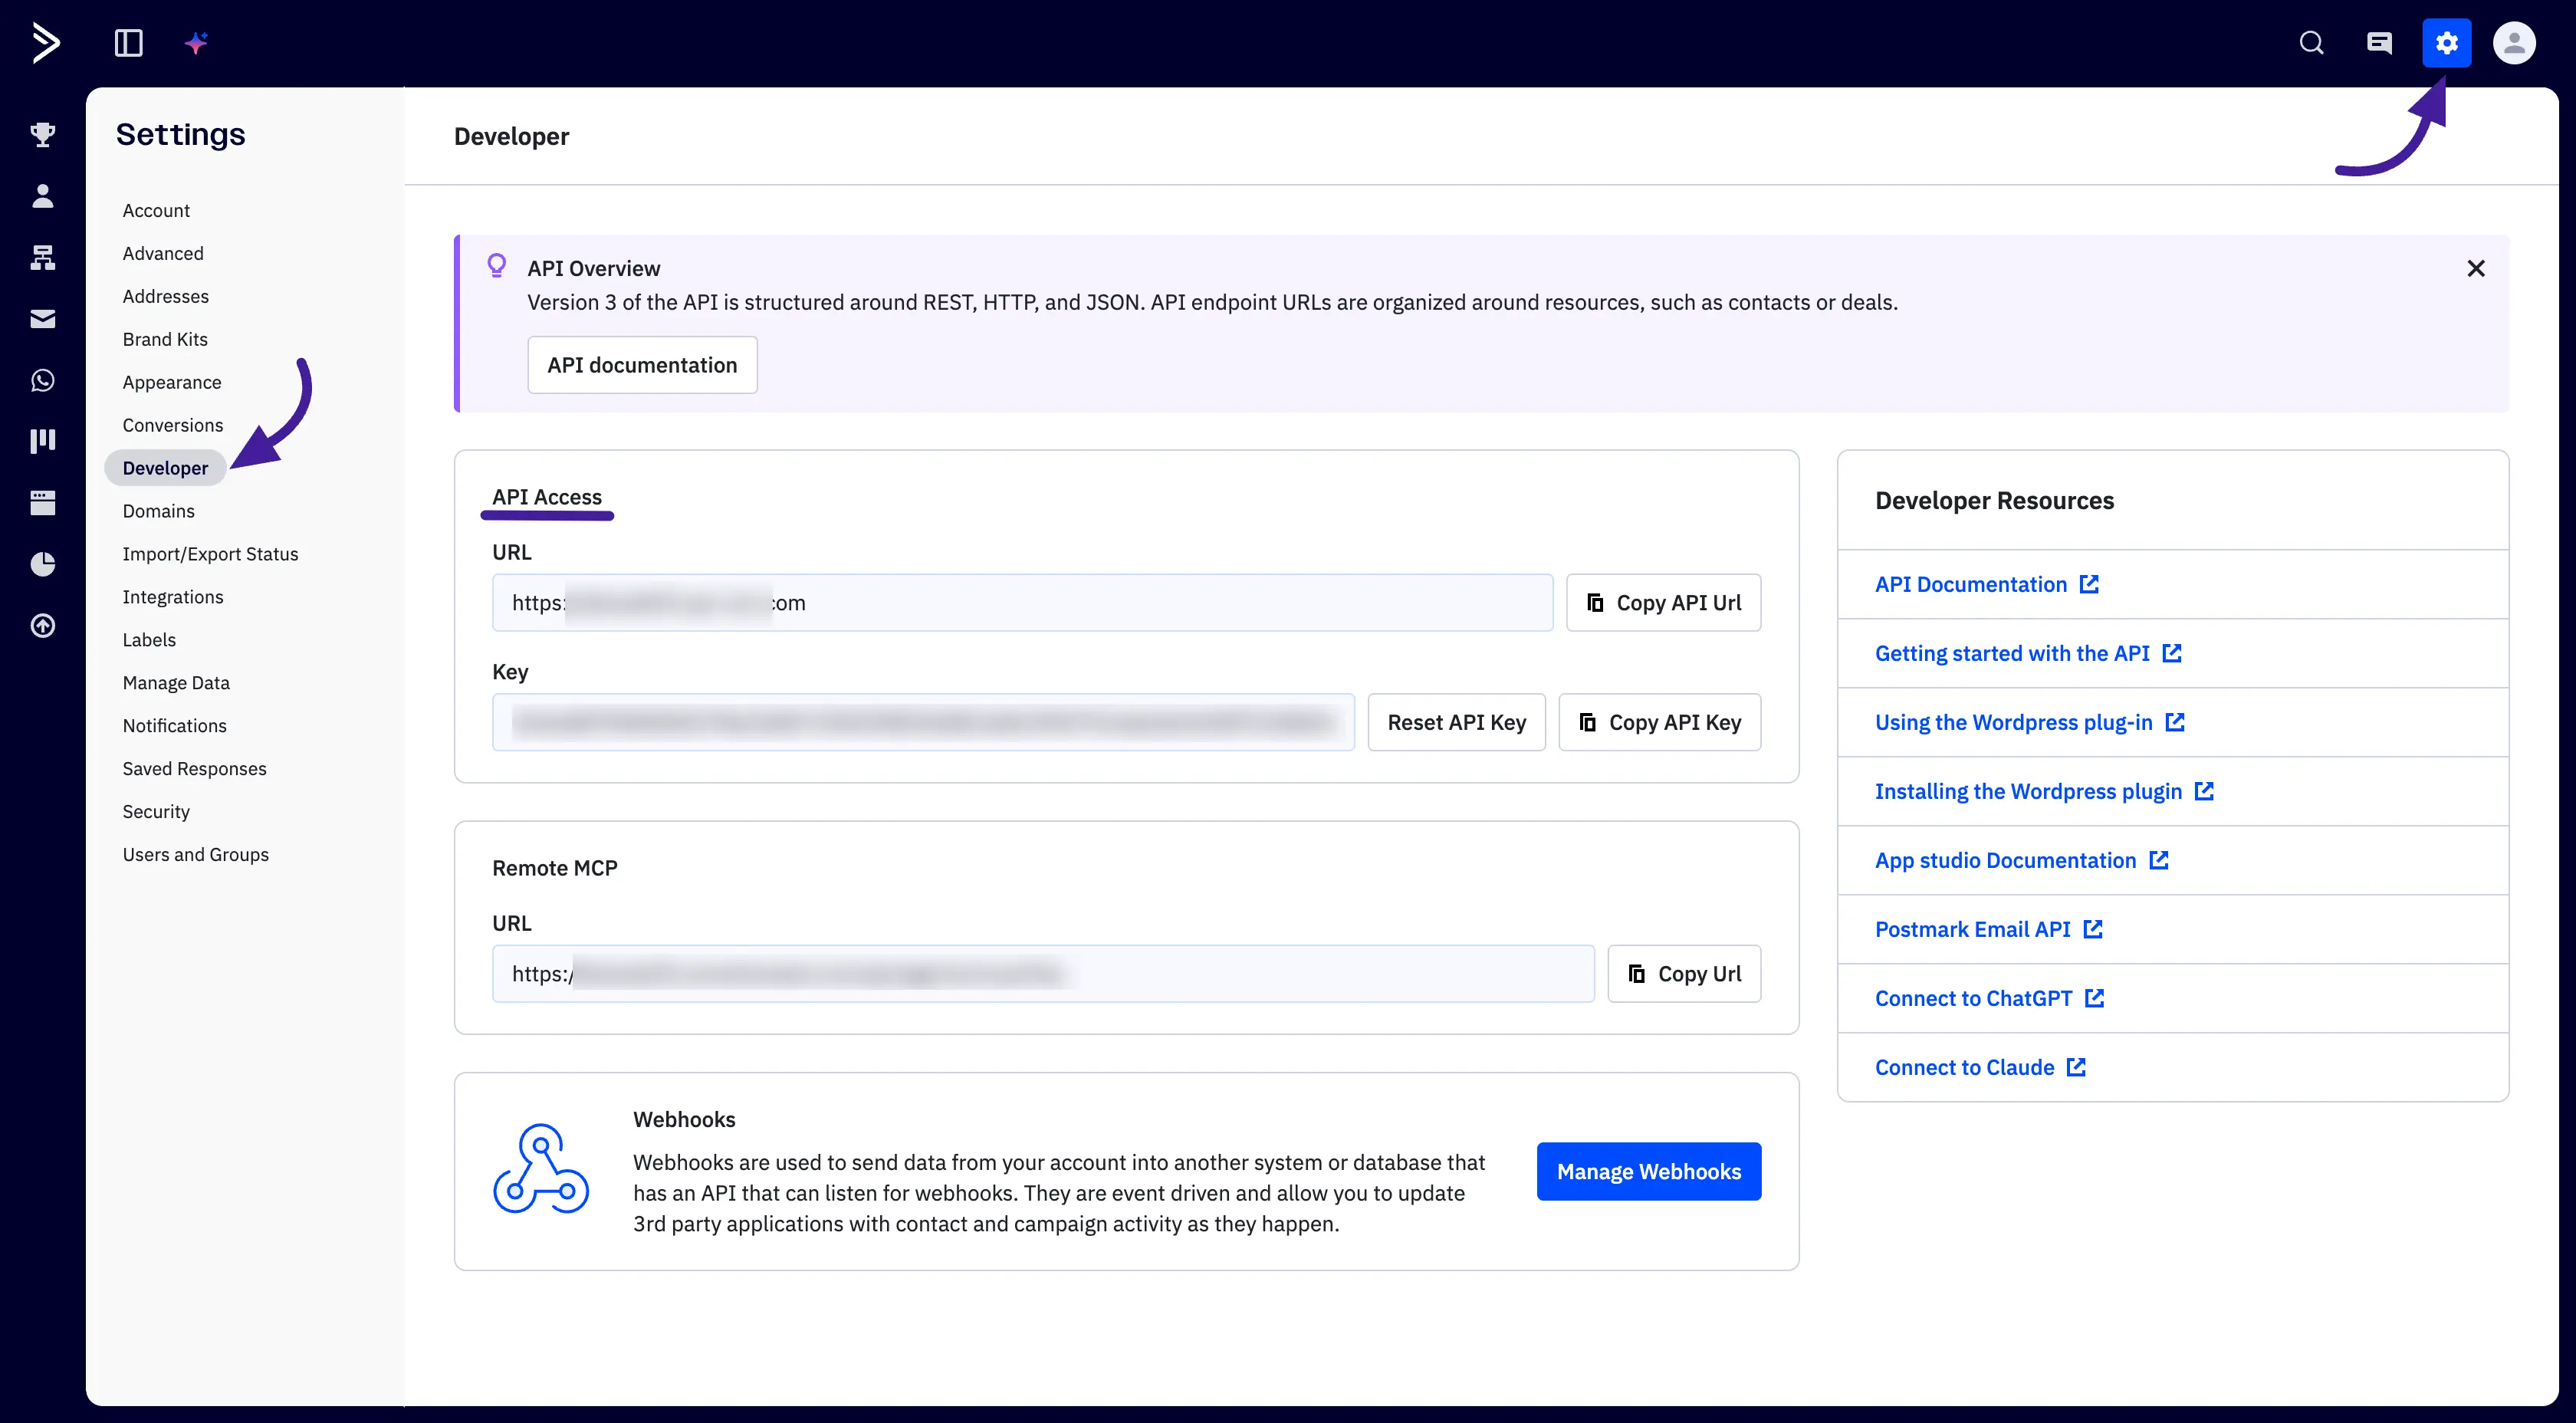
Before starting the process in FluentCRM, you need to grant permission for the two systems to communicate by gathering your API credentials.
- Log in to your ActiveCampaign account.
- Click the Settings (gear icon) located in the bottom-left/top-right corner.
- Navigate to the Developer tab in the sidebar.
- Under API Access, copy both the API URL and the API Key.
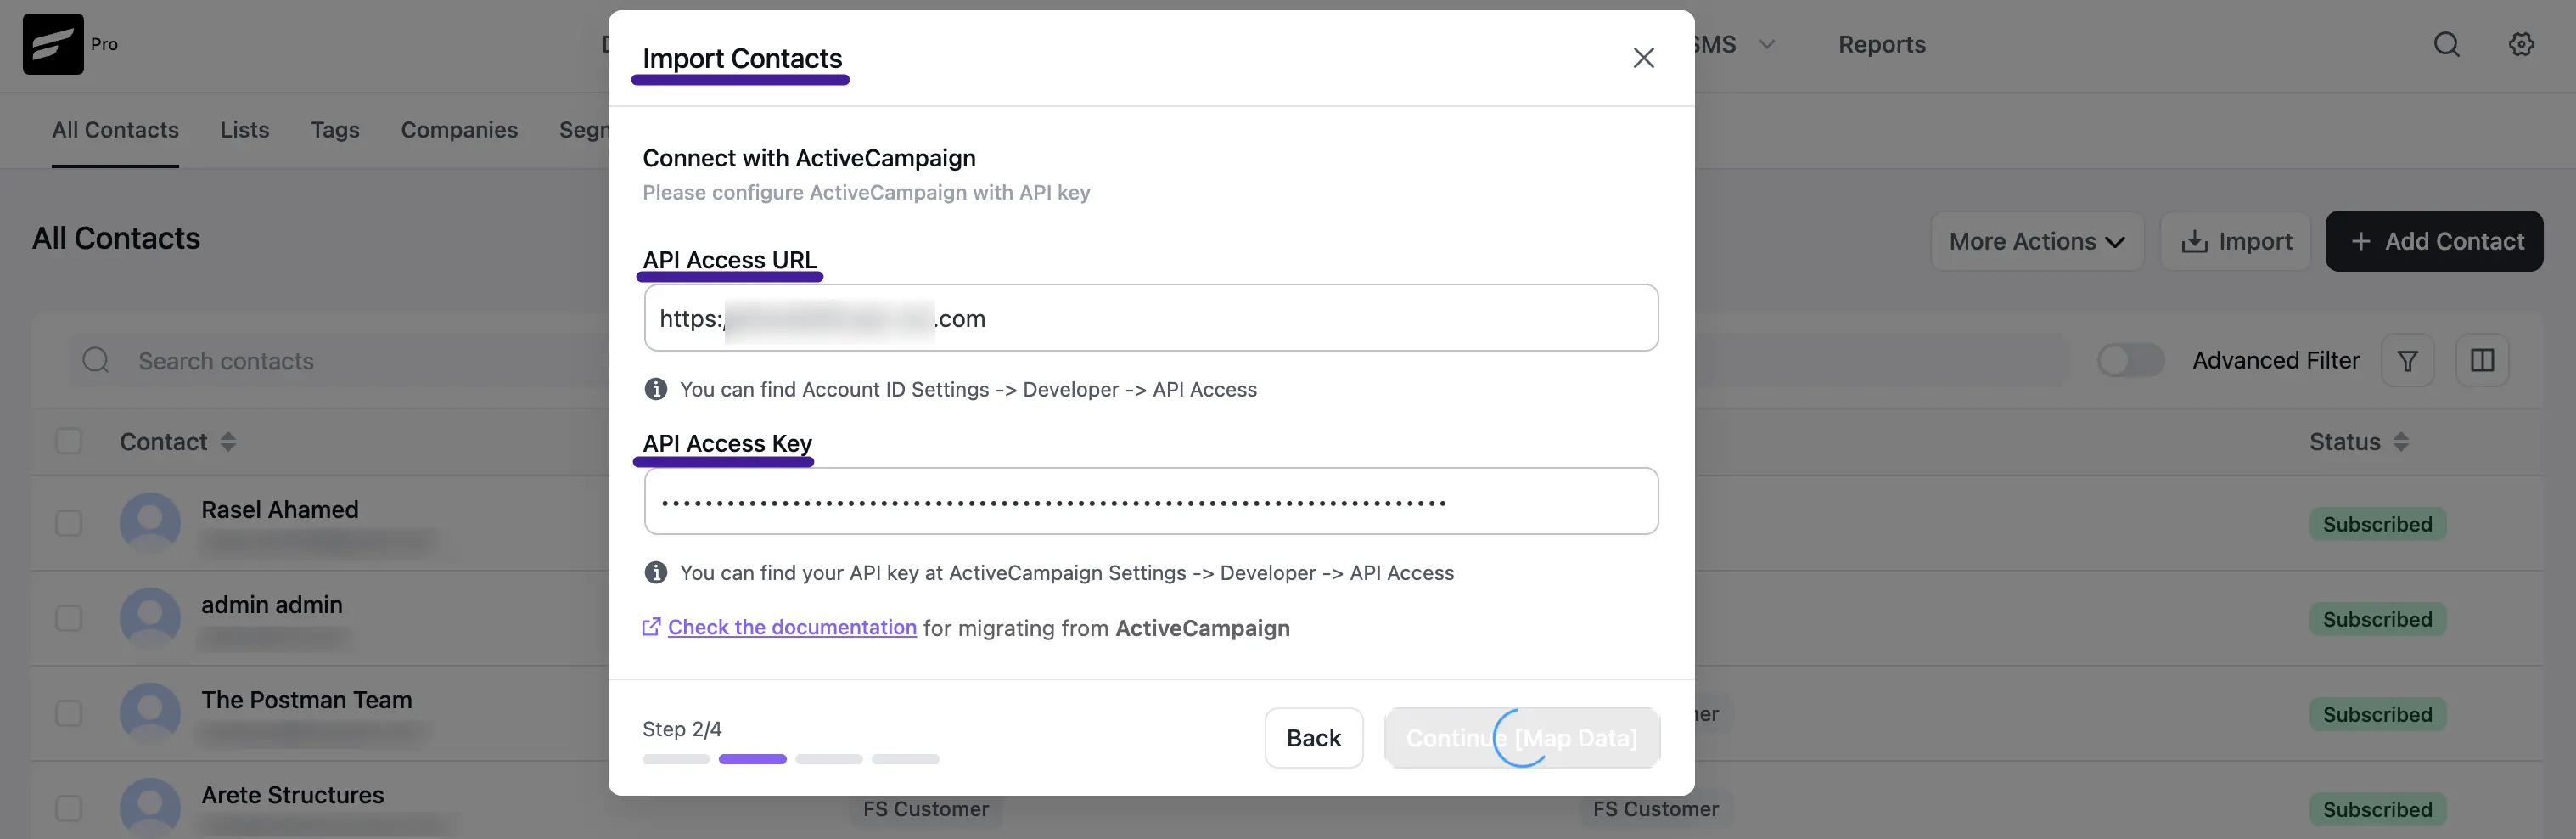
Step 2: Initiate the Connection in FluentCRM
Once you have your keys, head over to your WordPress dashboard to start the import.
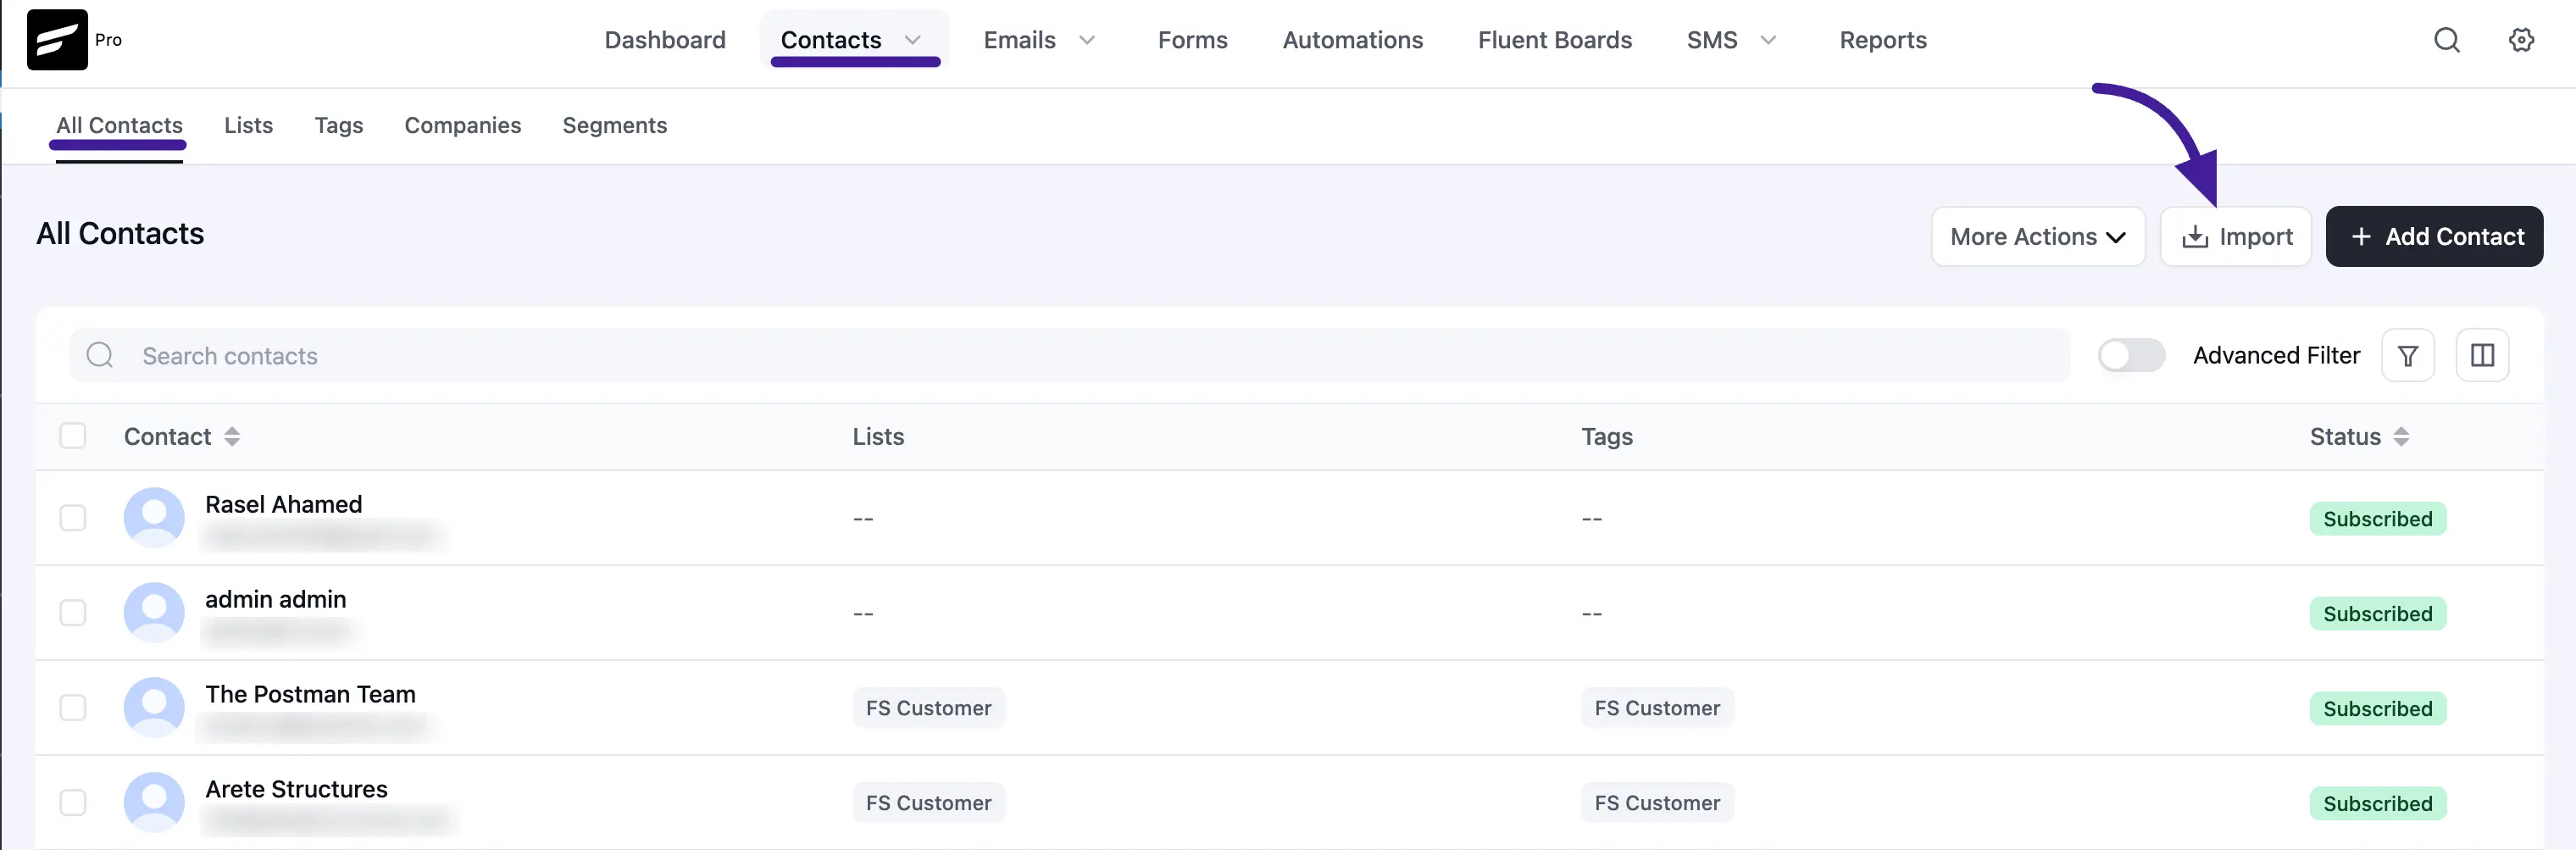
- Go to FluentCRM → Contacts and click the Import button at the top right.
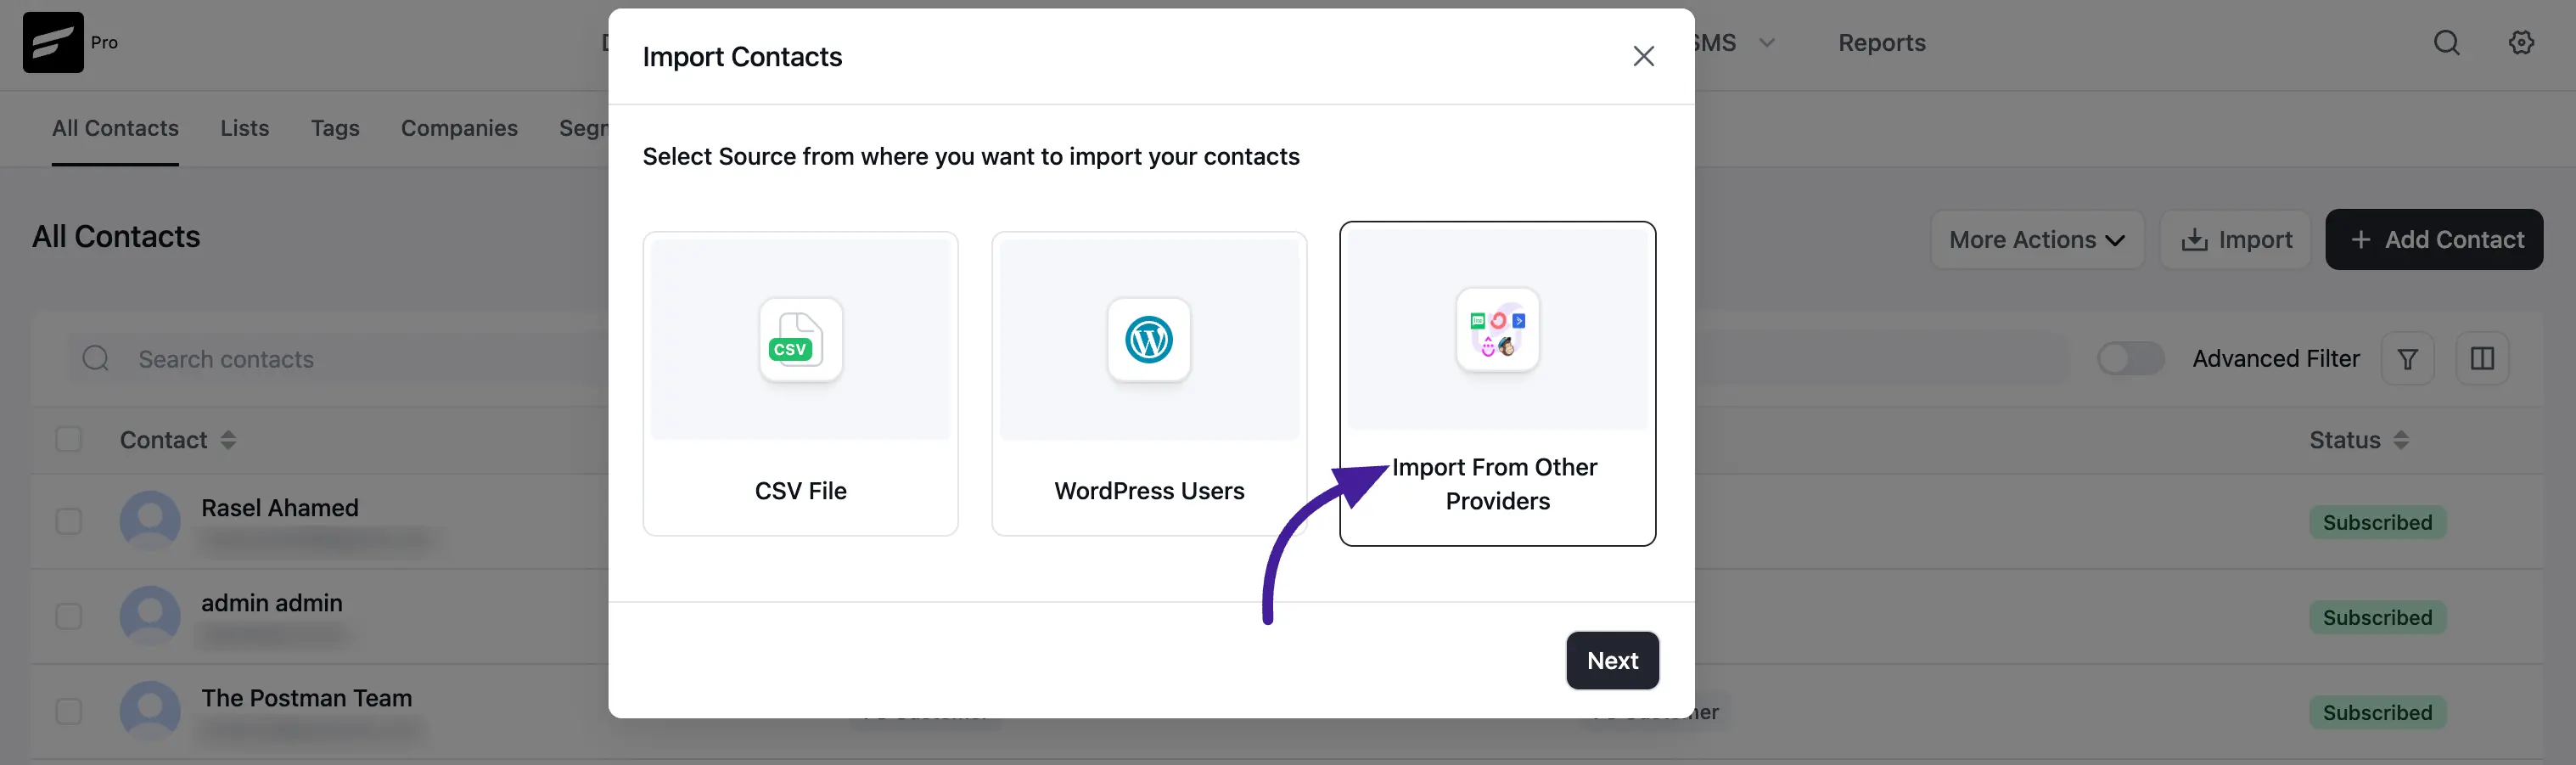
- In the pop-up window, select Import from Other Providers and click Next.
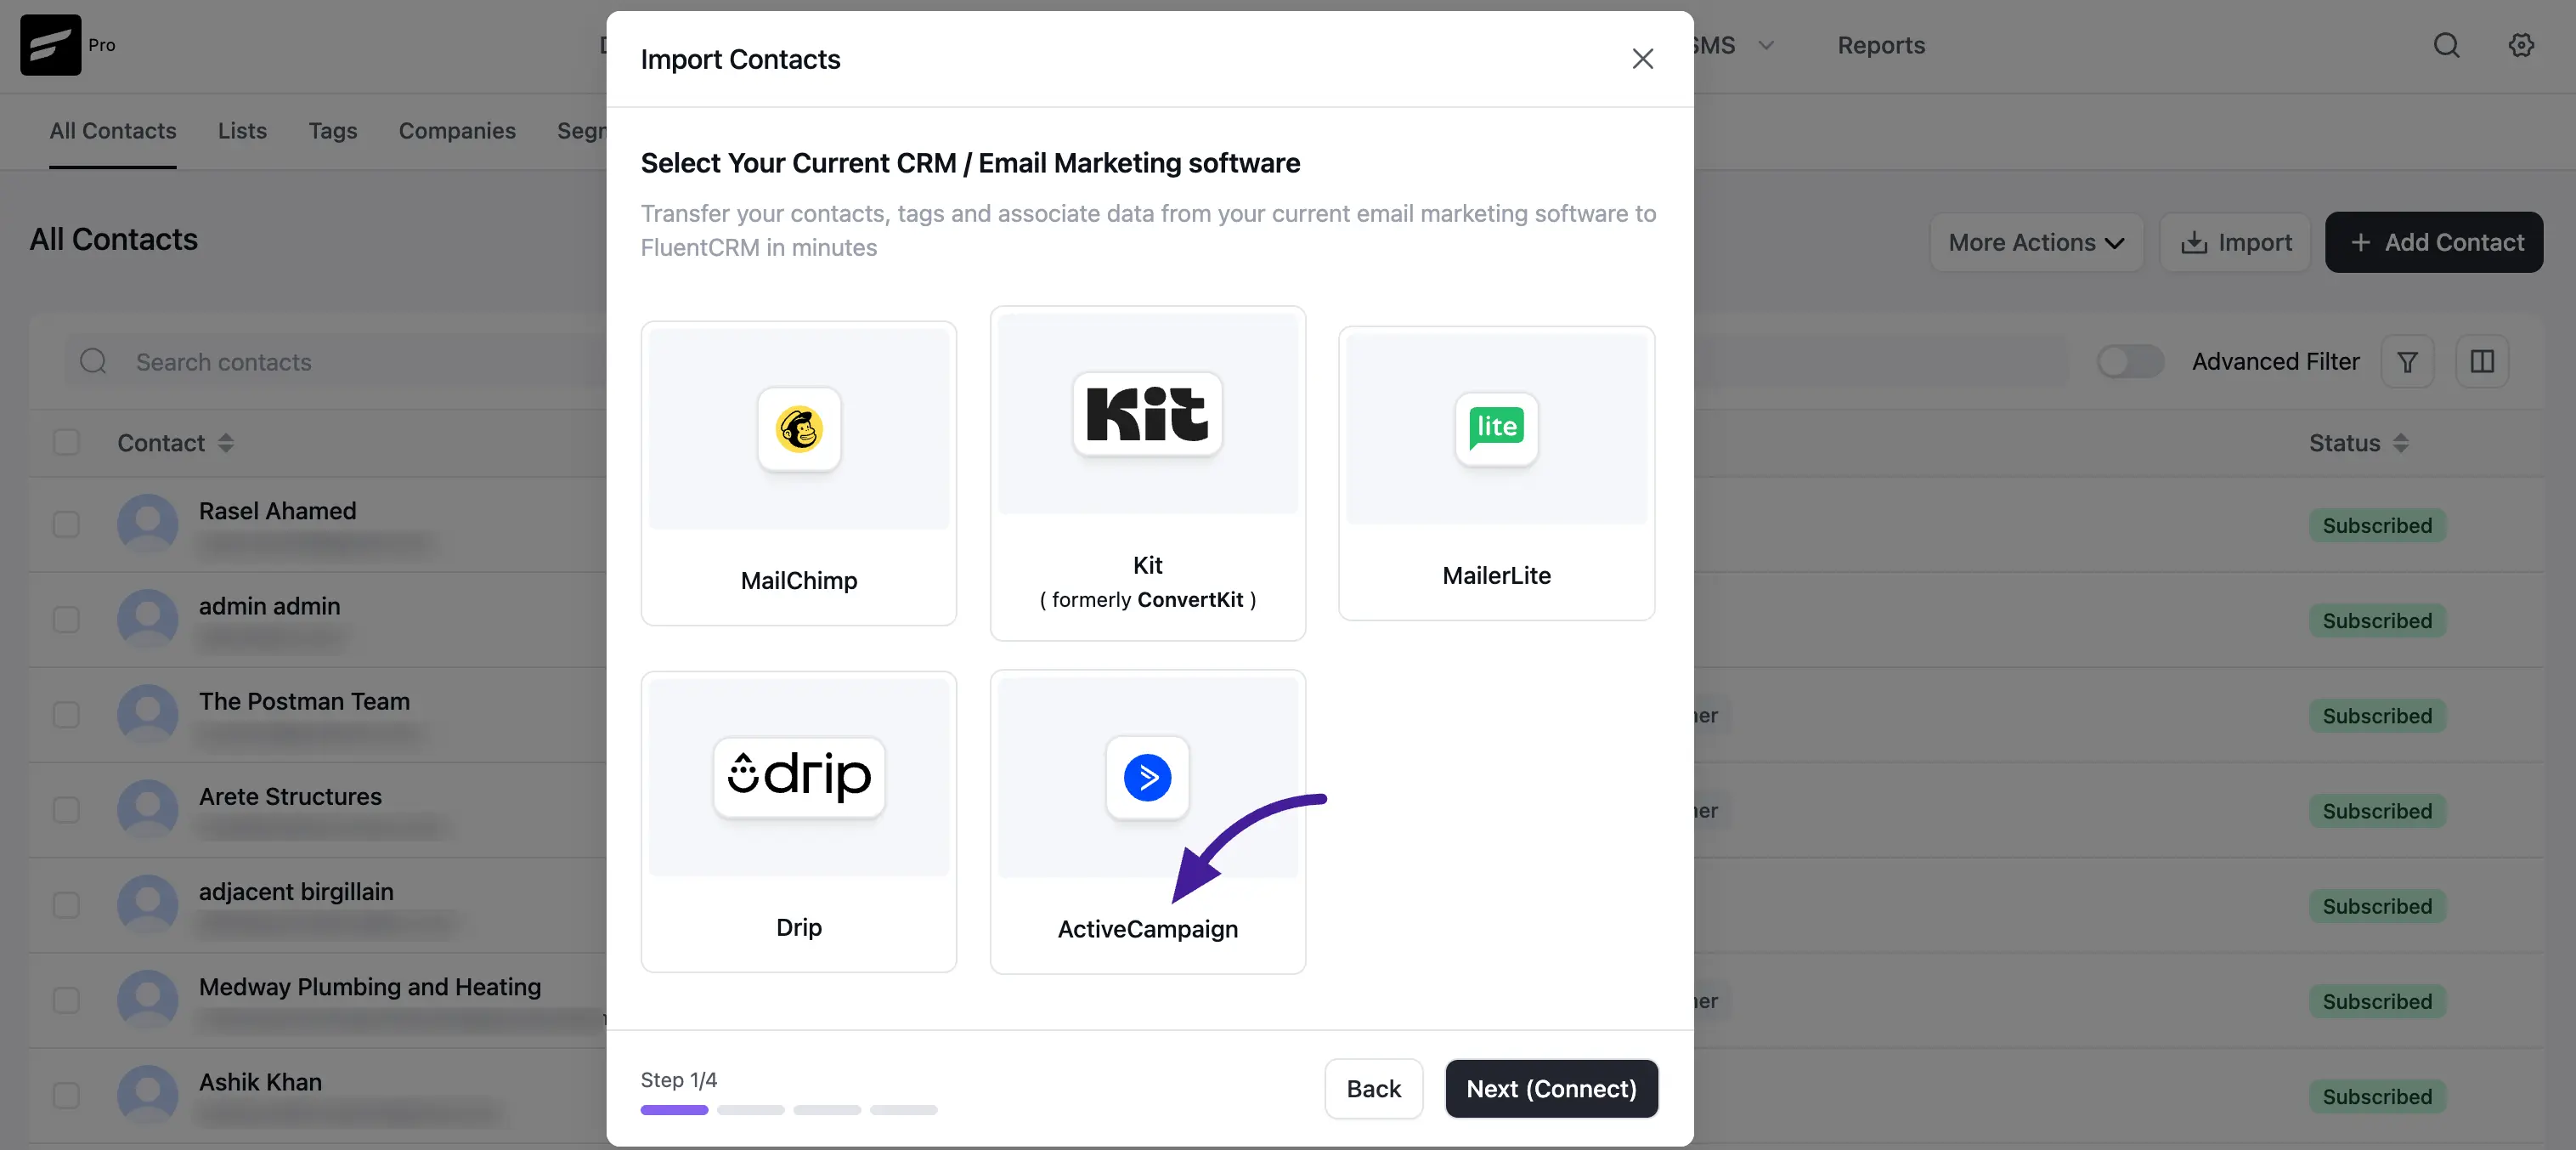
- Choose ActiveCampaign from the list of available services and click Next (Connect).
- Paste your API Access URL and API Access Key into the designated fields.
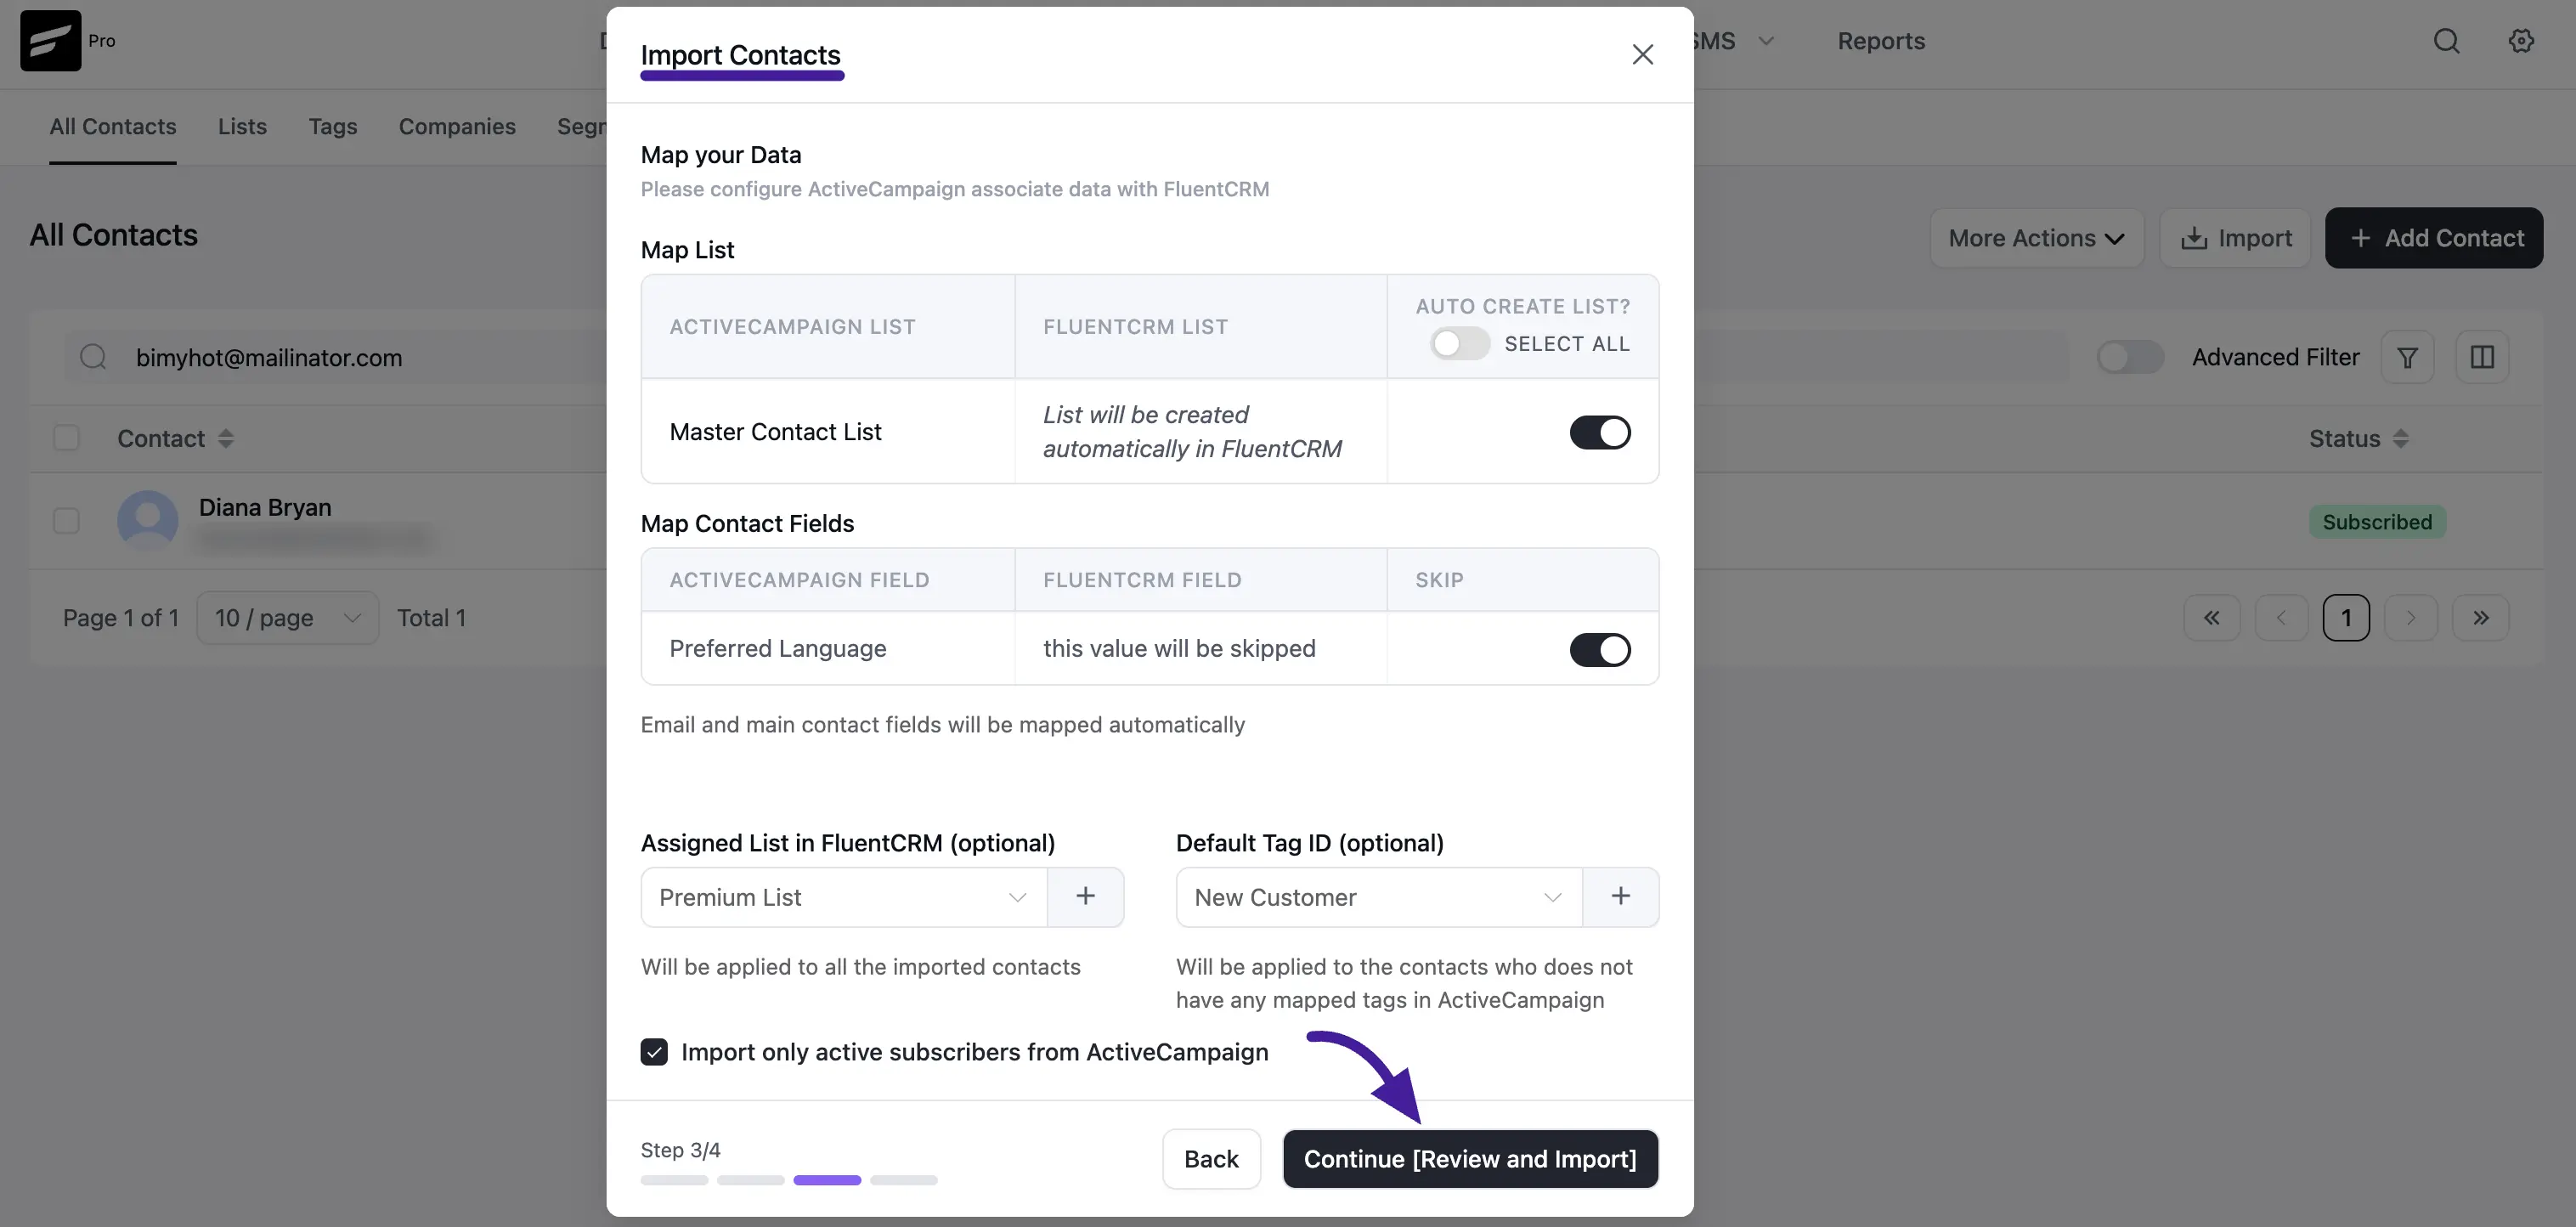
- Map Your Lists and Contact Fields
Now, you need to tell FluentCRM how to organize the data it is pulling from ActiveCampaign.
- Map Lists: Select which ActiveCampaign lists you want to bring over. You can toggle the Auto Create List? switch to have FluentCRM automatically recreate your list structure.
- Map Contact Fields: Match your ActiveCampaign fields (like "Preferred Language") to your FluentCRM custom fields. If there is data you no longer need, you can simply choose to Skip that field.
- Default Tags & Lists: You have the option to apply a specific list or tag to every contact being imported to keep your migration organized.
💡 Tip: We recommend checking the box "Import only active subscribers from ActiveCampaign". This ensures you only bring over engaged users and keeps your email deliverability healthy.
Now click on the Continue button.
Step 4: Review and Confirm
The final step is to verify your selections before the data transfer begins.
- Click Continue [Review and Import].
- A summary will show exactly how many lists and contacts are about to be moved.
- Click Confirm Import.
- Once the progress bar reaches 100%, you will see a success message confirming the migration is complete.