Appearance
FluentCRM Onboarding Wizard
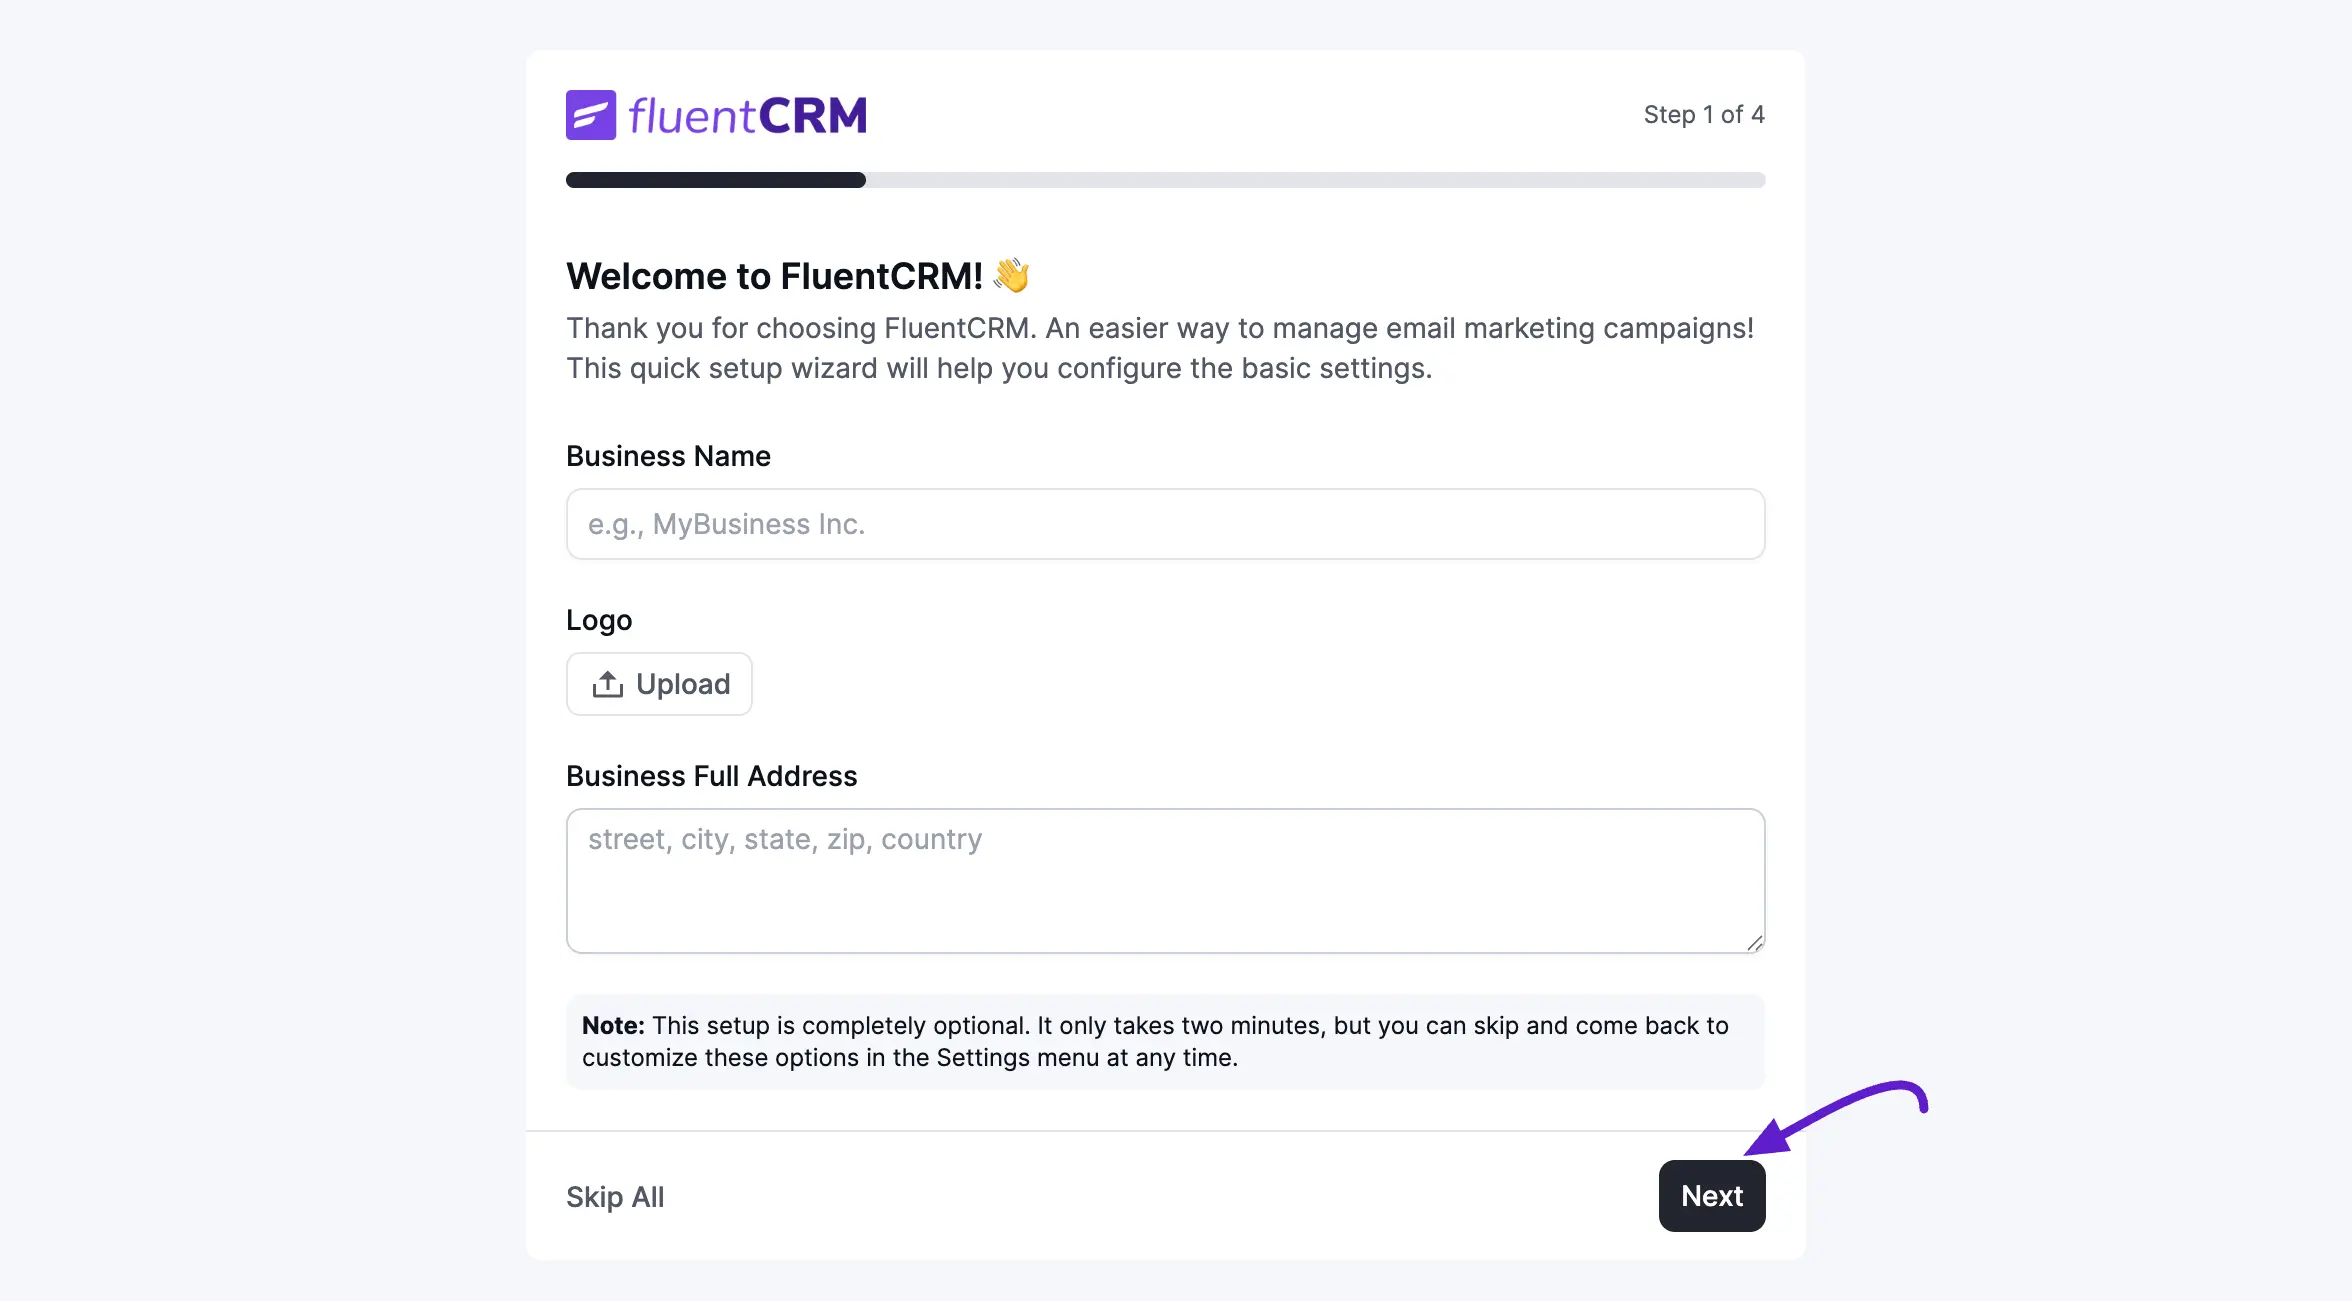
When you activate FluentCRM for the first time, a Setup Wizard launches automatically. It walks you through four short steps so your CRM is ready to use right away. Every step is optional, you can click Skip All at any point and return to configure these options later from the Settings menu.
Step 1: Business Profile
The first step collects the basic identity information that FluentCRM uses in outgoing emails and compliance footers.
- Business Name: Enter the name of your company or brand (e.g., MyBusiness Inc.).
- Logo: Click Upload to add your business logo. This appears in email templates that include a logo placeholder.
- Business Full Address: Provide your full mailing address (street, city, state, zip, country). A physical address is required by anti-spam laws such as CAN-SPAM and GDPR for commercial emails.
When you are done, click Next to save and proceed. A confirmation toast (Business Settings has been saved) appears to confirm the data was stored.
NOTE
This setup is completely optional. It only takes two minutes, but you can skip and come back to customize these options in the Settings menu at any time.
Step 2: Contact Segment Lists
Lists are broad groupings that help you segment your audience — for example, VIP Customers, Product Users, or WordPress Users.
Each list has two fields:
| Field | Description |
|---|---|
| Segment Name | A human-readable label for the list (e.g., Newsletter Subscribers). |
| Slug | A unique, URL-friendly identifier auto-generated from the name, or entered manually. |
- Click + Add More to create additional lists beyond the two default rows.
- Use the trash icon on any row to remove a list before saving.
Click Next when you are ready to move on, or Go Back to revisit the previous step.

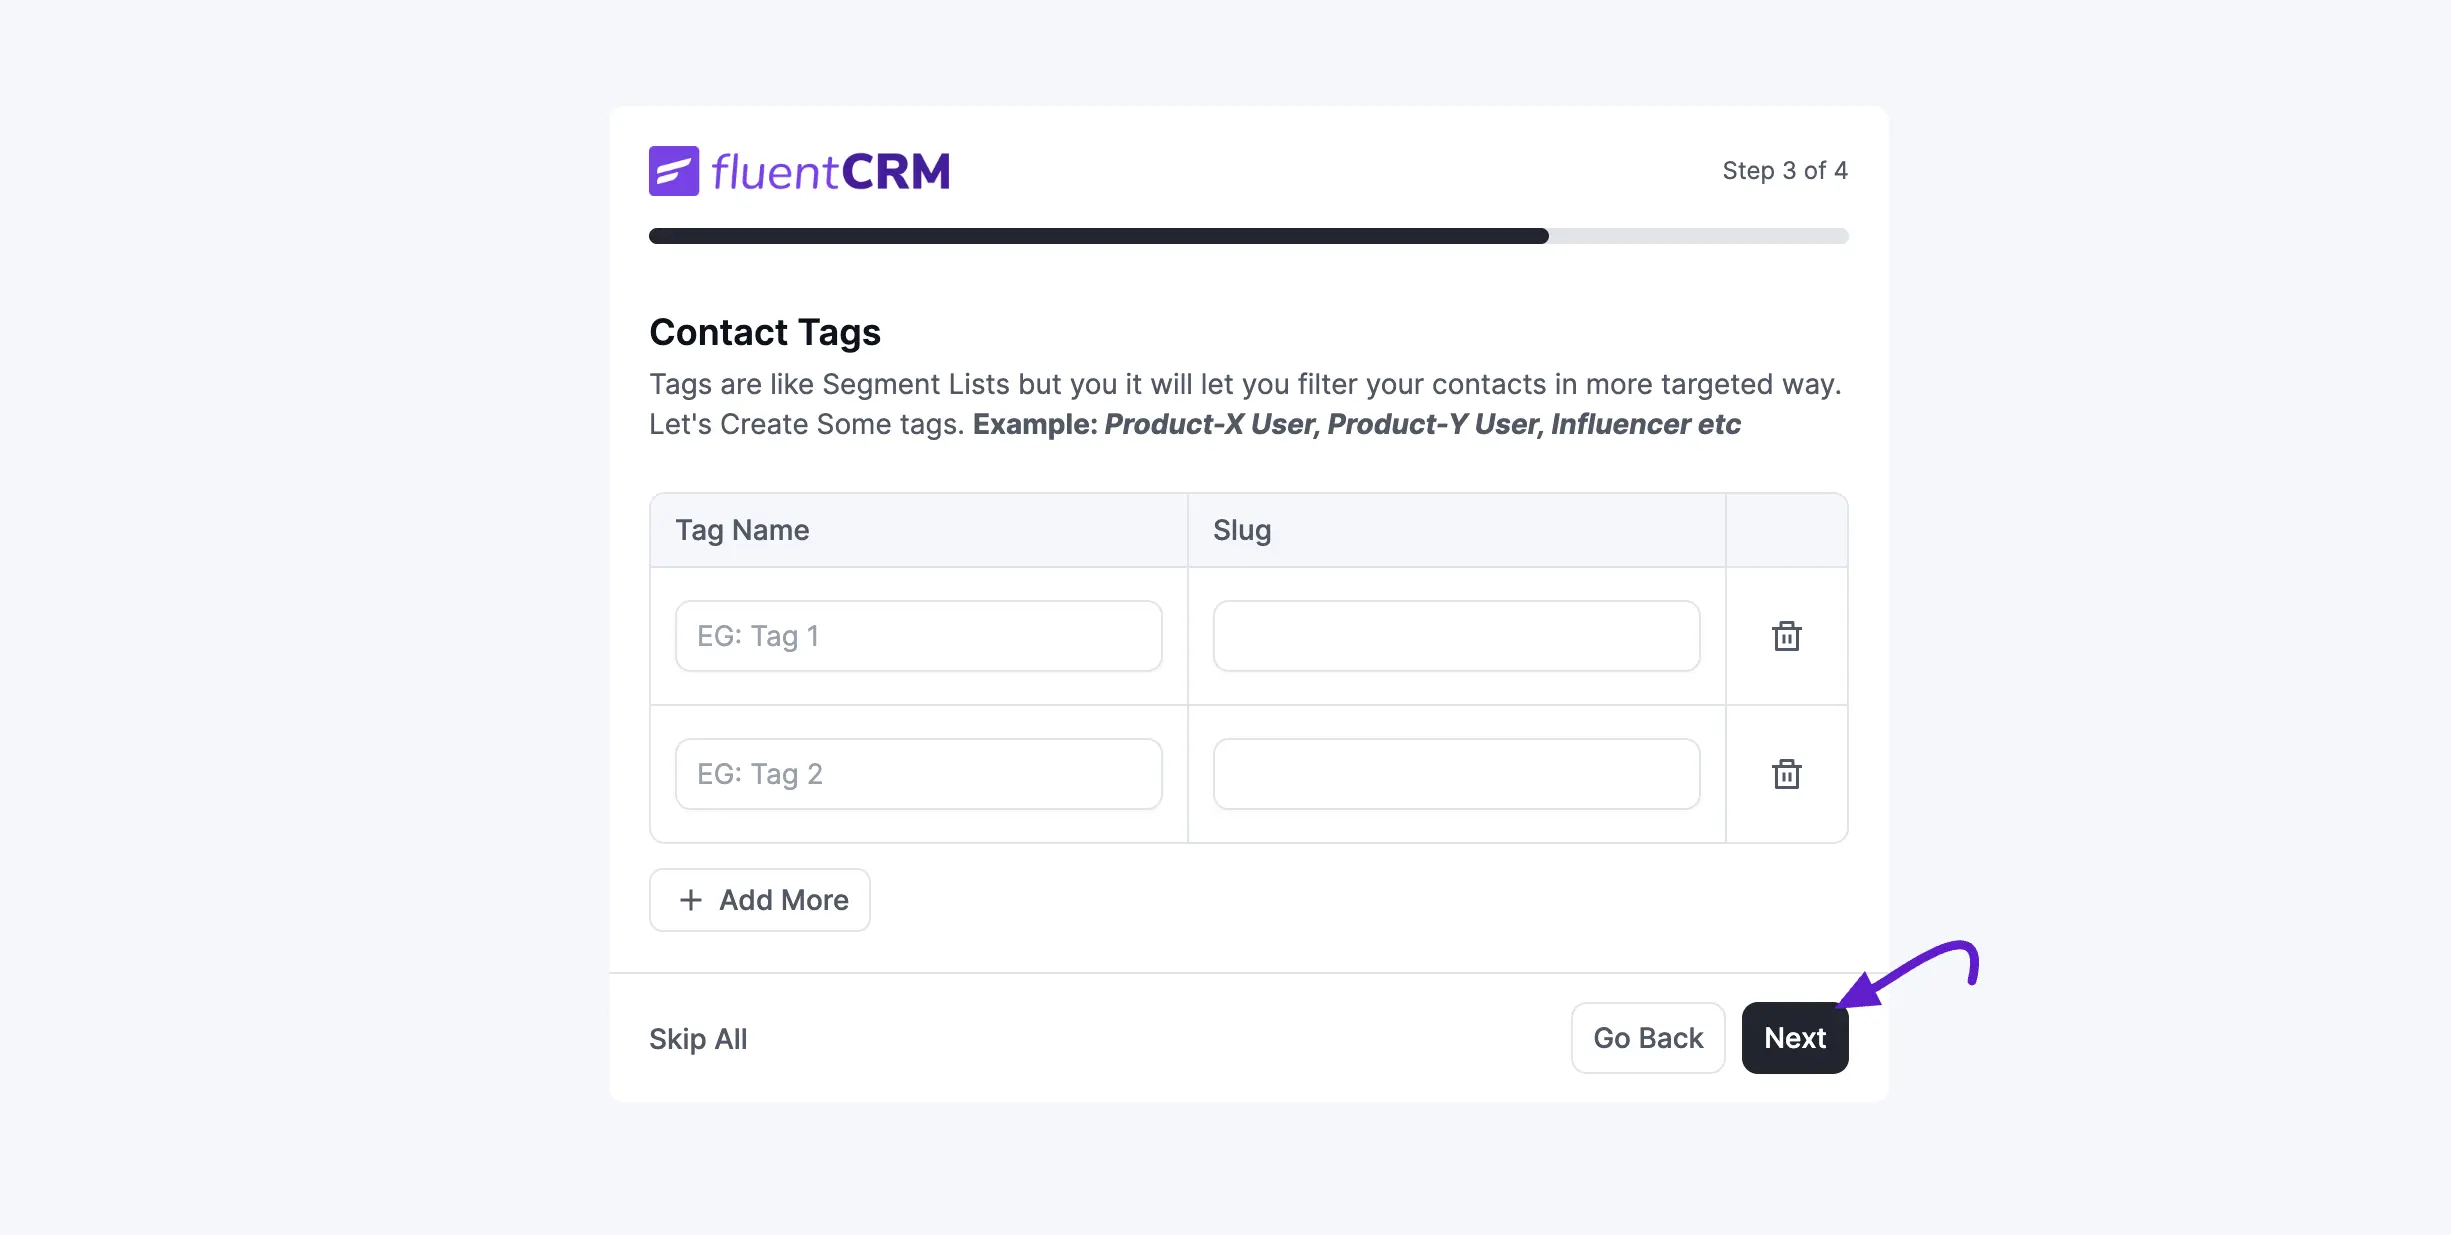
Step 3: Contact Tags
Tags work similarly to lists but allow more granular filtering. Where a list might group everyone who purchased a product, a tag could identify Product-X User, Influencer, or Beta Tester within that group.
Each tag also has a Tag Name and a Slug column. The same controls apply:
- Click + Add More to create as many tags as you need.
- Click the trash icon to remove any tag before saving.
Pro Tip: You can always create more lists and tags later from FluentCRM → Contacts → Tags and FluentCRM → Contacts → Lists. Use this step to set up your most commonly used segments so they are available from day one.
Click Next to continue or Go Back to edit your lists.
Step 4: Finish Up
The final step brings together a few optional but recommended actions before you complete the installation.
Recommended Plugins
- All In One CRM Features: This is FluentCRM itself, already installed and marked Already Installed.
- Capture leads effortlessly: Install the Fluent Forms plugin to add lead-capture forms to your site and automatically sync new submissions as CRM contacts. The checkbox is pre-selected; uncheck it if you prefer to install Fluent Forms separately.
Usage Data (Optional)
The Help us make FluentCRM better section asks for permission to share non-sensitive diagnostic data. Clicking Share Essentials sends only basic software interaction data — zero personal data from your contacts is ever collected. A confirmation modal appears:
"Enjoy a faster, more reliable experience by sharing non-sensitive usage data. Zero personal data collected your contacts, campaigns, and private details are completely secure."
Click Yes, Count me in to opt in, or No thanks to decline. This preference can be changed in settings at any time.
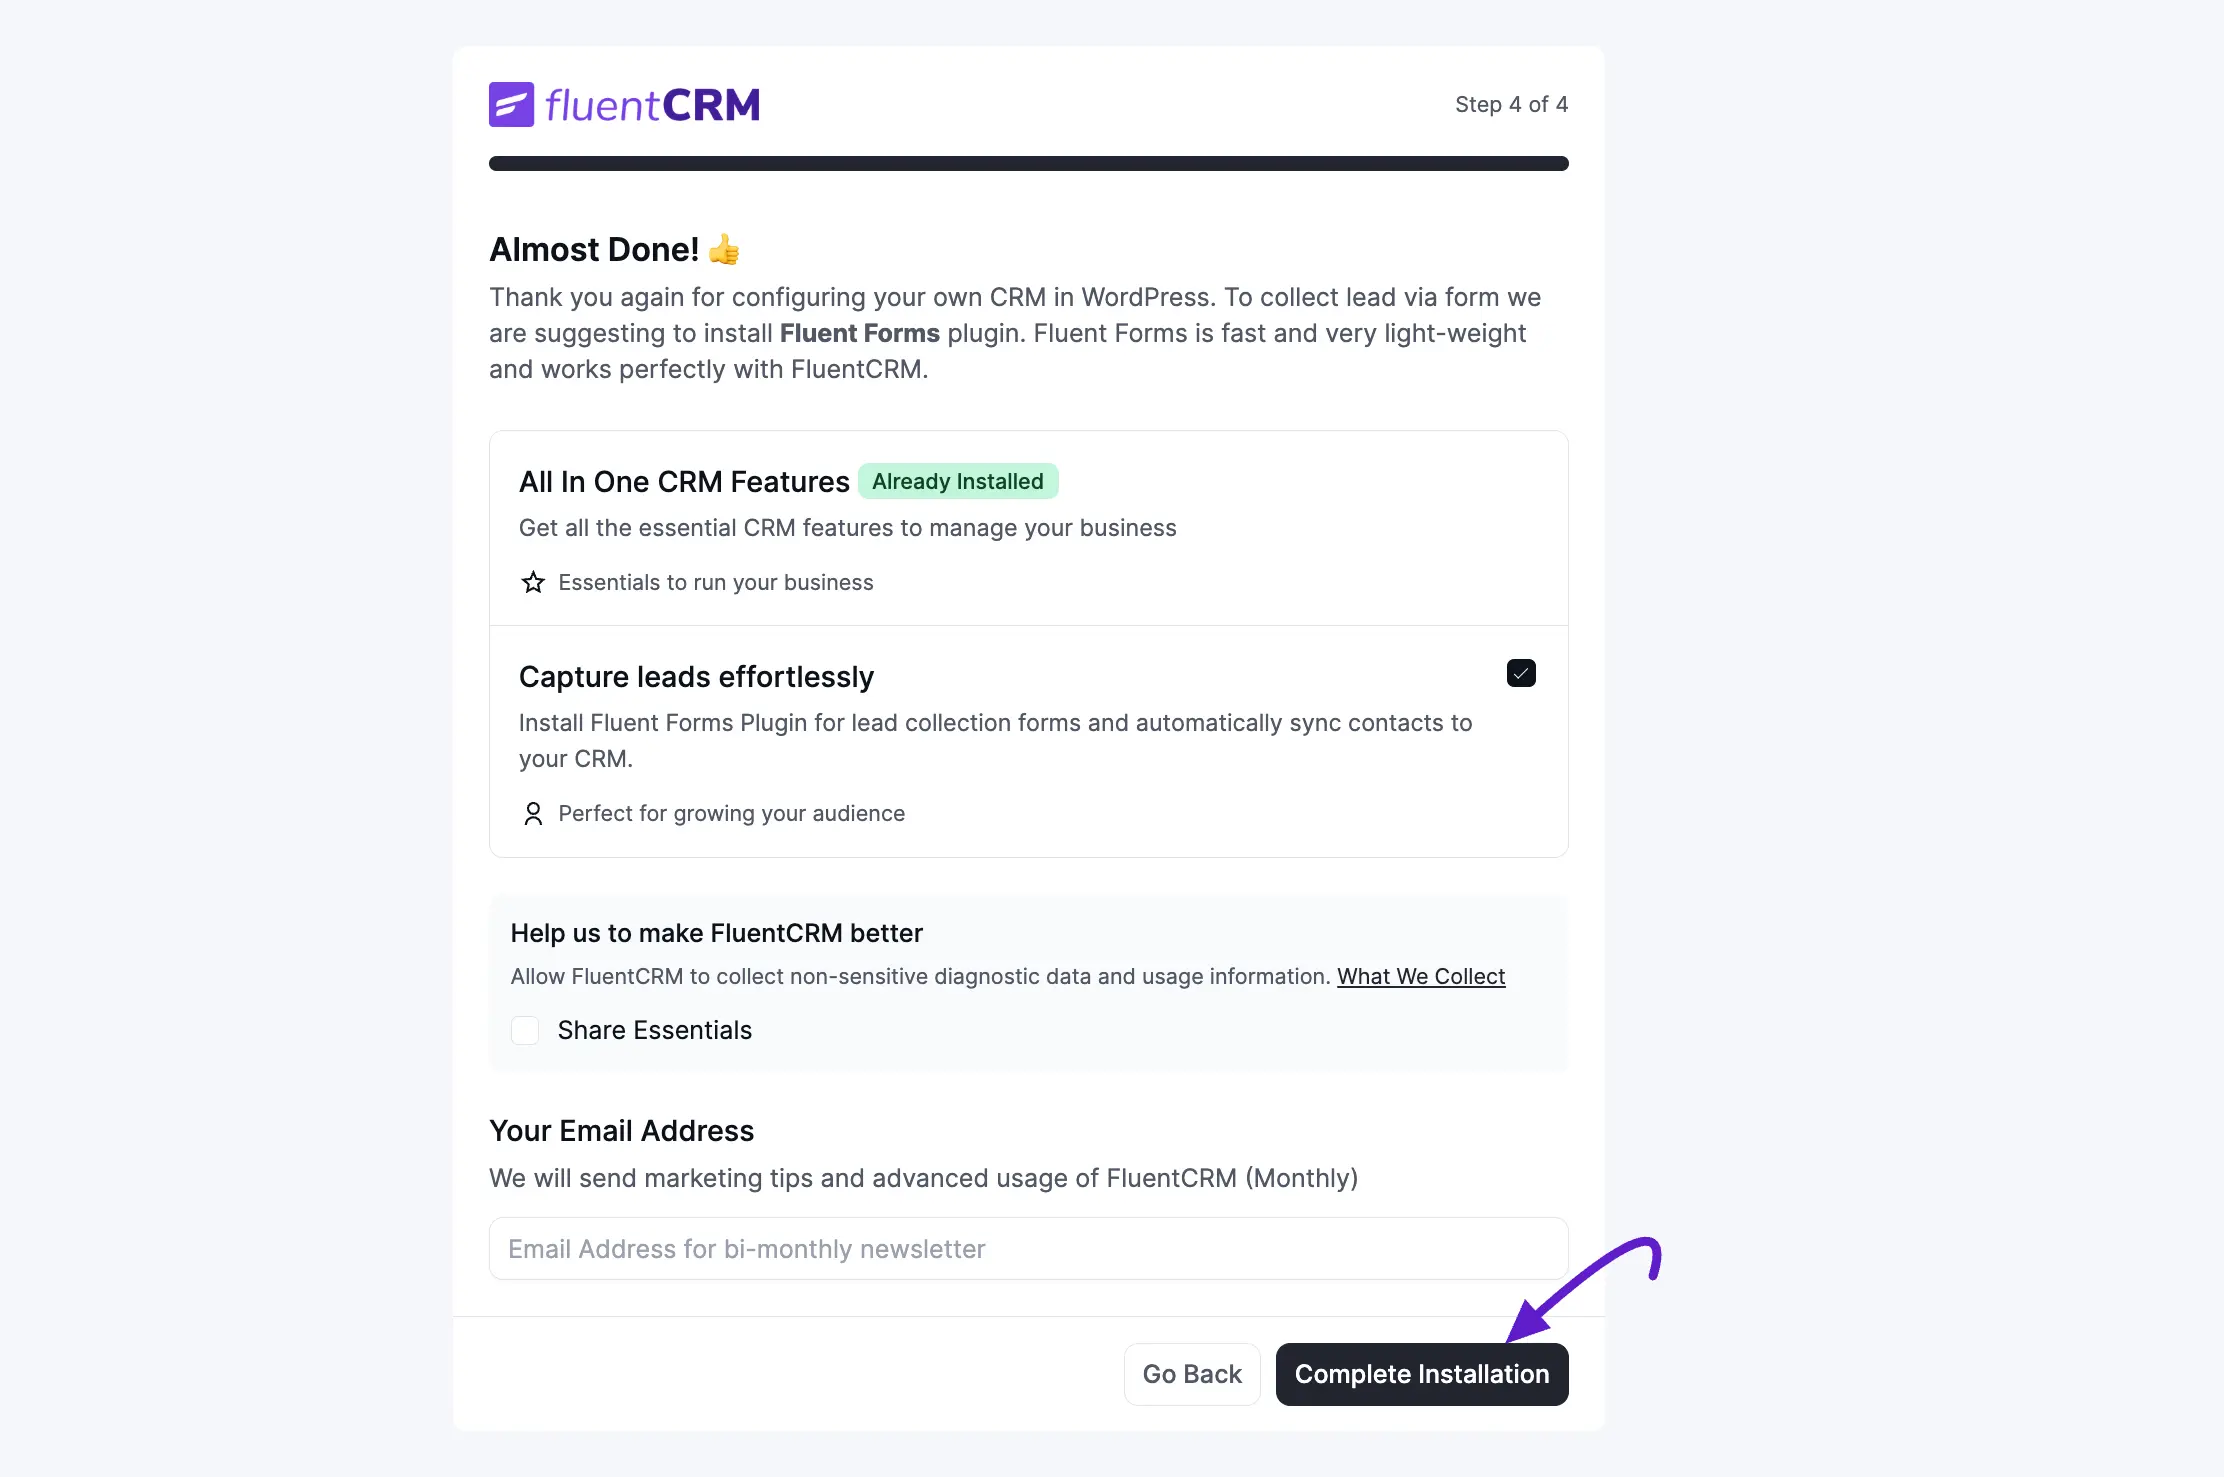
Your Email Address
Enter an email address to receive FluentCRM marketing tips and advanced usage guides. This is entirely optional.

Click Complete Installation to finish the wizard.
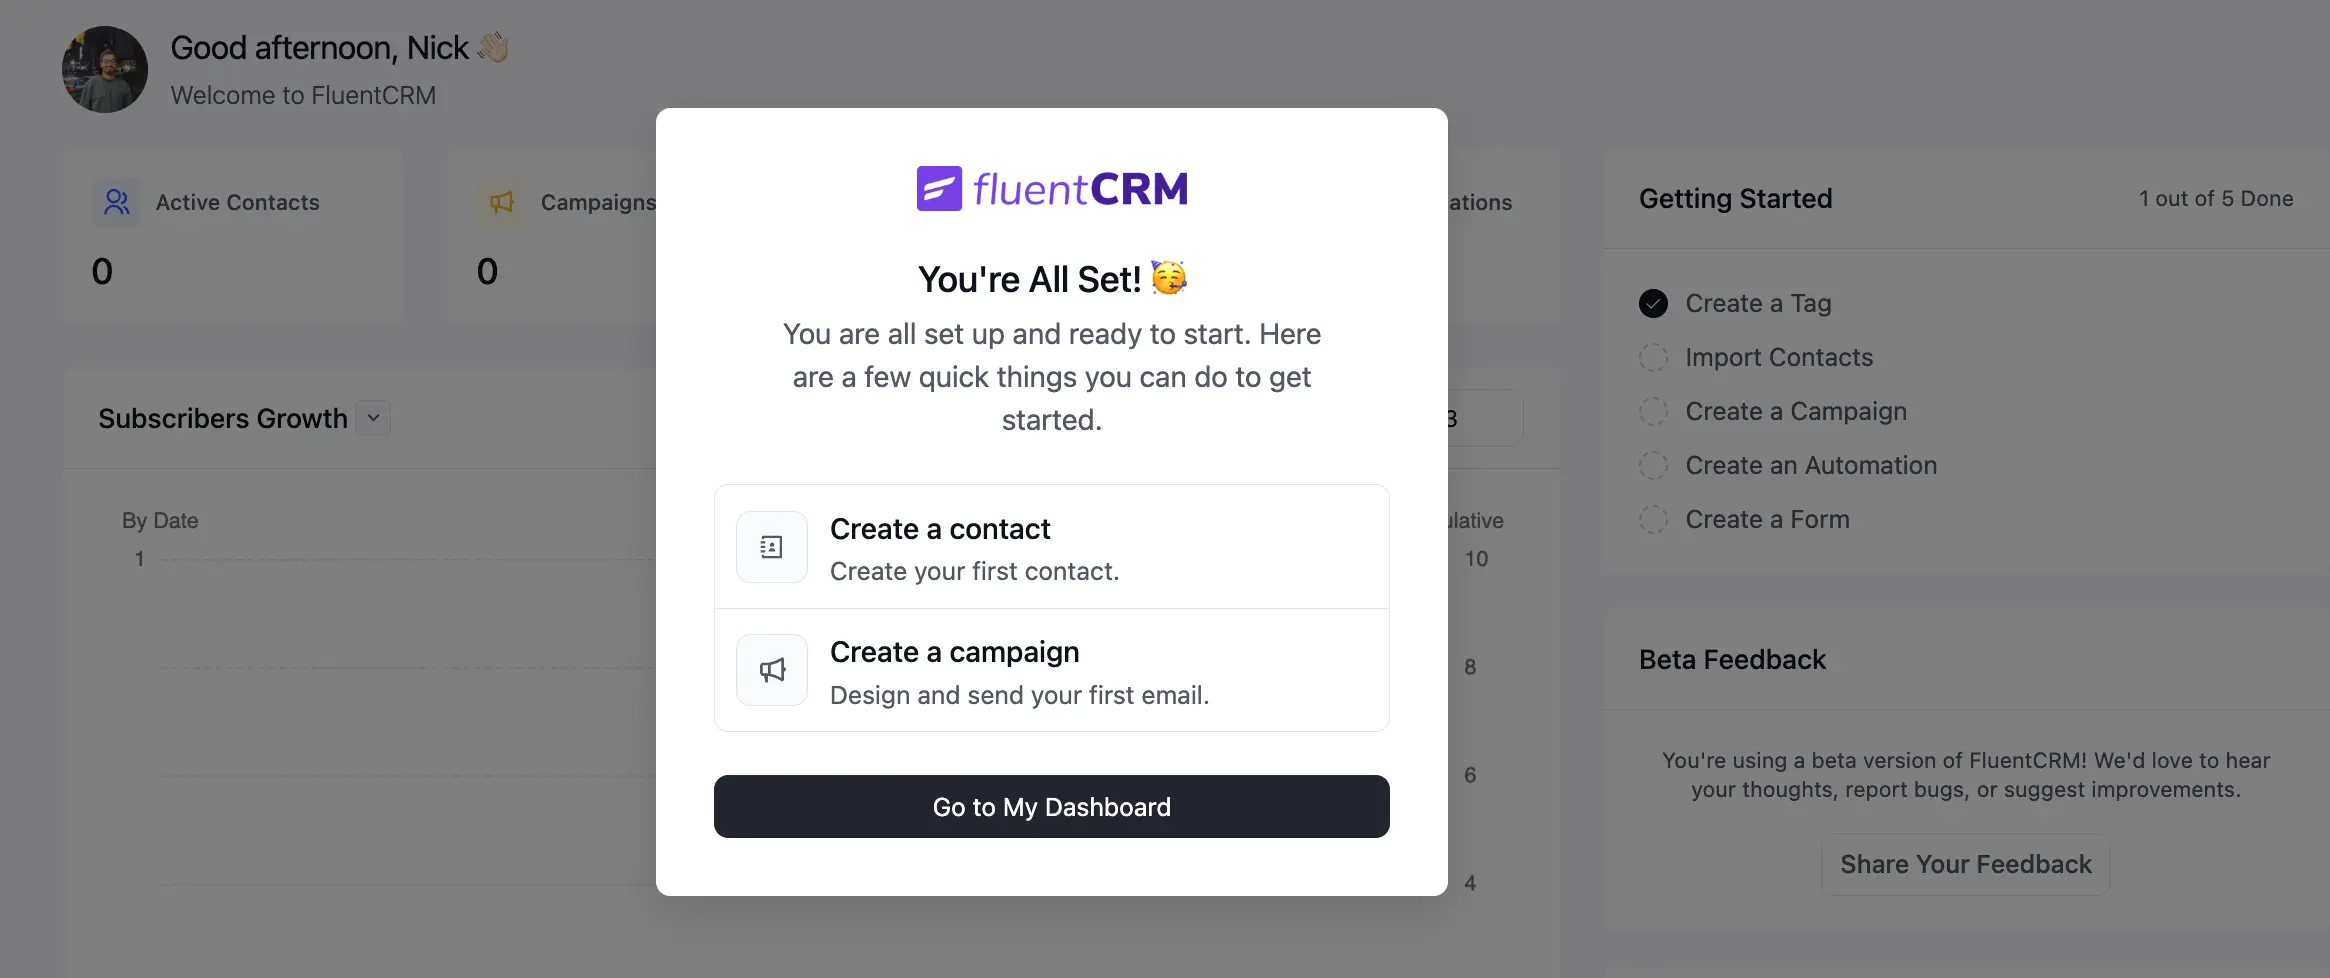
You're All Set!
Once you click Complete Installation, FluentCRM displays a confirmation modal: You're All Set! 🥳
From here you can jump straight into two common first actions:
- Create a contact: Add your first contact manually to start building your database.
- Create a campaign: Design and send your first broadcast email.
Click Go to My Dashboard to dismiss the modal and land on the main FluentCRM Dashboard, where the Getting Started checklist on the right sidebar tracks your progress (e.g., Create a Tag, Import Contacts, Create a Campaign).
What's Next?
With the wizard complete, here are the recommended next steps:
- Configure your SMTP and email sending settings to ensure reliable email delivery.
- Import your existing contacts if you are migrating from another platform.
- Explore the Dashboard to familiarize yourself with FluentCRM's reporting and navigation.