Appearance
Contact Overview
FluentCRM is a powerful Customer Relationship Management (CRM) and Marketing Automation tool that helps you manage your contacts, send targeted email campaigns, and create effective automations. This guide explains how FluentCRM organizes individual contact data and the actions you can use on the contact details page.
Individual Contact Profile
When you open a specific contact, you are presented with a comprehensive 360-degree view of that person's interaction with your brand.
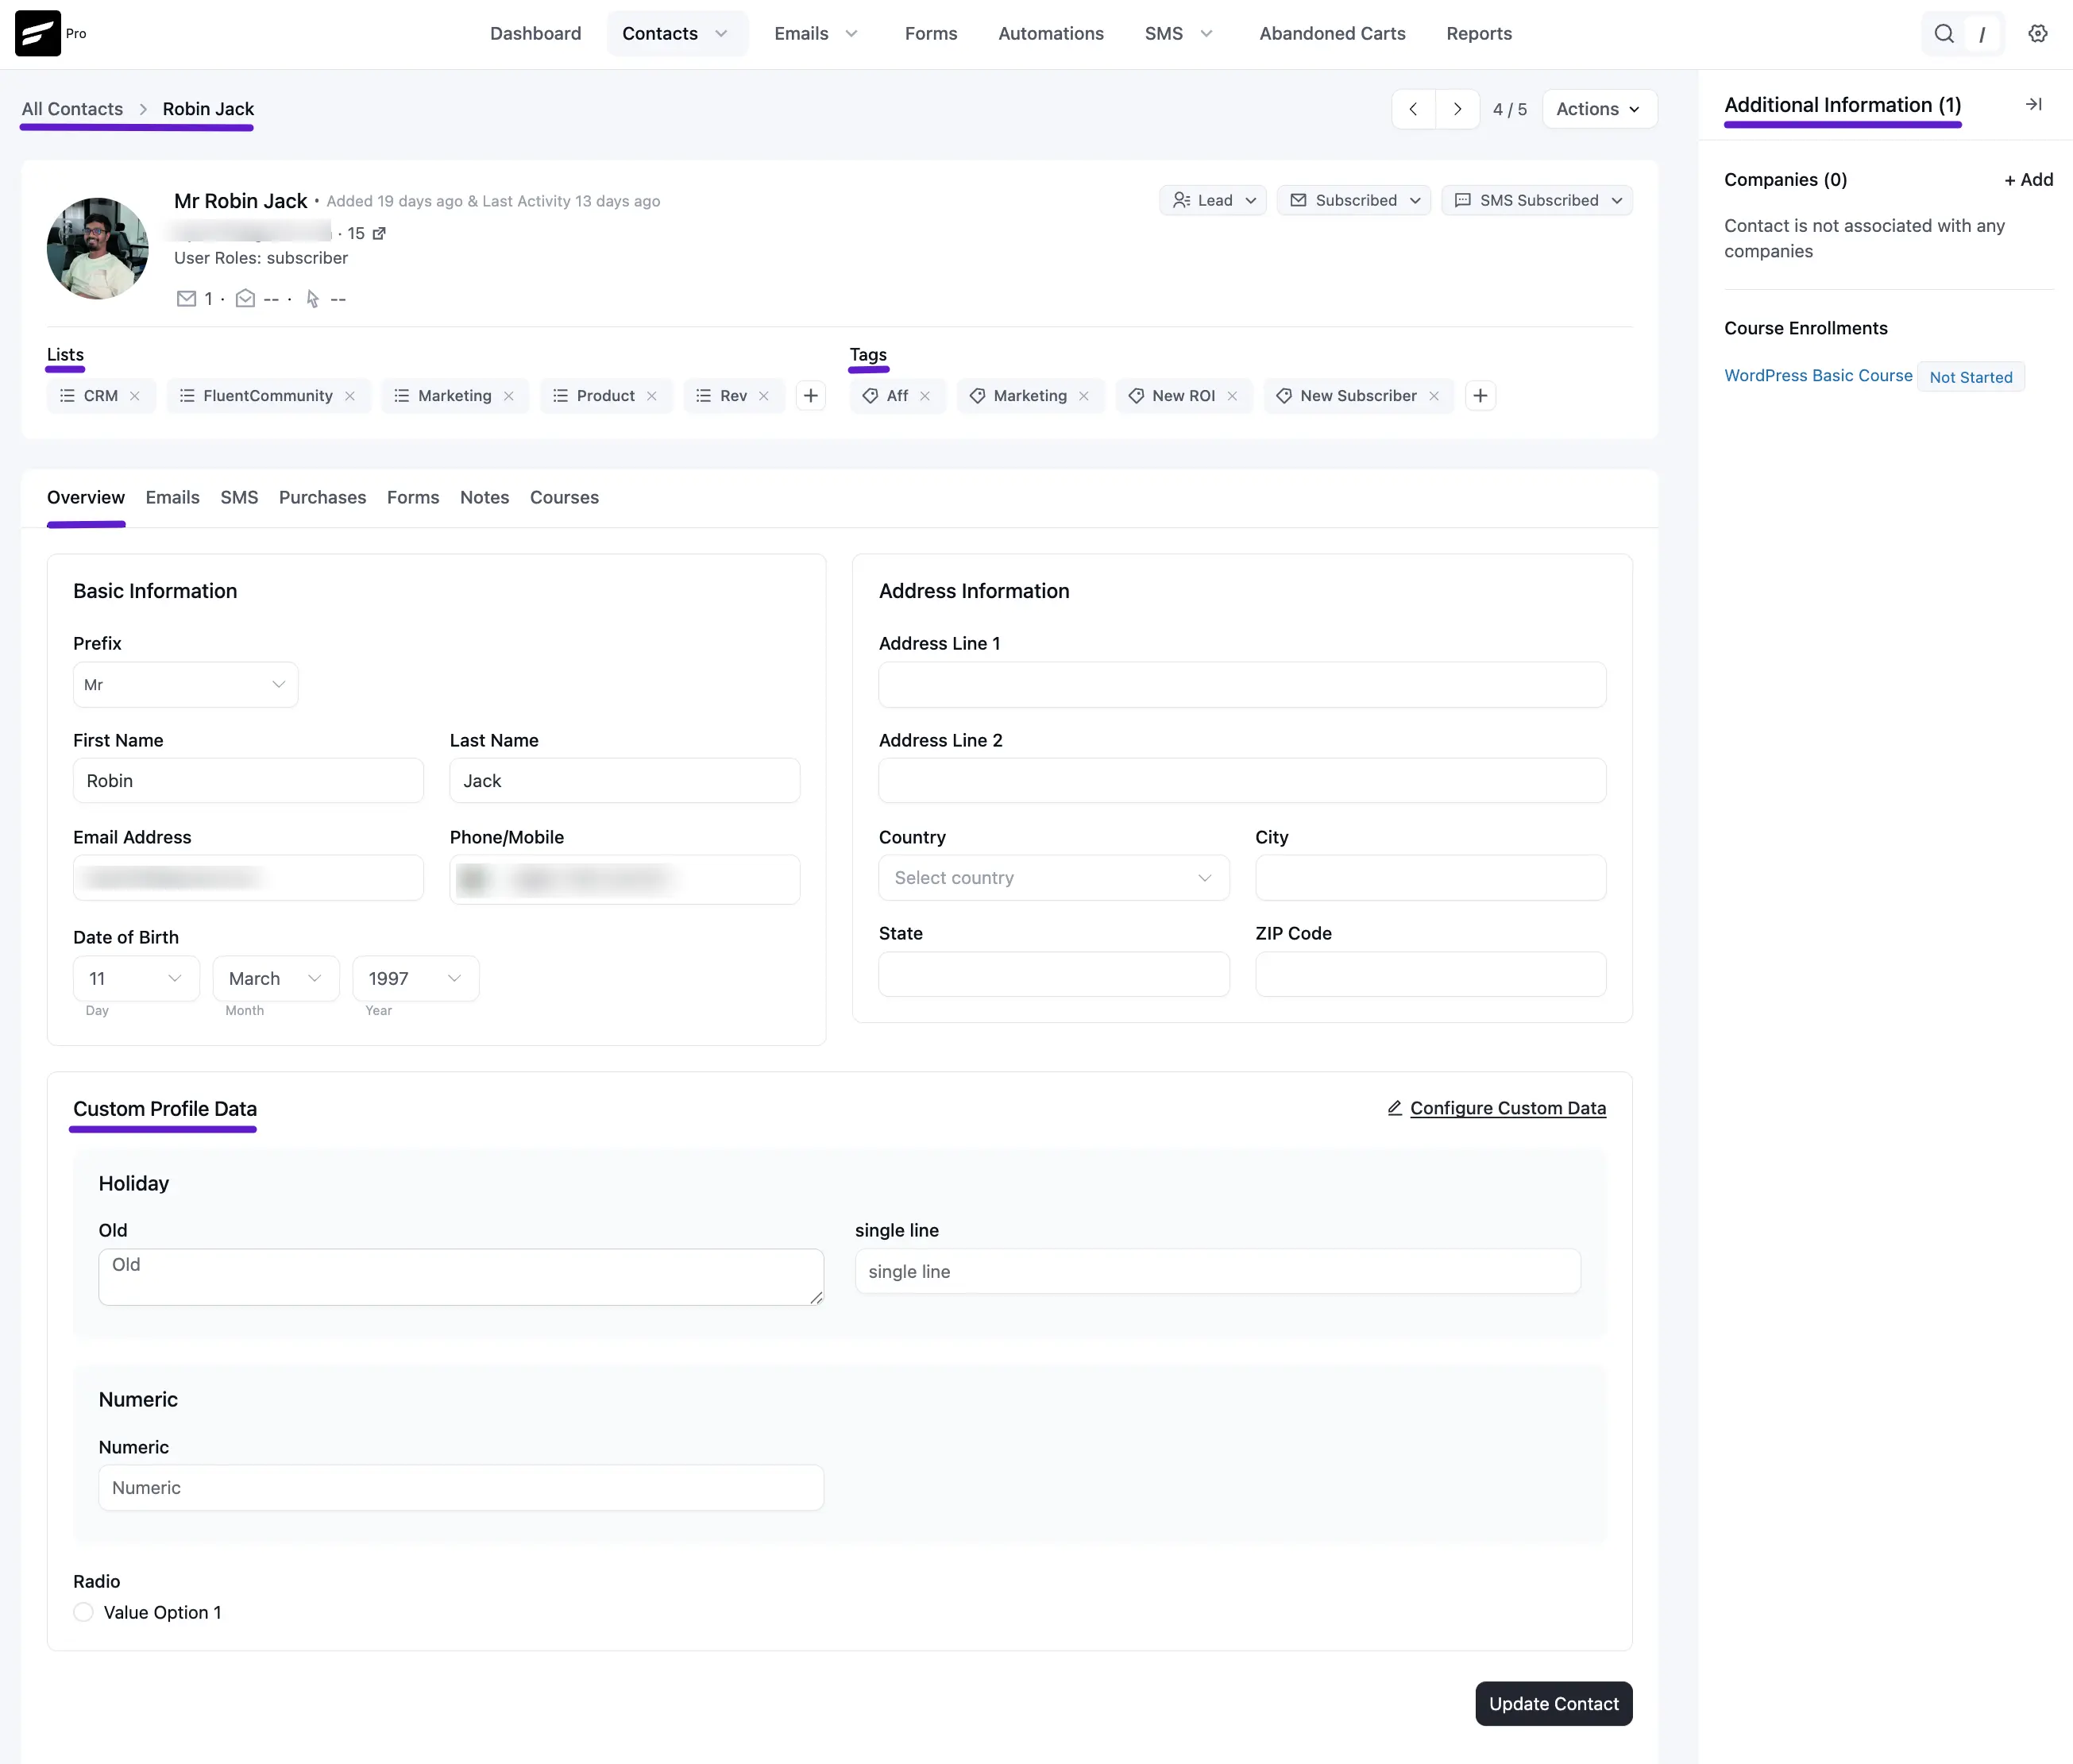
1. Header & Quick Actions
The top section provides an immediate snapshot of the contact's identity and status:
- Profile Image: Pulled automatically from Gravatar based on the email address.
- Contact Name & Details: Displays the full name, email, and WordPress User Role (e.g., subscriber).
- Contact Type & Status: Labels indicate if the contact is a Lead or Customer, their Subscription Status (e.g., Subscribed, Pending), and their SMS Subscription status.
- Activity Tracking: View exactly when the contact was added and the date of their last recorded activity.
2. Lists & Tags
Located directly under the header, this section displays the segments the contact belongs to.
- Managing Segments: You can click the + (Plus) icon to manually add the contact to a new List or Tag.
- Quick Removal: Click the X (Cross) icon on any individual tag or list to remove it instantly.
3. Stats & External Info (Right Sidebar)
- Additional Information: Shows the number of companies the contact is associated with.
- Course Enrollments: If you use LearnDash or LMS this section shows active courses and their progress status (e.g., "Not Started" or "Completed").
Information Tabs
The contact profile is organized into several tabs, allowing you to dive deep into different data points:
Overview
This is the default landing tab. It is split into three main sections:
- Basic Information: Manage the contact's Prefix (Mr/Mrs), Name, Email, Phone number, and Date of Birth.
- Address Information: Stores primary and secondary address lines, City, State, Zip Code, and Country.
- Custom Profile Data: Displays any unique data fields you have created (e.g., "Company Size" or "Interest"). You can click Configure Custom Data to edit these values.
Emails
The Emails tab is your command center for tracking and managing all email communications sent to a specific contact. This section is divided into three key areas: sent history, drip sequences, and automation funnels.
Emails from different campaigns and automations
This section serves as a comprehensive log of every individual email the contact has received. It allows you to monitor engagement and verify delivery at a glance.
- Log Details: You can view the Subject of the email, the Date and time it was sent, and its current Status (e.g., Sent, Opened, or Clicked).
- Filtering: Use the Filter icon (indicated by the purple arrow in the image) to quickly sort through the history to find specific campaigns or transactional emails.
- One-to-One Communication: By clicking the Send Email button, you can compose and send a personal, direct email to the contact immediately. Note that this feature is available only for contacts with a Subscribed status.
- Resending & Previewing: By clicking the three-dot menu icon on any sent email, you have the option to preview the content exactly as it was sent or resend the email to the contact if they missed it.
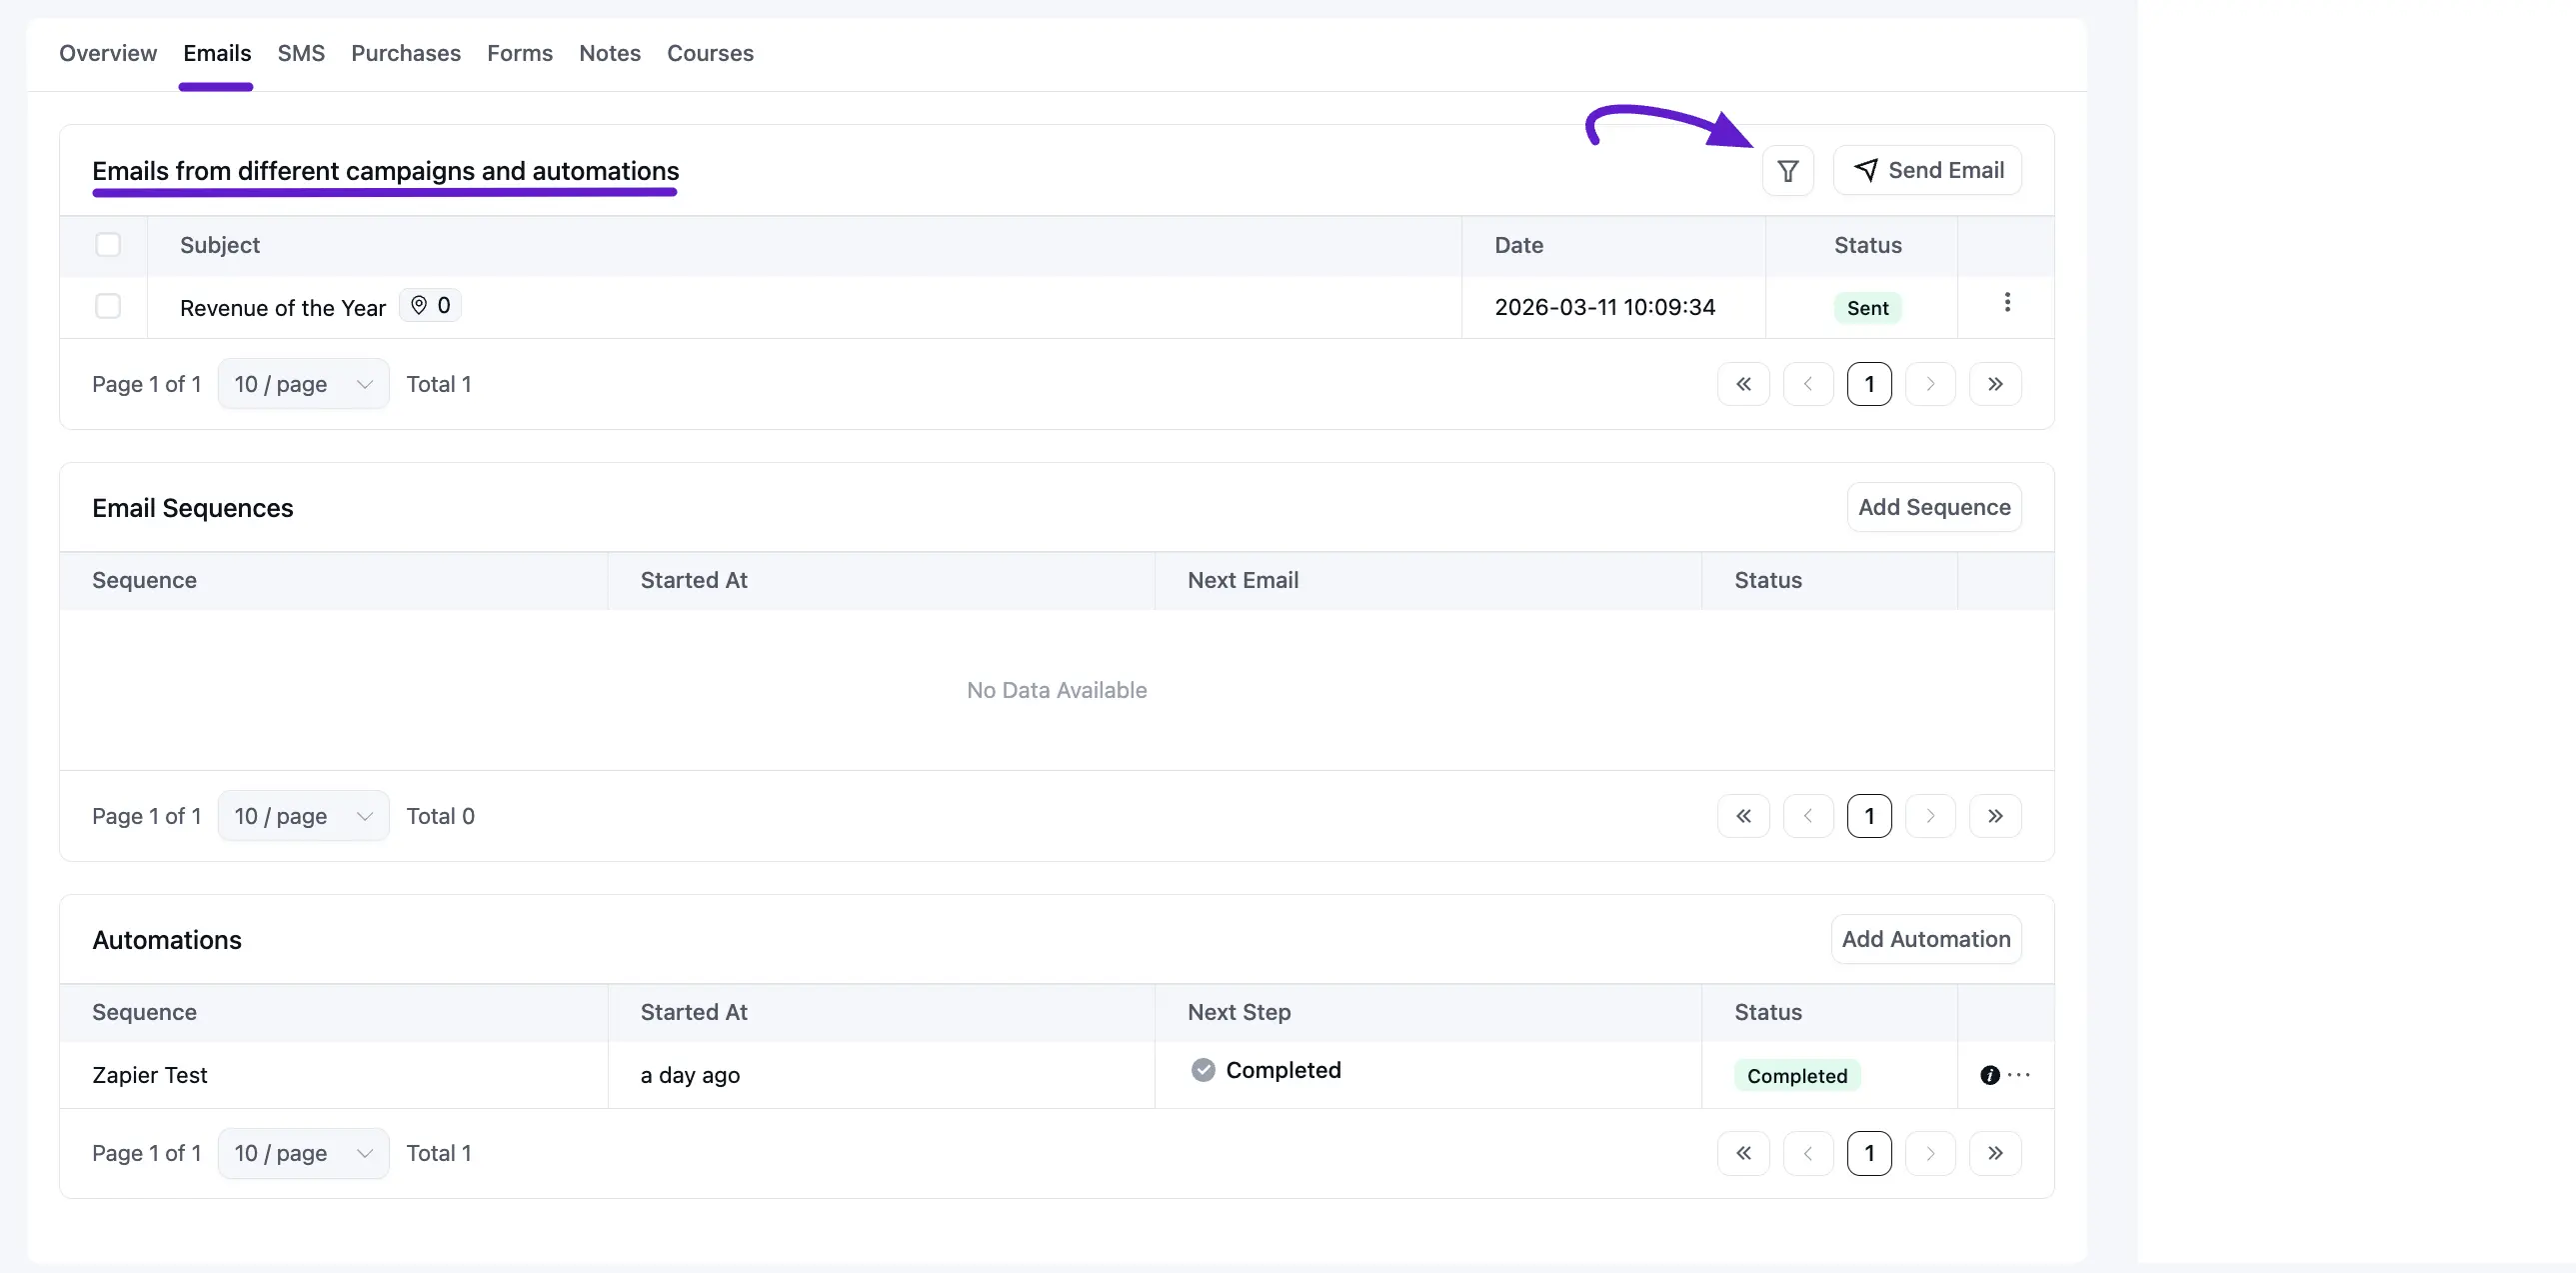
Email Sequences
Email sequences are scheduled series of emails (drips) that go out over time. This section displays all sequences the contact is currently enrolled in or has previously completed.
- Tracking Progress: The table shows the Sequence Name, when the contact Started At, the scheduled date for the Next Email, and the current Status.
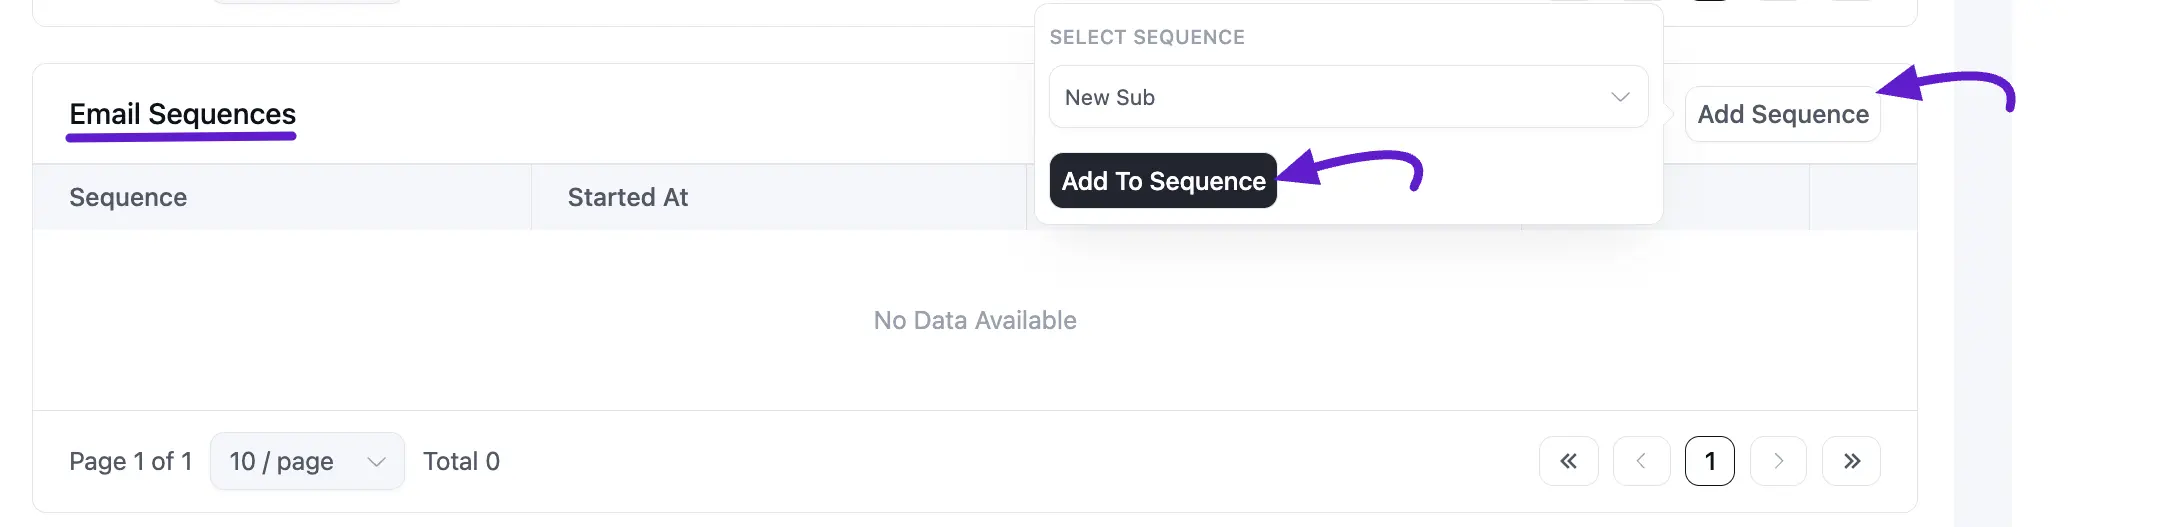
- Manually Adding a Sequence: To enroll a contact in a new drip series, click the Add Sequence button. A popup will appear titled Select Sequence. Now, choose your desired sequence from the dropdown menu and click the Add To Sequence button.
- Removing from Sequence: If you wish to stop a sequence for this specific contact, you can delete this sequence by clicking the three-dot icon Dlete option.
Automation
This section tracks the contact’s journey through your complex automation funnels, which trigger based on specific behaviors or conditions.
- Automation Status: View the Automation Name, Started At date, the Next Step they are waiting for, and the overall Status (e.g., Completed or Active).
- Manually Triggering an Automation: If you want to force-start a contact into an automation funnel:
- Click the Add Automation button.
- In the Select Automation popup, choose the relevant Automation Funnel from the dropdown.
- Click Add To Automation to confirm.
- Managing Entry: Just like sequences, you can manually remove a contact from any active automation by clicking the Delete icon if you no longer want them to proceed through the remaining steps.

SMS
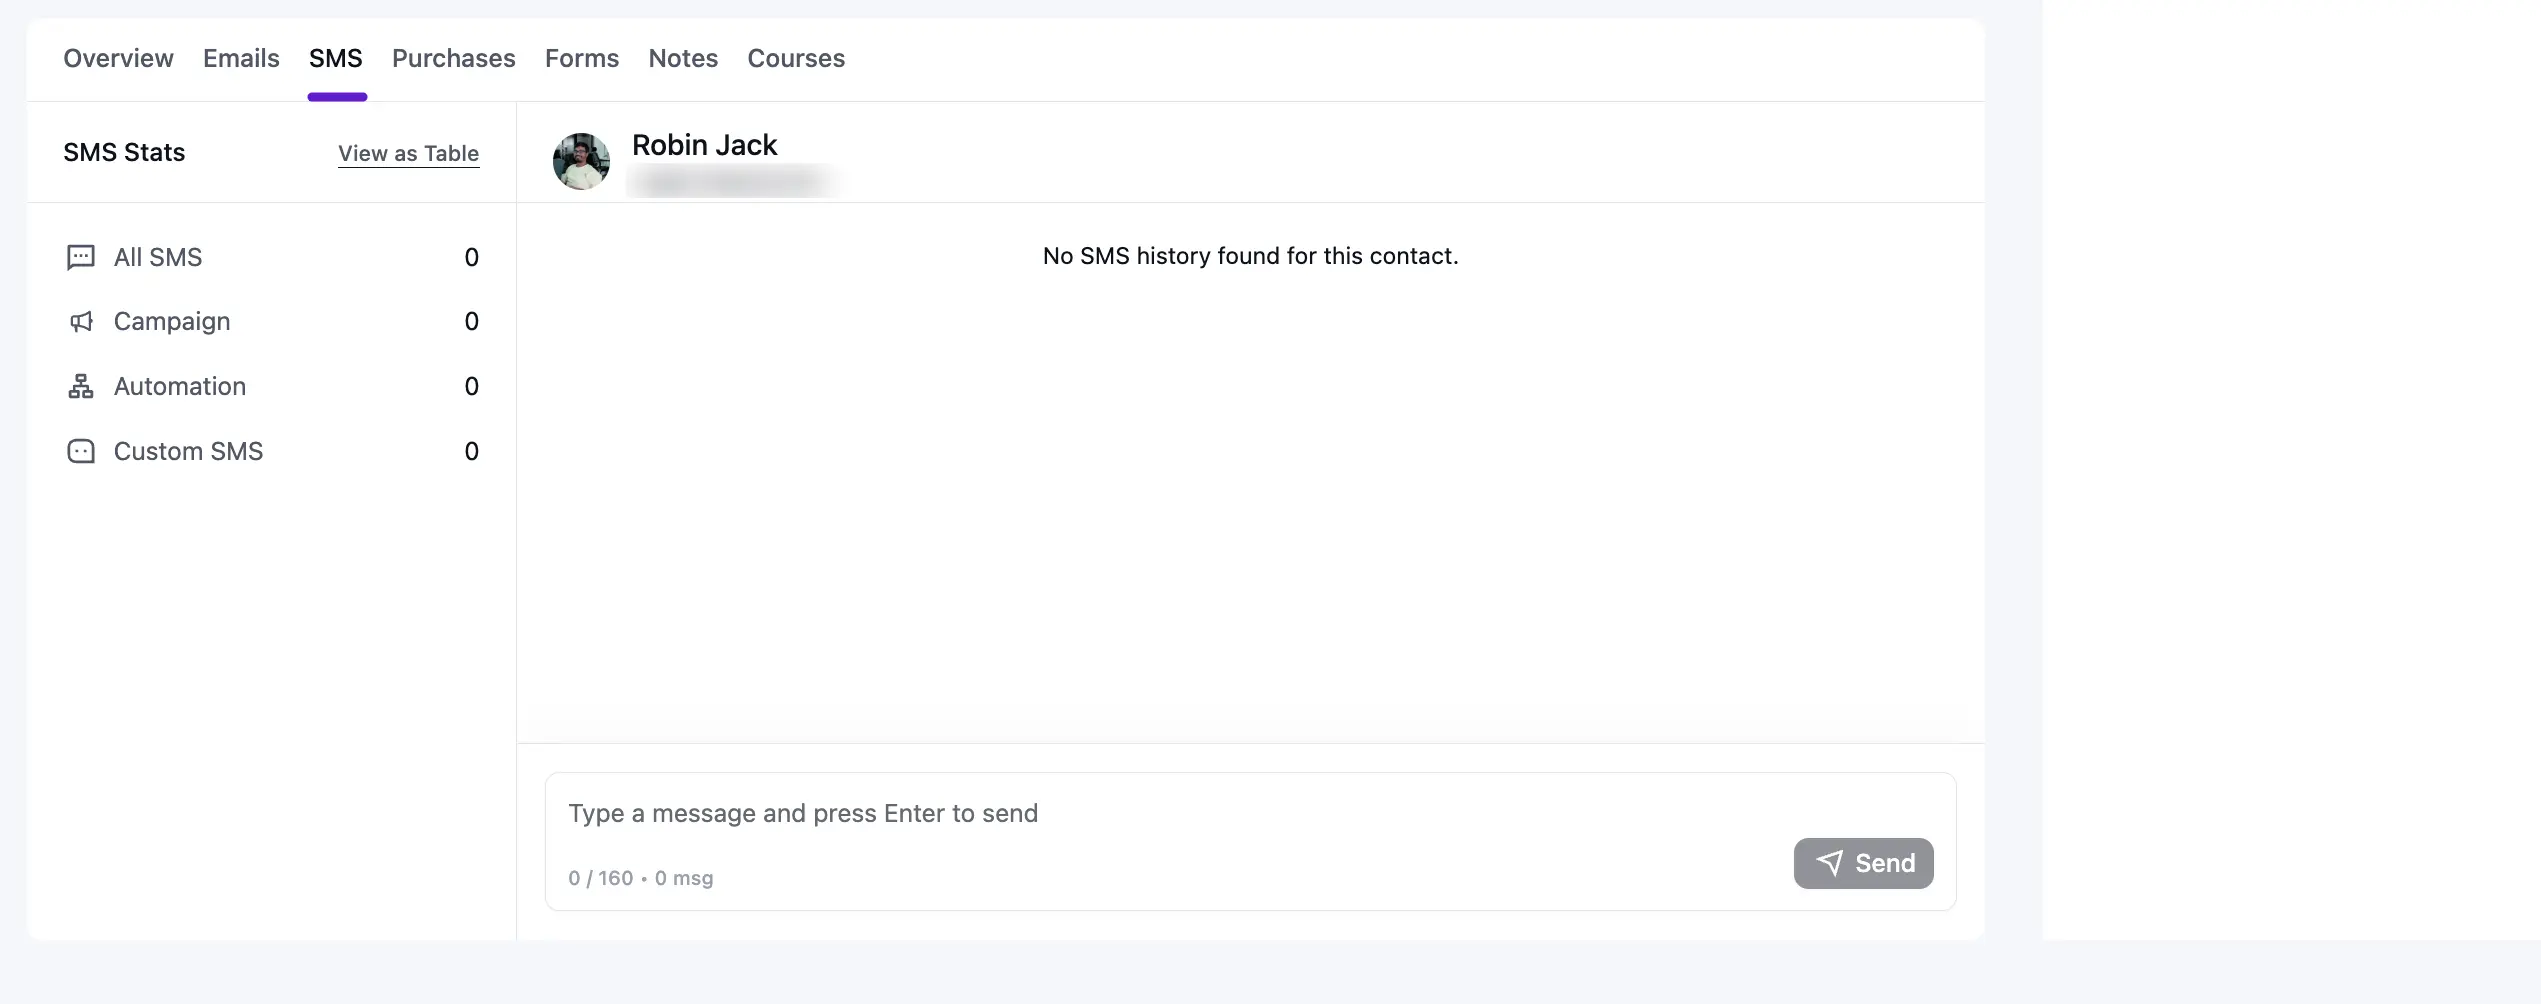
The SMS tab allows you to view and manage all SMS activities for a specific contact.
On the left side, you will see the SMS Stats, which show the total number of messages sent under different categories:
- All SMS: Total messages sent
- Campaign: Messages sent through campaigns
- Automation: Messages sent through automation workflows
- Custom SMS: Messages sent manually
In the main section, you can view the contact’s SMS history. If no messages have been sent yet, it will display a message saying no SMS history is available for this contact.
At the bottom, there is a message box where you can write and send a new SMS directly to the contact. Simply type your message and press Enter or click the Send button.
NOTE
To send SMS, you must have an active SMS gateway integration (like Twilio or amazon SNS) configured in your FluentCRM settings. Additionally, the contact must have an SMS Subscribed status to receive marketing messages.
Purchases
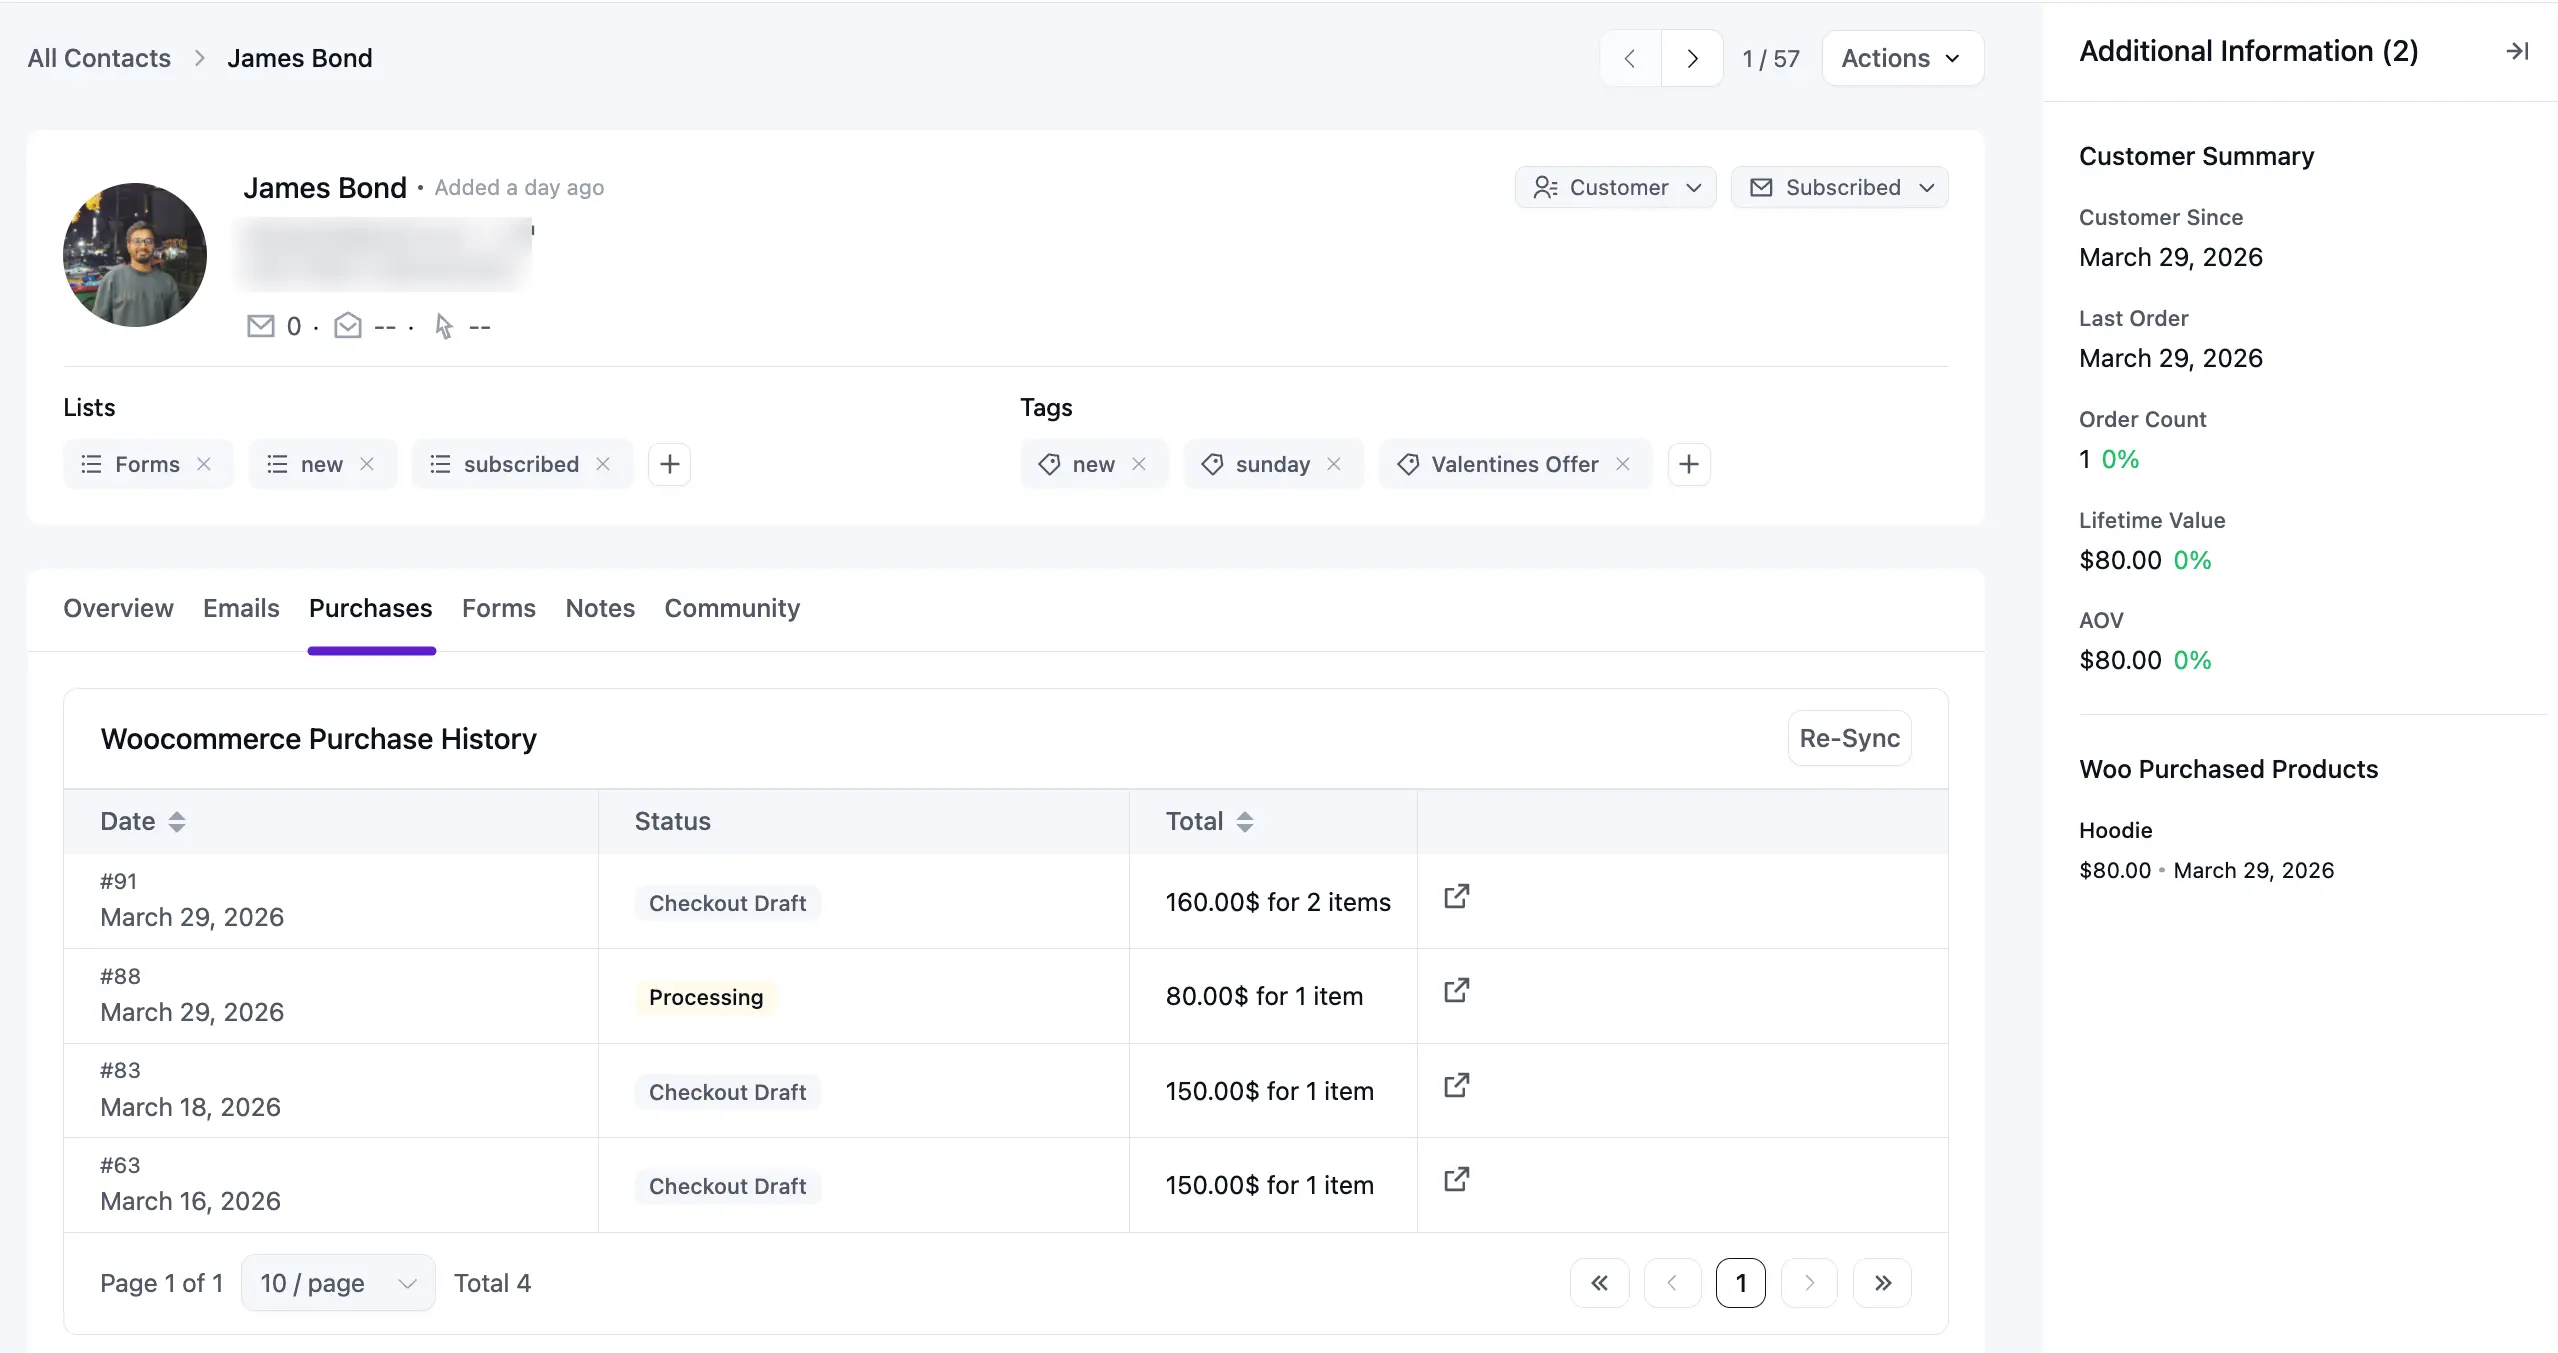
If you use an online store like WooCommerce, the Purchases tab shows you exactly what your customers are buying. This is a great way to see who your best customers are and what they like.
Customer Summary (Right Sidebar)
The sidebar on the right gives you a quick look at how much a customer has spent:
- Customer Since: The date they first joined your store.
- Order Count: The total number of orders they have placed.
- Lifetime Value: The total amount of money they have spent in your store.
- AOV (Average Order Value): The average amount they spend every time they buy something.
Below this, you can see a list of the specific products they bought, like a hoodie or a shirt.
Purchase History Table
The main table in the center lists every single order.
- Order Details: Shows the Order ID and the Date of the purchase.
- Status: Tells you if the order is Processing, Completed, or still a Checkout Draft (meaning they started to buy but didn't finish).
- Total: Shows how much they paid and how many items were in that order.
- View Order: Click the small Link icon to go directly to the full order page in WooCommerce.
- Re-Sync: Click this button to make sure the information is up-to-date if you just made a change.
Forms
The Forms tab shows you all the information a contact has submitted through Fluent Forms. This is a great way to see exactly what questions they asked or what details they provided when they filled out a form on your website.
Form Submissions (Fluent Forms)
The table lists every form entry connected to this contact's email address.
- ID: The unique entry number for that specific form submission.
- Form Title: The name of the form they filled out (for example, "Subscribe" or "Contact Us").
- Status: Shows if the message has been seen. An unread label helps you spot new inquiries quickly.
- Submitted At: The exact date and time the contact sent the form.
- Action: Click the view button to see the full details of what the person wrote in the form fields.

Notes
The Notes tab is like a digital notebook for each contact. It allows you to keep track of important conversations, meetings, or internal reminders so your team always knows what is happening with a customer.
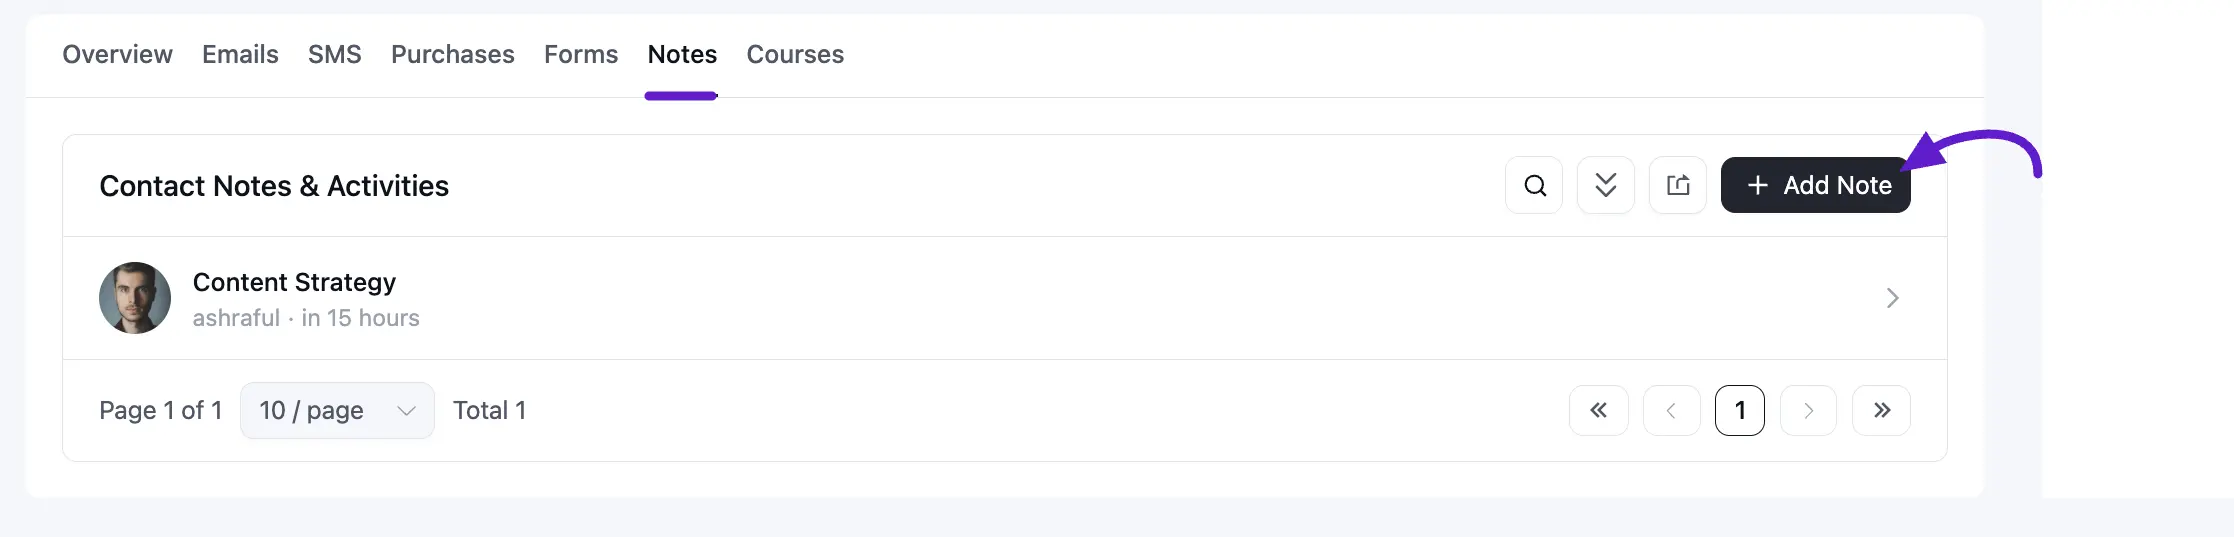
Contact Notes & Activities
This area keeps a history of all the notes you have added. If you haven't added any yet, the screen will say "No Note found."
- Search: Use the magnifying glass icon to quickly find a specific note.
- Export: Click the export icon (next to the search icon) to download all your notes.
- Add Note: Click the + Add Note button to write a new one.
- Edit or Delete: Also, you can edit or delete your notes by clicking the edit or delete icon from the right side.
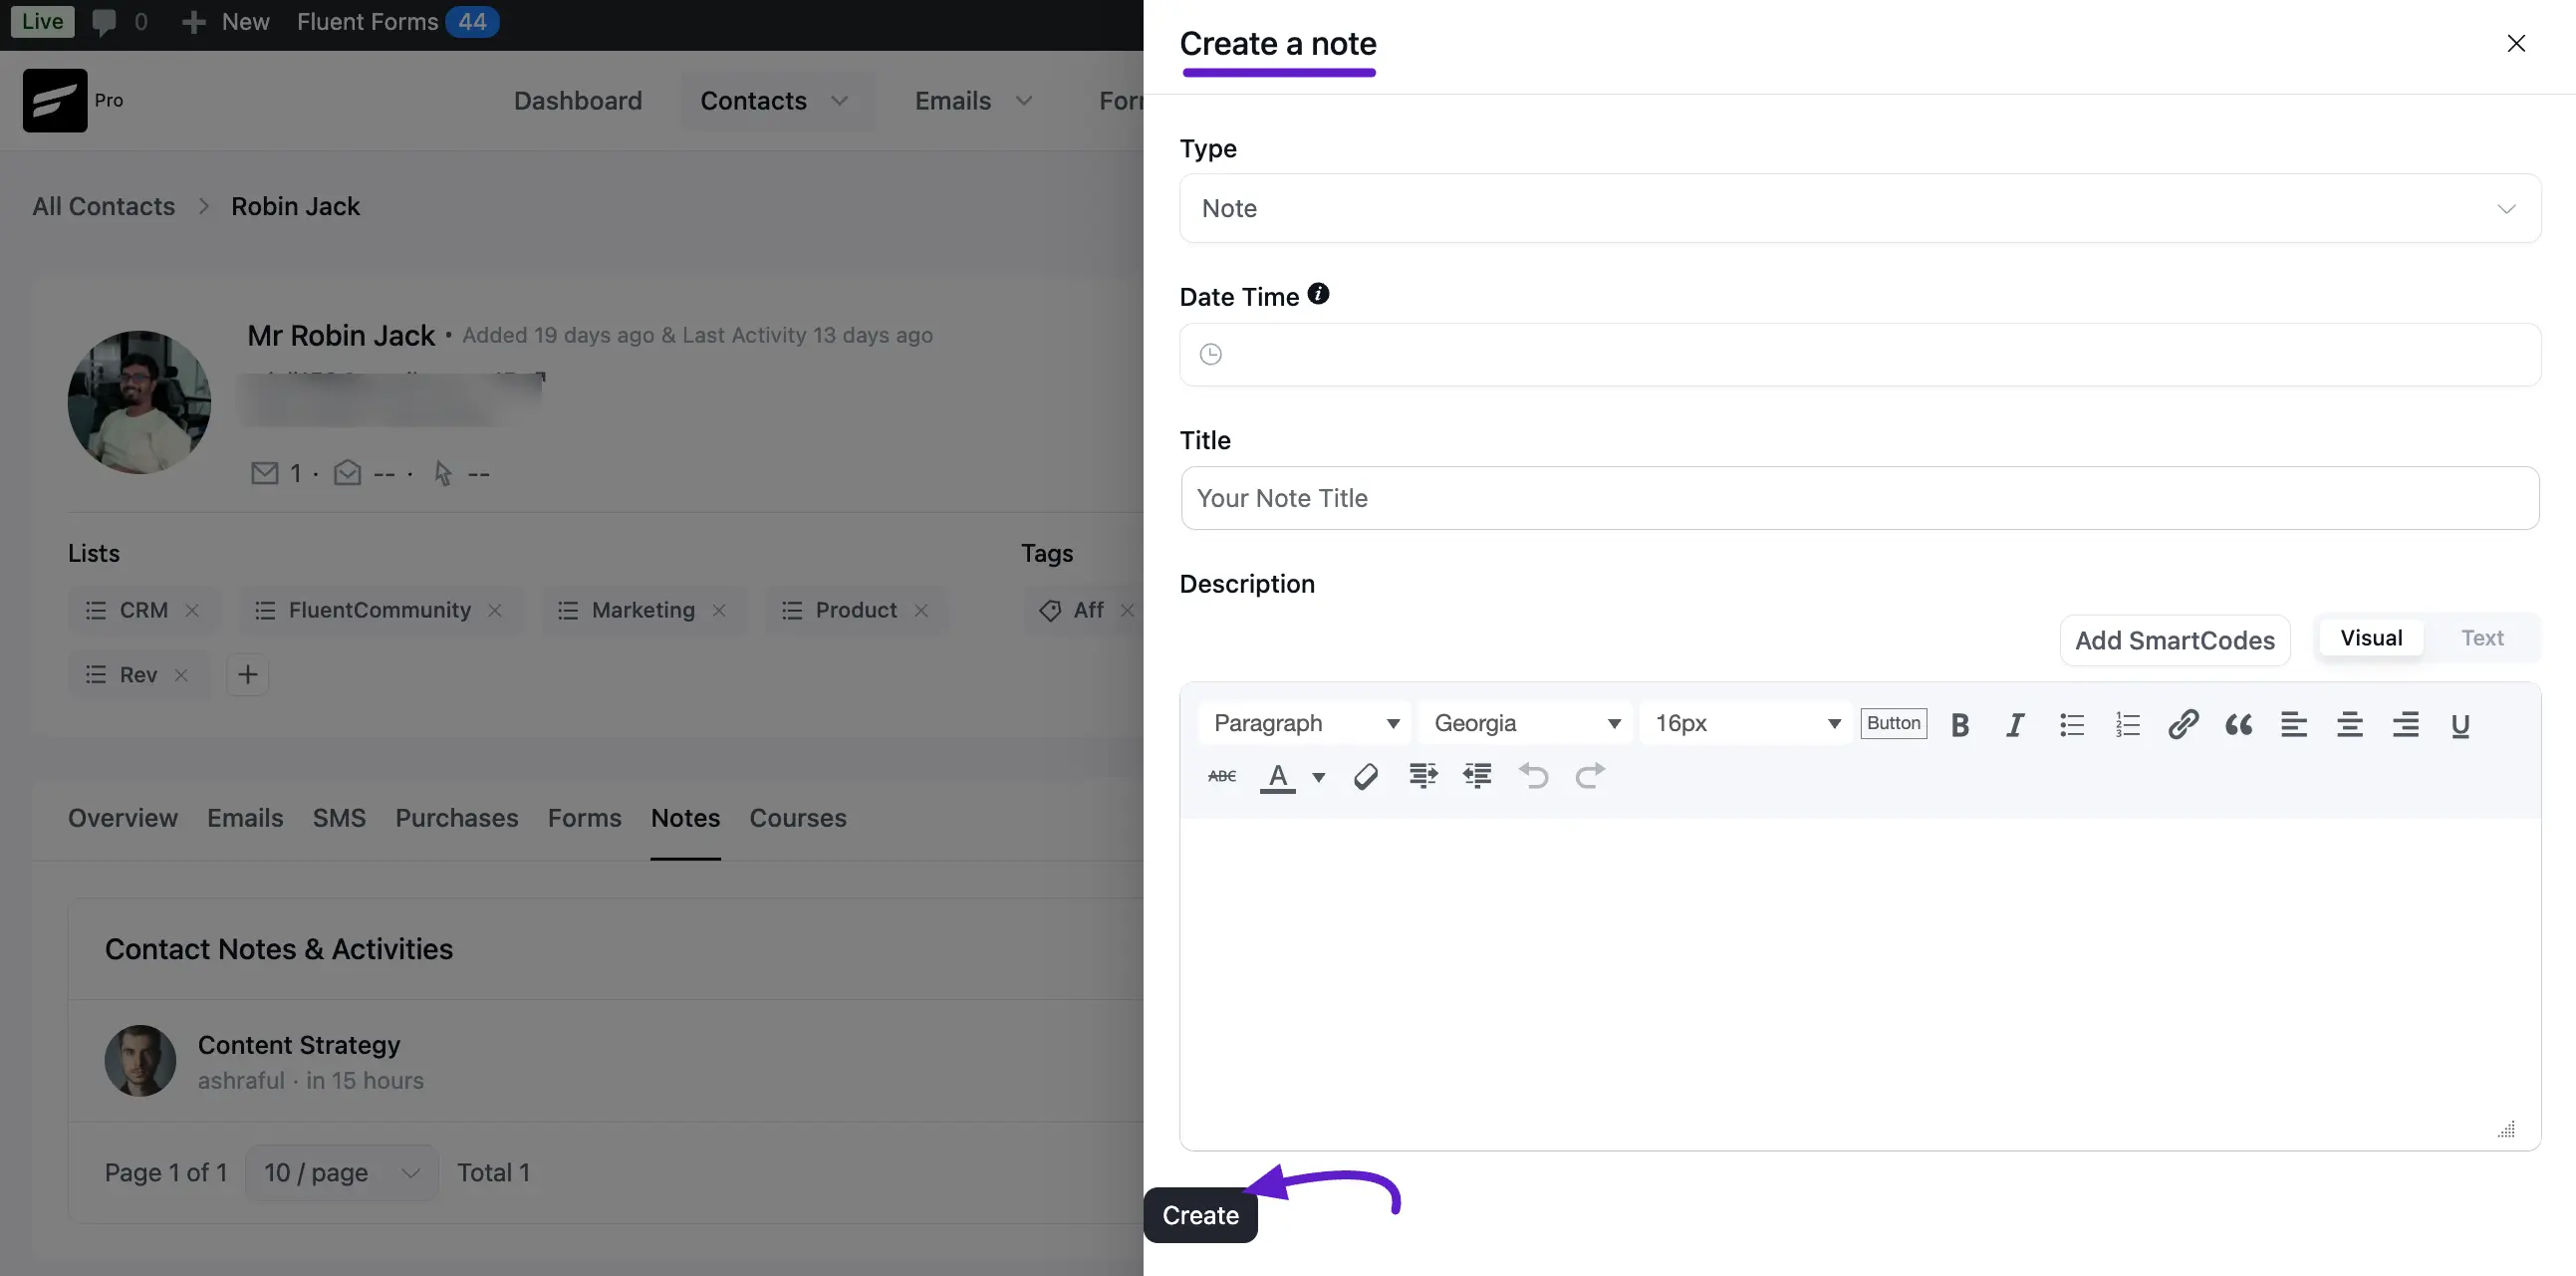
Creating a Note
When you click the add button, a popup will appear with these options:
- Type: Choose the category that fits best. You can select from options like Call, Email, Meeting, Quote: Sent, or a simple Note.
- Date Time: Pick the exact time the event happened. If you leave it blank, it will use the current time.
- Title: Give your note a short, clear name so you can find it later.
- Description: Use the editor box to write down all the details. You can even use SmartCodes to pull in data or format your text with bolding and links.
Once you are done, just click the Create button to save it.
Courses
If you use a Learning Management System (LMS) like LearnDash, the Courses tab helps you track a contact's learning progress. This is very useful for seeing how much of your training material a student has finished.
Courses Table
This table shows you every course the contact is enrolled in.
- ID: The unique identification number for that specific course.
- Course Name: The title of the course the student is taking (for example, "WordPress Basic Course").
- Started At: The exact date and time the student first began the course.
- Status: Shows where they are in their journey. For example, Not Started means they are enrolled but haven't begun, while Completed means they finished the course.
- Completed At: This column will show the date they finished the course once they reach the end.
