Appearance
Migrating from Mailchimp to FluentCRM
Migrating your contacts from Mailchimp to FluentCRM is a quick and easy process using a direct API connection. This method links the two platforms, allowing you to transfer your audience without the hassle of downloading and uploading CSV files.
Follow this simple, step-by-step guide to bring your contacts over seamlessly.
Step 1: Get Your Connection Key from Mailchimp
Before starting the process in FluentCRM, you need to generate an API key from your Mailchimp account. This key acts as a secure password, allowing FluentCRM to fetch your data.
- Log in to your Mailchimp account.
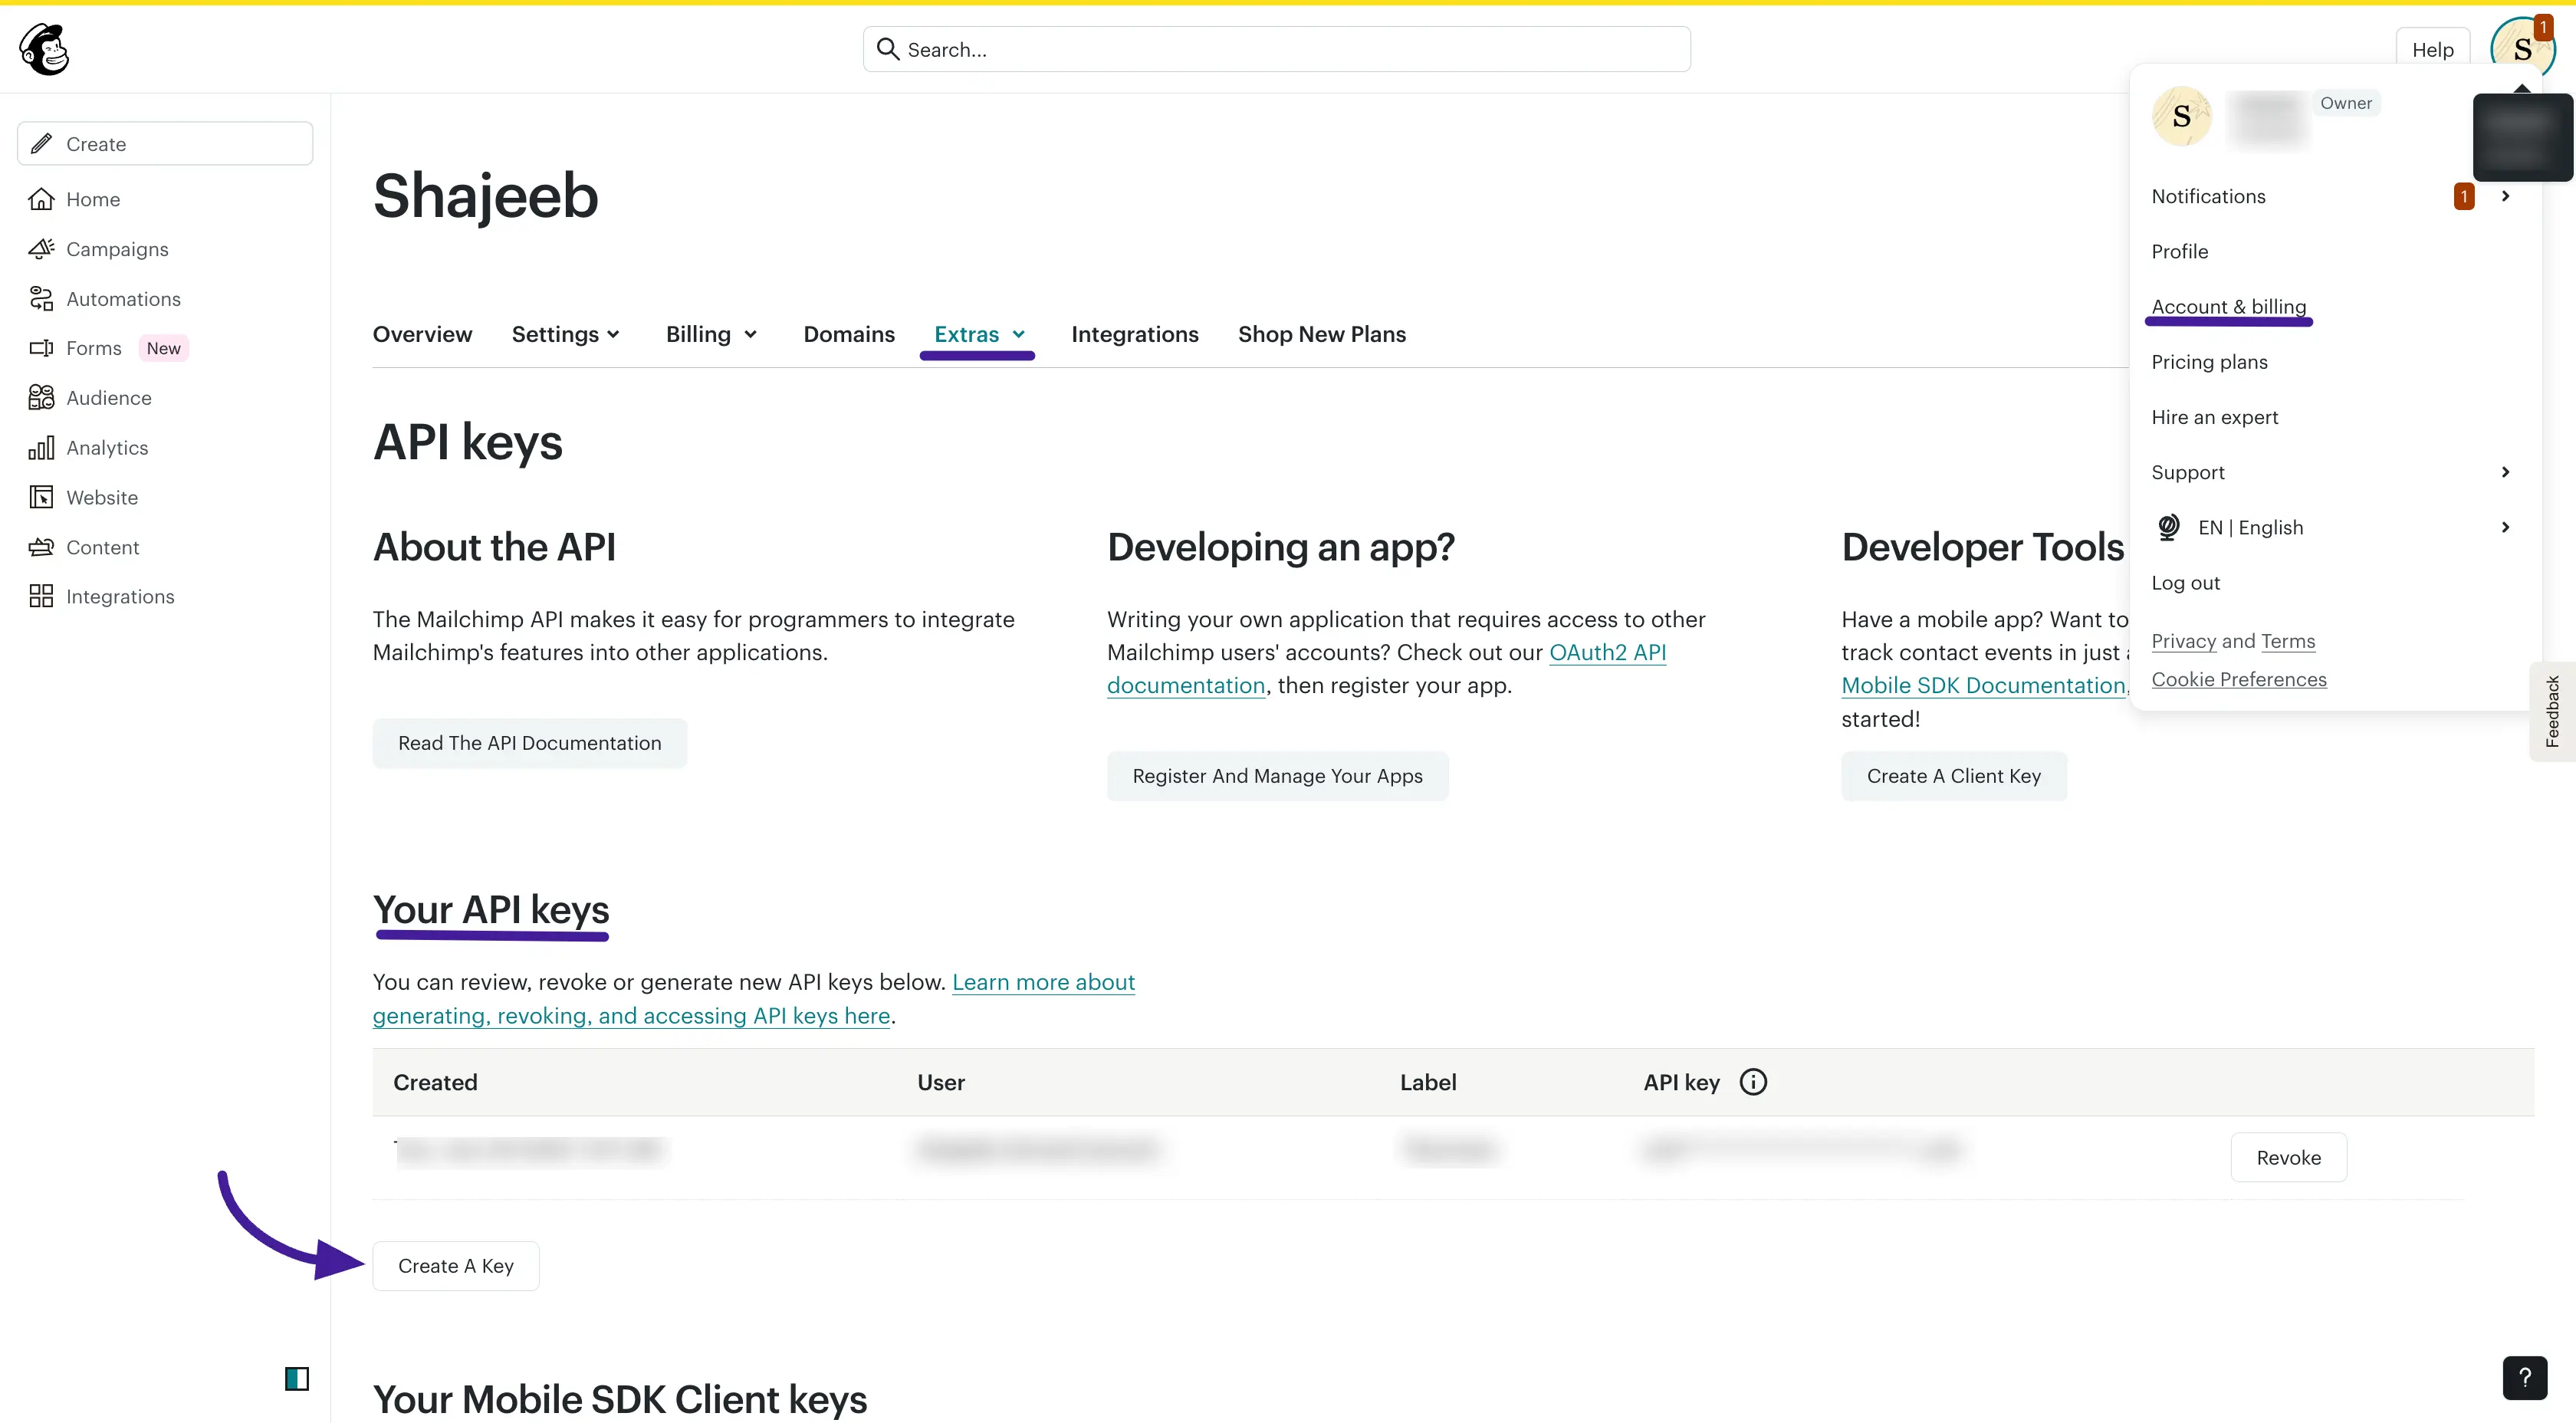
- Click on your Profile icon (your avatar) in the top-right corner.
- From the dropdown menu, select Account & billing.
- On the next screen, click the Extras dropdown menu and choose API keys.
- Scroll down to the "Your API keys" section and click the Create A Key button.
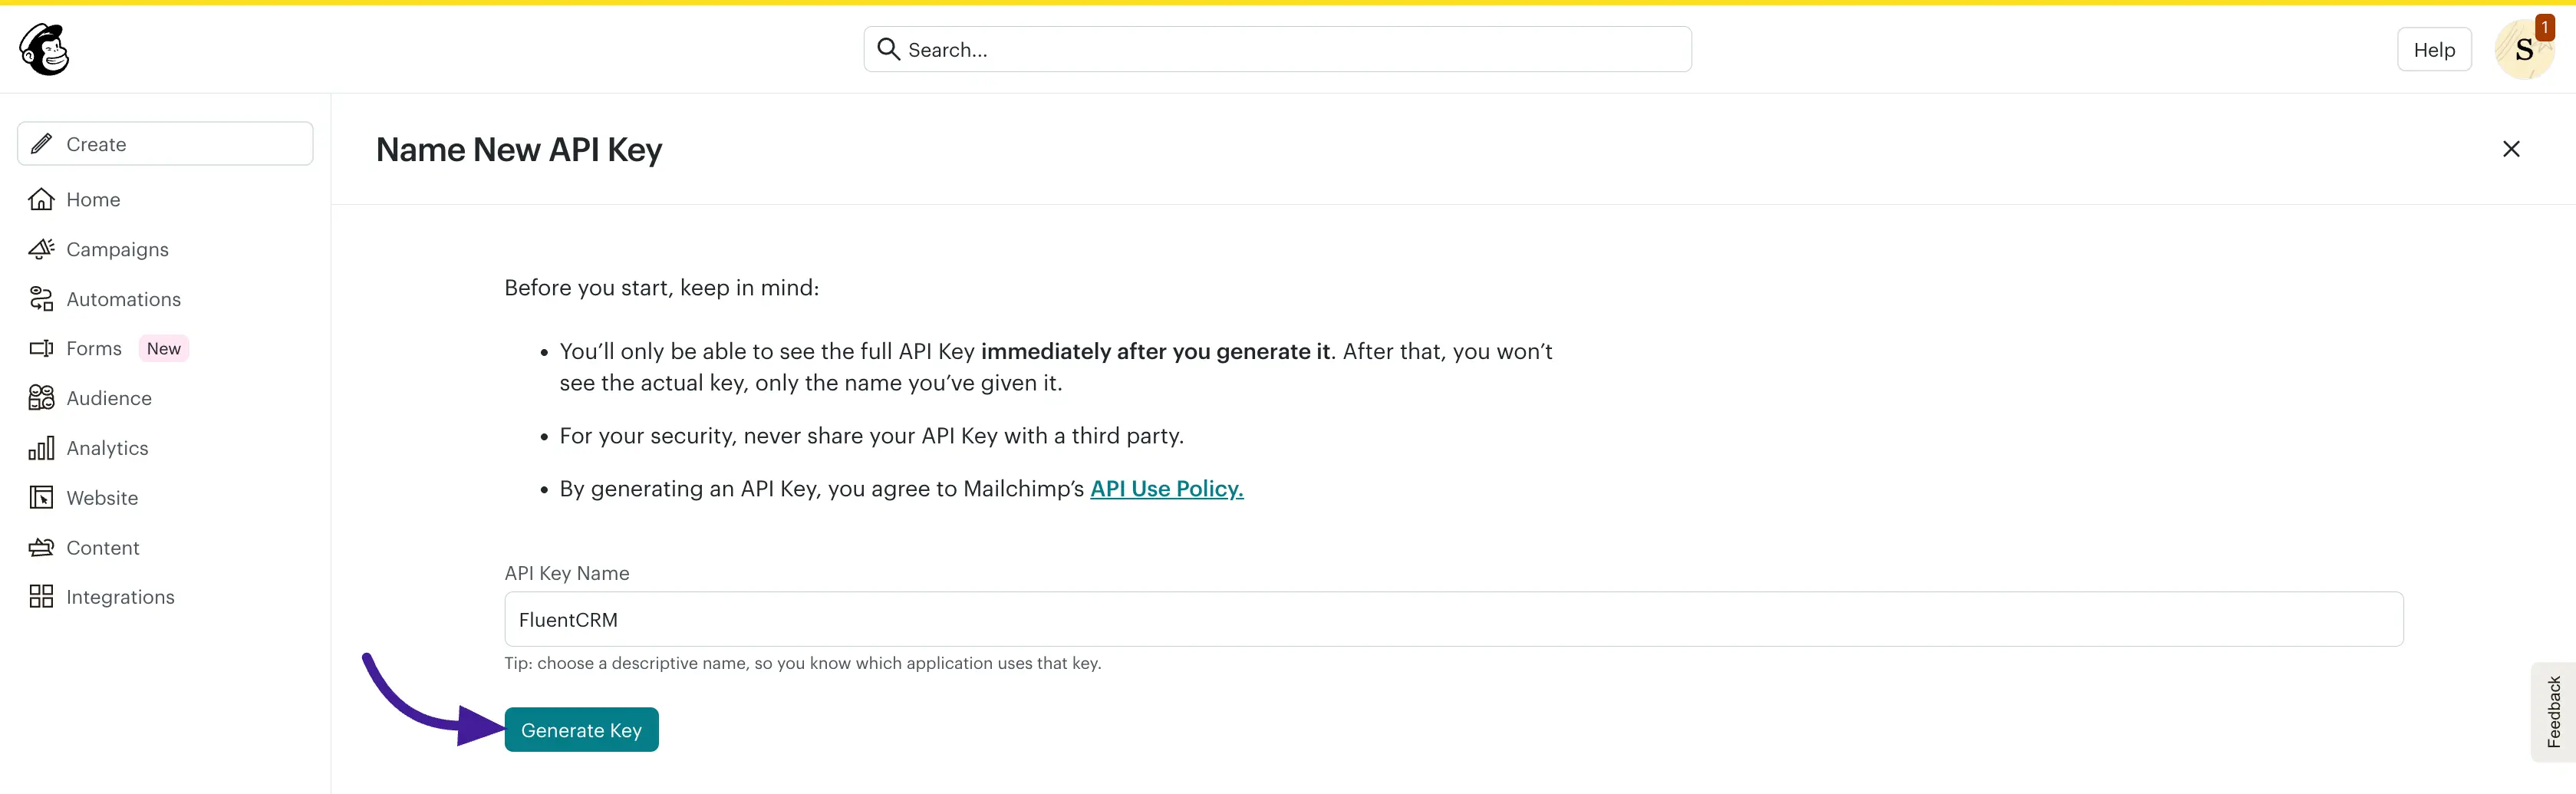
- You will be prompted to give your key a descriptive name (e.g., "FluentCRM"). Enter the name and click Generate Key.
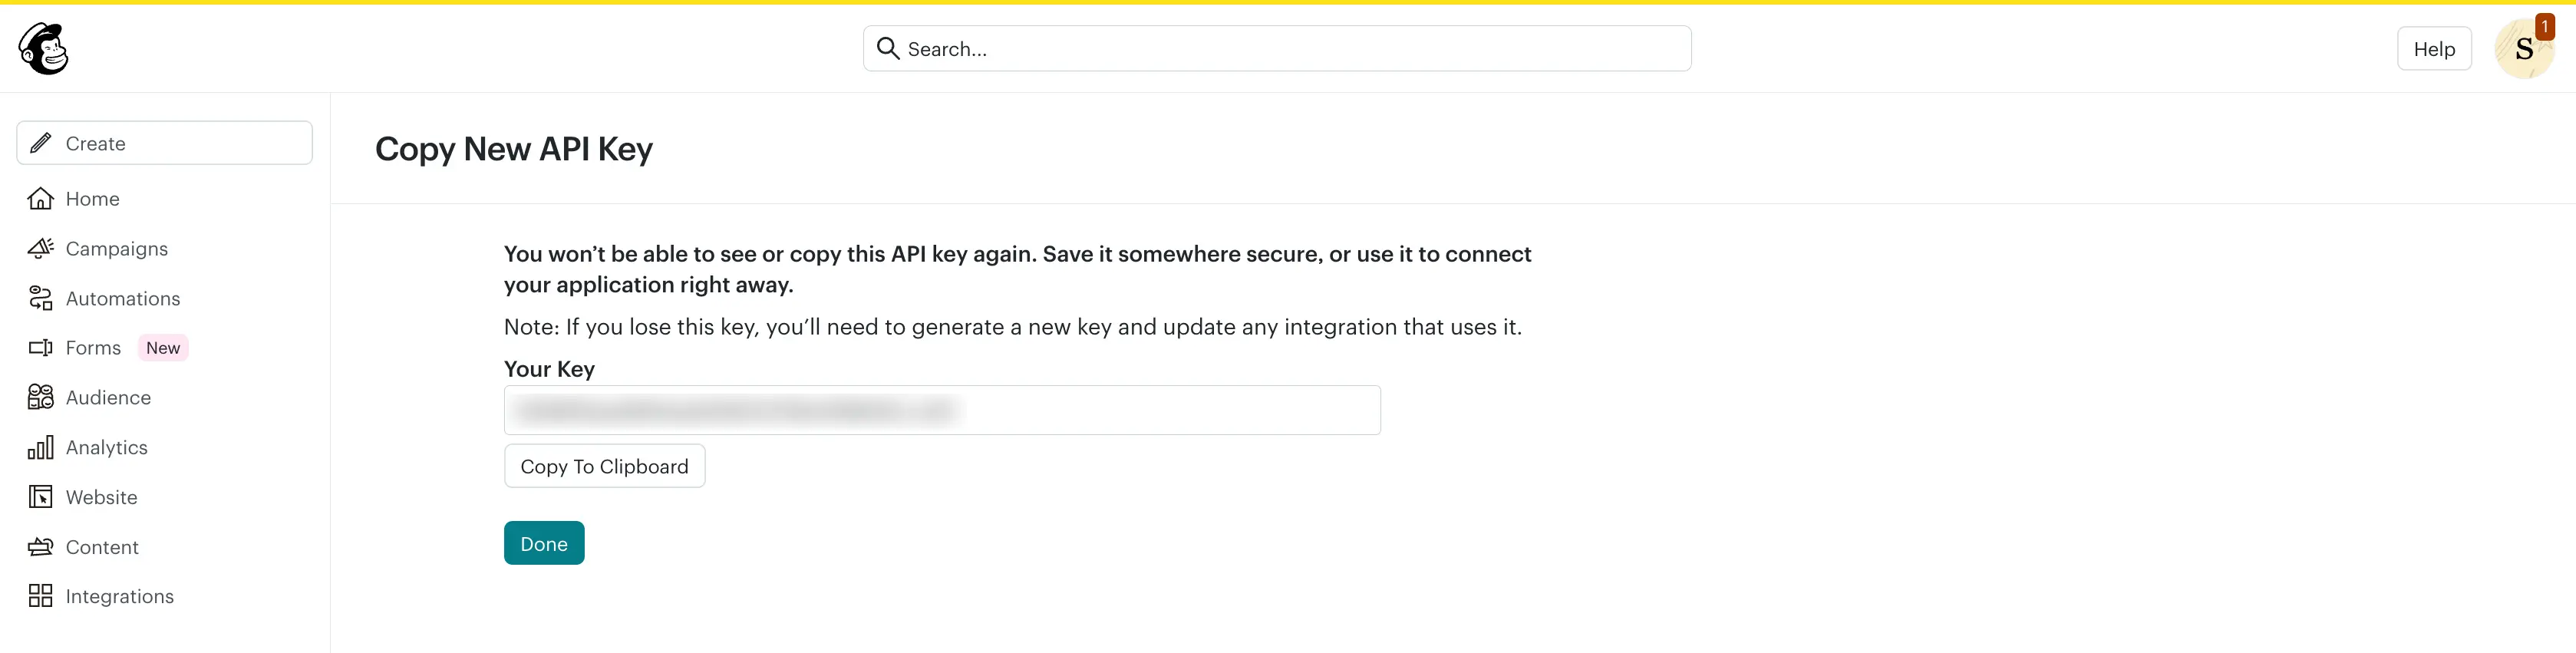
- Your new API key will be displayed. Click Copy To Clipboard.
⚠️ Crucial Note: Save this key immediately! Mailchimp will only show you the full API key this one time right after you generate it.
Step 2: Start the Import in FluentCRM
With your Mailchimp key copied, head over to your WordPress dashboard.
- Go to FluentCRM → Contacts.
- Click the Import button located in the top-right corner.

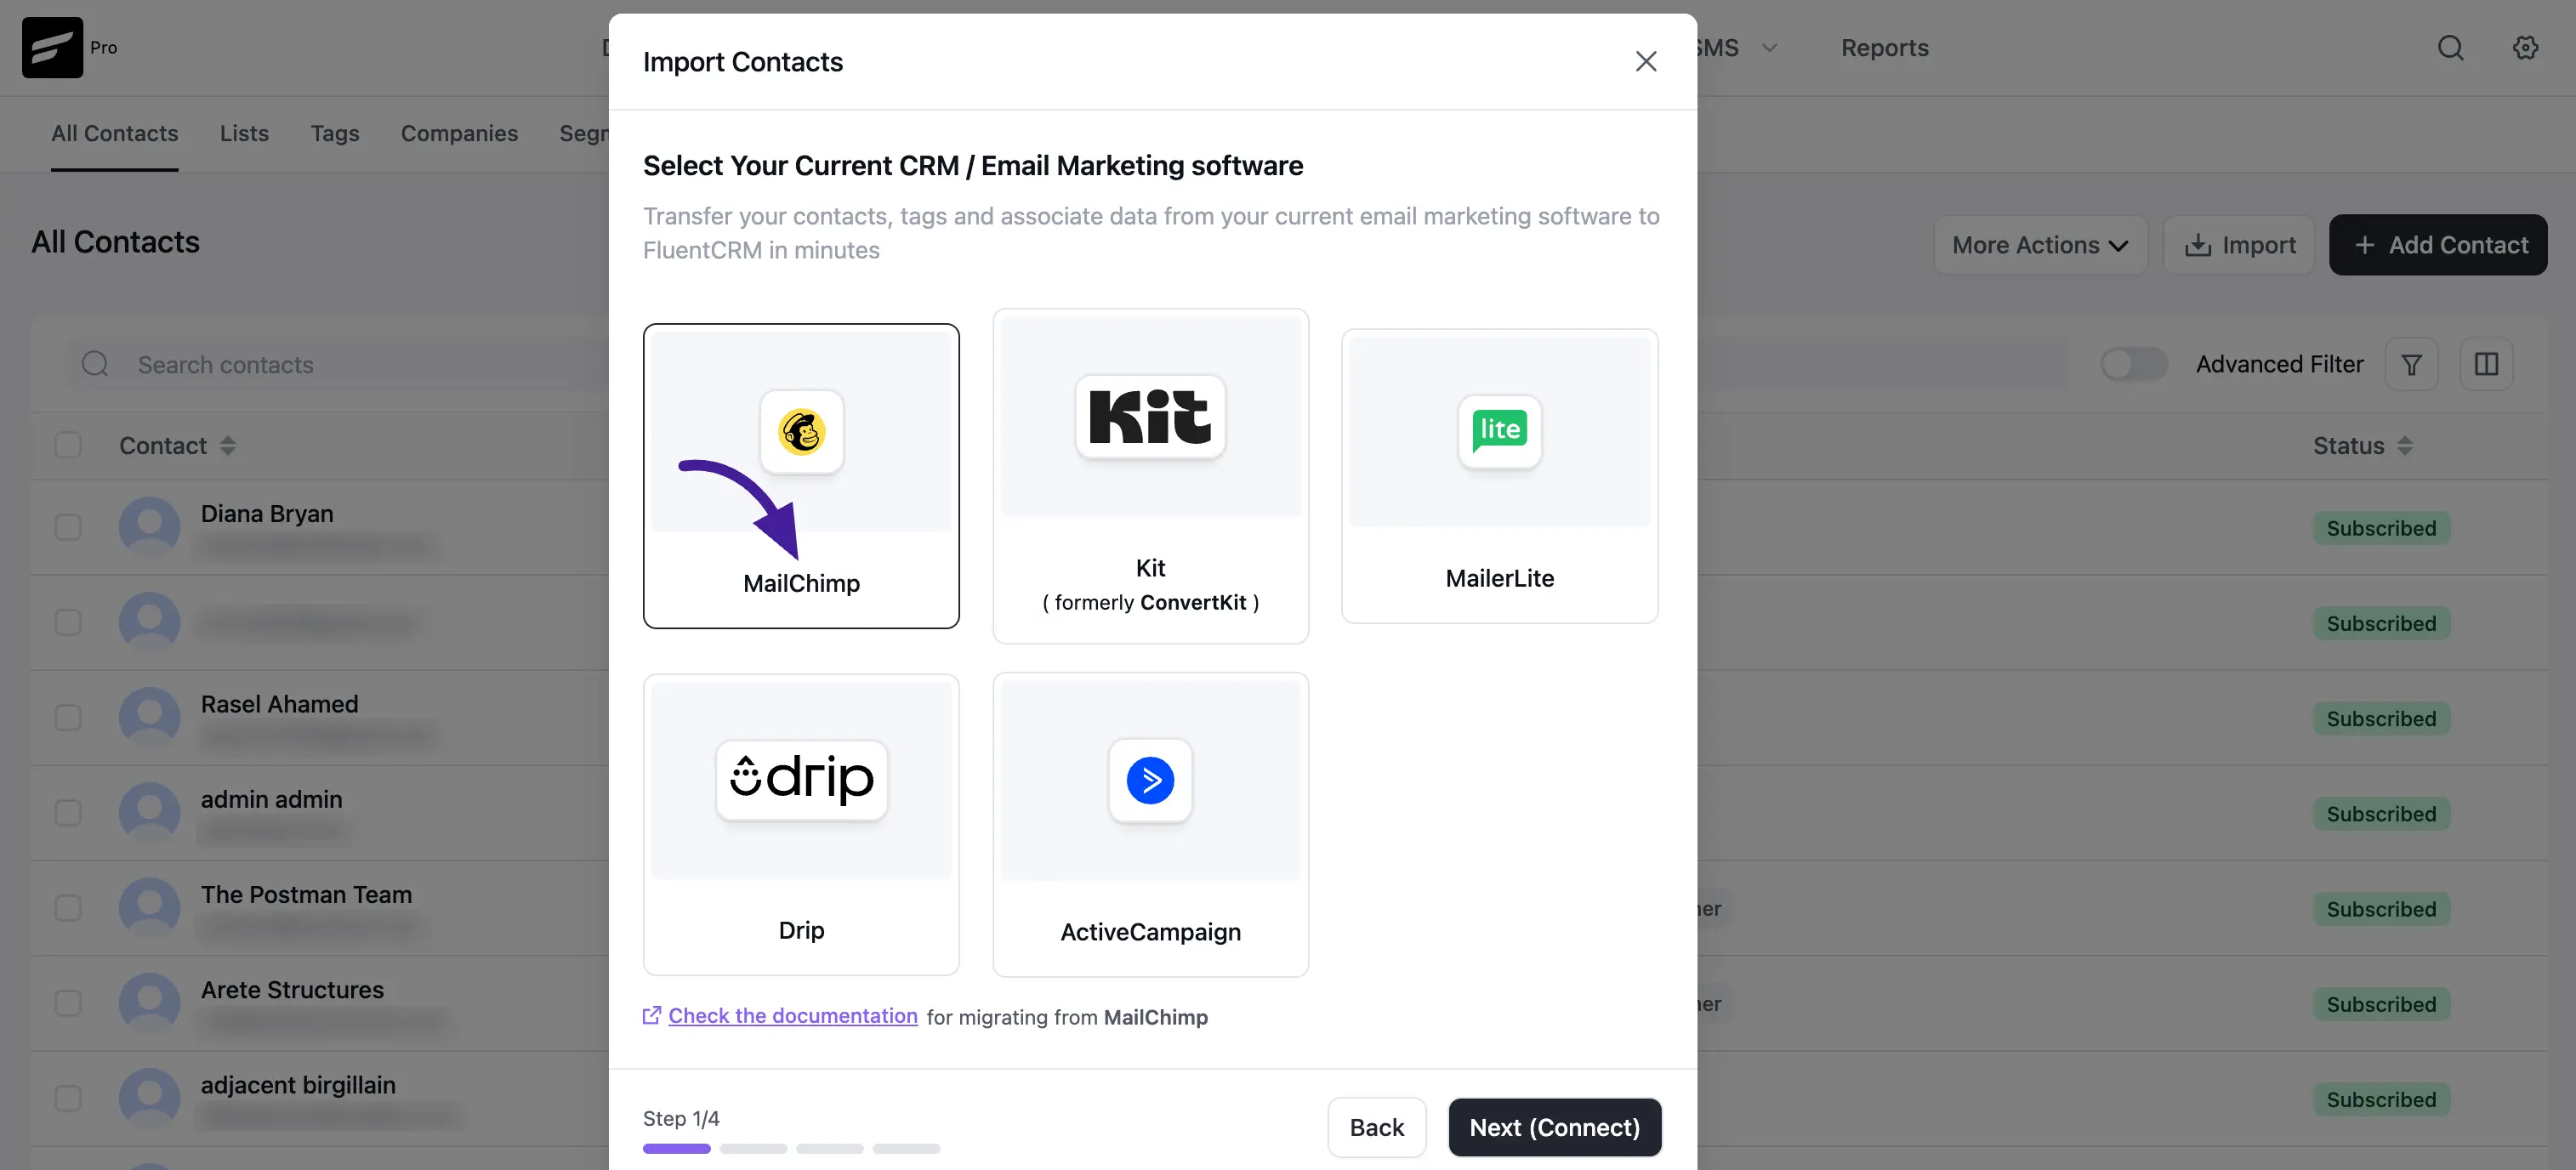
- A pop-up window will appear. Select the Import From Other Providers box and click Next.

- Choose the Mailchimp option from the list of software providers and click Next (Connect).
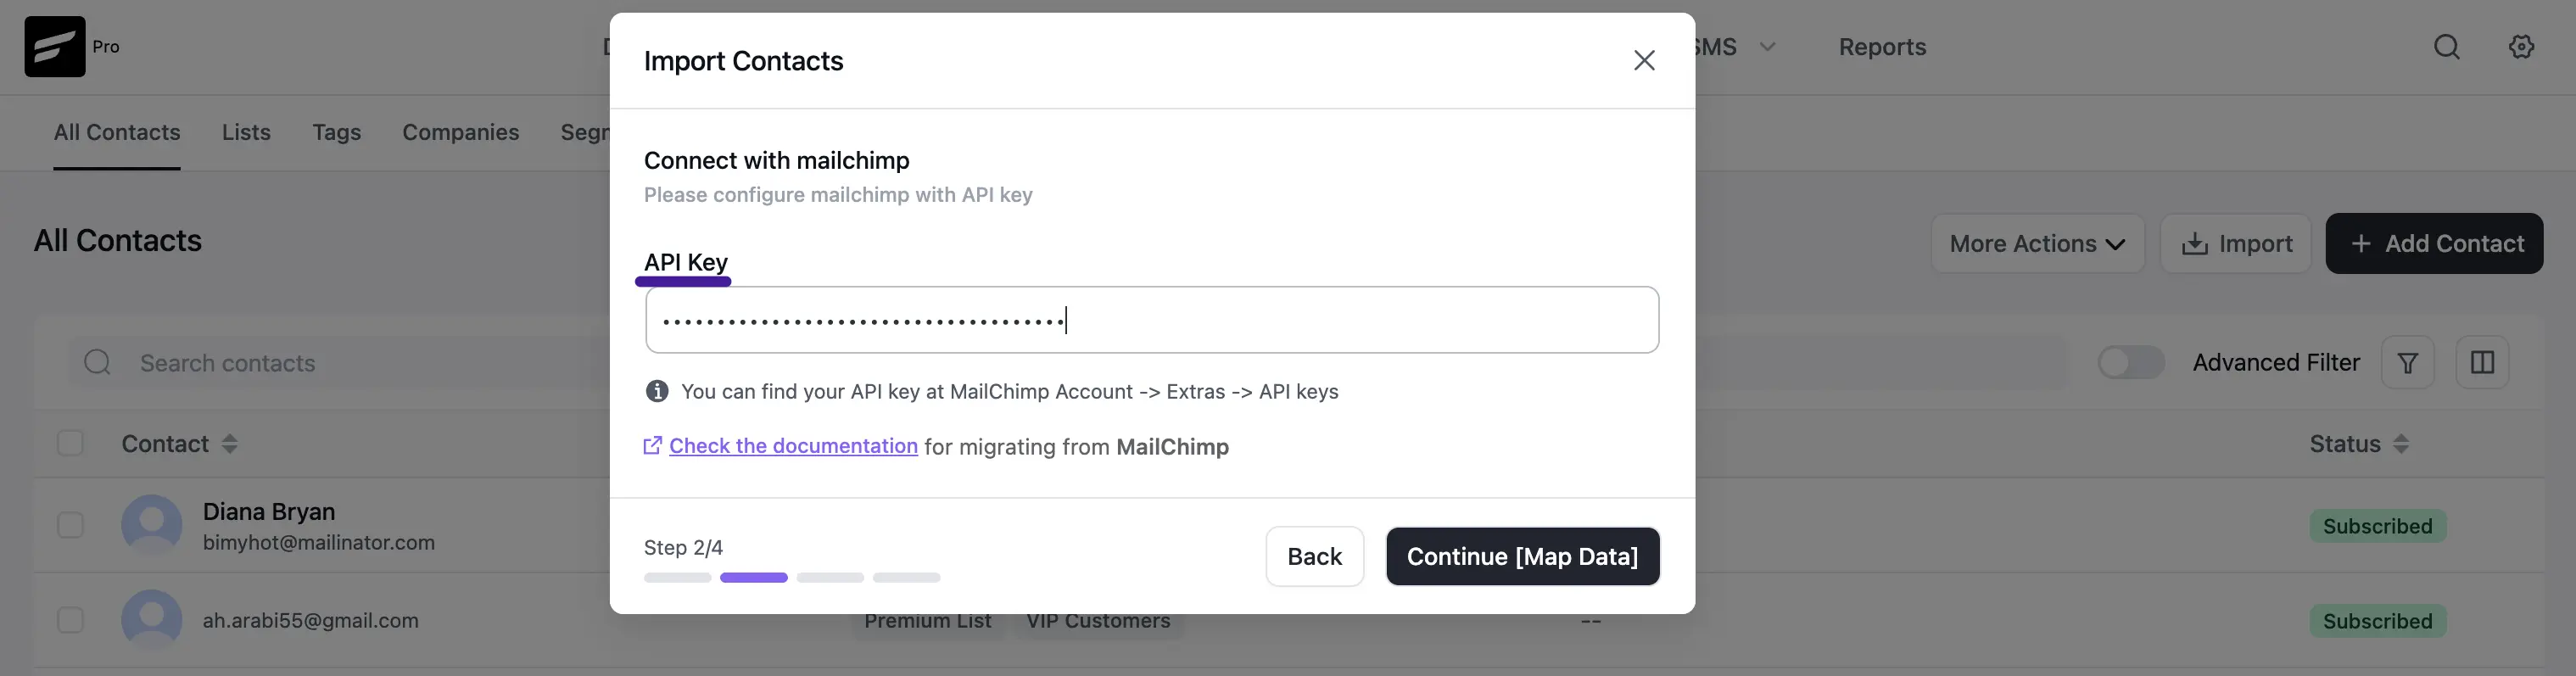
Step 3: Connect the Two Systems
Now, you'll paste the key you generated in Step 1 to bridge the two systems.
- Paste your copied Mailchimp API Key into the provided field.
- Click Continue [Map Data]. FluentCRM will connect to Mailchimp and pull in your list information.
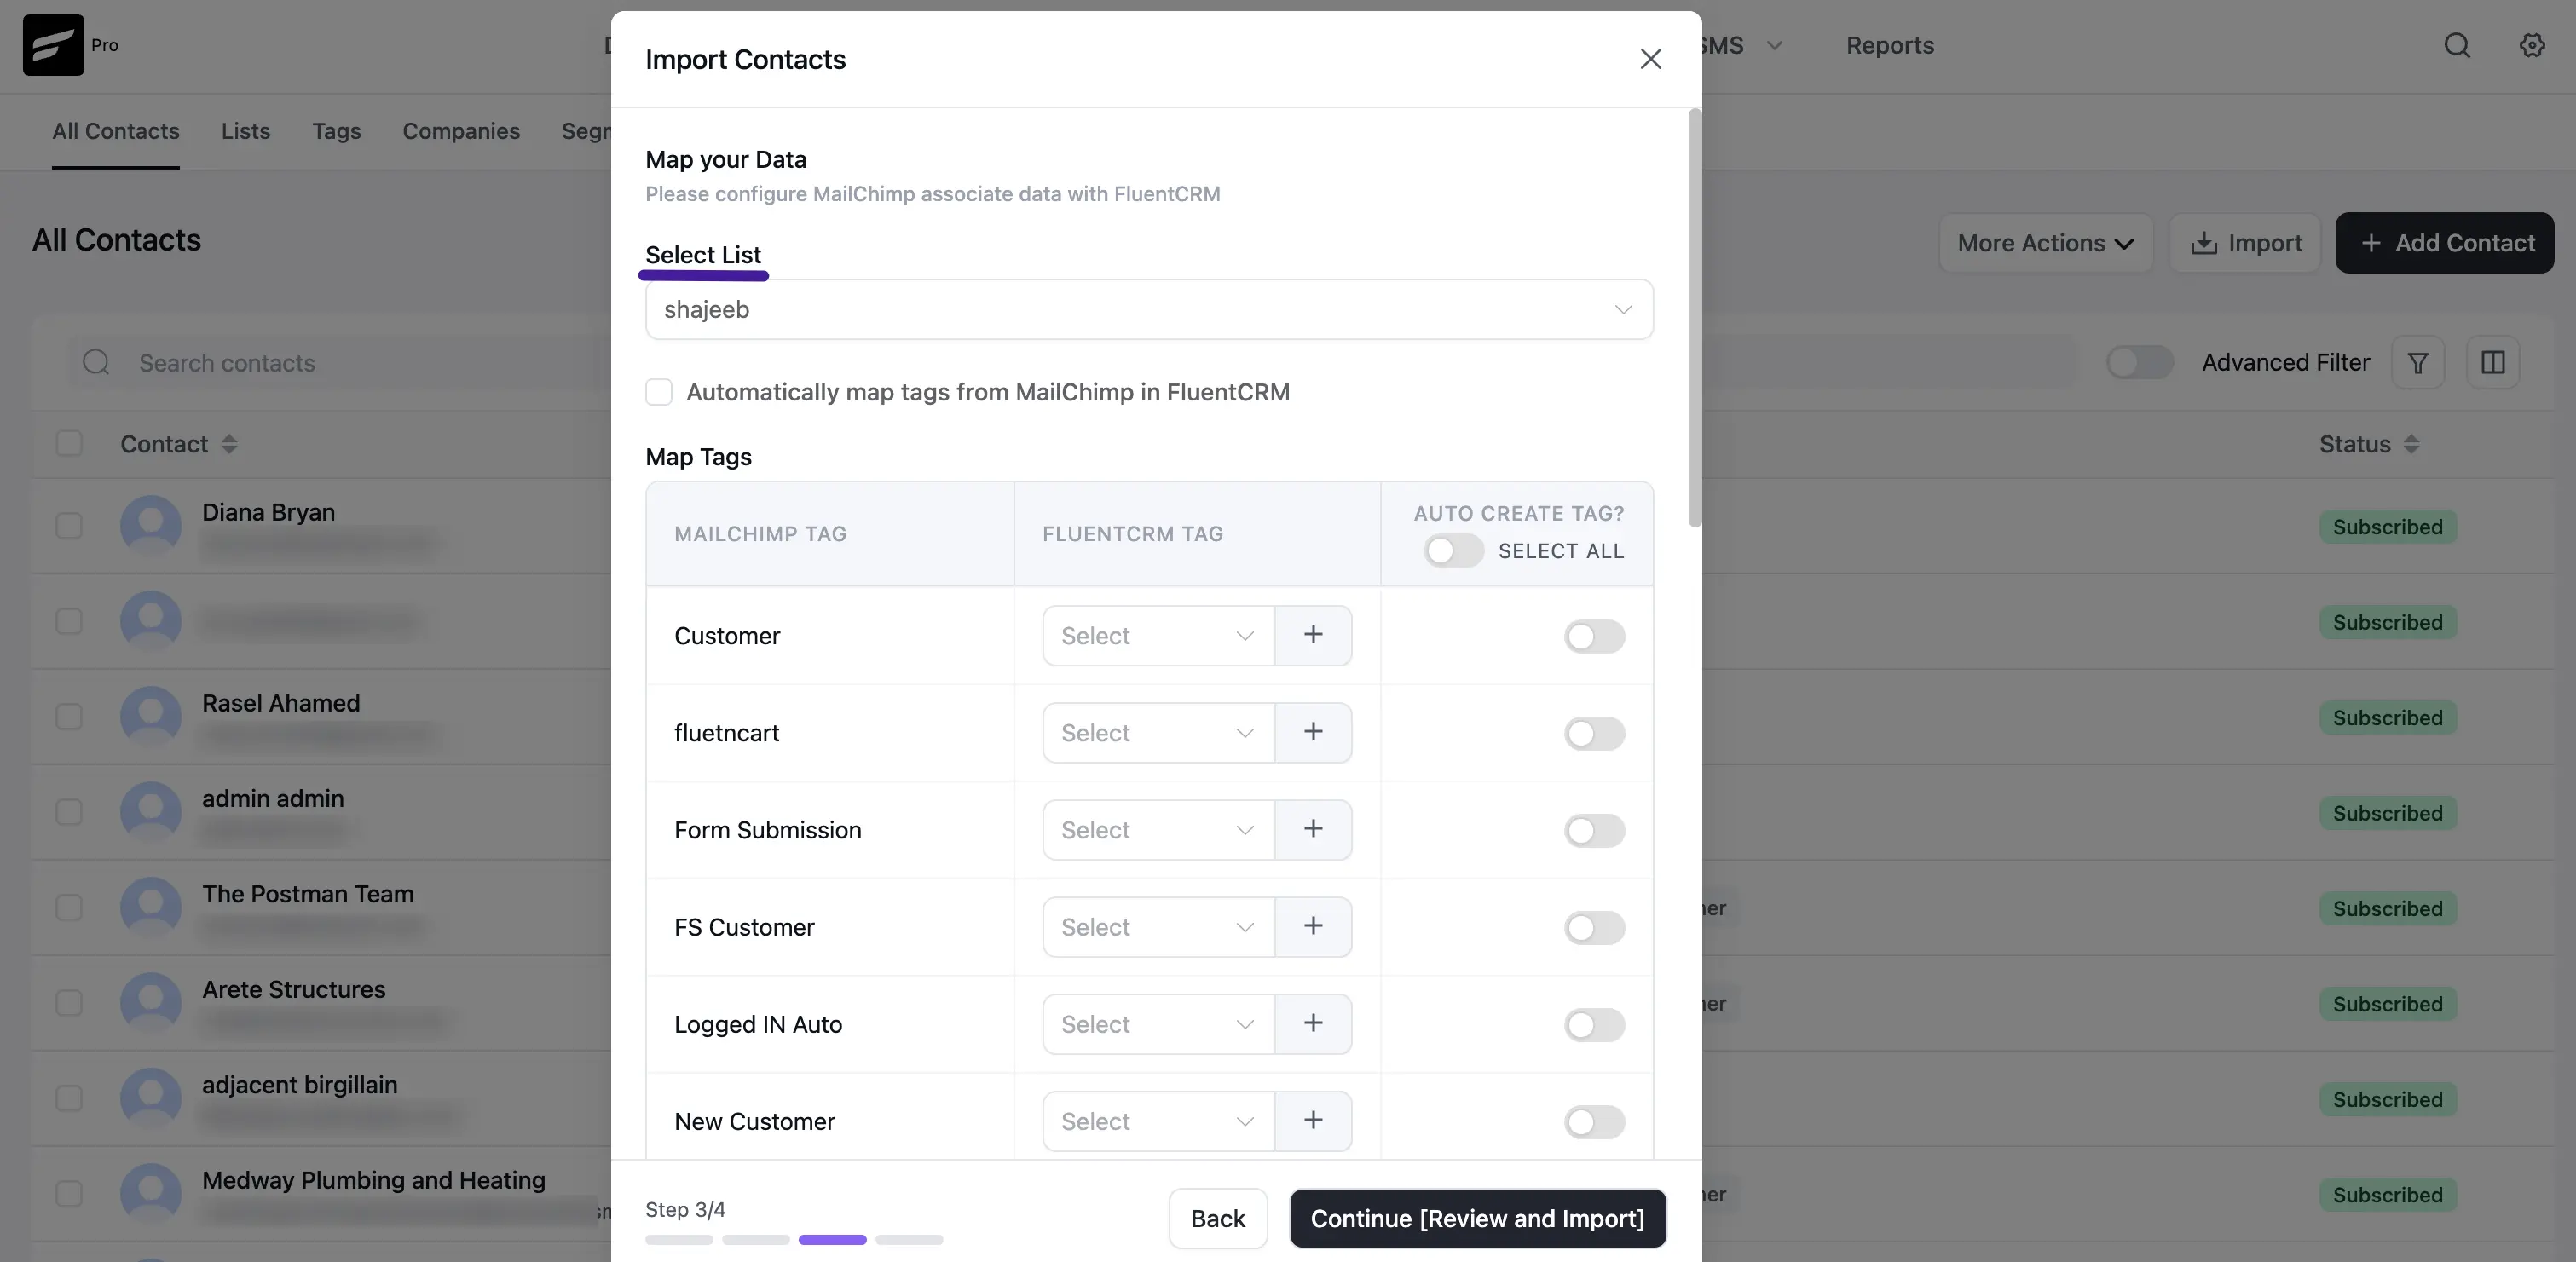
Step 4: Organize Your Data (Mapping)
This step tells FluentCRM how to structure the information coming from Mailchimp.
- Select List: Choose the specific Mailchimp list (Audience) you want to import.
- Mapping Tags: You will see a list of your existing Mailchimp tags. You can map them to existing FluentCRM tags, or simply check the "Automatically map tags from Mailchimp in FluentCRM" or "AUTO CREATE TAG? SELECT ALL" toggles to have the system recreate them for you automatically.
- Mapping Fields: Match your custom Drip fields (like
User_ID) to your FluentCRM custom fields. If there is a field you don't need anymore, just toggle the Skip switch next to it. (Note: Email Address and First Name are mapped automatically for you). - Global Assignments (Optional): You can pick a specific Assigned List or a Default Tag ID to apply to every single contact being imported. This is a great way to tag everyone with a label like "Migrated from Drip" to keep things organized.
Tip: We recommend checking the box labeled "Import only active subscribers from Drip". This ensures you only bring over engaged users and leaves bounced or unsubscribed contacts behind!
Once your lists and tags are configured, click Continue [Review and Import].
Step 5: Final Review and Finish
Before the data transfer officially begins, you'll get a final look.
- FluentCRM will display a summary showing the exact number of contacts that are about to be imported (e.g., "Based on your selections 84 contacts will be imported").
- If everything looks correct, click the Confirm Import button.
- The system will process your data. Once complete, all your selected contacts and their associated properties will be successfully moved into FluentCRM!