Appearance
AI Writing Settings
FluentCRM v3 ships with a built-in AI Writing assistant that helps you draft, refine, and rewrite email content directly inside the Gutenberg block editor. You can connect your preferred AI provider once, and from then on you'll be able to generate Smart Headings, Smart Buttons, Magic Images, or rewrite any block of copy without leaving the email editor.
This article walks you through enabling AI Writing, choosing a provider and model, adding your API key, testing the connection, and using AI tools in the email editor.
Access AI Configuration settings
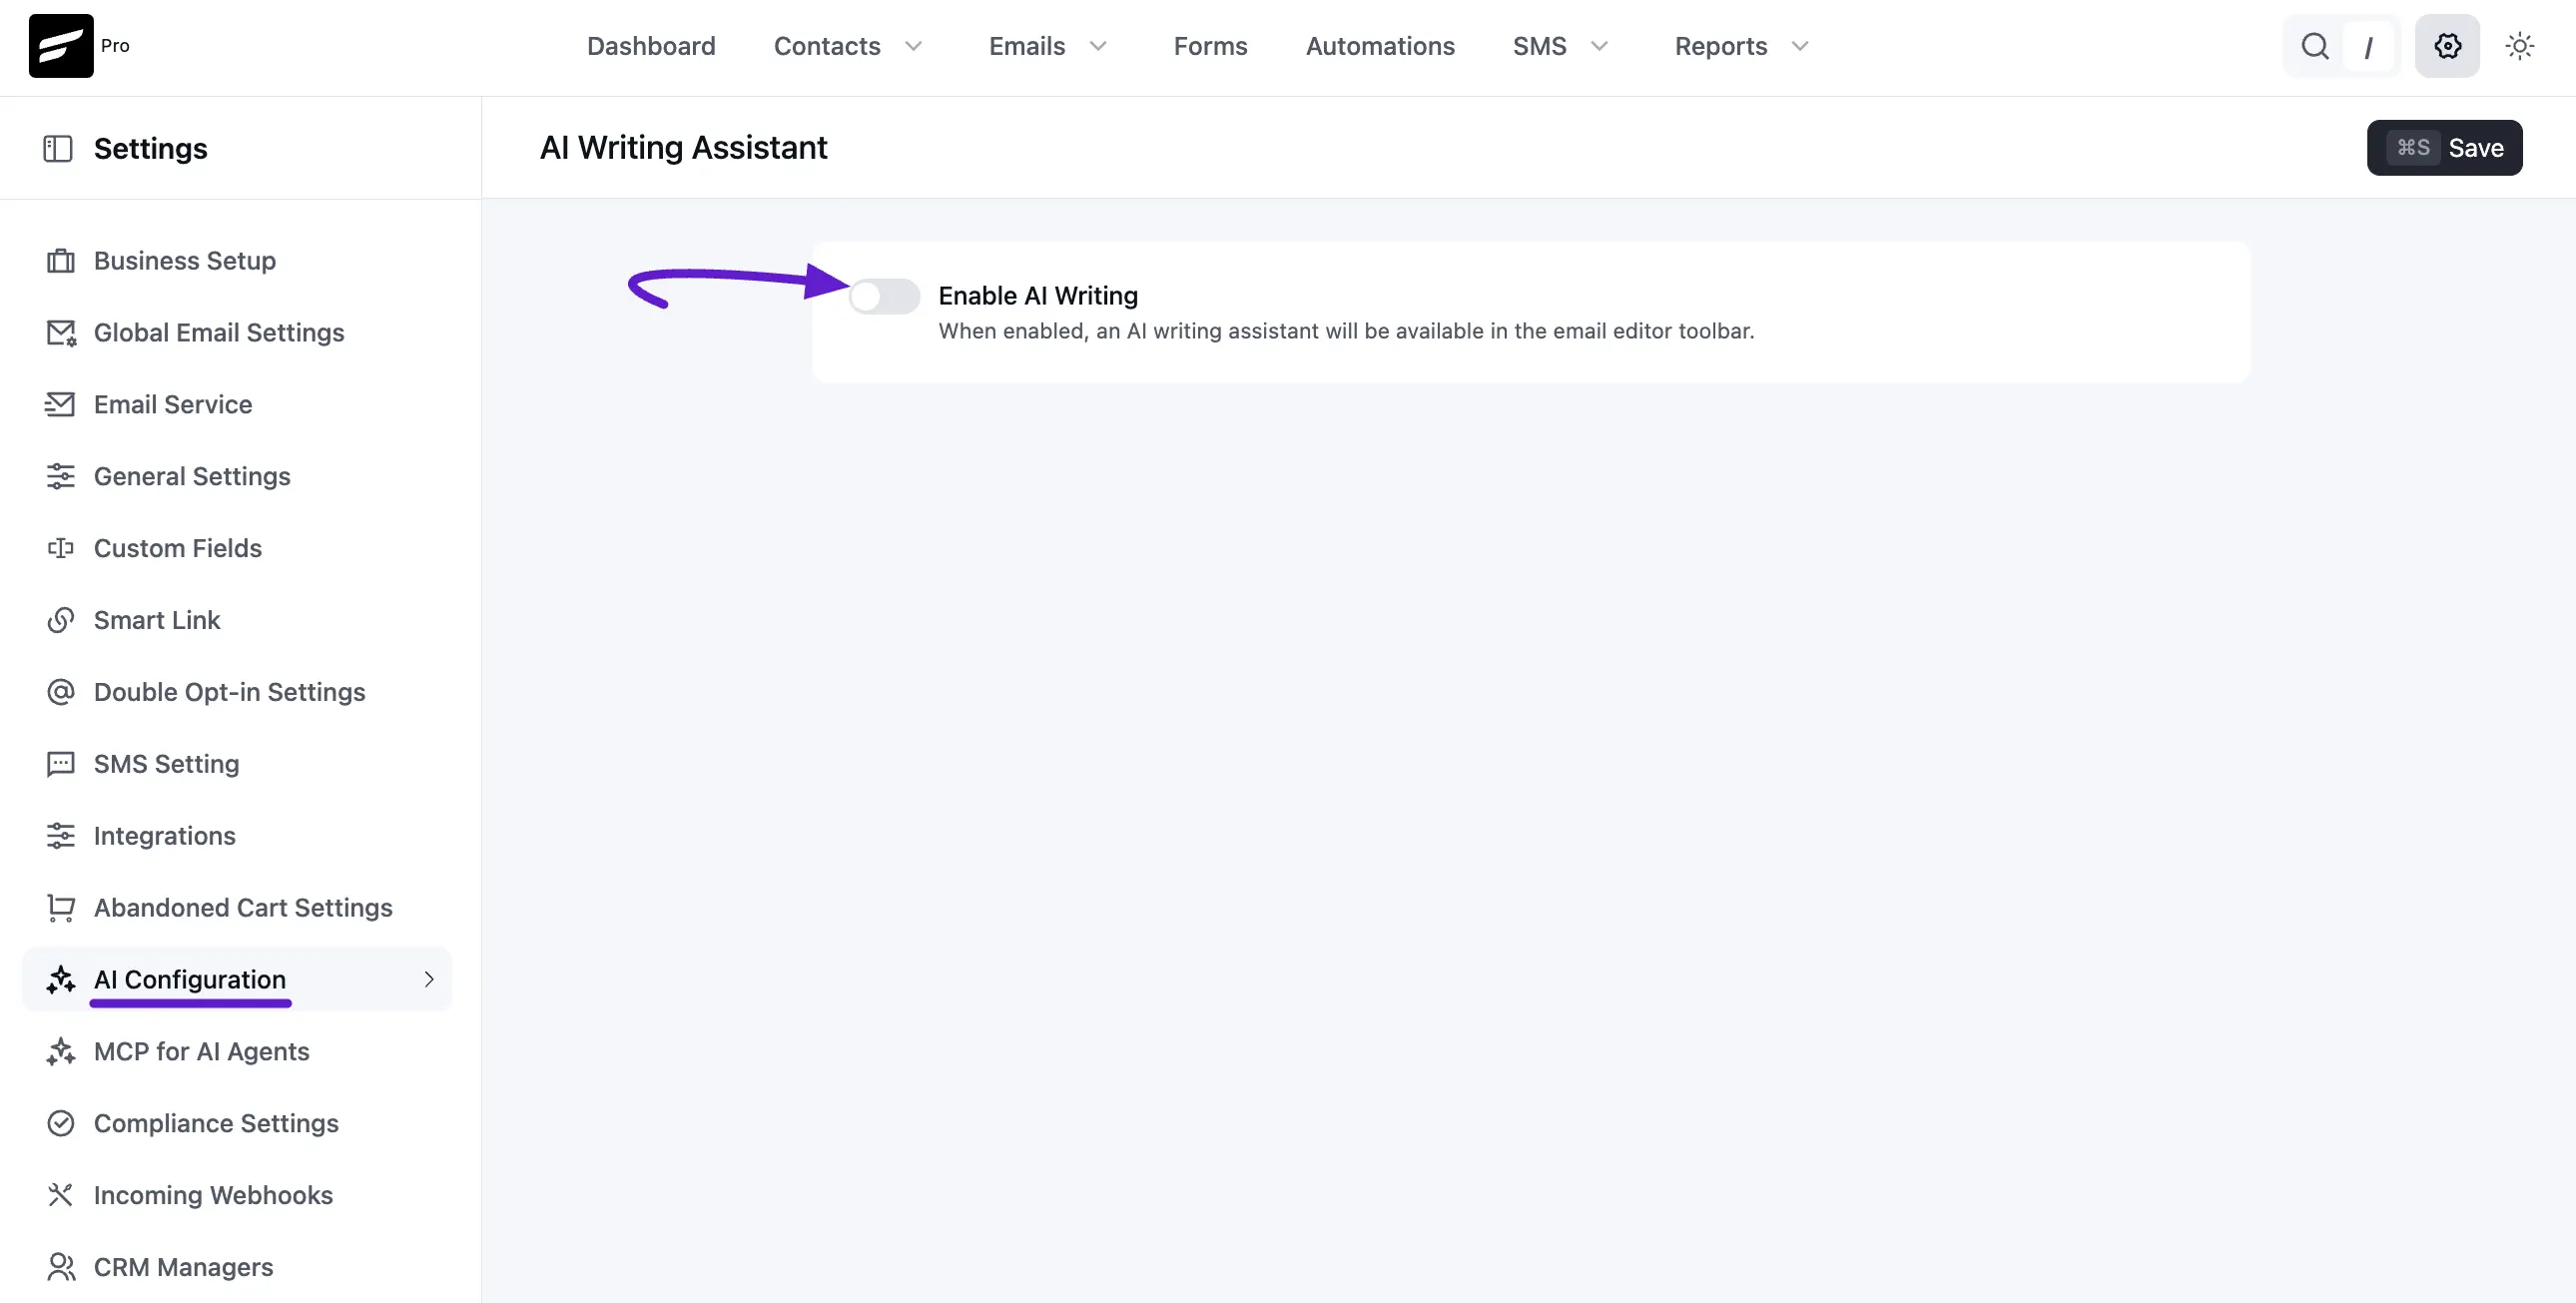
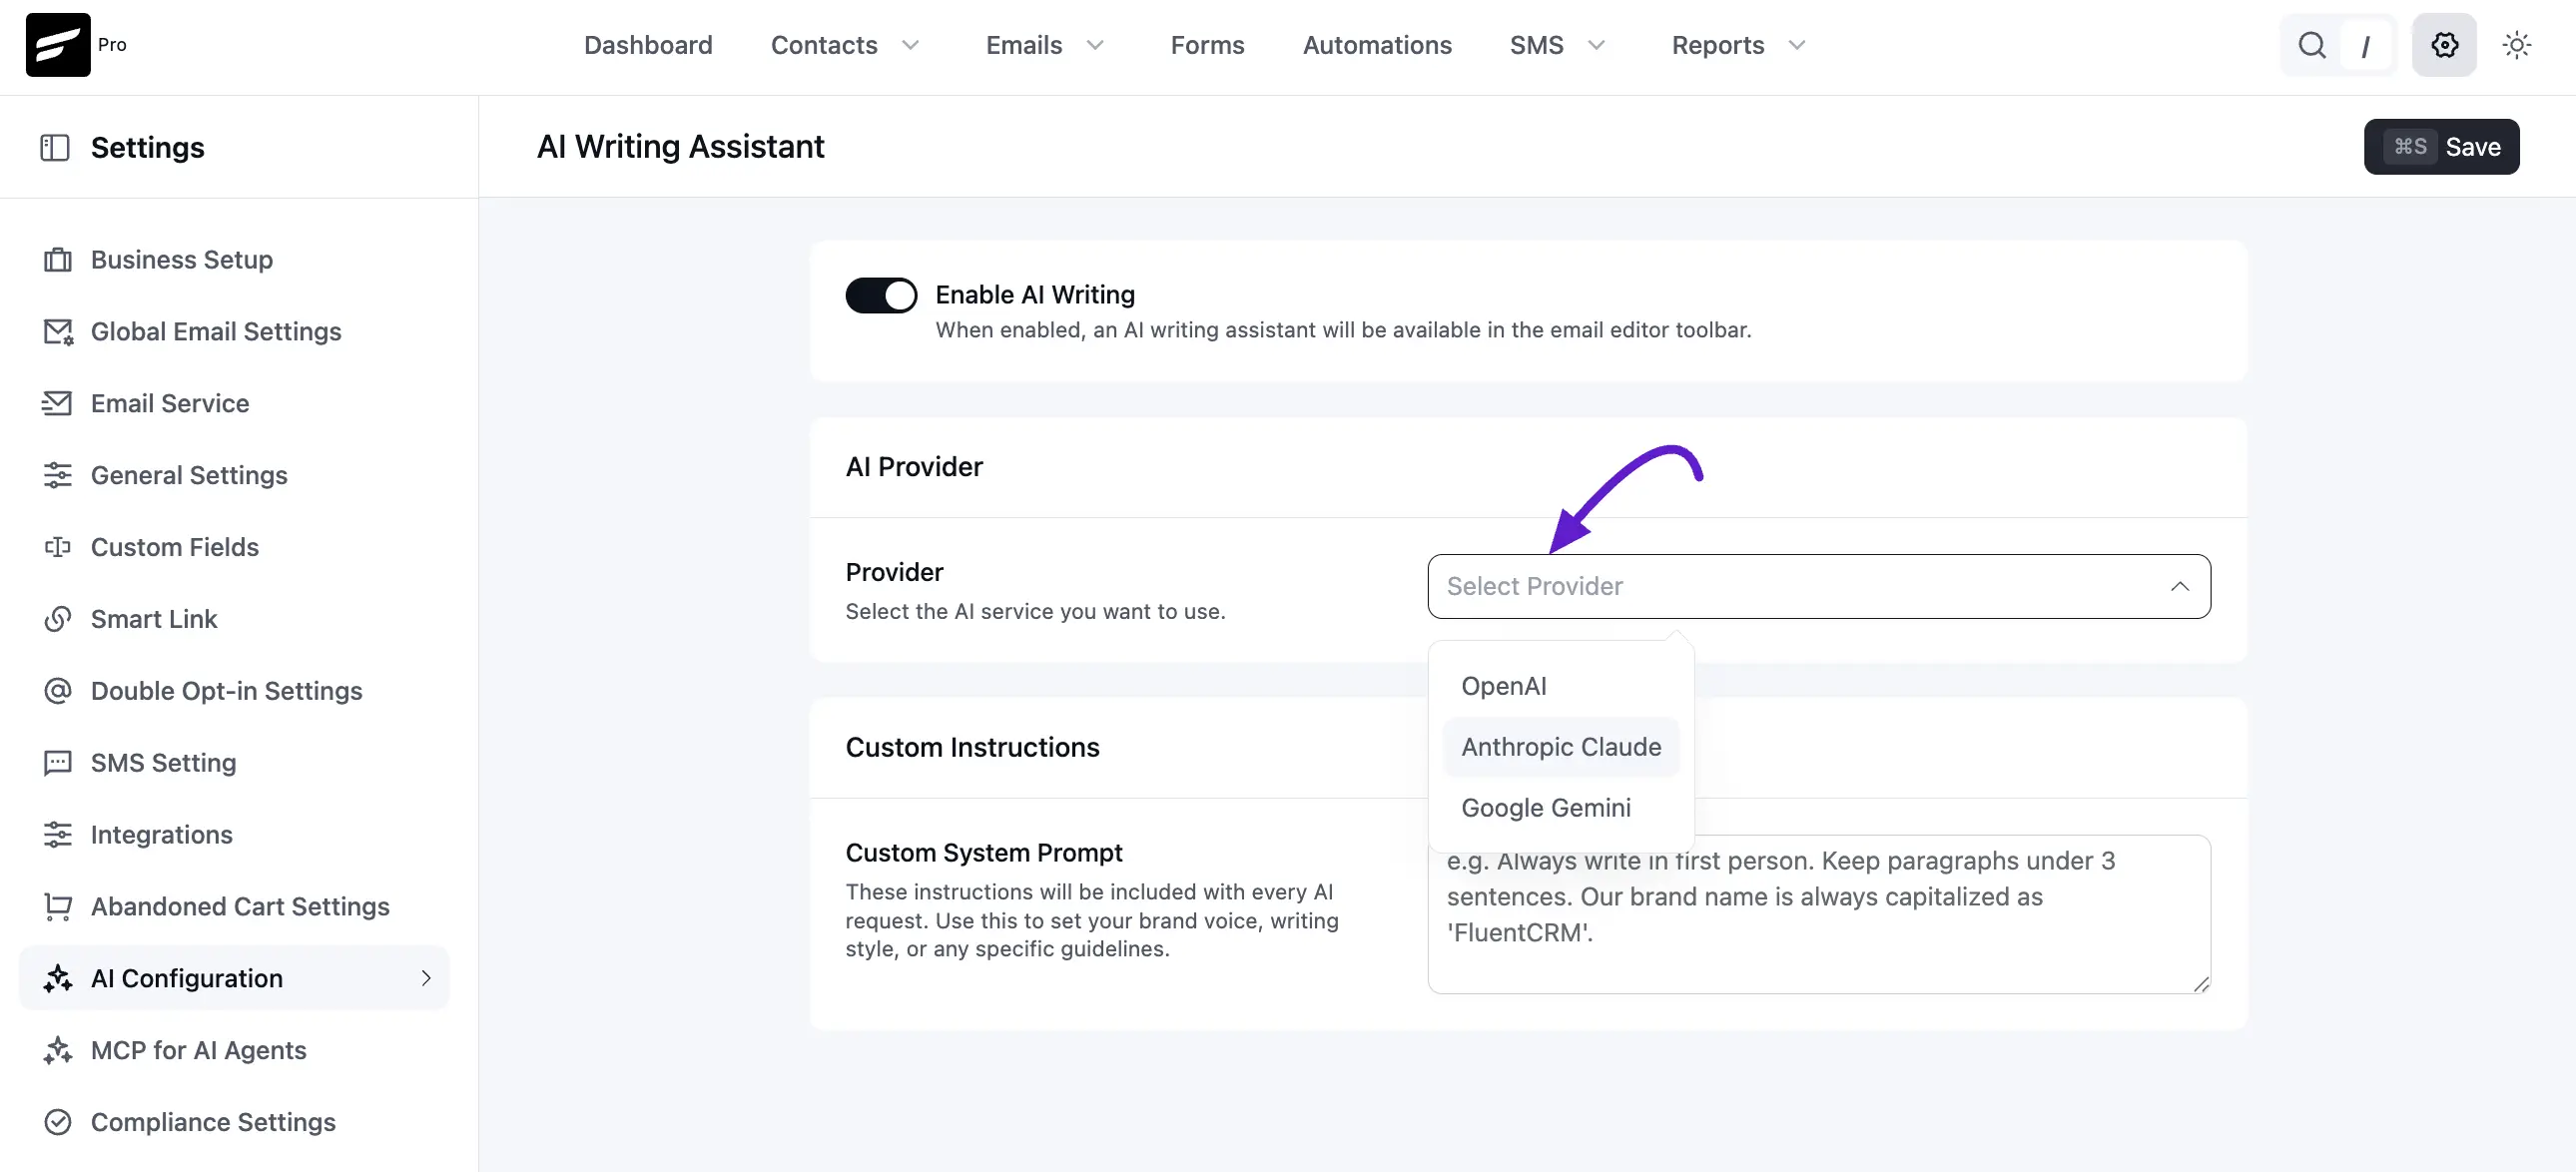
Go to FluentCRM → Settings → AI Configuration from your WordPress admin. The dedicated settings tab is where you enable or disable AI Writing, choose a provider and model, add your API key, add optional custom instructions, and run a connection test.
Supported AI providers
FluentCRM currently supports three providers out of the box:
- OpenAI – ChatGPT models (GPT-4o, GPT-4.1, GPT-3.5, etc.).
- Anthropic Claude – Claude 3.x and Claude Sonnet/Opus models.
- Google Gemini – Gemini 1.5 Pro / Flash models.
You can switch between providers at any time. FluentCRM does not route any AI traffic through a third-party proxy – calls go directly from your site to the provider you select using the API key you provide.
Enable AI Writing
Turn on the Enable AI Writing toggle to make AI actions available in the email editor toolbar. If this toggle is off, AI options will not appear in the editor.
Connect a provider
- Turn on Enable AI Writing.
- Choose a provider from the Provider dropdown in the AI Provider panel.
- Select a Model for text generation.
- Paste your API Key in the API Key panel.
- (Optional) Add a Custom System Prompt in Custom Instructions to enforce your brand voice, tone, or writing rules.
- Click Test Connection to verify the key works.
- Click Save (top-right) to store your configuration.
After a successful test, FluentCRM shows a confirmation message in the bottom-right area of the screen.
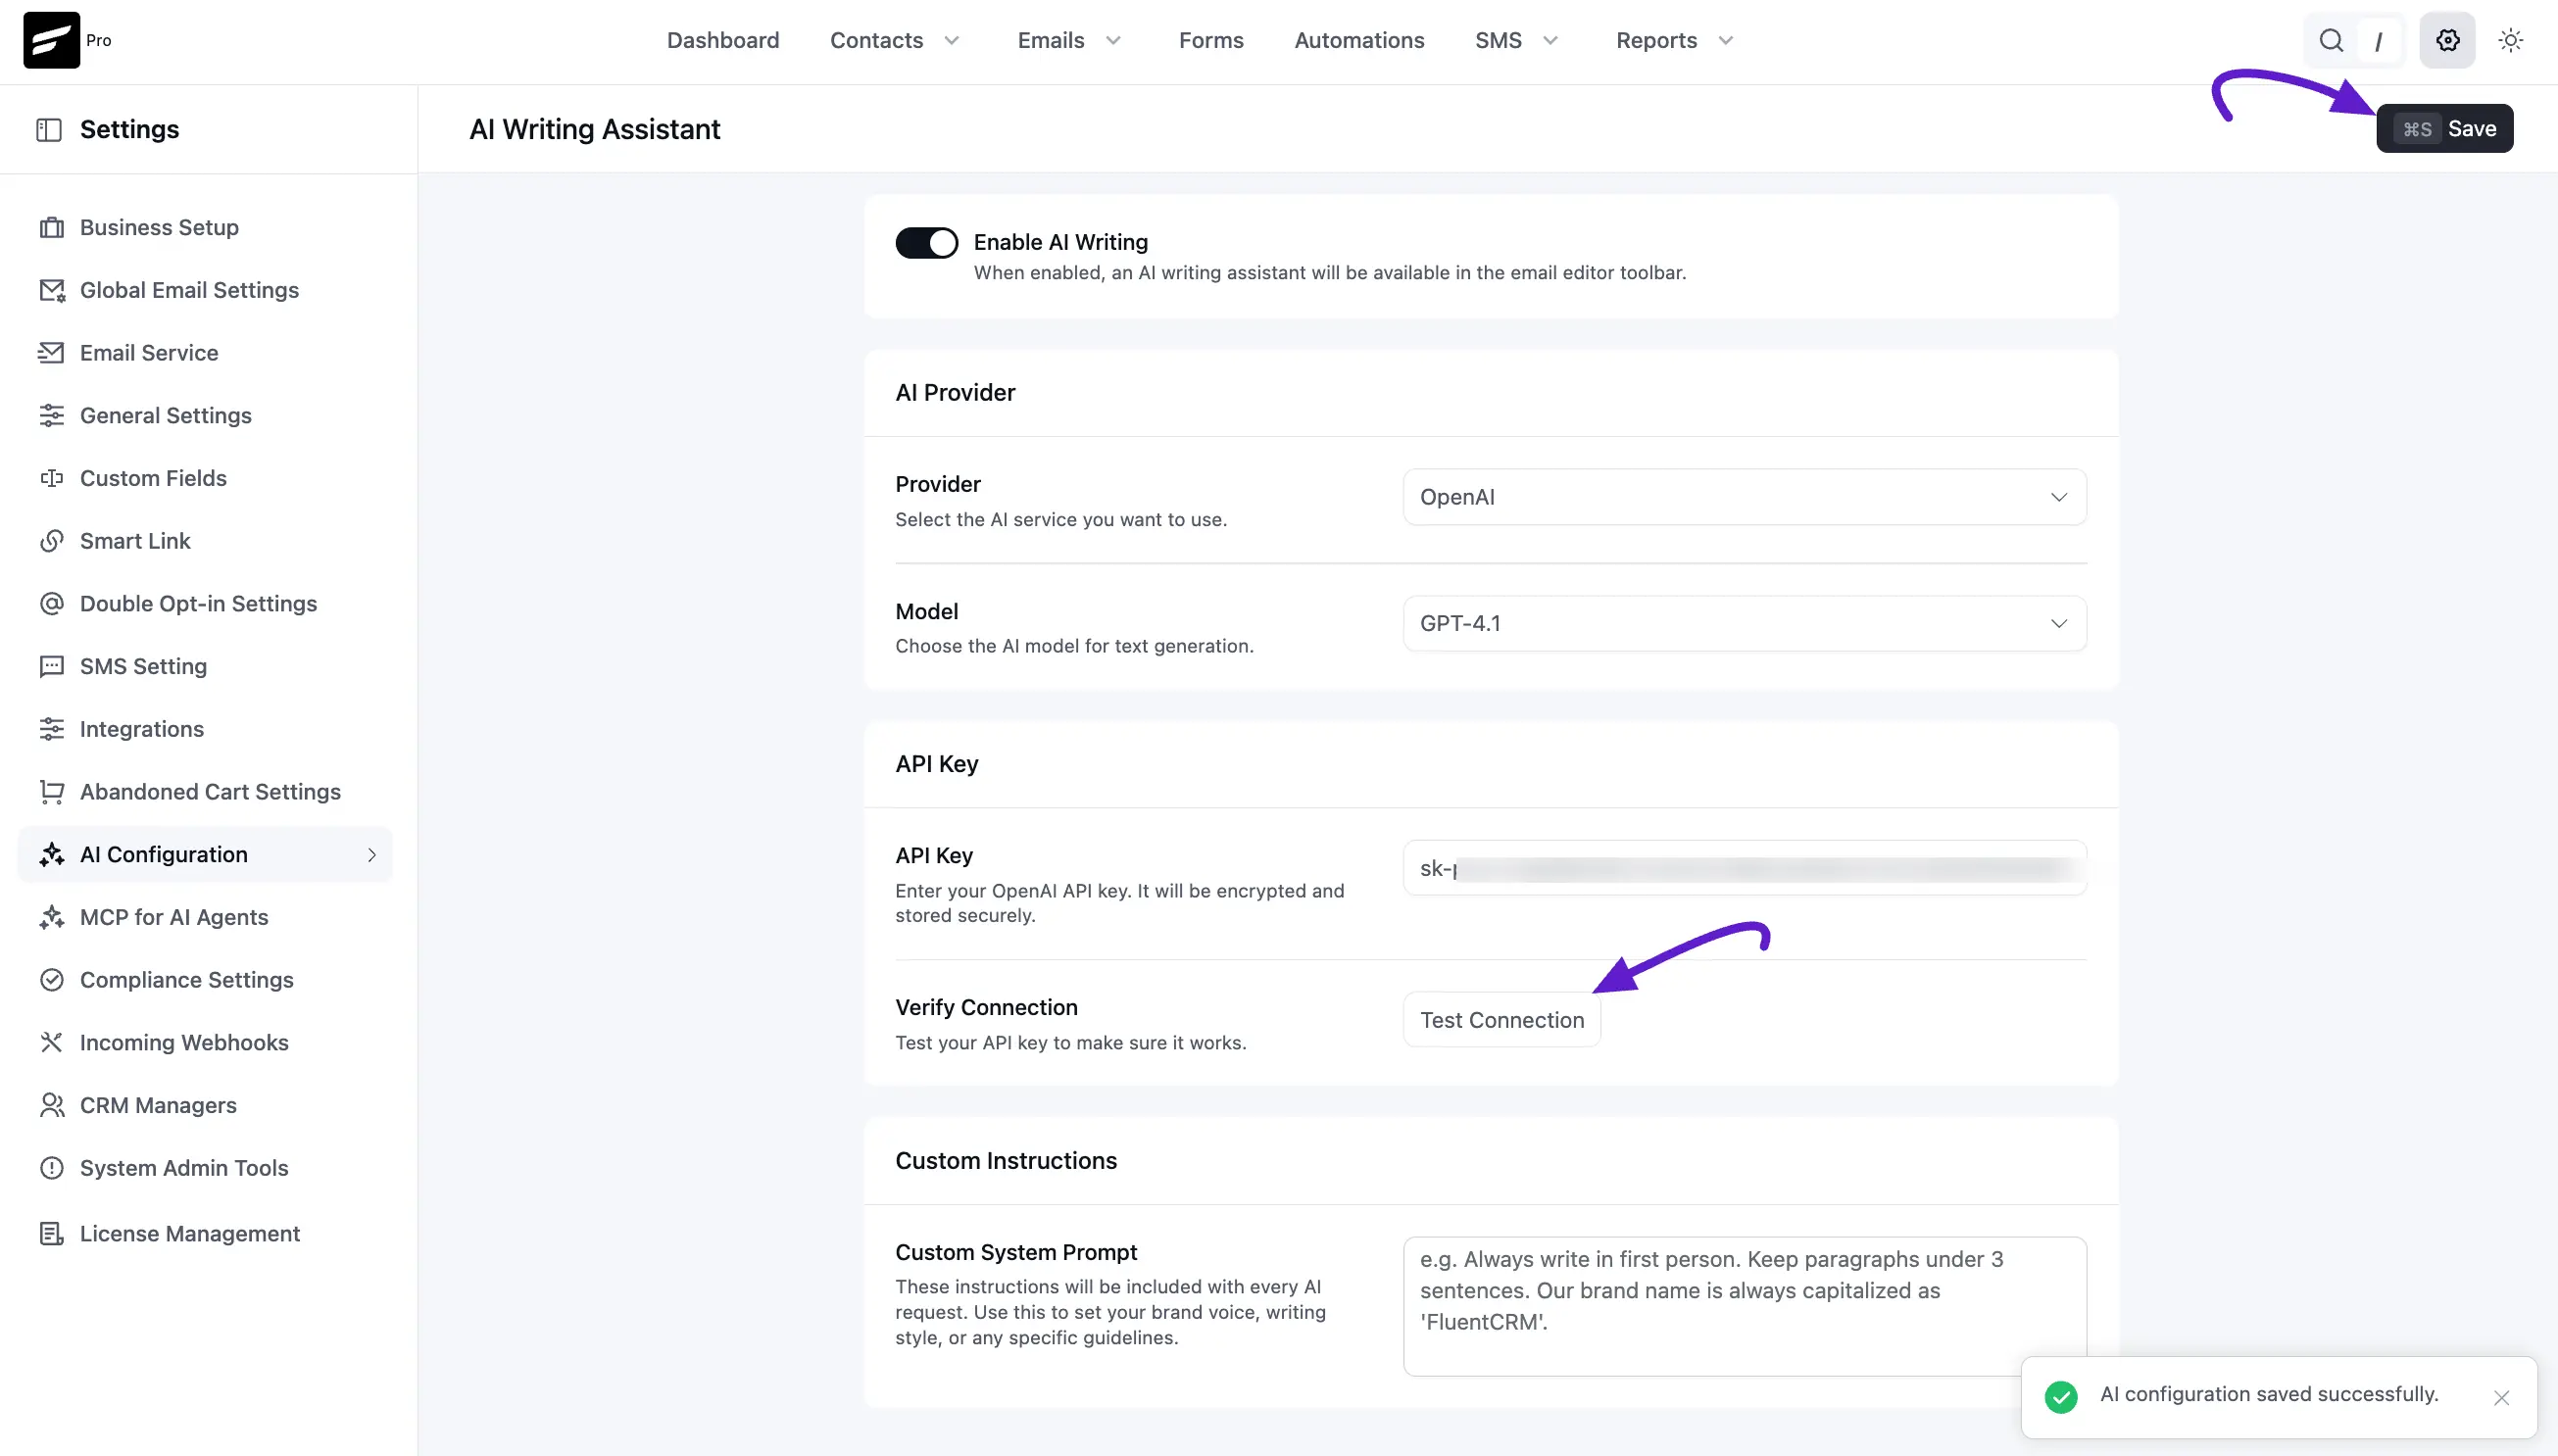
Note: API keys are stored as encrypted FluentCRM options on your own database. They are never shared with WPManageNinja or sent anywhere else.
Where to get an API key
- OpenAI: Sign in at platform.openai.com and create a key under API keys.
- Anthropic Claude: Sign in at console.anthropic.com and create a key under API Keys.
- Google Gemini: Sign in at aistudio.google.com and create an API key under Get API key.
Make sure billing is enabled on your provider account – most providers reject calls from accounts without an active billing setup.
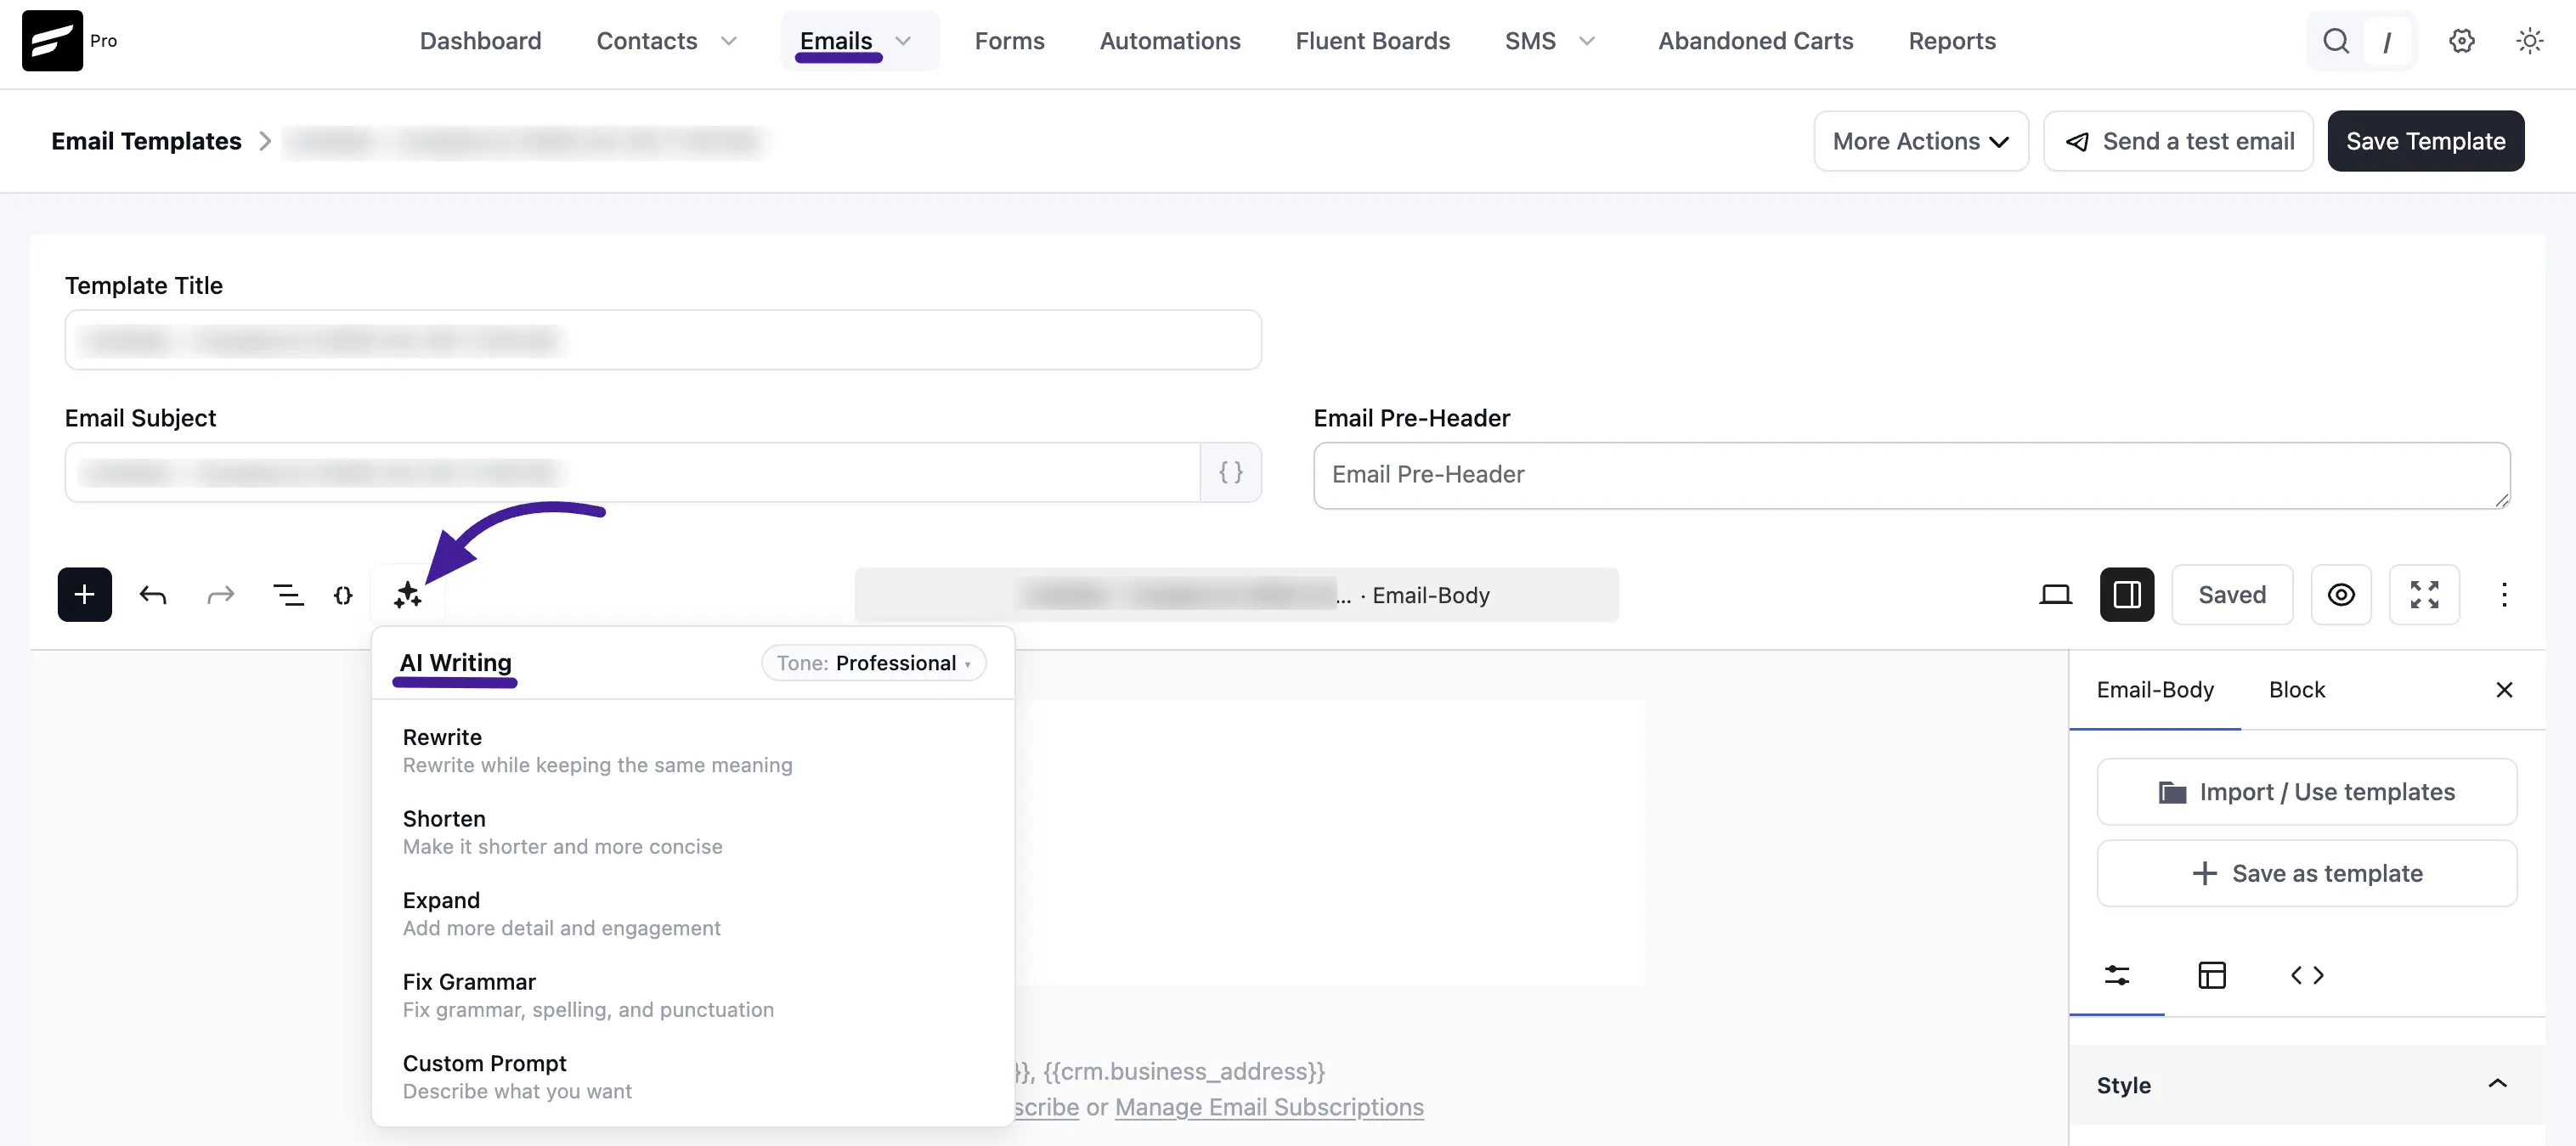
Where AI Writing surfaces inside FluentCRM
Once connected, AI Writing becomes available in the email editing experience. Open the AI menu from the editor toolbar to apply one-click transformations to selected text:
- Rewrite: Rewrites text while keeping the same meaning.
- Shorten: Makes selected text shorter and more concise.
- Expand: Adds detail and engagement.
- Fix Grammar: Corrects grammar, spelling, and punctuation.
- Custom Prompt: Lets you describe exactly how the text should be transformed.
These tools appear in the editor toolbar in the Visual Builder and Gutenberg-based editing flow.
Troubleshooting
- "Connection failed: invalid API key" – Re-copy the key, watching for hidden whitespace. Make sure billing is active on the provider account.
- "Quota exceeded" or
429errors – Your provider account has hit its monthly limit; upgrade or wait for the reset window. - AI buttons not appearing in the editor – Confirm the toggle is On, save settings, then hard-refresh the campaign editor.